To avoid these ads, REGISTER NOW!

1919 Reed 204 1/2 restoration

Aldochina

Active member
Joined
Jul 1, 2020
Messages
40
Location
Eastgreenbush NY(central eastern)
Well, this turned into a full blown project, but I've been loving it. Been loving the site aswell. I already started a thread in the vintage section, but since it has morphed into a project I wanted to post it here aswell. I will try to link the other thread here, or maybe the admins can do it. Not sure if it would be better in the vises thread. Cant believe its 4000+ pages! I'll put a link there too.
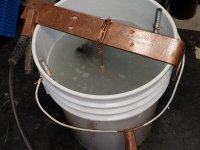
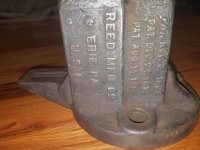
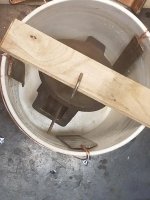
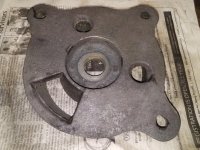
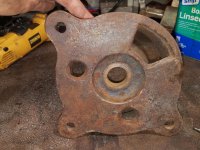
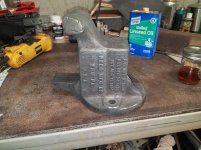
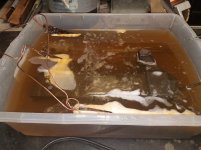
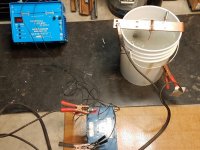
I'll start here where I left off in the other thread. So after a thorough cleaning and degrease, I pressure washed it good. After too much thought, I decided to try an electrolysis dip. Always wanted to try it, realized I had everything on hand. Should have done it from the get go. Thinking of going with a raw look finish, but havnt decided yet. Cant wait to see what It looks like when it comes out.
 

Attachments

  • 20200711_220012.jpg
    20200711_220012.jpg
    154.5 KB · Views: 46
  • 20200711_220030.jpg
    20200711_220030.jpg
    139.1 KB · Views: 44
  • 20200711_201811.jpg
    20200711_201811.jpg
    101.4 KB · Views: 46
  • 20200711_201754.jpg
    20200711_201754.jpg
    116.5 KB · Views: 43
  • 20200711_201720.jpg
    20200711_201720.jpg
    153.1 KB · Views: 44
  • 20200711_201657.jpg
    20200711_201657.jpg
    151.5 KB · Views: 39
  • 20200711_201631.jpg
    20200711_201631.jpg
    144.8 KB · Views: 44
To avoid these ads, REGISTER NOW!
OP
A

Aldochina

Active member
Joined
Jul 1, 2020
Messages
40
Location
Eastgreenbush NY(central eastern)
Couldnt get the 2 pieces together, the niks and peens on the corner of the slide were binding, little file work and it went together nice. Anyone who wants to post their process of finishing after the bath as far as shining up the machined surfaces. Or any before and after are welcome. I just cant sift through any more pages of the vices of GJ lol!! I burned out on vise repair 101!
 
OP
A

Aldochina

Active member
Joined
Jul 1, 2020
Messages
40
Location
Eastgreenbush NY(central eastern)
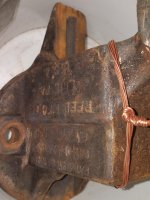
Changed my electrodes out for some raw steel plates. In for its second dip. What's the best way to remove the black carbon for finishing? Suppose you could get as fussy as you want. Looked really good after an overnight soak, but still some rust around the lettering. How long would you guys soak a vise in this shape?
 
OP
A

Aldochina

Active member
Joined
Jul 1, 2020
Messages
40
Location
Eastgreenbush NY(central eastern)
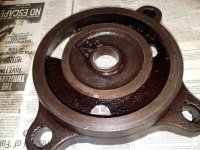
So after about a day in the tank, a good brushing and a rinse with water this is what we have. Still some rust present, should I expect all this to be gone after some more time in the tank. There was a ton of nasty sludge in the water and on the electrodes, going to clean it out and re submerge. Been working on cleaning up the main swivel bolt that I had welded the nut on. Call it good. Got the really badly pitted swivel nut cleaned up as much as I'm going to. Have to fab a new handle. I have some round stock that fit perfect with a slight ream of the hole. Was just going to weld some nuts on the ends and shape them down. I'm sure the round stock is mild steel, but I wont be pounding it tight with a hammer. I could source a long collar grade 8 bolt and use that if needed.
 

Attachments

  • 20200713_154308.jpg
    20200713_154308.jpg
    149.6 KB · Views: 20
  • 20200713_154349.jpg
    20200713_154349.jpg
    147.6 KB · Views: 22
  • 20200713_154241.jpg
    20200713_154241.jpg
    146.5 KB · Views: 22

MileHighRover

Well-known member
Joined
Mar 13, 2018
Messages
1,126
You could try a socket extension. That's what I used to replace the missing lockdown handle on my Rock Island vise. A 6 inch 3/8" worked perfectly. Figured it was hardened and would hold up better than mild steel rod.

You could go a few routes with it depending on the look you're trying to achieve. Stick with chrome, grind it down to bare metal, or pick up a black oxide one from Harbor Freight or the like. I went the black oxide route.
 
To avoid these ads, REGISTER NOW!
OP
A

Aldochina

Active member
Joined
Jul 1, 2020
Messages
40
Location
Eastgreenbush NY(central eastern)
You could try a socket extension. That's what I used to replace the missing lockdown handle on my Rock Island vise. A 6 inch 3/8" worked perfectly. Figured it was hardened and would hold up better than mild steel rod.

You could go a few routes with it depending on the look you're trying to achieve. Stick with chrome, grind it down to bare metal, or pick up a black oxide one from Harbor Freight or the like. I went the black oxide route.

Funny, I mentioned that for the main screw handle.
 
OP
A

Aldochina

Active member
Joined
Jul 1, 2020
Messages
40
Location
Eastgreenbush NY(central eastern)
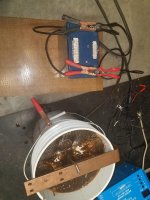
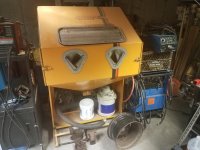
After a re arrange of the tank it's going good. Added an additional electrode. Pic of the blast cabinet, which I thought about throwing it in a bunch of times. Its loaded with garnet, and I wanted to see the finish the electrolysis produced anyway.
 

Attachments

  • 20200713_170056.jpg
    20200713_170056.jpg
    97.7 KB · Views: 15
  • 20200713_181630.jpg
    20200713_181630.jpg
    145.5 KB · Views: 15
  • 20200713_181544.jpg
    20200713_181544.jpg
    147.7 KB · Views: 16
OP
A

Aldochina

Active member
Joined
Jul 1, 2020
Messages
40
Location
Eastgreenbush NY(central eastern)
Lots of work done on the vise. I am digging the finish. Preheated the parts to around 400 then put the BLO on, let it set for 10 min. Wiped off the excess, back in the oven for 20 min, then another hot coat let sit for 10, then buffed it out and let cure. Base came out darker, kinda burnt looking. Thinner metal, so got hotter quicker, should have pulled it a bit sooner. Looks kinda cool though. Finish is definitely baked right on. Wont scratch with a fingernail.
 

Attachments

  • 20200717_103939.jpg
    20200717_103939.jpg
    154.9 KB · Views: 14
  • 20200715_073051.jpg
    20200715_073051.jpg
    149.8 KB · Views: 13
  • 20200714_173258.jpg
    20200714_173258.jpg
    150.6 KB · Views: 13
  • 20200714_175810.jpg
    20200714_175810.jpg
    155.8 KB · Views: 15
  • 20200714_173027.jpg
    20200714_173027.jpg
    151.6 KB · Views: 13
  • 20200714_172903.jpg
    20200714_172903.jpg
    151.6 KB · Views: 14
OP
A

Aldochina

Active member
Joined
Jul 1, 2020
Messages
40
Location
Eastgreenbush NY(central eastern)
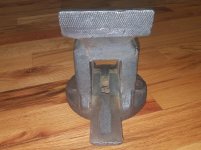
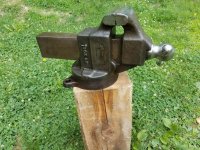
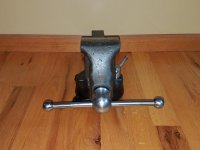
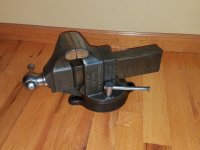
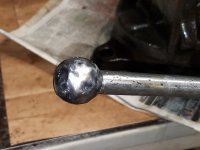
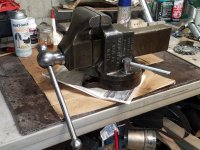
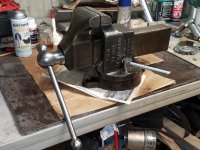
Got the swivel nut done, stick welded the ball back on the main screw handle, reshaped it best I could. All reassembled. Main scew lubed with dry moly spray, machine oil on the sliding surfaces, never seize on the threads of the main base and swivel screws. Opens and closes like butter. No in and out play on the main screw, just a bit of up and down. It was quite addicting doing this project. I had a ball. Think it turned out pretty awsome!
 

Attachments

  • 20200717_125354.jpg
    20200717_125354.jpg
    156.7 KB · Views: 11
  • 20200717_130614.jpg
    20200717_130614.jpg
    115.8 KB · Views: 13
  • 20200717_125316.jpg
    20200717_125316.jpg
    150.2 KB · Views: 13
  • 20200717_133536.jpg
    20200717_133536.jpg
    134.4 KB · Views: 14
  • 20200717_130724.jpg
    20200717_130724.jpg
    123 KB · Views: 14
  • 20200717_133742.jpg
    20200717_133742.jpg
    99.7 KB · Views: 14
  • 20200717_133937.jpg
    20200717_133937.jpg
    157.3 KB · Views: 15
OP
A

Aldochina

Active member
Joined
Jul 1, 2020
Messages
40
Location
Eastgreenbush NY(central eastern)
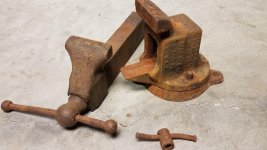
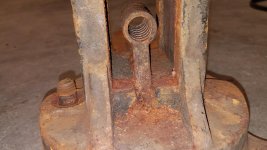
The official before and after
 

Attachments

  • 20200701_084412.jpg
    20200701_084412.jpg
    147.6 KB · Views: 5
  • 20200701_084458.jpg
    20200701_084458.jpg
    149.8 KB · Views: 5
  • 20200701_084604.jpg
    20200701_084604.jpg
    149.4 KB · Views: 5
  • 20200717_130502.jpg
    20200717_130502.jpg
    138 KB · Views: 8
  • 20200717_125316.jpg
    20200717_125316.jpg
    150.2 KB · Views: 7
  • 20200717_133937.jpg
    20200717_133937.jpg
    157.3 KB · Views: 7
To avoid these ads, REGISTER NOW!
Top Bottom