Greetings all.
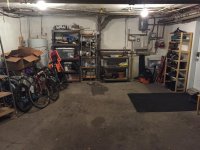
I'm the new owner of a house built in 1931 in Montreal. Houses of this style were often built leaving the finishing of the basement to the owners. The garage is congruent with the building and has seemingly had little attention paid to it. The work that has been done seems quite piecemeal.
I just moved in recently so much of the organization is temporary.
Ideally what I'd like to do is create a small wood/metal/bike workshop in the garage but I'm reluctant to do any cabinet and table building until I have a better sense of what's going on.
The issues appear to be:
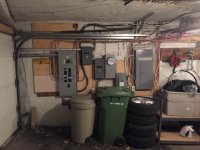
1. The walls are mixed. I'm seeing (a) poured concrete and (b) plaster over concrete blocks. Ideally I'd like to cover these with something nice, and hide as much electrical/plumbing as possible. That'll allow me to hang cabinets and put up workbenches. Does it matter if all that wiring is panels and not immediately accessible?
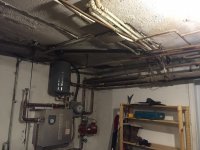
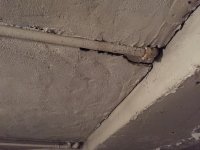
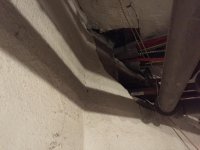
2. The ceiling is very sloppy. I don't know what it was originally, but it's currently plaster in various states of repair. I see a lot of places where it was just punched through to put pipes or other wiring through and shows what looks like slats of some sort underneath. I sort of want to rip it all out and re-do it all.
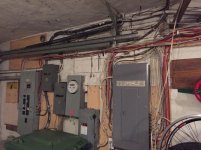
3. The electrical is similarly messy. The unit is a duplex and the wiring for both units lives here.
4. The floor looks to be half original concrete and half asphalt. It looks like the door opening was redone with a high lip to prevent snow/water runoff from entering the garage and in doing so they decided to make up the difference with asphalt. Ideally I'd like everything concrete and to have it regraded to be as flat as possible.
Anyway, that's an overview of what I'm working with. I've uploaded a bunch of photos. Any thoughts at all on how to approach this and what matters?
Much appreciated.
enieleni
I'm the new owner of a house built in 1931 in Montreal. Houses of this style were often built leaving the finishing of the basement to the owners. The garage is congruent with the building and has seemingly had little attention paid to it. The work that has been done seems quite piecemeal.
I just moved in recently so much of the organization is temporary.
Ideally what I'd like to do is create a small wood/metal/bike workshop in the garage but I'm reluctant to do any cabinet and table building until I have a better sense of what's going on.
The issues appear to be:
1. The walls are mixed. I'm seeing (a) poured concrete and (b) plaster over concrete blocks. Ideally I'd like to cover these with something nice, and hide as much electrical/plumbing as possible. That'll allow me to hang cabinets and put up workbenches. Does it matter if all that wiring is panels and not immediately accessible?
2. The ceiling is very sloppy. I don't know what it was originally, but it's currently plaster in various states of repair. I see a lot of places where it was just punched through to put pipes or other wiring through and shows what looks like slats of some sort underneath. I sort of want to rip it all out and re-do it all.
3. The electrical is similarly messy. The unit is a duplex and the wiring for both units lives here.
4. The floor looks to be half original concrete and half asphalt. It looks like the door opening was redone with a high lip to prevent snow/water runoff from entering the garage and in doing so they decided to make up the difference with asphalt. Ideally I'd like everything concrete and to have it regraded to be as flat as possible.
Anyway, that's an overview of what I'm working with. I've uploaded a bunch of photos. Any thoughts at all on how to approach this and what matters?
Much appreciated.
enieleni