To avoid these ads, REGISTER NOW!

1951 Delta Power Tools Division Production Table Drill Press

topcok88

Well-known member
Joined
Jun 3, 2013
Messages
660
So I was recently offered this 1951 Delta Power Tools Division / Rockwell Manufacturing Co. Production Table Drill Press from a good friend. He offered me a deal I could not refuse as he was moving and did not want to take it to his new place, so I gladly took it off his hands for him. :) Seeing as I currently do not own a drill press and have been in the market for one I figured this would be an excellent addition to my tool inventory. It runs like a dream currently with no noise or unexpected sounds to be heard. I borrowed a friends optical RPM meter, placed a tab of reflective tape on the Jacobs chuck, and got the following readings of 2400-1675-1200-830-550. I was pleasantly surprised but am still looking into ways to slow it down by half or so in case i want to drill large holes in metals. Seeing as it has a production table I have thought about purchasing a X/Y Cross Table Vise to mount on the table for securing material. I am hoping to perform a small refurbishment on it prior to any major use such as disassembly, cleaning/polishing, and re-coating. I have spend time on OWWM and vintage machinery looking for "paint" codes but it appears Delta was all over the place with grey's, although this one appears to be some sort of "green"? I was hoping to get it reasonable accurate so if anyone has any suggestions I would appreciate it. Also, would you be more apt to paint it with a spray can, automotive quality paint, or powder coat? I am most concerned with accuracy in the color and ensuring it is properly protected. Thank you guys for checking it out!

<a data-flickr-embed="true" href="https://www.flickr.com/photos/126635649@N07/24352927864/in/album-72157664019598240/" title="1951 Delta Rockwell Production Drill Press"><img src="https://farm2.staticflickr.com/1488/24352927864_0ee0168f11_b.jpg" width="768" height="1024" alt="1951 Delta Rockwell Production Drill Press"></a><script async src="//embedr.flickr.com/assets/client-code.js" charset="utf-8"></script>

<a data-flickr-embed="true" href="https://www.flickr.com/photos/126635649@N07/24352923154/in/album-72157664019598240/" title="Machine W/O Guard"><img src="https://farm2.staticflickr.com/1442/24352923154_78fedf3211_b.jpg" width="1024" height="768" alt="Machine W/O Guard"></a><script async src="//embedr.flickr.com/assets/client-code.js" charset="utf-8"></script>

<a data-flickr-embed="true" href="https://www.flickr.com/photos/126635649@N07/24352925434/in/album-72157664019598240/" title="Speed/Pully Selections"><img src="https://farm2.staticflickr.com/1605/24352925434_6710088851_b.jpg" width="768" height="1024" alt="Speed/Pully Selections"></a><script async src="//embedr.flickr.com/assets/client-code.js" charset="utf-8"></script>

<a data-flickr-embed="true" href="https://www.flickr.com/photos/126635649@N07/24865533502/in/album-72157664019598240/" title="2400 RPM"><img src="https://farm2.staticflickr.com/1470/24865533502_35e54861f5_b.jpg" width="1024" height="768" alt="2400 RPM"></a><script async src="//embedr.flickr.com/assets/client-code.js" charset="utf-8"></script>

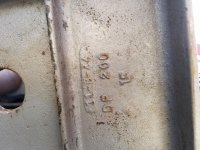
<a data-flickr-embed="true" href="https://www.flickr.com/photos/126635649@N07/24688024470/in/album-72157664019598240/" title="Delta Rockwell Factory ID"><img src="https://farm2.staticflickr.com/1550/24688024470_a666e0869d_b.jpg" width="1024" height="768" alt="Delta Rockwell Factory ID"></a><script async src="//embedr.flickr.com/assets/client-code.js" charset="utf-8"></script>

<a data-flickr-embed="true" href="https://www.flickr.com/photos/126635649@N07/24688022380/in/album-72157664019598240/" title=""Home Made Fix Found""><img src="https://farm2.staticflickr.com/1648/24688022380_db58471ea8_b.jpg" width="768" height="1024" alt=""Home Made Fix Found""></a><script async src="//embedr.flickr.com/assets/client-code.js" charset="utf-8"></script>
 
To avoid these ads, REGISTER NOW!

zkling

Well-known member
Joined
Jan 23, 2007
Messages
16,939
That's a 17" delta bench production drill press. Designed to drill small-ish holes in a fixtured part all day long, not a real good general shop press, but.

A sub table with T slots is about the best, but pretty expensive. Otherwise your best bet if you want to drill larger holes is to drill a hole in the back corner of the table for a button for a reaction arm of a vise. The float lock and similar vises are nice.

That has the standard "high speed" setup with JT33 taper and pulley set. If you really want to modify the speed easily a DC motor setup with regenerative drive would be a good solution for that press. With the fixed table and moving head, adding a pulley is not really an option.

BTW, you need to tighten the belt as it has too much free side slack in that running picture.
 
OP
T

topcok88

Well-known member
Joined
Jun 3, 2013
Messages
660
That's a 17" delta bench production drill press. Designed to drill small-ish holes in a fixtured part all day long, not a real good general shop press, but.

A sub table with T slots is about the best, but pretty expensive. Otherwise your best bet if you want to drill larger holes is to drill a hole in the back corner of the table for a button for a reaction arm of a vise. The float lock and similar vises are nice.

That has the standard "high speed" setup with JT33 taper and pulley set. If you really want to modify the speed easily a DC motor setup with regenerative drive would be a good solution for that press. With the fixed table and moving head, adding a pulley is not really an option.

BTW, you need to tighten the belt as it has too much free side slack in that running picture.

Thank you for the information zkling. So a I was talking with a friend at work about what to do as far as clamping is concerned. So as you can see in the pictures there are a few "holes/marks" making a very nice smile of shame. I have looked high and low about how to properly fix these but do no know if I want to go through that whole process. So what we talked about was water jetting a plate, machining some slots or threaded holes to secure an X/Y vice to the plate, and securing the plate to the drill press base itself. I could easily grind the plate smooth and drill/tap holes into the drill press base on the mill. And we have talked about putting a three phase motor on it with a VFD to control the speed a little bit better, but we will see when I get to that point. He run's his mill off a VFD and has had great success integrating speed control using a magnetic pick-up (hall effect sensor) when he programs the machine. It isn't that I do not have access to "better" machines, I just want a vintage "cool" machine at home for ammunition reloading (think case prep) and minor tinkering in my home shop. And yes I recognized I do indeed need to tighten the belt, I just haven't as I only took the picture to send my friend and give him a hard time. I don't think he ever used it for all the years he owned it actually. :dunno: Either way I like it and plan on keeping it. Thanks for the information, I need to go on vintage machinery and start saving copies of the information available for these 17" machines. Do you know if bearings and "refurbishment" supplies are readily available for these Delta Machines?
 

Packard V8

Well-known member
Joined
Mar 16, 2009
Messages
7,380
Location
Spokane, WA
I'm not as familiar with the 17" version, but on a standard 14", that pulley combination would look like the slow-speed version to me.

FWIW, fabricating the intermediate pulley and mount to have very slow RPMs is not rocket science. Do a search here and on line and you'll find several have done it successfully.

jack vines
 
OP
T

topcok88

Well-known member
Joined
Jun 3, 2013
Messages
660
I'm not as familiar with the 17" version, but on a standard 14", that pulley combination would look like the slow-speed version to me.

FWIW, fabricating the intermediate pulley and mount to have very slow RPMs is not rocket science. Do a search here and on line and you'll find several have done it successfully.

jack vines

In the original post I did talk about using a optical RPM meter and measuring the speed of the chuck at 2400-1675-1200-830-550 RPM. I found literature online talking about a "high speed model" that went from 4,100 to 12,000 RPM on "Super High Speed Drill Presses". I understand that intermediate pulley's were available fixed head versions where an intermediate table moved up and down instead of the "head". I would like to be able to run the guard on it and look "vintage" while still having the option for slower RPM selection. Part of the reason why I was thinking I could hide a VFD in a control box with a "simple" on/off switch mounted on the outside. I saw a poster on a similar forum (may have been this one, I forgot) that did something like that already. Thanks for checking out the drill press and the information Jack!
 

tombell572

Well-known member
Joined
Oct 3, 2015
Messages
1,034
Location
Sea Cliff, NY & Portland, OR
That's a good beefy drill press. It probably has a 2 3/4" column. Used tables that would attach to the column show up on ebay-the brand is not important as long as it is from a 17" drill with the same size column. A slow speed attachment that would give lower speeds would not really work out with this configuration since the only way to change height is to move the head. Find a table and slow speed attachment or fabricate one as noted by Packard V8 and you'll be good to go.

Tom B.
 

zkling

Well-known member
Joined
Jan 23, 2007
Messages
16,939
Bearings yes, not sure what you mean by "refurbishment supplies", just watch the spring return cup and worm gear as they are a pretty fragile alloy casting. You are making it too complicated wanting a hall sensor for speed pickup.

Why waste time and effort with a mechanical speed setup when an electrical solution would be easier to implement and more beneficial (ie instant reverse)?
 
Last edited:
OP
T

topcok88

Well-known member
Joined
Jun 3, 2013
Messages
660
Bearings yes, not sure what you mean by "refurbishment supplies", just watch the spring return cup and worm gear as they are a pretty fragile alloy casting. You are making it too complicated wanting a hall sensor for speed pickup.

Why waste time and effort with a mechanical speed setup when an electrical solution would be easier to implement and more beneficial (ie instant reverse)?

Zkling, I guess I was expecting more than just bearings being replacement items (seals and other items). I anticipate having a rather uneventful refurbishment when I get to it. I in no way want any sensors, just noting that my friend modifies his milling machine to a three axis machine by X/Y and using the quill as Z instead of a typical bed style mill with a entire head moving. And I am in agreement with an electrical solution. I intend to look into either a single phase or three phase solution. I just want a "cool" vintage drill press and think this is a awesome solution for such a low cost (free). :beer:
 
OP
T

topcok88

Well-known member
Joined
Jun 3, 2013
Messages
660
That's a good beefy drill press. It probably has a 2 3/4" column. Used tables that would attach to the column show up on ebay-the brand is not important as long as it is from a 17" drill with the same size column. A slow speed attachment that would give lower speeds would not really work out with this configuration since the only way to change height is to move the head. Find a table and slow speed attachment or fabricate one as noted by Packard V8 and you'll be good to go.

Tom B.

Tom, I am looking for the quill mounted slow speed attachments and anticipate acquiring one if I find one. Even if I don't use it, it would be a nice novelty item to own with this drill press. Thank you for the advice! :D
 
OP
T

topcok88

Well-known member
Joined
Jun 3, 2013
Messages
660
If you haven't tried this site: http://www.plazamachinery.com check it out. Joe has a vast supply of parts for older USA machines, especially Delta. He's a good, honest guy to deal with although no always prompt.

Tom B.

Thank you for the reference Tom. Luckily I am not so much worried about "instant delivery" as having the right part, the first time. I will look into them immediately.
 

Packard V8

Well-known member
Joined
Mar 16, 2009
Messages
7,380
Location
Spokane, WA
I guess I was expecting more than just bearings being replacement items (seals and other items). I anticipate having a rather uneventful refurbishment when I get to it..

There's little less eventful restoration than a last century Delta DP. It's basically a motor, belt, a few castings, a piece of pipe and some fasteners. There's no simpler machine until one starts using a wedge to split firewood.

jack vines
 
Last edited:

fl18guy

Well-known member
Joined
Dec 26, 2015
Messages
118
Location
cohoes, new york
I have a spare 15 in delta drill press base. is that missing the base , can't tell from the pics. the base is for a floor press.
 
To avoid these ads, REGISTER NOW!
OP
T

topcok88

Well-known member
Joined
Jun 3, 2013
Messages
660
I have a spare 15 in delta drill press base. is that missing the base , can't tell from the pics. the base is for a floor press.

What you see in the pictures is what came with the drill press. My understanding is they had legs that could be bolted to the table you see here, but this one didn't have them. So I am sure I will end up making a table for this to be fastened to.
 
OP
T

topcok88

Well-known member
Joined
Jun 3, 2013
Messages
660
Tear down, refinishing, and rebuilding has taken longer than expected. I travel abroad for work and have just recently returned home and have been able to make any meaningful progress. I started by simply tearing into the machine and inspecting it for any defects or repairs.
The table has the expected drill holes. I am contemplating welding up the holes but I may just put a surfaced plate on top of the existing table and securing it with some fasteners.
<a data-flickr-embed="true" href="https://www.flickr.com/photos/126635649@N07/26976838596/in/album-72157664019598240/" title="IMG_1039"><img src="https://farm8.staticflickr.com/7408/26976838596_009ecd44df_b.jpg" width="768" height="1024" alt="IMG_1039"></a><script async src="//embedr.flickr.com/assets/client-code.js" charset="utf-8"></script>
The belt guards were mostly dirty with a crummy paint job and the column just has surface rust that will be easily removed on the lathe.
<a data-flickr-embed="true" href="https://www.flickr.com/photos/126635649@N07/26736303590/in/album-72157664019598240/" title="IMG_1040"><img src="https://farm8.staticflickr.com/7755/26736303590_466c60d478_b.jpg" width="768" height="1024" alt="IMG_1040"></a><script async src="//embedr.flickr.com/assets/client-code.js" charset="utf-8"></script>
The pile of parts that will get de-greased in solvent, wire wheeled/brushed, and abrasive blasted.
<a data-flickr-embed="true" href="https://www.flickr.com/photos/126635649@N07/26941885111/in/album-72157664019598240/" title="IMG_1041"><img src="https://farm8.staticflickr.com/7122/26941885111_9ddcb5478c_b.jpg" width="768" height="1024" alt="IMG_1041"></a><script async src="//embedr.flickr.com/assets/client-code.js" charset="utf-8"></script>
Metal is solid and was well preserved by the grease and grime covering the parts. Cleaned up well with some simple de-greaser.
<a data-flickr-embed="true" href="https://www.flickr.com/photos/126635649@N07/26736277040/in/album-72157664019598240/" title="IMG_1042"><img src="https://farm8.staticflickr.com/7766/26736277040_918fbdfe4e_b.jpg" width="768" height="1024" alt="IMG_1042"></a><script async src="//embedr.flickr.com/assets/client-code.js" charset="utf-8"></script>
You can see the previous paint jobs were applied over all the dust, metal chips, and grime.
<a data-flickr-embed="true" href="https://www.flickr.com/photos/126635649@N07/27010248015/in/album-72157664019598240/" title="IMG_1043"><img src="https://farm8.staticflickr.com/7294/27010248015_f59fcda01b_b.jpg" width="768" height="1024" alt="IMG_1043"></a><script async src="//embedr.flickr.com/assets/client-code.js" charset="utf-8"></script>
<a data-flickr-embed="true" href="https://www.flickr.com/photos/126635649@N07/26404487534/in/album-72157664019598240/" title="IMG_1044"><img src="https://farm8.staticflickr.com/7214/26404487534_40ba5e4cf6_b.jpg" width="1024" height="768" alt="IMG_1044"></a><script async src="//embedr.flickr.com/assets/client-code.js" charset="utf-8"></script>
So I put the column on the lathe and decided to clean it up with light abrasives.
<a data-flickr-embed="true" href="https://www.flickr.com/photos/126635649@N07/26941831711/in/album-72157664019598240/" title="IMG_1045"><img src="https://farm8.staticflickr.com/7638/26941831711_939bcf7638_b.jpg" width="1024" height="768" alt="IMG_1045"></a><script async src="//embedr.flickr.com/assets/client-code.js" charset="utf-8"></script>
And here it is on the base plate that I also wire wheeled up the same day to see how the finish was and how many surface imperfections there were.
<a data-flickr-embed="true" href="https://www.flickr.com/photos/126635649@N07/26406280293/in/album-72157664019598240/" title="IMG_1048"><img src="https://farm8.staticflickr.com/7154/26406280293_406433f6b4_b.jpg" width="768" height="1024" alt="IMG_1048"></a><script async src="//embedr.flickr.com/assets/client-code.js" charset="utf-8"></script>
Parts that have been lightly cleaned but still require more attention.
<a data-flickr-embed="true" href="https://www.flickr.com/photos/126635649@N07/26736211510/in/album-72157664019598240/" title="IMG_1049"><img src="https://farm8.staticflickr.com/7239/26736211510_fc4e4acbe8_b.jpg" width="768" height="1024" alt="IMG_1049"></a><script async src="//embedr.flickr.com/assets/client-code.js" charset="utf-8"></script>
Laid out in my basement shop and still in the process of cleaning.
<a data-flickr-embed="true" href="https://www.flickr.com/photos/126635649@N07/26736199790/in/album-72157664019598240/" title="IMG_1050"><img src="https://farm8.staticflickr.com/7178/26736199790_082b3664a4_b.jpg" width="1024" height="768" alt="IMG_1050"></a><script async src="//embedr.flickr.com/assets/client-code.js" charset="utf-8"></script>
<a data-flickr-embed="true" href="https://www.flickr.com/photos/126635649@N07/26736193320/in/album-72157664019598240/" title="IMG_1051"><img src="https://farm8.staticflickr.com/7217/26736193320_96c4fde9e5_b.jpg" width="1024" height="768" alt="IMG_1051"></a><script async src="//embedr.flickr.com/assets/client-code.js" charset="utf-8"></script>
<a data-flickr-embed="true" href="https://www.flickr.com/photos/126635649@N07/26976745516/in/album-72157664019598240/" title="IMG_1052"><img src="https://farm8.staticflickr.com/7640/26976745516_635a7468d8_b.jpg" width="1024" height="768" alt="IMG_1052"></a><script async src="//embedr.flickr.com/assets/client-code.js" charset="utf-8"></script>
This is where a previous owner simply forced it off the machine instead of taking out the screw.
<a data-flickr-embed="true" href="https://www.flickr.com/photos/126635649@N07/26404419744/in/album-72157664019598240/" title="IMG_1053"><img src="https://farm8.staticflickr.com/7328/26404419744_336e93eb78_b.jpg" width="768" height="1024" alt="IMG_1053"></a><script async src="//embedr.flickr.com/assets/client-code.js" charset="utf-8"></script>
Another home-made fix. I may look for another online to replace this one, but it seems to be holding fine.
<a data-flickr-embed="true" href="https://www.flickr.com/photos/126635649@N07/26976722616/in/album-72157664019598240/" title="IMG_1054"><img src="https://farm8.staticflickr.com/7079/26976722616_bd844086b9_b.jpg" width="768" height="1024" alt="IMG_1054"></a><script async src="//embedr.flickr.com/assets/client-code.js" charset="utf-8"></script>
<a data-flickr-embed="true" href="https://www.flickr.com/photos/126635649@N07/27010183315/in/album-72157664019598240/" title="IMG_1055"><img src="https://farm8.staticflickr.com/7239/27010183315_f4eb7b8ce8_b.jpg" width="768" height="1024" alt="IMG_1055"></a><script async src="//embedr.flickr.com/assets/client-code.js" charset="utf-8"></script>
The old bearings.
<a data-flickr-embed="true" href="https://www.flickr.com/photos/126635649@N07/27010165185/in/album-72157664019598240/" title="IMG_1056"><img src="https://farm8.staticflickr.com/7371/27010165185_d63e548b60_b.jpg" width="768" height="1024" alt="IMG_1056"></a><script async src="//embedr.flickr.com/assets/client-code.js" charset="utf-8"></script>
<a data-flickr-embed="true" href="https://www.flickr.com/photos/126635649@N07/26941758951/in/album-72157664019598240/" title="IMG_1057"><img src="https://farm8.staticflickr.com/7174/26941758951_4126310310_b.jpg" width="768" height="1024" alt="IMG_1057"></a><script async src="//embedr.flickr.com/assets/client-code.js" charset="utf-8"></script>
<a data-flickr-embed="true" href="https://www.flickr.com/photos/126635649@N07/27010154195/in/album-72157664019598240/" title="IMG_1058"><img src="https://farm8.staticflickr.com/7554/27010154195_1f9cffdc2a_b.jpg" width="768" height="1024" alt="IMG_1058"></a><script async src="//embedr.flickr.com/assets/client-code.js" charset="utf-8"></script>
I started washing and de-greasing the parts in solvent prior to wire wheeling or blasting.
<a data-flickr-embed="true" href="https://www.flickr.com/photos/126635649@N07/26976661766/in/album-72157664019598240/" title="IMG_1164"><img src="https://farm8.staticflickr.com/7194/26976661766_b197447e73_b.jpg" width="768" height="1024" alt="IMG_1164"></a><script async src="//embedr.flickr.com/assets/client-code.js" charset="utf-8"></script>
Started dis-assembling the quill.
<a data-flickr-embed="true" href="https://www.flickr.com/photos/126635649@N07/27010131425/in/album-72157664019598240/" title="IMG_1168"><img src="https://farm8.staticflickr.com/7399/27010131425_e6ef951b95_b.jpg" width="768" height="1024" alt="IMG_1168"></a><script async src="//embedr.flickr.com/assets/client-code.js" charset="utf-8"></script>
<a data-flickr-embed="true" href="https://www.flickr.com/photos/126635649@N07/26976643906/in/album-72157664019598240/" title="IMG_1169"><img src="https://farm8.staticflickr.com/7164/26976643906_d78b70788a_b.jpg" width="768" height="1024" alt="IMG_1169"></a><script async src="//embedr.flickr.com/assets/client-code.js" charset="utf-8"></script>

Continued in next post:
 
OP
T

topcok88

Well-known member
Joined
Jun 3, 2013
Messages
660
And taking other assemblies apart so I could throw the round objects on the lathe to clean up and polish.
<a data-flickr-embed="true" href="https://www.flickr.com/photos/126635649@N07/26406178853/in/album-72157664019598240/" title="IMG_1170"><img src="https://farm8.staticflickr.com/7169/26406178853_333fc8644e_b.jpg" width="768" height="1024" alt="IMG_1170"></a><script async src="//embedr.flickr.com/assets/client-code.js" charset="utf-8"></script>
Polished and cleaned the pullies on the lathe.
<a data-flickr-embed="true" href="https://www.flickr.com/photos/126635649@N07/26736119970/in/album-72157664019598240/" title="IMG_1176"><img src="https://farm8.staticflickr.com/7226/26736119970_9a37bbb1e1_b.jpg" width="768" height="1024" alt="IMG_1176"></a><script async src="//embedr.flickr.com/assets/client-code.js" charset="utf-8"></script>
Cleaned and started the wire wheeling of the head castings.
<a data-flickr-embed="true" href="https://www.flickr.com/photos/126635649@N07/26736112830/in/album-72157664019598240/" title="IMG_1177"><img src="https://farm8.staticflickr.com/7060/26736112830_b453fdca07_b.jpg" width="768" height="1024" alt="IMG_1177"></a><script async src="//embedr.flickr.com/assets/client-code.js" charset="utf-8"></script>
Started blasting the parts in anticipation for priming.
<a data-flickr-embed="true" href="https://www.flickr.com/photos/126635649@N07/26404348464/in/album-72157664019598240/" title="IMG_1178"><img src="https://farm8.staticflickr.com/7083/26404348464_9f43fa7f4d_b.jpg" width="768" height="1024" alt="IMG_1178"></a><script async src="//embedr.flickr.com/assets/client-code.js" charset="utf-8"></script>
Picked up some supplies from a local paint supply. This is what they suggested I use.
<a data-flickr-embed="true" href="https://www.flickr.com/photos/126635649@N07/26736103390/in/album-72157664019598240/" title="IMG_1179"><img src="https://farm8.staticflickr.com/7024/26736103390_627b40012e_b.jpg" width="1024" height="768" alt="IMG_1179"></a><script async src="//embedr.flickr.com/assets/client-code.js" charset="utf-8"></script>
This is an example of the surface finish prior to priming. I de-greased in solvent, wire wheeled, lightly abrasive blasted, followed by washing with dawn dish soap and water. Prior to applying the Red Oxide Primer I wiped the parts down with denatured alcohol and it is noted that very littler residue showed up on the white towel wipes.
<a data-flickr-embed="true" href="https://www.flickr.com/photos/126635649@N07/27010097405/in/album-72157664019598240/" title="IMG_1183"><img src="https://farm8.staticflickr.com/7123/27010097405_750324a740_b.jpg" width="768" height="1024" alt="IMG_1183"></a><script async src="//embedr.flickr.com/assets/client-code.js" charset="utf-8"></script>
<a data-flickr-embed="true" href="https://www.flickr.com/photos/126635649@N07/26736090930/in/album-72157664019598240/" title="IMG_1184"><img src="https://farm8.staticflickr.com/7516/26736090930_71d744c47d_b.jpg" width="1024" height="768" alt="IMG_1184"></a><script async src="//embedr.flickr.com/assets/client-code.js" charset="utf-8"></script>
<a data-flickr-embed="true" href="https://www.flickr.com/photos/126635649@N07/26736086790/in/album-72157664019598240/" title="IMG_1185"><img src="https://farm8.staticflickr.com/7683/26736086790_dd41aa5cfb_b.jpg" width="768" height="1024" alt="IMG_1185"></a><script async src="//embedr.flickr.com/assets/client-code.js" charset="utf-8"></script>
<a data-flickr-embed="true" href="https://www.flickr.com/photos/126635649@N07/26404324154/in/album-72157664019598240/" title="IMG_1187"><img src="https://farm8.staticflickr.com/7160/26404324154_68865a4a00_b.jpg" width="768" height="1024" alt="IMG_1187"></a><script async src="//embedr.flickr.com/assets/client-code.js" charset="utf-8"></script>
Yes I am choosing to brush on the finish. The primer has layed down flat and they said the paint would be glass smooth. I am happy with it so far, but we shall see when I get to the painting part.
I also received bearing recently from Lynn at Accurate Bearing. For anyone else looking for excellent customer service, I highly suggest them.
The old bearings next to the new replacements.
<a data-flickr-embed="true" href="https://www.flickr.com/photos/126635649@N07/26405004814/in/album-72157664019598240/" title="IMG_1188"><img src="https://farm8.staticflickr.com/7127/26405004814_4b71e52a3d_b.jpg" width="768" height="1024" alt="IMG_1188"></a><script async src="//embedr.flickr.com/assets/client-code.js" charset="utf-8"></script>
And how it sits now until I can get some more time to finish blasting the top belt guard and base table. After everything is primed and has sit for a few days I am going to try and paint everything at once. I have kept track of all the costs associated with this refurbishment and right now I am sitting at a little under $200. I still have not touched the motor or control box and do no intend to until I am complete with this and it is re-assembled. Hopefully with in the next month I will complete it and then I am going to start on a Gardener Denver 80 Gallon Air Compressor. Thanks for checking out the drill press and I hope to have more updates soon!
 
OP
T

topcok88

Well-known member
Joined
Jun 3, 2013
Messages
660
As with all projects for me it always takes longer than planned due to my travel and work schedule. But here are more pictures of my progress. I although the paint isn't spotless, I am positive it will provide many worry free years of protection.

<a data-flickr-embed="true" href="https://www.flickr.com/photos/126635649@N07/26404999584/in/album-72157664019598240/" title="IMG_1189"><img src="https://c1.staticflickr.com/8/7292/26404999584_36ef622127_b.jpg" width="1024" height="768" alt="IMG_1189"></a><script async src="//embedr.flickr.com/assets/client-code.js" charset="utf-8"></script>

<a data-flickr-embed="true" href="https://www.flickr.com/photos/126635649@N07/27712873904/in/album-72157664019598240/" title="IMG_1198"><img src="https://c1.staticflickr.com/9/8817/27712873904_628a00c260_b.jpg" width="1024" height="768" alt="IMG_1198"></a><script async src="//embedr.flickr.com/assets/client-code.js" charset="utf-8"></script>

The paint laid out very well as far as I am concerned and plan on using it in future projects with items I do not feel like spraying.

<a data-flickr-embed="true" href="https://www.flickr.com/photos/126635649@N07/27713226183/in/album-72157664019598240/" title="IMG_1199"><img src="https://c8.staticflickr.com/9/8771/27713226183_ef4022063a_b.jpg" width="768" height="1024" alt="IMG_1199"></a><script async src="//embedr.flickr.com/assets/client-code.js" charset="utf-8"></script>

<a data-flickr-embed="true" href="https://www.flickr.com/photos/126635649@N07/27713219143/in/album-72157664019598240/" title="IMG_1254"><img src="https://c8.staticflickr.com/9/8658/27713219143_08ebd86185_b.jpg" width="1024" height="768" alt="IMG_1254"></a><script async src="//embedr.flickr.com/assets/client-code.js" charset="utf-8"></script>

Sand blasted the base prior to primer and paint.

<a data-flickr-embed="true" href="https://www.flickr.com/photos/126635649@N07/28250667011/in/album-72157664019598240/" title="IMG_1331"><img src="https://c4.staticflickr.com/9/8854/28250667011_8e9e4670f1_b.jpg" width="768" height="1024" alt="IMG_1331"></a><script async src="//embedr.flickr.com/assets/client-code.js" charset="utf-8"></script>

<a data-flickr-embed="true" href="https://www.flickr.com/photos/126635649@N07/28047246560/in/album-72157664019598240/" title="IMG_1335"><img src="https://c1.staticflickr.com/8/7739/28047246560_574e8ef61e_b.jpg" width="768" height="1024" alt="IMG_1335"></a><script async src="//embedr.flickr.com/assets/client-code.js" charset="utf-8"></script>

<a data-flickr-embed="true" href="https://www.flickr.com/photos/126635649@N07/28250659131/in/album-72157664019598240/" title="IMG_1336"><img src="https://c4.staticflickr.com/9/8592/28250659131_026ce82aaf_b.jpg" width="768" height="1024" alt="IMG_1336"></a><script async src="//embedr.flickr.com/assets/client-code.js" charset="utf-8"></script>

<a data-flickr-embed="true" href="https://www.flickr.com/photos/126635649@N07/28329043275/in/album-72157664019598240/" title="IMG_1337"><img src="https://c4.staticflickr.com/9/8715/28329043275_a594b064f9_b.jpg" width="768" height="1024" alt="IMG_1337"></a><script async src="//embedr.flickr.com/assets/client-code.js" charset="utf-8"></script>

<a data-flickr-embed="true" href="https://www.flickr.com/photos/126635649@N07/28225412762/in/album-72157664019598240/" title="IMG_1338"><img src="https://c3.staticflickr.com/8/7472/28225412762_74034a6540_b.jpg" width="1024" height="768" alt="IMG_1338"></a><script async src="//embedr.flickr.com/assets/client-code.js" charset="utf-8"></script>

<a data-flickr-embed="true" href="https://www.flickr.com/photos/126635649@N07/28047235570/in/album-72157664019598240/" title="IMG_1345"><img src="https://c3.staticflickr.com/8/7683/28047235570_ba3317852f_b.jpg" width="768" height="1024" alt="IMG_1345"></a><script async src="//embedr.flickr.com/assets/client-code.js" charset="utf-8"></script>

And then re-assembly of all the parts. I wanted to get this part re-assembled prior to disassembling the motor and electrical box. Right now this is how it will sit until I can get back home to finish off the rest of the parts.

<a data-flickr-embed="true" href="https://www.flickr.com/photos/126635649@N07/28329035085/in/album-72157664019598240/" title="IMG_1369"><img src="https://c6.staticflickr.com/9/8635/28329035085_7392ccb325_b.jpg" width="768" height="1024" alt="IMG_1369"></a><script async src="//embedr.flickr.com/assets/client-code.js" charset="utf-8"></script>

<a data-flickr-embed="true" href="https://www.flickr.com/photos/126635649@N07/28047228380/in/album-72157664019598240/" title="IMG_1370"><img src="https://c5.staticflickr.com/9/8712/28047228380_51f6bc3330_b.jpg" width="768" height="1024" alt="IMG_1370"></a><script async src="//embedr.flickr.com/assets/client-code.js" charset="utf-8"></script>

<a data-flickr-embed="true" href="https://www.flickr.com/photos/126635649@N07/28329028435/in/album-72157664019598240/" title="IMG_1371"><img src="https://c4.staticflickr.com/9/8808/28329028435_b65009c469_b.jpg" width="768" height="1024" alt="IMG_1371"></a><script async src="//embedr.flickr.com/assets/client-code.js" charset="utf-8"></script>

Thank you for looking and if you have any questions just ask!
 
OP
T

topcok88

Well-known member
Joined
Jun 3, 2013
Messages
660
Thank you. It has been very fun for the limited amount of time I have been able to work on it.
 
OP
T

topcok88

Well-known member
Joined
Jun 3, 2013
Messages
660
Well I have since wrapped up the restoration or sorts. I still wish to find some dimensions and information for a few parts so I can machine some new ones per old spec, but it runs great and I am sure will provide another fifty years of wood working! Enjoy!
Cleaned up the outside of the motor case as best I could and coated with one coat of red oxide primer and two coats of urethane fortified enamel in black.
<a data-flickr-embed="true" href="https://www.flickr.com/photos/126635649@N07/30032336824/in/album-72157664019598240/" title="IMG_1735"><img src="https://c1.staticflickr.com/6/5506/30032336824_4d18528e04_b.jpg" width="768" height="1024" alt="IMG_1735"></a><script async src="//embedr.flickr.com/assets/client-code.js" charset="utf-8"></script>
<a data-flickr-embed="true" href="https://www.flickr.com/photos/126635649@N07/30032332144/in/album-72157664019598240/" title="IMG_1736"><img src="https://c1.staticflickr.com/6/5834/30032332144_a922f0a2e9_b.jpg" width="768" height="1024" alt="IMG_1736"></a><script async src="//embedr.flickr.com/assets/client-code.js" charset="utf-8"></script>
<a data-flickr-embed="true" href="https://www.flickr.com/photos/126635649@N07/30032327944/in/album-72157664019598240/" title="IMG_1744"><img src="https://c1.staticflickr.com/6/5609/30032327944_09997311c1_b.jpg" width="768" height="1024" alt="IMG_1744"></a><script async src="//embedr.flickr.com/assets/client-code.js" charset="utf-8"></script>
<a data-flickr-embed="true" href="https://www.flickr.com/photos/126635649@N07/30032325784/in/album-72157664019598240/" title="IMG_1745"><img src="https://c1.staticflickr.com/6/5669/30032325784_c4a75ee35e_b.jpg" width="768" height="1024" alt="IMG_1745"></a><script async src="//embedr.flickr.com/assets/client-code.js" charset="utf-8"></script>
Mounted it on the drill press for mock up. As you can see the motor, motor plate, and configuration is not best suited for this drill press. The little 1/3hp pre-NEMA standard motor was most likely stole off a fan and configured for drilling duty. I don't expect the journal bearing motor to last forever but have already fitted a NEMA 56 frame motor to verify it fits. When this one fails to drill what I wish or dies completely I will replace it with a proper Baldor.
<a data-flickr-embed="true" href="https://www.flickr.com/photos/126635649@N07/30663497715/in/album-72157664019598240/" title="IMG_1782"><img src="https://c4.staticflickr.com/6/5324/30663497715_eaaf47b0df_b.jpg" width="768" height="1024" alt="IMG_1782"></a><script async src="//embedr.flickr.com/assets/client-code.js" charset="utf-8"></script>
<a data-flickr-embed="true" href="https://www.flickr.com/photos/126635649@N07/30663491145/in/album-72157664019598240/" title="IMG_1783"><img src="https://c2.staticflickr.com/6/5784/30663491145_98e8e4422b_b.jpg" width="768" height="1024" alt="IMG_1783"></a><script async src="//embedr.flickr.com/assets/client-code.js" charset="utf-8"></script>
<a data-flickr-embed="true" href="https://www.flickr.com/photos/126635649@N07/30363827110/in/album-72157664019598240/" title="IMG_1784"><img src="https://c7.staticflickr.com/6/5662/30363827110_5d19c1f6a4_b.jpg" width="1024" height="768" alt="IMG_1784"></a><script async src="//embedr.flickr.com/assets/client-code.js" charset="utf-8"></script>
<a data-flickr-embed="true" href="https://www.flickr.com/photos/126635649@N07/30032318114/in/album-72157664019598240/" title="IMG_1786"><img src="https://c3.staticflickr.com/6/5737/30032318114_6dcf99d1f0_b.jpg" width="1024" height="768" alt="IMG_1786"></a><script async src="//embedr.flickr.com/assets/client-code.js" charset="utf-8"></script>
<a data-flickr-embed="true" href="https://www.flickr.com/photos/126635649@N07/30663476195/in/album-72157664019598240/" title="IMG_1793"><img src="https://c4.staticflickr.com/6/5609/30663476195_99f4a478a7_b.jpg" width="768" height="1024" alt="IMG_1793"></a><script async src="//embedr.flickr.com/assets/client-code.js" charset="utf-8"></script>
The manual motor started installed (with the unit when I purchased it) was a 3 phase manual starter. Wiring doesn't care but is in a larger configuration than I care for but will work for the time being. I have been looking at alternatives but won't change it until I replace the motor.
<a data-flickr-embed="true" href="https://www.flickr.com/photos/126635649@N07/30032304724/in/album-72157664019598240/" title="IMG_1795"><img src="https://c5.staticflickr.com/6/5330/30032304724_a9ef773d43_b.jpg" width="768" height="1024" alt="IMG_1795"></a><script async src="//embedr.flickr.com/assets/client-code.js" charset="utf-8"></script>
<a data-flickr-embed="true" href="https://www.flickr.com/photos/126635649@N07/30032297554/in/album-72157664019598240/" title="IMG_1796"><img src="https://c3.staticflickr.com/6/5599/30032297554_2eb3196e6d_b.jpg" width="768" height="1024" alt="IMG_1796"></a><script async src="//embedr.flickr.com/assets/client-code.js" charset="utf-8"></script>
Performed some wiring, ran a ground to the case, and made sure things looks in good electrical and mechanical condition.
<a data-flickr-embed="true" href="https://www.flickr.com/photos/126635649@N07/30032286894/in/album-72157664019598240/" title="IMG_1798"><img src="https://c7.staticflickr.com/6/5566/30032286894_e34ec6b910_b.jpg" width="768" height="1024" alt="IMG_1798"></a><script async src="//embedr.flickr.com/assets/client-code.js" charset="utf-8"></script>
<a data-flickr-embed="true" href="https://www.flickr.com/photos/126635649@N07/30032274914/in/album-72157664019598240/" title="IMG_1800"><img src="https://c3.staticflickr.com/6/5684/30032274914_a06c74ca25_b.jpg" width="768" height="1024" alt="IMG_1800"></a><script async src="//embedr.flickr.com/assets/client-code.js" charset="utf-8"></script>
<a data-flickr-embed="true" href="https://www.flickr.com/photos/126635649@N07/30546764492/in/album-72157664019598240/" title="IMG_1801"><img src="https://c5.staticflickr.com/6/5596/30546764492_7975dc7428_b.jpg" width="768" height="1024" alt="IMG_1801"></a><script async src="//embedr.flickr.com/assets/client-code.js" charset="utf-8"></script>
(Wiring nazi's, don't ask about using L3 as my ground "bar" but is was the easiest and most suitable solution.)
New cord because the old 14-4 cord was tough, cracked, and fell apart. This new 12-3 was hooked up using a plug that lets the operator know the ground circuit is acceptable.
<a data-flickr-embed="true" href="https://www.flickr.com/photos/126635649@N07/30546759162/in/album-72157664019598240/" title="IMG_1802"><img src="https://c3.staticflickr.com/6/5756/30546759162_0109bee1dd_b.jpg" width="768" height="1024" alt="IMG_1802"></a><script async src="//embedr.flickr.com/assets/client-code.js" charset="utf-8"></script>
Everything mounted up!
<a data-flickr-embed="true" href="https://www.flickr.com/photos/126635649@N07/30575622771/in/album-72157664019598240/" title="IMG_1803"><img src="https://c4.staticflickr.com/6/5501/30575622771_0d9c2ff61c_b.jpg" width="768" height="1024" alt="IMG_1803"></a><script async src="//embedr.flickr.com/assets/client-code.js" charset="utf-8"></script>
Clearances around back.
<a data-flickr-embed="true" href="https://www.flickr.com/photos/126635649@N07/30627374946/in/album-72157664019598240/" title="IMG_1804"><img src="https://c3.staticflickr.com/6/5632/30627374946_7e67208951_b.jpg" width="768" height="1024" alt="IMG_1804"></a><script async src="//embedr.flickr.com/assets/client-code.js" charset="utf-8"></script>
And complete!
<a data-flickr-embed="true" href="https://www.flickr.com/photos/126635649@N07/30575613381/in/album-72157664019598240/" title="IMG_1805"><img src="https://c6.staticflickr.com/6/5334/30575613381_6744822496_b.jpg" width="768" height="1024" alt="IMG_1805"></a><script async src="//embedr.flickr.com/assets/client-code.js" charset="utf-8"></script>
And the first drilled hole!
<a data-flickr-embed="true" href="https://www.flickr.com/photos/126635649@N07/30663445145/in/album-72157664019598240/" title="IMG_1806"><img src="https://c2.staticflickr.com/6/5832/30663445145_f9f89c2658_b.jpg" width="768" height="1024" alt="IMG_1806"></a><script async src="//embedr.flickr.com/assets/client-code.js" charset="utf-8"></script>
I have a video of it running at it is super quiet! Very good drilling, tight quill (haven't measures run-out), and will do exactly what I need.
I plan on using it for wood working and case prep for reloading. Thanks for looking!
 

driftpin

Well-known member
Joined
Dec 22, 2016
Messages
11,271
Location
Miami-Dade/Broward Co. Florida
A great job, I liked the pics. The brush paint looks fine. I had an older Delta DP220 that I recently sold but I think you may be interested to see a pic of the drill table underside which has a historical foundry date of sorts. Mine is a bit older than yours. It worked fine. I got it at a thrift store and sold it for more than I paid.

The date it was cast, the US Army under General George Patton, during the Battle of the Bulge began moving towards the Siegfried Line. Patton's tactics of a highly-mobile army moving in all directions to harass the enemy was not looked-upon favorably by some military leaders, especially Britain's General Montgomery. As Patton advanced across France into the fall of 1944, he didn't give the Germans time to re-coup and to be able to make a stand in defensive positions. Between the Third Army and the AAF, the Germans lost precious manpower and equipment. Still, the Third Army kept advancing. At some point, General Eisemhower made the decision to divert supplies destined for supporting Patton's Third Army advancement, to General Montgomery's front. This stymied the advancement of the Third Army, and allowed the Germans to retreat while saving precious combat personnel and material. Some historians think that if Eisenhower had continued to support Patton's Third Army advancement into the winter of 1944, the Germans would have been defeated before the end of the year. As it turned out, Montgomery's strategy caused tremendous damage to the Netherlands, especially. After it was all over, Prince Bernard of the Netherlands said, "My country can never again afford the luxury of another Montgomery success."
 

Attachments

  • 20161222_130152_001.jpg
    20161222_130152_001.jpg
    143 KB · Views: 42
  • 20161226_155635.jpg
    20161226_155635.jpg
    146.4 KB · Views: 32
Last edited:

Packard V8

Well-known member
Joined
Mar 16, 2009
Messages
7,380
Location
Spokane, WA
Very nicely done. You'll enjoy the 17", as it is a major step up in durability and precision over the more common 14"s.

Yours, having the JT33 spindle, is less common, as most 17"s came with the #2MT spindle. Although I do notice yours does not appear to have the correct Delta chuck with the threaded collar; a standard chuck still works OK, just not as secure or as easy on-off as those with the threaded collar.

Should you decide to convert to a conventional table, you won't have any difficulty finding one and the raising rack and pinion mechanism will work on the 17" table as well as the head.

FWIW, some tables from smaller DPs sharing the same column diameter will also fit and work. They just won't have the raising mechanism holes. Not a total deal-breaker, as I've used 14" Deltas without a table raiser for more than forty years now.

jack vines
 
To avoid these ads, REGISTER NOW!
Top Bottom