To avoid these ads, REGISTER NOW!

1966 F100 EcoBoost Engine Swap (EcoBoosted)

Status
Not open for further replies.

Wanna Ride

Well-known member
Joined
Jul 28, 2010
Messages
2,790
I feel so bad when these things rear their ugly head for you. I wish I was close, so I could come over and help on some of the small, menial tasks so you can focus on the bigger issues of the build.

If nothing else, know that we're all here in cyberland, cheering you on!
 
To avoid these ads, REGISTER NOW!

gasgas17

Well-known member
Joined
Nov 7, 2009
Messages
443
Location
Nova Scotia, Canada
I feel so bad when these things rear their ugly head for you. I wish I was close, so I could come over and help on some of the small, menial tasks so you can focus on the bigger issues of the build.

If nothing else, know that we're all here in cyberland, cheering you on!

Ditto! All the way from cold snow covered NovaScotia.
 

madoc1

Well-known member
Joined
Dec 11, 2012
Messages
1,242
Location
spicewood, tx
I feel your pain. in 2008 I came down with severe arthritis. been moving slow ever since. I am trying to find some help on my fj40 . am I an only 72!:)

nice work by the way. this is the first thing I look up in morning. disappointed when I don't see you on here. keep up the good work!
 
Last edited:
OP
T

TimeWarpF100

Well-known member
Joined
Aug 21, 2010
Messages
6,784
Location
not here
I feel so bad when these things rear their ugly head for you. I wish I was close, so I could come over and help on some of the small, menial tasks so you can focus on the bigger issues of the build.

If nothing else, know that we're all here in cyberland, cheering you on!

Ditto! All the way from cold snow covered NovaScotia.

I feel your pain. in 2008 I came down with severe arthritis. been moving slow ever since. I am trying to find some help on my fj40 . am I an only 72!:)

nice work by the way. this is the first thing I look up in morning. disappointed when I don't see you on here. keep up the good work!

Thanks! Appreciate the support. Will get thru it and figure out what happened. And how to fix it.

In the mean time started to strip the front fenders. One application of paint remover and just hit it with steam cleaner. No scraping or elbow grease needed.

1A1B3142-07C0-4832-94B6-5FEAD54051E6.jpg


09BF2551-22F8-4C5C-AC89-50906BCAF5F5.jpg


A18FC6D3-9EA5-4DBC-A400-48E21CDF6D1E.jpg

9C9204D0-618D-47F9-9B72-7945FC985DAC.jpg

57891353-1DCE-4D78-8CCE-0B5B78305FAC.jpg

639BD4B4-FBFB-42D6-AD97-FD0B736162A5.jpg

1F7E548B-47D7-43FB-8C5D-718E7403096B.jpg

7A75814F-8A45-4709-B327-3E3C685A5305.jpg

9D12B14C-9AFF-4F8D-BF41-0229460F1CE2.jpg
 

MagKarl

Well-known member
Joined
Oct 15, 2012
Messages
684
Location
Olympia, WA
I'm very curious what you use for the paint stripper, and what do you do for cleanup/containment of the mess?
 
OP
T

TimeWarpF100

Well-known member
Joined
Aug 21, 2010
Messages
6,784
Location
not here
I'm very curious what you use for the paint stripper, and what do you do for cleanup/containment of the mess?

I have been stripping my vehicles like this for 38yrs now. Trying different variations on the way.

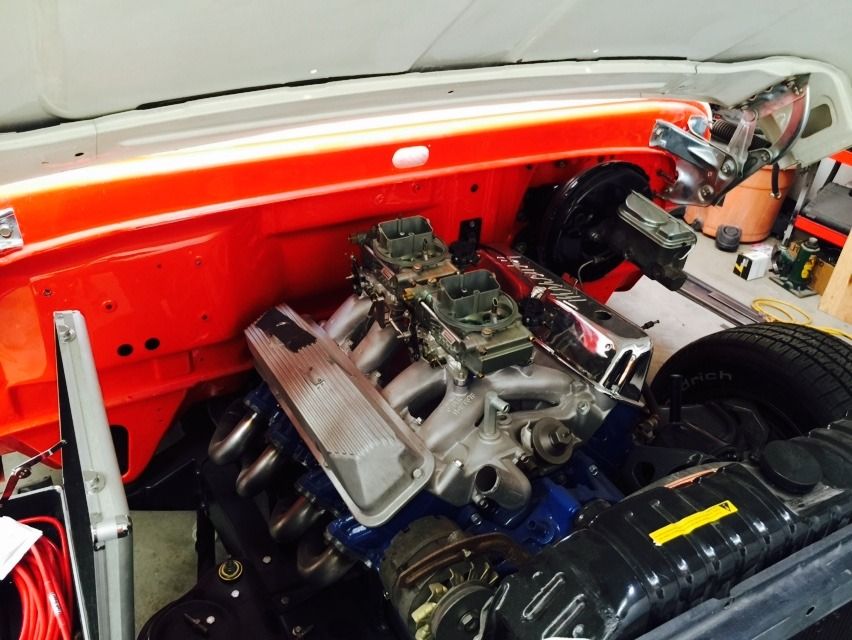
In the middle I tried different media blasting too and still use it for door jambs, floors, trunks or other spots. I usually use the chemical strip for outside sheet metal.

It is by far away the fastest and cheapest way to do it.

Usually 2-3 gallons max to strip a car.

Kleen Strip Aircraft Paint Remove is what I have used for the 38yrs.

Tried others but none work as well for me.

I have found technique is equally important.

I have found as soon as I put a brush to it and move it around or touch it in any other way after application it does not work as well.

Each time I strip a car I try different methods.

I even tried to use my pressure pot and spray it on . . . It ATE the aluminum! Lesson learned.

So after the 38yrs, On this truck I tried yet another method. (getting lazy)
Looking for another time saver.

I will find another part to strip. (the hood) and show a time line from start to finish. My estimate to strip the hood in labor time is approx 15 minutes start to finish. Clean bare metal. At a cost of under 5.00

As far as cleanup I have normally just done it in shop with window or door open but makes me ill.

Seeing as though water neutralizes it the best is outside, sun an warm helps.

It was very rainy yesterday when I stripped the fenders.

1) In short I take a 1L Smart Water bottle drill a 1/4" hole in cap.

2) Fill water bottle with remover after a bit of agitating to make sure its mixed.

3) Hard to explain but I then just slowly squirt the remover onto panel with panel vertical and just keep adding until it runs down panel adding where needed kind of like making a even flowing river. any amount that runs off I catch and re-use. Once I have 100% coverage I lay the item flat and let it do its job. Usually 15 minutes or less. If I wait longer it will dry on its own.

4) One can then scrape off with large scraper, putty knife etc.

5) I am lazy I heat the steamer up and using a very wide pattern let it just roll off and onto the concrete or cardboard etc.

6) Sounds bad I know but I just leave it out and allow the moisture to evaporate.

7) At this point the paint is now dry chips just as you scraped it off using no chemical.

8) I have tried touching up with brush for spots I missed, just does not work well.

9) I have also tried brushing it on, one ends up using much more remover.

10) Cheap and fast the current method. It takes one or 2 minutes tops to apply. I can walk away and keep an eye on it. When its ready I scrape or use steamer. Then any small spots I can touch up with brush and then hit with water and steel wool.

I will try to show the exact method and time line tomorrow if help shows up.
 
Last edited:
OP
T

TimeWarpF100

Well-known member
Joined
Aug 21, 2010
Messages
6,784
Location
not here
Today is 15 years of ownership on my '66 427 F100 Project. Hoping its not another 15yrs before I can drive it for the first time.

Happy 15th 427 F100!

E5829B8E-7D2D-4DD1-9567-7378EE6FB755.jpg

IMG_6215.png


Kind of where I am at with EcoProject

Did you notice the hood is on and HINGED?

8C27351E-CA24-4129-9A0C-0D6AEECBDA89.jpg

C56E594D-ECAE-432B-84A7-FDBA3B5A8612.jpg


Working on solution for getting drivers door to fit, still unsure how n why the door opening did what it did. A bit overwhelmed at the moment but "trucking" on!
 
Last edited:
OP
T

TimeWarpF100

Well-known member
Joined
Aug 21, 2010
Messages
6,784
Location
not here
Geez... Another frankenstein? How many intakes can you fit on that bigblock?

Oh, Those I bought for the ecoboost project!

6 cylinders 6 intakes I was told.

I realized after I bought them that was only for one side, now I need to go on the hunt for 6 more intakes.

I just re-read what I was told . . It did say 6 intakes for each side. but it was 6 intake valves not intake manifolds . .:lol_hitti:lol_hitti:dunno::willy_nil:lol:

I have been searching Google, Bing & Yahoo all weekend.

I cannot seem to find a Door Gap Tool anywhere . .

Only way I can see to get the drivers door gap correct!

I did measure the door and its 1/8 shorter than others for same side . .

So all I need is a 2/8" door gap tool.

I will be back when I find one and get the gap adjusted . . .
 
Last edited:

Wanna Ride

Well-known member
Joined
Jul 28, 2010
Messages
2,790
Quit wastin' time and get back to work. We haven't seen any progress pics in at least... well, a day.
 
Last edited:

70f100builder

New member
Joined
Feb 2, 2015
Messages
1
Location
Plato, Mo
Awesome and inspiring build. Just spent the last couple evenings going through your build thread. This build thread gives me motivation to push forward on my own build. Keep up the great work, you have my attention.
 
OP
T

TimeWarpF100

Well-known member
Joined
Aug 21, 2010
Messages
6,784
Location
not here
Quit wastin' time and get back to work. We haven't seen any progress pics in at least... well, a day.

Yeah, After the cab stretch fiasco . . . After a bit of fiddling had the door fitting like this. Grand Canyon sized Gap.

Is bad news still good? LOL!

2123D948-8771-42F6-991E-0FA842D0118B.jpg


Awesome and inspiring build. Just spent the last couple evenings going through your build thread. This build thread gives me motivation to push forward on my own build. Keep up the great work, you have my attention.

Thanks! More to come but a bit slow like me . .
After this job a typical restoration will be a walk in the park . . On 2nd thought I will be so old by then it will probably not be any easier. . :lol_hitti:lol_hitti

WTH... no more progress updates in a week?

This time of year with rains and cold usually make me sick. Problem is my Immune system is still messed up so I cannot go to the doc for antibiotics like a normal person can. But started to feel better last couple days.

You know it is sometimes good to take a break and give the brain a rest for a bit. He most likely wants to get his shop cleaned up. You look closley there may be another tread on this forum to look at. :lol_hitti

BINGO! When I am making progress my shop does get quite messy.
I use that as my daily workout routine. Shop is only 25x39 but I swear its at least 3 miles across uphill both ways . . Total obstacle course at times. With the semi trailer gone I still have not found a place for stuff that needs to be indoors.


When I need my fix I just look at Robert's Thread! Along with a few others.
 
OP
T

TimeWarpF100

Well-known member
Joined
Aug 21, 2010
Messages
6,784
Location
not here
I still am not sure if this is going to work on fixing cab problem. I ground off approx 6 spot welds on drivers side of cab then using a turnbuckle pulled it into place. (a bit of overpull thinking it will move back some.) What happened to passenger side door opening was simply amazing. It now fits much better than stock!

Still a lot of flex in cab. Getting old and need a hand to move and hold stuff & help is very limited. Also spending a lot of time on property, trying to finish up things around here that need done (sorta a break on eco until I could find a way to fix it)

Yesterday 2 new door openers showed up as had 2 doors not secure. I still need to put up another couple security lights and a few camera's. So if and when someone does come back here it will be recorded . . Just sooo much to do.

My laughable turn buckle system . . I just dont know how I will hang the door or get into the truck with it in place, maybe just use the passenger side . . haha

Lets hope when cab is welded up in places that were flexing and I let it go it does not move back to "prior" position.

I took apart a extra hinge and made the little bolt on bracket to help pull with.

4DBF70BD-52D1-4901-AD0D-3AC9324C3DBE.jpg

34112923-8E24-46EA-9E1A-65B096D2EB7F.jpg

FF489343-B931-4421-8C7E-47E166986B7A.jpg
 
Last edited:
OP
T

TimeWarpF100

Well-known member
Joined
Aug 21, 2010
Messages
6,784
Location
not here
Turns out the hood is quite nice!

A couple dents like most have. Always thought it was from people using it for a ladder but am starting to think its from when hinges get dry and its forced. Always in same spots.

A fair amount of "pop can" on drivers side at dent.

27BE080D-8C58-408C-8DD5-B34236A4CAB8.jpg


5D0F173B-CC22-48A3-AE54-F2D879F4F0A8.jpg

7B422DD0-B5FB-4DAE-B20D-8A560BB47366.jpg
 
Last edited:
To avoid these ads, REGISTER NOW!

Wanna Ride

Well-known member
Joined
Jul 28, 2010
Messages
2,790
Whew... got my update fix on the Eco-project.

I travel a lot for work this time of year, and didn't see much movement on this while I was away. Glad to see you're back at it!
 
OP
T

TimeWarpF100

Well-known member
Joined
Aug 21, 2010
Messages
6,784
Location
not here
Glad to see you are progressing. Take as much time as you need. Better to do it right than rush to impress the audience.

I just shortened the amount of time on this project drastically!

Whew... got my update fix on the Eco-project.

I travel a lot for work this time of year, and didn't see much movement on this while I was away. Glad to see you're back at it!

I got a real update for ya!

Finally after months of headaches with cab trying to get all to fit and work together . . .

Cowl, hood issues . .

And then the biggie. Drivers door opening so bad could not get the door in place.

Took a week or so of scratching my head thinking of different ways to fix.

I finally decided as a last bit attempt to just do the turnbuckle deal then go a bit "further" in case it moved back some.

I pretty much final welded both sides thinking I finally had it . . . WRONG!

It never moved back at all. Now the opening on drivers door is smaller than the door itself!


So after all this I finally got fed up and lost it!

I just took the large cutoff wheel to it along with the PLASMA CUTTER

All the frustrations got to me enough I took the cutoff wheel to the door too!:dunno::dunno::willy_nil:willy_nil

What did they say about Humpty Dumpty?

Oh yeah, ALmost forgot, the cutoff wheel got to the cowl too!

I will post photo's of the mess in a day or so, when I cool down!
 
OP
T

TimeWarpF100

Well-known member
Joined
Aug 21, 2010
Messages
6,784
Location
not here
I hope this turns out well.


Me Too!

I have cooled down now, warm from so much work . . It was over 80 in shop had to turn the A/C on for a bit . .

A4663E5D-31E2-4DCB-86E7-A7E086BF3693.jpg


Will know in a day or two how it goes.

A big THANKS to Robert (MP&C) for taking time from his busy day to speak with me over the phone with a few pointers on how best to go about chopping up the cab any further . .

Idea's I had not thought of. Just knew general what I thought needed to be done. Lets hope I can execute it properly.:D:D

Wish me well as it is the first time I have cut anything apart to make it "fit better"!

Prior if the panel did not fit I adjusted it best I could or maybe elongated the adjustment hole a bit , A 1st for me.
 
Last edited:

HOTFR8

Banned
Joined
Mar 2, 2007
Messages
24,498
Location
Castlemaine, Victoria. The Hot Rod Centre of Austr
A big THANKS to Robert (MP&C) for taking time from his busy day to speak with me over the phone with a few pointers on how best to go about chopping up the cab any further . .

Idea's I had not thought of. Just knew general what I thought needed to be done. Lets hope I can execute it properly.:D:D

Now that is what I like reading on the forum. :rocker:
 
OP
T

TimeWarpF100

Well-known member
Joined
Aug 21, 2010
Messages
6,784
Location
not here
Now that is what I like reading on the forum. :rocker:

Glad to help, looking forward to the results!

Before I started to cut on "B" pillar to change the gap I put a small 1" strap between the A & B and the gap closes up quite easily.

Still not sure where exactly its moving around. Do not dare cut at this point.

Could be because of the lower part of cowl area has been removed for fitting the HVAC. Working on chopping up the extra cowl and possible splicing it into the Eco cab. Pretty lost at this point what to do.

If I cannot get cab to work proper the job will be over. I already have many weeks in it trying to correct things~

This is area I am now trying to correct.

E1F3E9C1-D385-469E-B6B7-CB61AF6CEA17.jpg


By pulling just a bit with the small strap it closes up nicely.

8125AD7D-3A21-4581-8691-44CB2CCDFCA5.jpg


The passenger side fits better than any other 65-66 I have seen without any mods as in cuts, welding.

52232DC6-6F8A-427A-B8BC-BEF7AAC7EBD7.jpg

6A93A3FE-4B7F-44DB-9B98-DCF298AAFE16.jpg


So its "kinda close" on drivers just not acceptable.


Some minor cutting at cowl on drivers side has it fitting very nice.

BF8CA6BD-896F-45A5-A5FF-91A24E53FD73.jpg

E920711F-A966-4426-86A0-151739E2EAAE.jpg

AA1EA646-8697-4D05-AD09-0D74DC3C2549.jpg


Very early almost in the teardown stage it was like this.

DSC00165_zpsb280dcc8.jpg


I had no clue the door gap moved until recently when I attempted to do a trial fit on the doors.

The piece removed I am thinking may be causing issue is here where wipers would mount.

Live and learn I guess. hope I have not ruined the cab.

DSC00039_zpscab5760d.jpg


Working alone is near impossible to figure this stuff out as have to wait sometimes for days for someone to show.

Its the door gap on drivers side that keeps easily changing. I simply cannot see where its moving . .

I should just stick with "STOCK" restorations . . Health just not allowing me to do this . . . constant pain not helping much.

Still not giving up but if someone were to walk in and ask if it was for sale . . Sorry to say but it would be GONE!
 
OP
T

TimeWarpF100

Well-known member
Joined
Aug 21, 2010
Messages
6,784
Location
not here
The wide piece that goes across back that is part of window opening is also spot welded around window and back panel but plug welded to B pillar at door opening.

It is different from side to side on location of how its welded together, making everything not the same side to side. Part of gap issue.

B2335F7E-1BD5-4915-84E5-82A910F284F9.jpg

0857B606-FFE8-407A-B421-C2FCA5BDAF49.jpg
 
Last edited:

nkidl

Member
Joined
Apr 3, 2013
Messages
13
Location
UK
Hi time warp.

I just wanted to say that I have been a long time lurker on the forum, getting ideas for my up coming build.

But your thread is one of the most interesting and coolest I ve seen, and I look forward to all updates.

Hopefully your health will pick up, and you definitely have the skills to crack his cool project.

Nathan
 
OP
T

TimeWarpF100

Well-known member
Joined
Aug 21, 2010
Messages
6,784
Location
not here
Hi time warp.

I just wanted to say that I have been a long time lurker on the forum, getting ideas for my up coming build.

But your thread is one of the most interesting and coolest I ve seen, and I look forward to all updates.

Hopefully your health will pick up, and you definitely have the skills to crack his cool project.

Nathan

Thanks!

You have me curious as to what your upcoming build is?

This one has been a rollercoaster and the learning curve has been HUGE! LOL
 
OP
T

TimeWarpF100

Well-known member
Joined
Aug 21, 2010
Messages
6,784
Location
not here
A bit beyond frustrated at the moment . . LOL

I heard that once a person sees the light at end of tunnel it gets easier?

Problem is I cannot find the tunnel at the moment to get started.

I wish my "FORD" lightbulb would never have turned on in the beginning, things would be much easier. EVeryone remember the ford "Lightbulb" ads from the 60's and 70's?

Something about a better Idea . . EcoBoost in a '66 F100, Brilliant Idea . . NOT!


A couple pics with a machinist straightedge on the "B" pillar. Here one can see about midway up on lower portion of the door how it was assembled crooked "helping" cause the issue. The door itself is actually spot on straight. It was only a "Truck" back then and as long as it was in general "ballpark" it was welded together and sent on its way.

Of the nearly dozen 65-66 Trucks I have owned the gaps are usually all off in this area. Best fitting one was my 1965 F250.

80374516-6EB8-4609-AB39-A717EA76E016.jpg

58014CD3-6A51-4A93-BD06-D1B687AE1C8D.jpg

E849D9A2-8923-4411-B4DF-DA943B0F04F3.jpg
 
OP
T

TimeWarpF100

Well-known member
Joined
Aug 21, 2010
Messages
6,784
Location
not here
This really has me thinking. The "B" pillar has not been modified or messed with in any way. It has a HUGE strong crossmember at bottom of cab and other support around window and below. If I took the door off hinges and hold it up to "B" pillar the fit of door to jamb is way off because of how it was put together.

I do not think at this point if I cut it and try to add a piece it will easily move forward to match the door. I may be better off slicing it inside the door jamb . . I am officially
STUCK!
 
OP
T

TimeWarpF100

Well-known member
Joined
Aug 21, 2010
Messages
6,784
Location
not here
Better Idea by Ford

Ford%20Better.jpg


Timewarp has a better idea too!

Rent backhoe, dig large hole, bury EcoProject, Sell dirt!

Can anyone borrow me the $$ to rent a backhoe? Spent it all on the (EcoProject)


Thanks to Robert (MP&C) for calling this morning to give me a few more idea's on how to fix this before I really do go out and rent a backhoe.

Robert mentioned it was kinda cold there this morning.

Cold here too, the shop was a coool 69 Degree's this morning at 6:30 am, forecast shows 79 today, 81 saturday, 79 sunday, and a major cooldown to 77 on Monday.
warmer in Phoenix as I am around 2000' elevation . .

How many of you can heat your garage in the winter with the lights in shop? Yesterday evening after a late dinner around 6:30pm it was 81 deg in shop, open door or turn on A/C. I opened door . . Turned off lights while I ate, temp dropped nicely.

If I had the time I would change the wording on ad to TimeWarp had a better Idea, he had burial on the EcoProject then change pic from torino to the Eco getting pushed in hole.

Selling the dirt would give me enough funds to buy that new Chevy!
 
Last edited:
OP
T

TimeWarpF100

Well-known member
Joined
Aug 21, 2010
Messages
6,784
Location
not here
Hole almost done . . Need help to push ecoproject into hole.

images_1.jpg


I may have to chop the top to get it to fit.

Could not afford a larger backhoe for deeper hole.

Maybe if I just pushed it into the hole I am now in. Its plenty deep! Room for Both!

A clearer pic of me digging hole . .

147602_9542e1e58c3f4e8280f5b5e21462bb95.jpg
 
Last edited:
Status
Not open for further replies.
To avoid these ads, REGISTER NOW!
Top Bottom