bigboost
Well-known member
This is my build thread from the DSM forum, it’s a little wordy due to it originally being on a DSM specific board, but there are lots of pictures if you’re not into the narrative type. This work was done over the course of about 6 months
Here is my 1990 AWD TSi build. Enjoy!
A DSM was my first car when I was 16 in 2003, and I think there has only been about a year or 2 since that I haven't owned at least one.
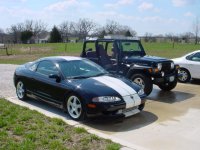
An old DSM friend of mine gave me a call and was in a bind and had to get rid of his car and in a hurry. So we arranged the deal and I left at 5AM and headed from Jacksonville FL to Charleston SC loaded it onto the trailer and headed home. Made it back to the shop in good time and dropped it off.


Here is the mod list
Engine
Stock Block & Head
ARP Headstuds
FP4R Cams
Kiggly Race Beehive Springs/Retainers
HTA86 Turbo
FP Inline Oil Filter/Restrictor
Tial MVR 44mm WG
FP O2 Housing & Dump Tube
FP Manifold
K&N Filter
Magnus Manifold
Intercooler Setup
Spark Tech COP
Custom 3” Downpipe/Exhaust
FIC 2150cc Injectors
Fuel Lab Inline Filter w/SS E85 filter
Dual Walbros in stock hanger
ARP Headstuds
Halman ES MBC
Ny-Trex Wet kit
Fuel Lab AFPR
Catch Can Setup
Drivetrain/Suspension
DIY Built Transmission
South Bend Clutch
ACT Streetlite Flywheel
Eibach Pro Springs
KYB AGX Adjustables
BFG g-Force Sport Comp Tires 225/50/16
Prothane Mounts
Torque Solutions DS Bushings
Shep Pedal Assembly
Shifter Base Bushings
Shifter Cable Bushings
Shifter Bracket Bushings
OEM Master & Slave cylinder
Tuning/Electronics:
ECM Link V3 Full
Speed Density Setup
PLX Wideband
Pro Sport – Boost, Oil Pressure & Oil Temp Gauges
Interior
Battery Box/Relocate
Mint Interior/Carpet/Seats/Plastics/Door Panels
Custom Gauge Bezel
E-PSI Shift Knob
Aesthetics
HID Kit
Hood Shocks
FP Manifold Blanket
Cooling
STM Oil Cooler
Fluidyne Radiator
2 12” SPAL Fans
AN Lines
-6AN Fuel Feed & Return lines
-10AN Turbo Drain
-4AN Vacuum Lines
-6AN Catch Can Lines
-6AN Coolant overflow
The car is in great shape exterior wise, but had a few issues that needed to be addressed. The previous owner had upgraded to 2G GSX front calipers, but the brake line fittings are different between a 1G and a 2G so I had to get some new brake lines made, it also had some shift cable bracket issues that I'm still working through.
First, I started accumulating parts for the project.
FP Intake, FIC 850cc Injectors, Fuel Lab AFPR w/Gauge


The car had a non-eprom ECU and I sent it off to ECMLink to have them convert it and install V3.


Picked one of these guys up during the Pre-Release pre-order for $750, what a masterpiece


Ported HTA68 from Forced Performance


I'll be using the cylinder head off of my GST, its been O-Ringed, has FP4R Cams and Kiggly Beehive springs.

So I pulled the engine out and set it aside, I haven't gotten to taking it apart yet.
Next we pulled the engine out of the gold car and put it on a stand to be cleaned up, and parts swapped.
The first big thing on the list of work is to do a complete wire tuck, brake line tuck, and fuel line tuck. Much more work than I had imagined, it’s actually still in progress, going to be working on it tomorrow.
So I didn't want to just get some cheap bs wire loom from the auto parts store so I went a little classy and ordered some Nylon Expandable Mesh Sleeving from McMaster-Carr.


Stripped the front end down and pulled the Engine Harness and the Chassis Harness from the car, and began going to work. By the time everything is said and done, only the Injectors, Igniter, Coil Pack, TPS, CAS, O2 Sensor, and GM-MAF plug will remain on the Engine Harness, and Only the Headlights, Running Lights, Turn Signals, and Alternator plug will remain on the Chassis Harness. The fusebox under the hood will be relocated to underneath the dash. Here are some pictures of the nightmare that is a factory wiring harness!
Doesn't look much like a 1G anymore does it?


1 of the 2 Harness's with loom and electric tape removed, god what did I get myself into.

Vic Vs Rat Nest - FIGHT!


FML


Chassis Harness Stripped and Shortened

Engine Harness Stripped, needs trimming I say!

Still got a little bit left to remove and get the lengths right, but so far here is all the wire and loom that have been removed from the factory harness. Because Race Car


We were having a hard time coming up with exactly how long each plug needed to be, and we wanted to be on the money so as little as possible could be seen, So we set one of my empty blocks in the engine bay with two motor mounts and a jack, set a spare head on top, and put my Magnus intake, fuel rail, injectors, and throttle body on to do an accurate mock up. Man this things gonna look sweet when its done.


Here is a sneak peek at what the connectors look like finished w/sleeving and shrink tubing done. Pretty excited!

Here is my 1990 AWD TSi build. Enjoy!
A DSM was my first car when I was 16 in 2003, and I think there has only been about a year or 2 since that I haven't owned at least one.
An old DSM friend of mine gave me a call and was in a bind and had to get rid of his car and in a hurry. So we arranged the deal and I left at 5AM and headed from Jacksonville FL to Charleston SC loaded it onto the trailer and headed home. Made it back to the shop in good time and dropped it off.
Here is the mod list
Engine
Stock Block & Head
ARP Headstuds
FP4R Cams
Kiggly Race Beehive Springs/Retainers
HTA86 Turbo
FP Inline Oil Filter/Restrictor
Tial MVR 44mm WG
FP O2 Housing & Dump Tube
FP Manifold
K&N Filter
Magnus Manifold
Intercooler Setup
Spark Tech COP
Custom 3” Downpipe/Exhaust
FIC 2150cc Injectors
Fuel Lab Inline Filter w/SS E85 filter
Dual Walbros in stock hanger
ARP Headstuds
Halman ES MBC
Ny-Trex Wet kit
Fuel Lab AFPR
Catch Can Setup
Drivetrain/Suspension
DIY Built Transmission
South Bend Clutch
ACT Streetlite Flywheel
Eibach Pro Springs
KYB AGX Adjustables
BFG g-Force Sport Comp Tires 225/50/16
Prothane Mounts
Torque Solutions DS Bushings
Shep Pedal Assembly
Shifter Base Bushings
Shifter Cable Bushings
Shifter Bracket Bushings
OEM Master & Slave cylinder
Tuning/Electronics:
ECM Link V3 Full
Speed Density Setup
PLX Wideband
Pro Sport – Boost, Oil Pressure & Oil Temp Gauges
Interior
Battery Box/Relocate
Mint Interior/Carpet/Seats/Plastics/Door Panels
Custom Gauge Bezel
E-PSI Shift Knob
Aesthetics
HID Kit
Hood Shocks
FP Manifold Blanket
Cooling
STM Oil Cooler
Fluidyne Radiator
2 12” SPAL Fans
AN Lines
-6AN Fuel Feed & Return lines
-10AN Turbo Drain
-4AN Vacuum Lines
-6AN Catch Can Lines
-6AN Coolant overflow
The car is in great shape exterior wise, but had a few issues that needed to be addressed. The previous owner had upgraded to 2G GSX front calipers, but the brake line fittings are different between a 1G and a 2G so I had to get some new brake lines made, it also had some shift cable bracket issues that I'm still working through.
First, I started accumulating parts for the project.
FP Intake, FIC 850cc Injectors, Fuel Lab AFPR w/Gauge
The car had a non-eprom ECU and I sent it off to ECMLink to have them convert it and install V3.
Picked one of these guys up during the Pre-Release pre-order for $750, what a masterpiece
Ported HTA68 from Forced Performance
I'll be using the cylinder head off of my GST, its been O-Ringed, has FP4R Cams and Kiggly Beehive springs.
So I pulled the engine out and set it aside, I haven't gotten to taking it apart yet.
Next we pulled the engine out of the gold car and put it on a stand to be cleaned up, and parts swapped.
The first big thing on the list of work is to do a complete wire tuck, brake line tuck, and fuel line tuck. Much more work than I had imagined, it’s actually still in progress, going to be working on it tomorrow.
So I didn't want to just get some cheap bs wire loom from the auto parts store so I went a little classy and ordered some Nylon Expandable Mesh Sleeving from McMaster-Carr.
Stripped the front end down and pulled the Engine Harness and the Chassis Harness from the car, and began going to work. By the time everything is said and done, only the Injectors, Igniter, Coil Pack, TPS, CAS, O2 Sensor, and GM-MAF plug will remain on the Engine Harness, and Only the Headlights, Running Lights, Turn Signals, and Alternator plug will remain on the Chassis Harness. The fusebox under the hood will be relocated to underneath the dash. Here are some pictures of the nightmare that is a factory wiring harness!
Doesn't look much like a 1G anymore does it?
1 of the 2 Harness's with loom and electric tape removed, god what did I get myself into.
Vic Vs Rat Nest - FIGHT!
FML
Chassis Harness Stripped and Shortened
Engine Harness Stripped, needs trimming I say!
Still got a little bit left to remove and get the lengths right, but so far here is all the wire and loom that have been removed from the factory harness. Because Race Car
We were having a hard time coming up with exactly how long each plug needed to be, and we wanted to be on the money so as little as possible could be seen, So we set one of my empty blocks in the engine bay with two motor mounts and a jack, set a spare head on top, and put my Magnus intake, fuel rail, injectors, and throttle body on to do an accurate mock up. Man this things gonna look sweet when its done.
Here is a sneak peek at what the connectors look like finished w/sleeving and shrink tubing done. Pretty excited!