To avoid these ads, REGISTER NOW!

19x21 Motorcycle Garage

JasonJ

Well-known member
Joined
Aug 4, 2006
Messages
424
Location
Las Vegas
I am starting to this to hopefully answer some questions that I have been getting in private IM and in various threads and to track my own progress.

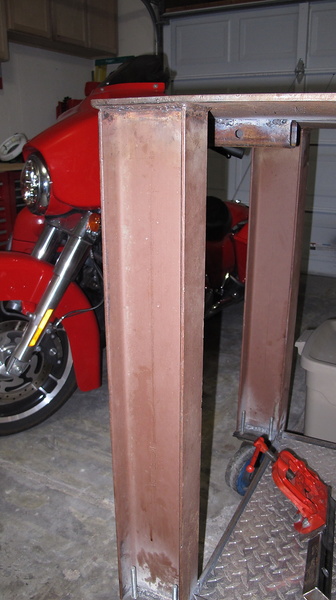
This is the space that I am forced to use. :) Its not a shop or a man cave, it is a garage. There is a car in it along with a water heater, washer and dryer, golf clubs, christmas decorations, trash can, recycling bins, shelfs of storage and my motorcycle.

With all the above crammed into a 19x21 garage, I have basically one 21' wall to work with and I'll try to do what I can with the rest.

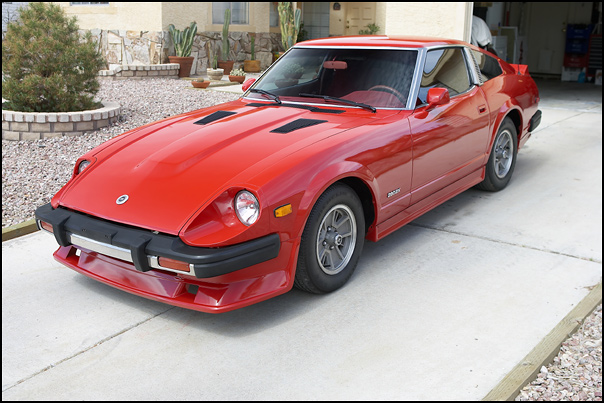
So what started this cleanup was 1) this web site and 2) the 280ZX that is normally parked in the garage went to a mechanic for an over heating problem. With the extra space, I felt motivated to start a clean up... and it snow balled from there.

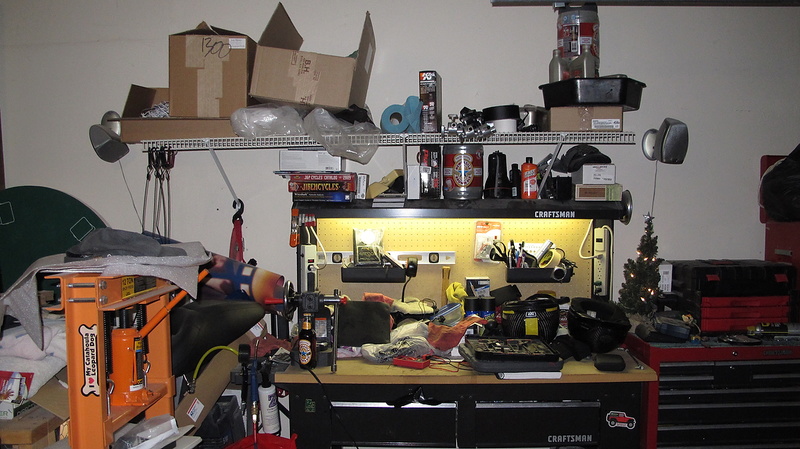
This is the garage when I started.

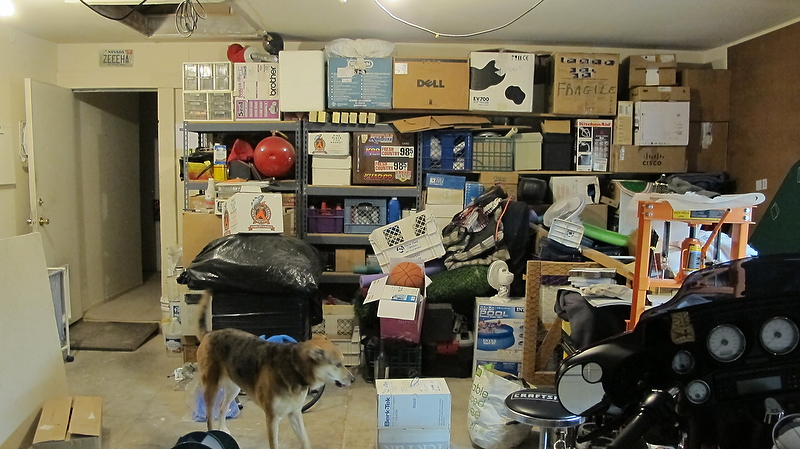
From the door that leads to the house, looking into the garage
20121217141012-e9a0b7f8.jpg


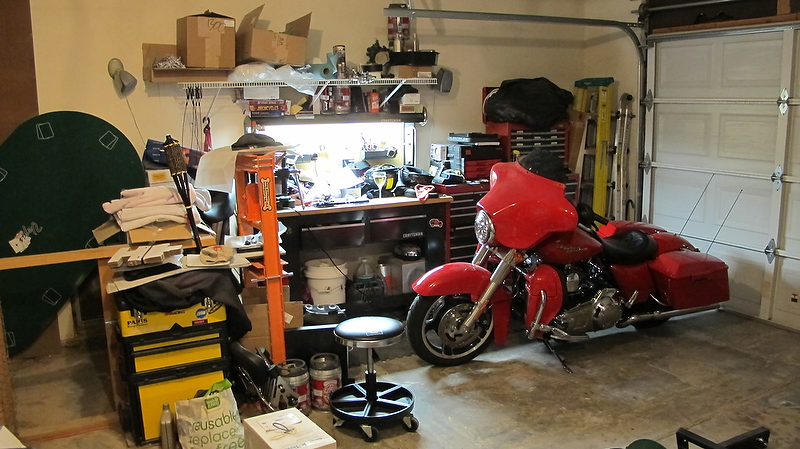
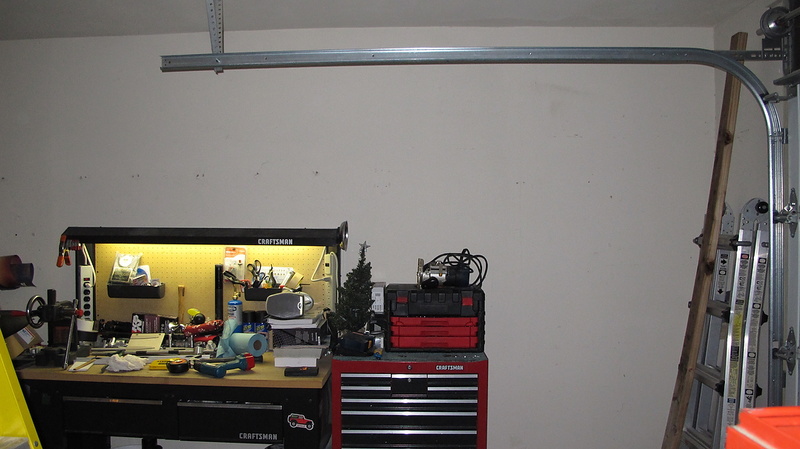
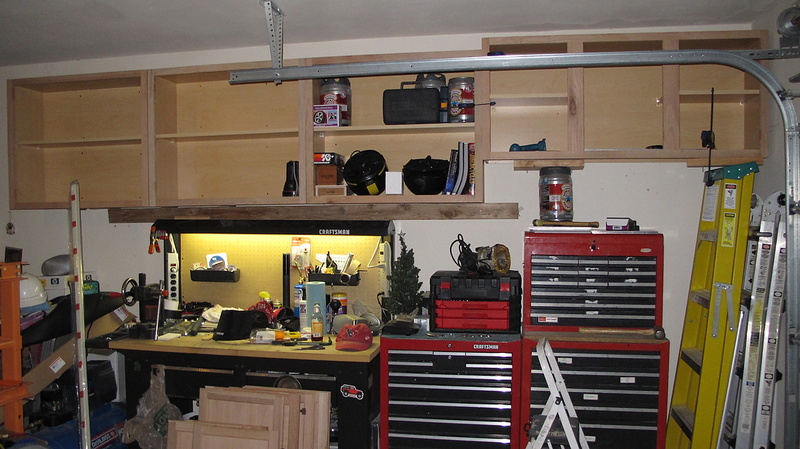
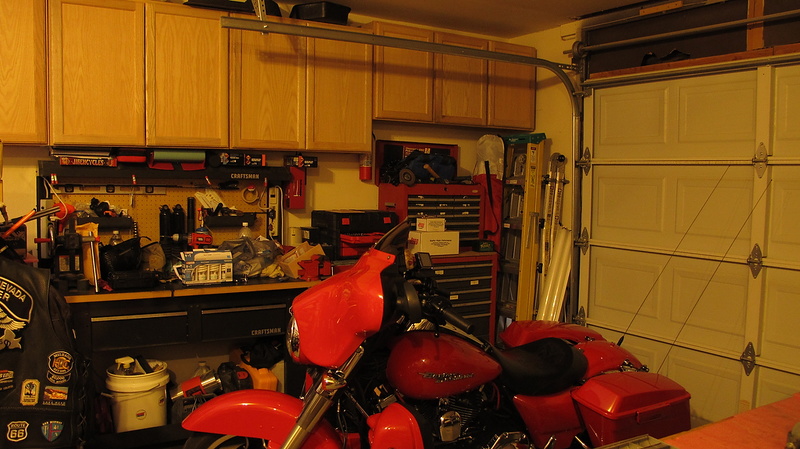
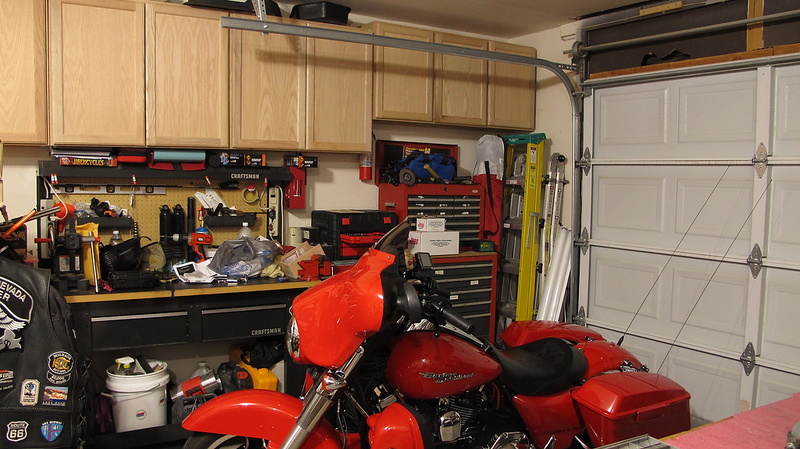
Standing with my back against the garage door looking in:
20121217141013-d012256e.jpg


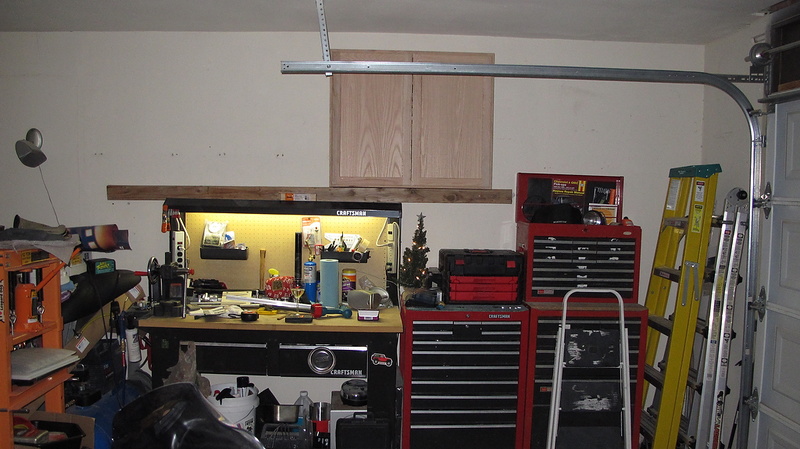
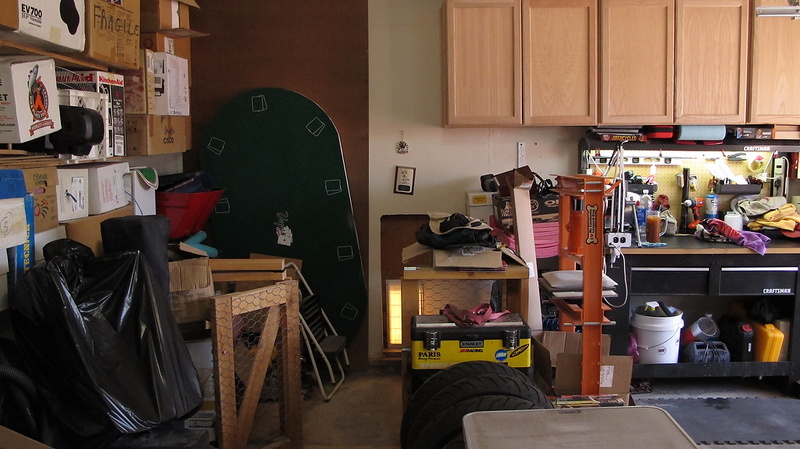
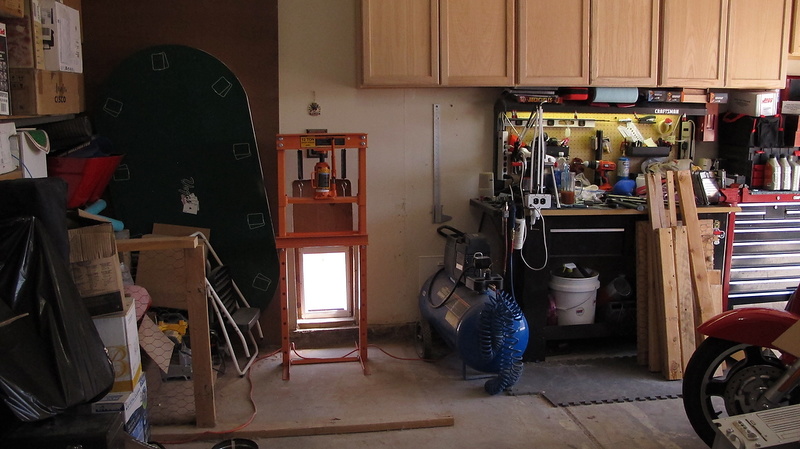
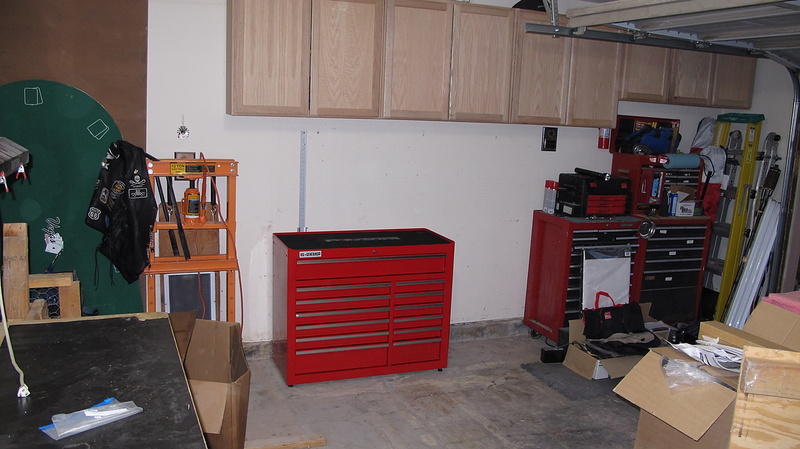
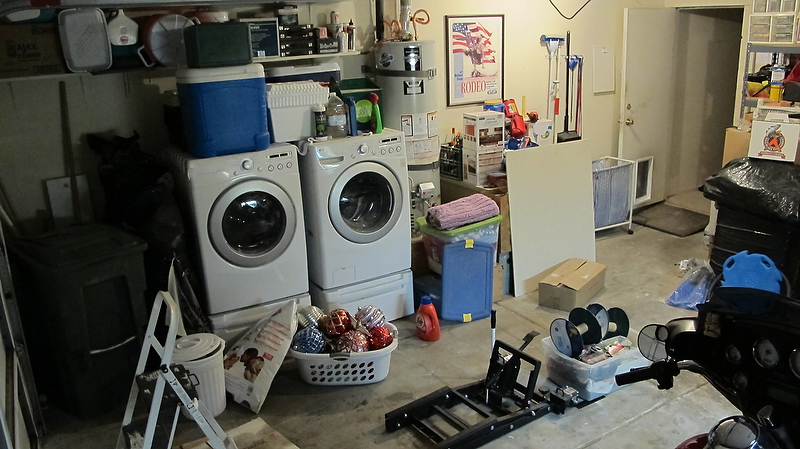
Standing between my motorcycle and the workbench looking to the other side of the garage.
20121217141014-b528ae8b.jpg


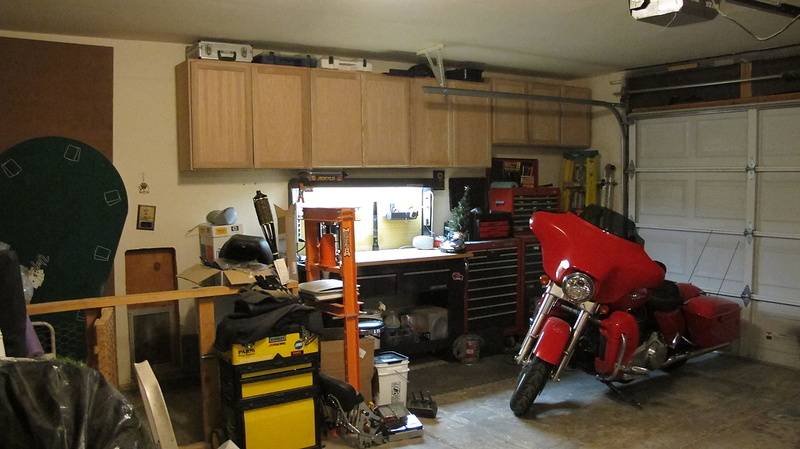
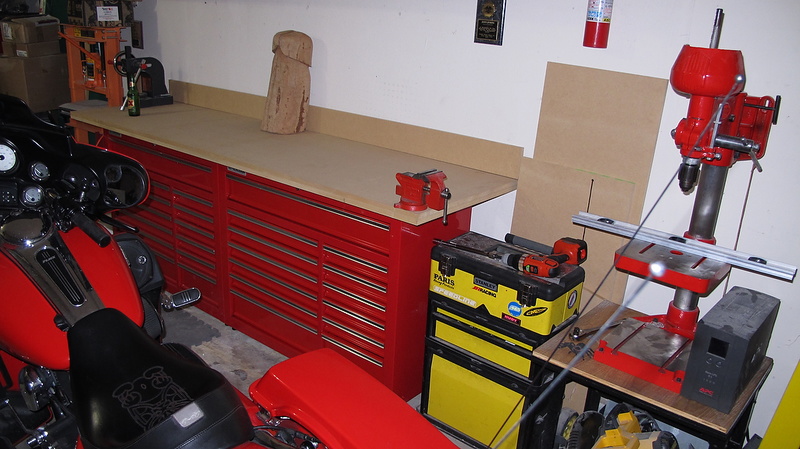
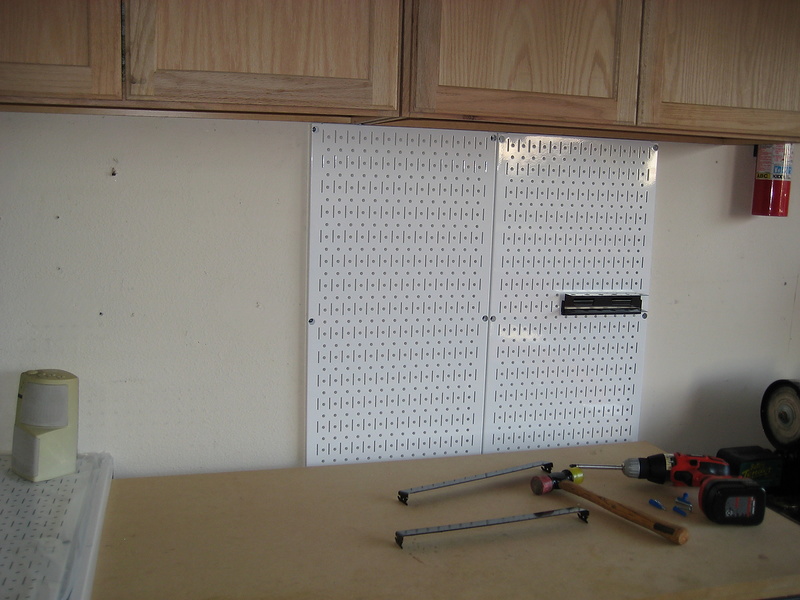
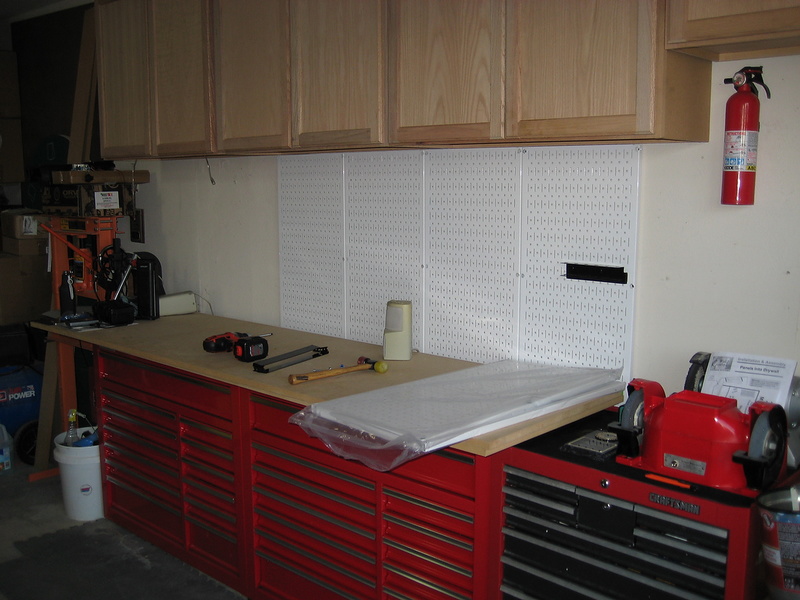
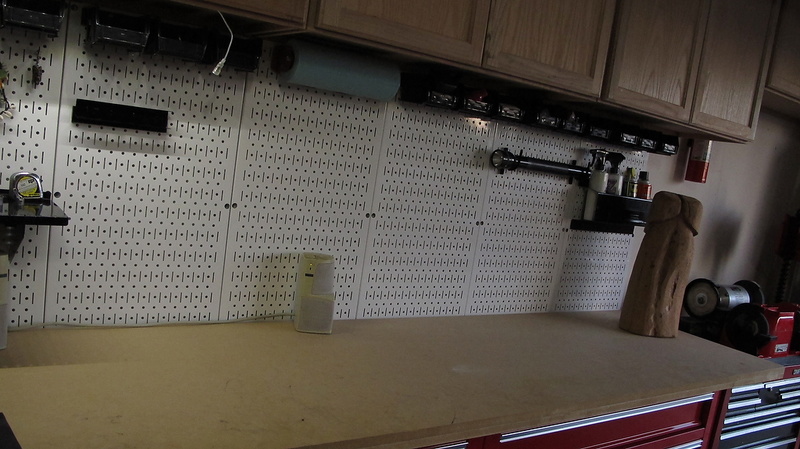
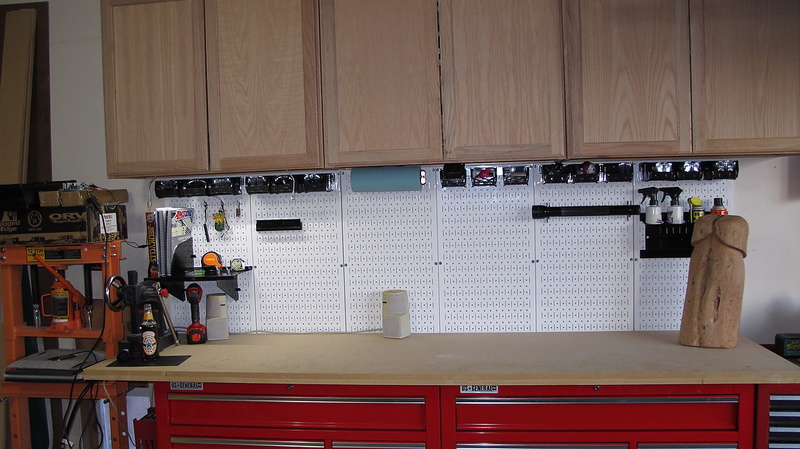
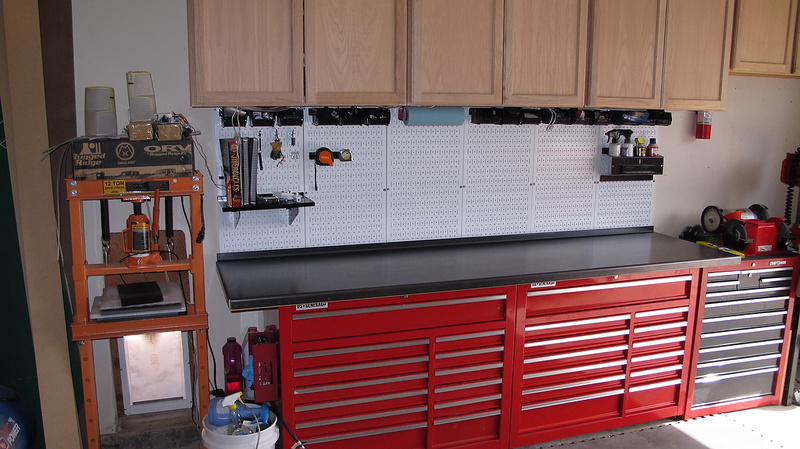
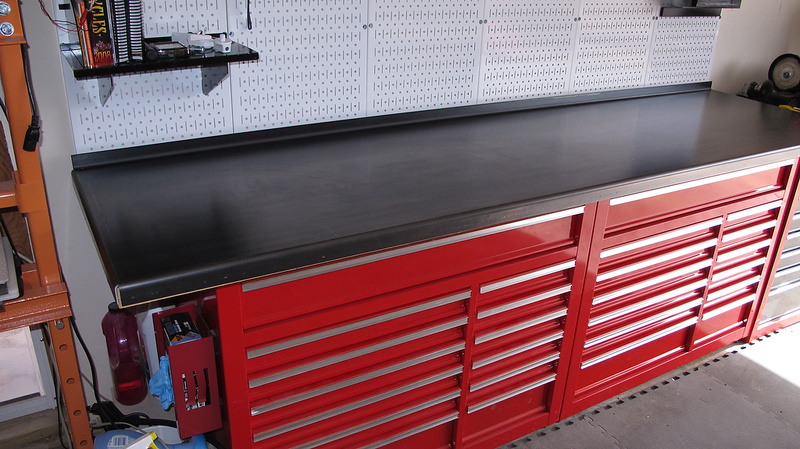
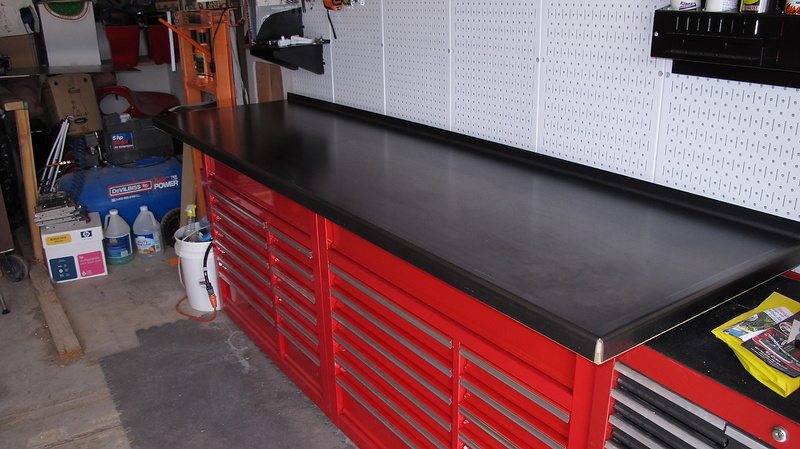
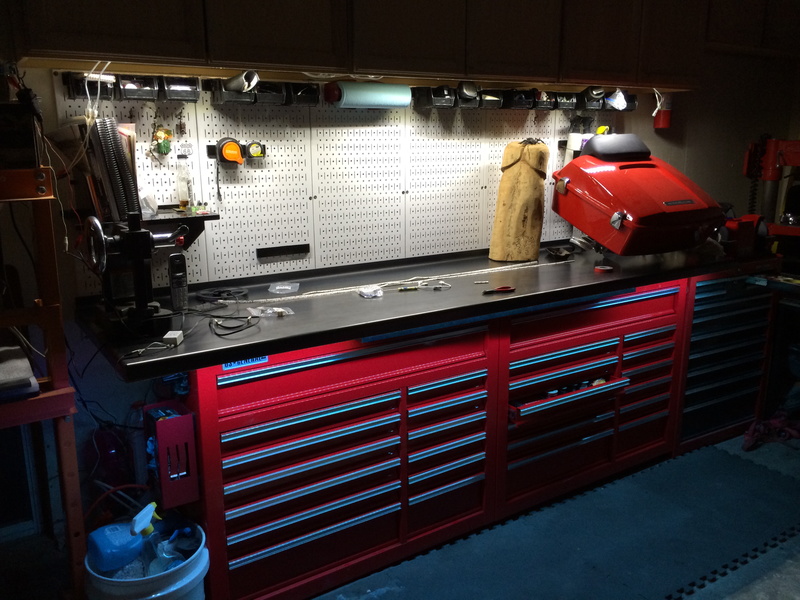
This is where my garage is now, the following posts are how I got there.
20131027013843-fa76c3bf-me.jpg
 
Last edited:
To avoid these ads, REGISTER NOW!
OP
J

JasonJ

Well-known member
Joined
Aug 4, 2006
Messages
424
Location
Las Vegas
The first thing I wanted to do was to just clean up the current workbench and fix the wire shelf above it. Some months before the pic was taken, the shelf has pulled way from the wall and was now supported by various items that were below the shelf.
20131113023503-f5f59cee-me.jpg


I took down the shelf and cleaned the bench off.
20131113023715-603a81e7-me.jpg


The first cabinet was a trial run, I bought one unpainted cabinet from the Home Depot and hung it. I aligned it so the door would open against the support for the rail on the garage door track.
20131113023717-37d329fc-me.jpg


Liking what was done, I went back to Home Depot the following day and bought the remaining cabinets and hung them.
20131113023940-30af1a5c-me.jpg


Also measured, measured and measured again to make sure the cabinets doors would still open, hence the smaller three door cabinet. Those doors were smaller and would still open before hitting the garage door track.
20131113023945-67b468d8-me.jpg


The bigger cabinet door rest against the vertical support for the garage door track.
20131113023943-0f0534ea-me.jpg


When it was all said and done, I had hidden storage and a clean work bench.
20131113023947-82cdcfbd-me.jpg
 
OP
J

JasonJ

Well-known member
Joined
Aug 4, 2006
Messages
424
Location
Las Vegas
Lighting is still an issue for me and all I have to work with is two ceiling light sockets, both at the front of the garage. I replaced both of the incandescents with the highest wattage Compact Fluorescent Lights that I could find.

(camera settings manually set, same setting for before and after pictures)
Before:
20130716150407-aca8bc21-me.jpg


After:
20130716150408-76dd8138-me.jpg
 
Last edited:
OP
J

JasonJ

Well-known member
Joined
Aug 4, 2006
Messages
424
Location
Las Vegas
To the left of my workbench was a dog pen. The house was setup with two dog doors, one in the door from the garage that led to the house and another dog door in the side of the garage that led to the back yard. The dog pen was made so that we could shut the door to the pen which would allow him access to the garage for shelter but still keep him out of the house. It made for a variety of configurations as deemed necessary but over time we stopped keeping the one dog outside and after he passed, we stopped using the pen altogether.

We still have a strong emotional to the dog that passed and the discussion of removing the pen had brought up a lot of feelings, but in the end, my girlfriend and I both agreed that it was no longer needed.

Picture of the Pen, made of 2x4's and chicken wire... now filled with junk as it was never used anymore.
20131113030035-38b76737-me.jpg


Cleaning up the area in preparation of removing it.
20131113030036-79164d47-me.jpg


After removing half of the pen, I moved the press over to see how it would fit and take measurements for my next step in the workbench install.
20131113030038-7013e183-me.jpg
 

e-tek

Well-known member
Joined
Dec 19, 2007
Messages
10,690
Location
Saskatoon, SK
Good work! Lov the 280 - great car, bad bumpers! I always wondered why someon hasn't come up with a small chrome retrofit.....

That space where the dingy is, useful for storage?
 
OP
J

JasonJ

Well-known member
Joined
Aug 4, 2006
Messages
424
Location
Las Vegas
Good work! Lov the 280 - great car, bad bumpers! I always wondered why someon hasn't come up with a small chrome retrofit.....

That space where the dingy is, useful for storage?

I have replaced the bumper on that car twice now. I don't think it would look good though with a chrome bumper.... maybe if someone went all Mad Max with it, that might be kind of cool.

What dingy? The Dog Pen?
 
Last edited:
OP
J

JasonJ

Well-known member
Joined
Aug 4, 2006
Messages
424
Location
Las Vegas
My wall remodel was thought out months ago. I drew up in Visio and played with it. Stuck tape to the concrete as things would be laid out eventually and worked in the garage around the tape lines and made changes as necessary.

I had thought about doing a dual Harbor Freight setup using the 56" rolling cabinets but they were too wide and too long for my space. So I went for the 44" rollers.

Now, I'm no Steevo and I don't have a welder to build my own metal frame for the boxes like others have done. So after some consideration and realizing that I don't plan on doing anything heavy or do any serious beating I decided to just place my work surface on top of the rollers.

First thing that I had to do was to move the current 4' Craftsman bench out of the way. I cleared it off and started to move it away from the wall when I saw this guy!
20131113030047-57503e84-me.jpg


After a quick scare and the heart settled back down, the spider started to look more like the spider that I bought for Halloween a year or two ago and it must have fallen behind the bench. So I started to move the bench again and when I looked back, the spider had moved! Again the heart is pumping and I'm standing back starring at this thing when I realized that the piece of clear plastic next to it must have moved it. After poking it with a stick a few times just to be sure that it was a toy spider, I moved the old workbench out from the wall and out of the way.
 
Last edited:
OP
J

JasonJ

Well-known member
Joined
Aug 4, 2006
Messages
424
Location
Las Vegas
First Harbor Freight 44" cabinet in the garage and ready for prep:
20131113030040-c17fa2a3-me.jpg


Removing the casters:
20131113030042-a76831f1-me.jpg


The leveling feet that I used to compensate for the slope in the garage floor.
20131113030043-97f8296c-me.jpg


Moving the old workbench.. (See spider story above)
20131113030044-d4bebf50-me.jpg


First cabinet placed and leveled:
20131113030049-4bcb0ec6-me.jpg


Just for a sense of timeline once I decided to use the 44" roller.
1) Wait for (X) amount of time for them to go on-sale. Purchase and bring home.
2) Remove one caster and figure out how I am going to mount leveling feet.
3) Spend (X) amount of days looking on Internet for best prices and proper fit for levelers.
4) Order levelers and wait (X) amount of time for delivery.
5) Test levelers on cabinet
6) Wait (X) amount of time for second cabinet to go on sale again.

It's a slow process...
 

BeachBoy

Well-known member
Joined
Dec 28, 2010
Messages
540
very nice without casters. I don't understand that so many garages have big rolling toolboxes but it never moves one inch.

Maybe you'll want to put something in front to fill the gap because when you'll have bolts or stuff rolling under there you won't like to move them when they are filled.
 
OP
J

JasonJ

Well-known member
Joined
Aug 4, 2006
Messages
424
Location
Las Vegas
very nice without casters. I don't understand that so many garages have big rolling toolboxes but it never moves one inch.

Maybe you'll want to put something in front to fill the gap because when you'll have bolts or stuff rolling under there you won't like to move them when they are filled.

Already lost a steel bearing. Was using that to see how level the bench actually was which was spot on. But started playing with it and yup... rolled right under the bench. LOL I;ll come up with something, not sure what yet.
 
OP
J

JasonJ

Well-known member
Joined
Aug 4, 2006
Messages
424
Location
Las Vegas
So after another trip to HF for the second cabinet, I went to Home Depot for some 3/4" MDF and cut it down so it would fit the top of the HF cabinets. The idea was to spread the load out as much as possible.

The 3/4" thickness got the next layer of MDF over the lips at the top of the box.
20131113130547-83704691-me.jpg


The top itself is (2) 3/4" MDF cut to 97"x26". The backsplash is just a remnant that I sat up there to see if I liked it or not. The Boice Crane Drill Press is a project that I was working on at the same time as the bench which made for a crowded garage. More on that later.
20131113130545-d0cc9fe3-me.jpg
 
OP
J

JasonJ

Well-known member
Joined
Aug 4, 2006
Messages
424
Location
Las Vegas
I guess at this stage I should explain the ***** carving... :)

I frequent a Tiki Bar and every so often they have a Tiki Carver that comes in and carves live in the bar. The Tiki's are then raffled off as prizes later that night.

On this particular night the carver announced that he was tired of people coming up to him at the end of night and claiming that they bought a bunch of raffle tickets and didn't win **** for it.

So... he carved a ****, and the person who won it would be the person who bought the most tickets and didn't win anything during the earlier raffles.

I think that I ended up buying $50 in tickets that night but then I started thinking that $50 might be what someone else bought in for, so I bought one more ticket for $2. At the end of the night he asked for everyone that bought $40 or more to come forward, and people gradually sat back down as he asked who had the next highest number of tickets. Eventually we were up to the people that bought $50 worth and it was me and this girl left.

As it turned out, I beat her out by that $2. :beer:

After getting it home, my girlfriend announced that it wasn't going in the house or the back patio, so on the workbench it went and that's where it stays. :thumbup:
 

Crusher47

Well-known member
Joined
Nov 10, 2012
Messages
85
Location
Fort Worth, TX
I guess at this stage I should explain the ***** carving... :)

I frequent a Tiki Bar and every so often they have a Tiki Carver that comes in and carves live in the bar. The Tiki's are then raffled off as prizes later that night.

On this particular night the carver announced that he was tired of people coming up to him at the end of night and claiming that they bought a bunch of raffle tickets and didn't win **** for it.

So... he carved a ****, and the person who won it would be the person who bought the most tickets and didn't win anything during the earlier raffles.

I think that I ended up buying $50 in tickets that night but then I started thinking that $50 might be what someone else bought in for, so I bought one more ticket for $2. At the end of the night he asked for everyone that bought $40 or more to come forward, and people gradually sat back down as he asked who had the next highest number of tickets. Eventually we were up to the people that bought $50 worth and it was me and this girl left.

As it turned out, I beat her out by that $2. :beer:

After getting it home, my girlfriend announced that it wasn't going in the house or the back patio, so on the workbench it went and that's where it stays. :thumbup:

Hahaha brings new meaning to the term "wood"
 
To avoid these ads, REGISTER NOW!
OP
J

JasonJ

Well-known member
Joined
Aug 4, 2006
Messages
424
Location
Las Vegas
While getting the new work bench setup, I had a few other projects going at the same time. One was to rebuild/restore a Thor Bench Grinder that I picked up and match it to the color scheme of the garage.

Before:
20130704201240-13506268-me.jpg


After:
20131113130456-6f63c042-me.jpg


Before:
20130704201252-b9fd3434-me.jpg


After:
20131113130508-d25d31f8-me.jpg
 
OP
J

JasonJ

Well-known member
Joined
Aug 4, 2006
Messages
424
Location
Las Vegas
Wall Control Metal Pegboard Installation:

Parts Arrived:
20131115022031-c88031da-me.jpg


Two panels installed:
20131115023121-3186129c-me.jpg


Four Panels Installed:
20131115023235-3f0120e4-me.jpg


All six panels installed with accessories:
20131115023922-6c9c1494-me.jpg


20131115023904-f8b1e2be-me.jpg
 

Jbizzle

Well-known member
Joined
Oct 14, 2012
Messages
136
Location
New Mexico
Nice garage! I like how you put those leveling legs in place of the wheels. I will probably be copying you. Where did you get them from? Have a part# or specs? What is your counter height now?
 

B Mad

Active member
Joined
Nov 5, 2013
Messages
31
Location
South Africa
Nicely done ;)

I have the same situation, but instead of "stuff", my side of the garage is crowded with 6 bikes :rocker:

Looking forward to more on your for inspiration on mine
 
OP
J

JasonJ

Well-known member
Joined
Aug 4, 2006
Messages
424
Location
Las Vegas
Nice garage! I like how you put those leveling legs in place of the wheels. I will probably be copying you. Where did you get them from? Have a part# or specs? What is your counter height now?

I got them from Reid Supply, I had to go with black to match the color scheme. :)
Direct Link to the part # : http://www.reidsupply.com/sku/MLP-250/

The bench is 36.5" tall on the left side and 37" tall on the right side (Garage floor slope).
 

-Brent-

Well-known member
Joined
Dec 23, 2009
Messages
4,709
Location
Utah
I love the metal pegboards. I put up a set in a utility closet and one in our laundry/utility room. I've got one left over that I should put in the garage.

I've never seen anyone else use them but I recommend them a bunch.

Keep up the good work. Love that bagger, too.
 
OP
J

JasonJ

Well-known member
Joined
Aug 4, 2006
Messages
424
Location
Las Vegas
When it was finally time to order the steel top, I went back and forth on what I wanted. I finally decided on 10 Gauge steel with a 1.5" back splash. I just wanted it high enough to keeps things from rolling off the back and I figured if I want to bring parts bin to the bench, I could use the peg board.

20131121005611-b189805f-me.jpg


20131121005628-fe29a3ae-me.jpg


20131121005634-27861111-me.jpg
 
OP
J

JasonJ

Well-known member
Joined
Aug 4, 2006
Messages
424
Location
Las Vegas
The Vise Hunt - Part 1
With a work bench of great power comes a vise with great responsibility... well at the very least, I needed/wanted a bigger and better vise for the new work bench. My current vise was a small vise that I picked up somewhere long forgotten.

After months of searching Craigslist ( and still) I have found that vises in my town go QUICK. We recently had a nice american vise get listed, sold and the ad removed, all within two hours. For the record I saw at at the 1:45:00 and was late to the party and missed out.

My first Craigslist find was this guy. A Littco #112 that probably isn't much better than the one I started with. But it did come with a welding table. Did I mention that I don't weld? It was a package deal that also included a pipe vise. Each vise was mounted on square tubing that fit into a receiver under the table. Hell, I figured I could sell the table alone for the $75 that I bought the package for so home it went.

The welding table you ask? Oh the top is 30" x 30" made of 000 Gauge steel. I-Beams as the legs and casters from a trash dumpster. The table is 41.5" high (seems the casters were added later). I still have the table for the record and am now thinking that I need to take up welding, I do have a welding table after all.

The welding table with included vises
20130930231012-f7ca9aaa-me.jpg


I-Beam legs and the receiver for the vises
20130930231014-d2178a97-me.jpg


20130930231016-00de77c4-me.jpg


Casters off of a dumpster
20130930231020-2d09c38c-me.jpg


The two vises that came with the table
20130930231033-5d9f34cf-me.jpg
 

thetastelingers

Well-known member
Joined
Mar 12, 2007
Messages
716
Location
Soddy Daisy
Totally going to copy you on the wall control pegboard.
nice design.
You are doing a great job of transforming that garage. Keep it up.

I LOLed at the ***** carving story. especially the end where your girlfriend said it wouldn't come inside.

I would have to leave it random places in the house for her to find. A game if you will. LOL
 
OP
J

JasonJ

Well-known member
Joined
Aug 4, 2006
Messages
424
Location
Las Vegas
I like it, it keeps all the little stuff off of the work surface. The bins at the top I just have misc junk in it right now. The shelf is nice, I can keep my "Go To" reference material there and I use one of the metal bars that would normally hold the bins, I use to hold tape measures. :)
 

N0tt0N

Well-known member
Joined
Sep 26, 2013
Messages
229
Location
DC
I have never seen the metal peg board. I love the pattern it creates - really unique. Good job, man! What a transformation.

P.S. Kill that spider!
 

marty_p

Well-known member
Joined
Aug 1, 2008
Messages
1,411
Location
SE LoUiSiAna
Fine space to hang out and work in, Jason! :beer: Your ideas are just genius, and thanks for sharing your leveler link.

I'm curious, am I seeing some under-counter lighting from rope lights, fluorescent strips, or something else? I like the wash of light across the cabinets! :thumbup:
 
Last edited:
To avoid these ads, REGISTER NOW!
Top Bottom