To avoid these ads, REGISTER NOW!

2 post Lift Refurbish/Re-build (Weaver)

stngfever

Well-known member
Joined
Apr 2, 2013
Messages
89
Location
West Michigan
In the months leading up to the ground breaking for my "man cave", routine searches we're performed on craigslist throughout the state for a 2 post lift at a decent price. Found some that we're over my price range, too far away, or just a tad late. This would go on for a few months, then one day found an ad that was merely 2 hours old. Here are the pics from that add:


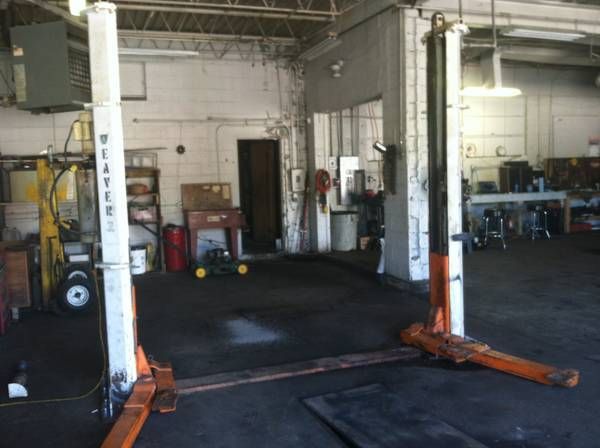
Made contact with the seller and found they we're located within a couple hours drive. The seller had purchased this lift ~ 6- 12 months prior also from a craigslist add. Turns out he was having difficulty starting an auto shop in a very small town. I made the drive to have a first hand look at the lift. Looked for signs of leaks, worn out parts, tested unit, took down make and model number info, measurements, etc... One of the first things I noticed was how "Hefty" this unit was built compared to a majority of new ones. It's a Weaver AFH-88 with capacity of 7000lb's.

Research began in earnest that evening to determine if it was worth pursuing this unknown Weaver lift. I found that Weaver was no longer in business since they we're bought our by a competitor in the late 80's. Parts diagrams we're readily available online (primarily from SVI & Panzita). Also appeared that parts could be ordered (although later I find that these parts are expensive if done via the parts diagram, more on that later). That evening I decided it was worth trying to strike a deal as the asking price was less than $1000 for a 7k capacity asymetrical lift that campares in workmanship to Mohawk lifts.

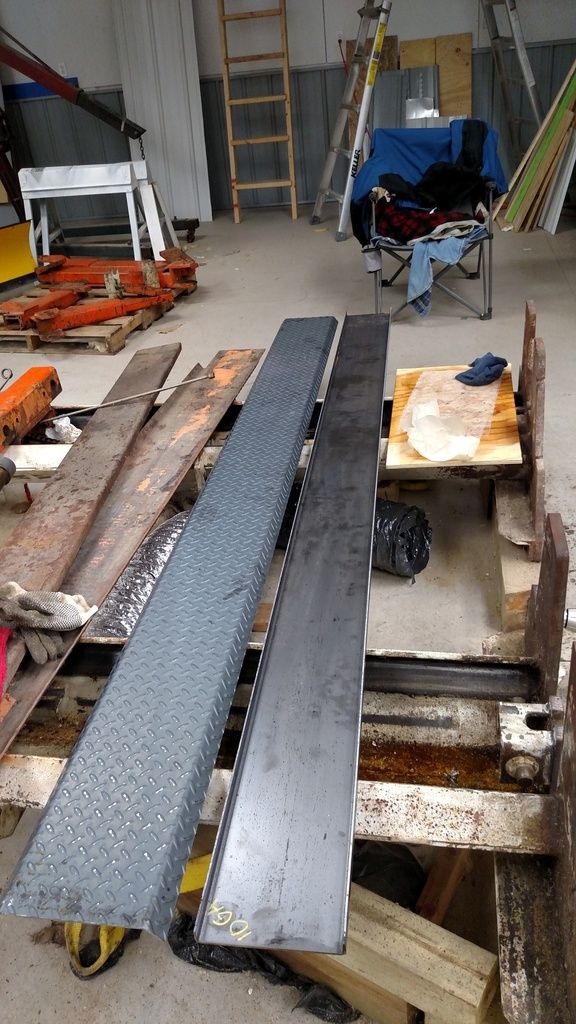
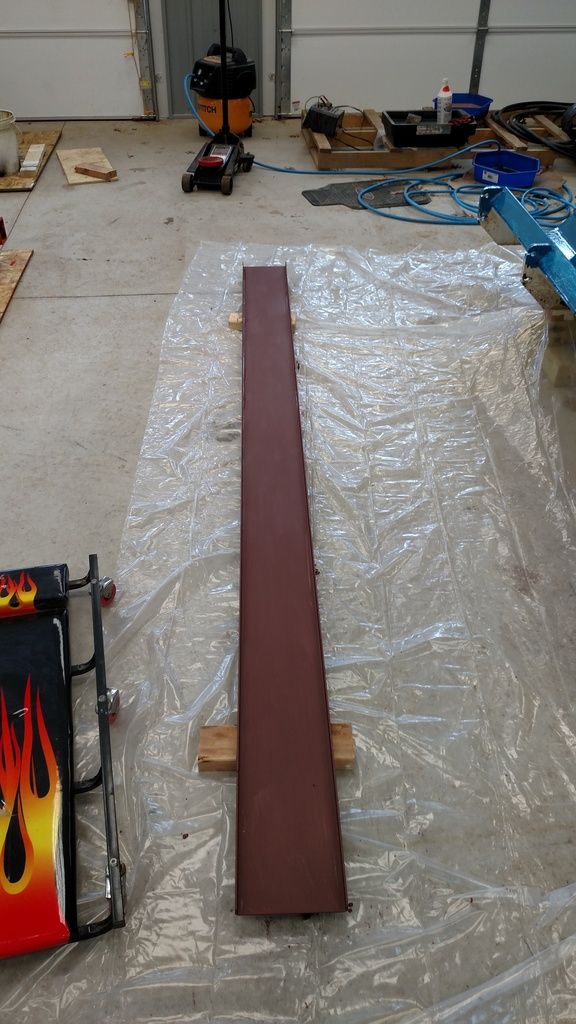
A deal was struck, removed, loaded on a trailer and stored in a friends pole barn with 2 days. A few months later after the "man cave" buillding structure was completed, the lift was moved from temp location:


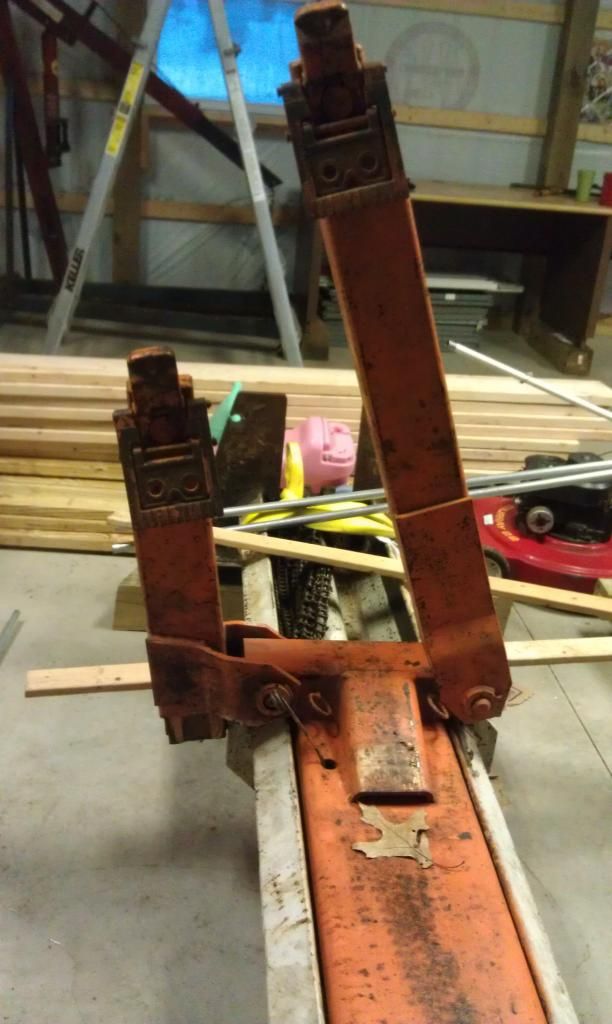
It would sit in the middle of the "man cave" for another 16 months while I spent time finishing the inside. Early February of this year it was time to begin re-furbishing. Starting with chain wheels. Removed all chain wheels removing the pressed in bearings to determine replacements. While most bearings appeared to move somewhat freely, I chose to replace all 10 bearings as i was able to find new high quality bearings online for ~$11 each. Inspection of the metal sleeved chain wheels found all to be in great condition (just needing a good cleaning). Thanks to other GJ posts as it related to vise refurbishing/cleaning, I decided to try out the apple vinegar. Bought a couple gallons and let the all removable metal parts (chain wheels, arm gears, arm pivot pins, etc...) soak over night. Removing from vinegar next day then onto a water rinse. Quick towel dry it was time for wire wheel treatment. The apple vinegar had loosened all the rust and grime to the point that wire wheel was quick and easy as the gunk would nearly fall off at this point. Then onto an oil bath then drip dry overnight.

Chain wheel prior to cleanup:


Arm safety gears before and after cleanup:


Stay tuned for updates!
 
Last edited:
To avoid these ads, REGISTER NOW!

rburke65

Well-known member
Joined
Nov 10, 2007
Messages
12,349
Location
Canfield, Ohio
The vinegar does a really good job on some the lightly rusted parts. Bought a used Mohawk, power washed, degreaser, sand, repainted, new decal kit.........looks brand new!
 
OP
S

stngfever

Well-known member
Joined
Apr 2, 2013
Messages
89
Location
West Michigan
You think it's a lot of work so far, just wait for the remainder of my posts as I'm nearly done with the effort :)

Since I'll have ~$1100 into this lift after refurbish, a comparable unit will cost over $7k new, it's well worth the elbow grease!

The vinegar treatment works GREAT!
 
OP
S

stngfever

Well-known member
Joined
Apr 2, 2013
Messages
89
Location
West Michigan
Arm pivot pins required a bit of pursuasion (round steel stock used as punch with big hammer). Majority of roll pins used to hold pivot pins to arms we're broken off, removed, or removed enough so that arms rotated on pivot arms without rotating the locking gears. This in effect had the arm safeties in a disabled state. Once all 4 arms we're removed, investigation began to determine how to remove the internal arm safety mechanisms gears as these are internal to the carriage where the arms are attached. Ultimately determined they had to be cut off. Appears that the top ring to lift half gear away from arm gears was welded on during assembly at the factory. Due to the binding of the gears and such, the shaft that lifts the safety gear were all bent. Having a friend that works at a machine shop is a wonderful thing as he's milling new shafts. Meanwhile it allows me to de-rust and degrease the gears.

Now that the arms and safeties are disasembled, time to move onto cleaning, degreasing, removal of loose paint, etc.. on the posts and carriages:

You won't find thick base plates like this on the cheaper imports of today:


Base prior to and during wire wheel:


Base after wire brushing:


Post prior to degrease:


Post during degrease:


Post after degrease, 1st, 2nd, and final coat of paint:


OP
S

stngfever

Well-known member
Joined
Apr 2, 2013
Messages
89
Location
West Michigan
Cylinder reseal kits we're found online for my lift. Once these we're received, I proceeded to take apart the cylinders only to find that I couldn't remove the piston and the bottom of the shaft. Found a hydraulic repair facility near by that re-furbishes all kinds of hydraulics. ~$100 per cylinder for them to replace seals, hone cylinders, re-assemble, test and paint makin these like new.

Chains we're removed and place in a tub with minreal spirits over night. Next day brushed in parts washer to remove remaining grime, then let sit for a few days to dry. Re-lubed with fresh chain lube.

Researched the potentital of locating replacement bearing blocks (Vinyl blocks to guide the carriages), while they we're found, they we're costly @ $44 each (unit takes 8 total). While all seemed to be in working order, just wanted to check potential of new ones while it was apart. I was able to locate a plastics place to purchase a block of material. Friend working in machine shop saves the day once again by milling this block into 8 new bearing blocks!

Weaver made this lift in standard (AFH-88) and wide (AFH-88W). Upon reviewing the parts diagram it became apparent that all parts are identical between the 2 except the additional parts neccesary to add 12" between the posts. Located place to purchase (2) 12" equalizer chain extensions with connecting links, and 12" hydraulic line. Having another friend that works at a steel plant provided new trough and cover plate 12" wider then the original. I now have the AFH-88W :)

Made in USA:


Cylinder prior to refurbish:


Cylinders after refurbish:


Chains after cleaning:


Arms after removal:


Carriage prior to degrease:


Carriage decal closeup:


Heavy Duty safety Lock:


Close up of carriage bearing block:


New bearing blocks in process:


Chain cover and trough (original on left, new on right):


Carriage and chain cover 1st and final coats of paint:


Chain trough with primer:


Trough and chain wheel assemblies painted:
 
OP
S

stngfever

Well-known member
Joined
Apr 2, 2013
Messages
89
Location
West Michigan
Now onto today's progress:

First post re-assembled and ready for install:

<a href="http://s651.photobucket.com/user/rilesw/media/Garage%20Build/IMG_20150316_185859157_zpsfyvlqu4m.jpg.html" target="_blank"><img src="http://i651.photobucket.com/albums/uu240/rilesw/Garage%20Build/IMG_20150316_185859157_zpsfyvlqu4m.jpg" border="0" alt=" photo IMG_20150316_185859157_zpsfyvlqu4m.jpg"/></a>

<a href="http://s651.photobucket.com/user/rilesw/media/Garage%20Build/IMG_20150316_185844072_zpsei8fiihz.jpg.html" target="_blank"><img src="http://i651.photobucket.com/albums/uu240/rilesw/Garage%20Build/IMG_20150316_185844072_zpsei8fiihz.jpg" border="0" alt=" photo IMG_20150316_185844072_zpsei8fiihz.jpg"/></a>
 

AMCguy

Well-known member
Joined
Dec 23, 2009
Messages
2,022
Location
Sunshine Coast, BC Canada
Great lift. It's nice to see you bringing it back to it's former glory. I went through the same procedure on my no longer made Hydra-Lift. Here's a picture.


rburke65

Well-known member
Joined
Nov 10, 2007
Messages
12,349
Location
Canfield, Ohio
Lots of work, but now you have a great tool and you know what you have in it and should very safe under it. Nice job.
 

broncorick

Well-known member
Joined
May 30, 2007
Messages
71
Location
Indianapolis
Good job--just don't figure out your labor cost. :). I love the auto rebuild shows like wheeler dealer, they do a goo djob but poor Edd never gets his labor costs included
 
OP
S

stngfever

Well-known member
Joined
Apr 2, 2013
Messages
89
Location
West Michigan
Thanks for all the GREAT compliments!

Projects like this are very self gratifying to tackle.

Permanent electrical was completed today with a couple of 110 outlets.


It was time for an oil change on the wife's daily driver, first use of the lift and what a difference it made!

 
Last edited:

laser3kw

Well-known member
Joined
Nov 17, 2012
Messages
7,276
Location
northen IL
great job!
I can appreciate your approach, tear it down, clean and fix, paint. When you are done, you can have confidence in what you are standing under.
:rocker:
 

86turbodsl

Well-known member
Joined
Jul 1, 2005
Messages
6,553
Location
Michigan
I remember seeing that lift on craigslist. Glad you got it and the refurb went well. I also looked into the parts availability and it scared me a little. Good job!
 
To avoid these ads, REGISTER NOW!
OP
S

stngfever

Well-known member
Joined
Apr 2, 2013
Messages
89
Location
West Michigan
I remember seeing that lift on craigslist. Glad you got it and the refurb went well. I also looked into the parts availability and it scared me a little. Good job!

Don't be afraid of the "parts availability" on these lifts as majority of the replaceable parts (chains, cylinders, wheel bearings within chain guides) are all available once properly identified.
 

volaredon

Well-known member
Joined
Oct 7, 2012
Messages
1,608
Location
IL
I see that you also have a Weaver lift. I had heard of an AFH 88 but had never seen one til now, I have an AFH 90, the difefrence is yours has Assymetrical arms (unequal length) mine has symmetrical (equal length) I too have completely redone mine. but I paid a whole $450 for it to begin with. I too had to remove it from its former owners' place; mine came with 2 extra, brand new, pumps.... original one worked but was a bit noisey so after using my lift a while I pulled the reservoir off and put one of the new pumps in, runs much quieter. I put in their recommended AW 68 hyd. oil, fine except in winter, for winter (unheated garage) I think that something like AW32 would be better. In the winter mine groans and goes up slow. rest of year, fine. hopefully I get the heat goin in my garage before this winter, that will also solve that issue.

At work we have symmetrical lifts (another old defunct brand, ALM) and with FWD cars that style lift is a PITA.
one other thing between my Weaver vs the lifts we have at work; big "feet"; same capacity but the base plates that bolt to the ground are more than 2x the size of my Weaver than they are on ours at work! Way better to distribute that load over a larger area than to have the support closer together especially when doing something where the car will be rockin' a bit when raised....
4 guys almost got hurt laying each of those posts down onto my trailer.... they are HEAVY. I found a way to lay them down w/o having to be under them though as we laid them down; a ratchet strap as the flat bed semi's use tied around the top and we pushed the column down and hung on tug o'war style as it laid over...

I found that very little had to come from SVI and could be had from places like Mc Master Carr or Motion Industries which was fantastic; SVI REFUSES to sell direct you MUST buy from one of their dam distributors ("price-fixed") I cannot stand companies that think the little guy's money is no good... I, too, replaced all the bearings (pressed them from within teh rollers, mine takes 14 of the same bearing) got em all via Ebay, held out til I got all old good name stuff, no no-name import **** used here.
Mine don't have the nylon blocks but rather ball bearing rollers. (another difference between their symmetric and assymetric lifts)
I found out mine is a 1986 model, Weaver was bought out by Rotary in 89. but had been around prior to that since the '30s.
At the time I got mine my son was working at a small company that had their own powdercoat booth and huge sand blast capabilities, so yes while mine wa sapart every piece but the motor and the hyd cylinder bodies was powdercoated. My columns are very close to Chrysler engine Blue, arms and carriages Hemi Orange. It was not free but as an employee my son got a he11uva deal on the powdercoat job and actually was able to do that all himself to boot. I, too, have about $1100-1200 into mine. not at all bad since all that is made today that can touch it is a Mohawk.
We had use of a tractor and bucket to set the posts, a huge help!


One day I get better at pictures-to-computer I will post mine. I am not good with computer stuff, at all.

I talked about this lift alot between the time I got it and teh time I had it up and running, alot on here. Mine's been up almost 2 years now and has already paid for itself many times over.
 
OP
S

stngfever

Well-known member
Joined
Apr 2, 2013
Messages
89
Location
West Michigan
Been a few months since I updated this thread.

Shortly after install, attempted to lift my sons suburban (6500 lb vehicle). Lift strained to get air under the tires. While the installers stated the lift wouldn't attempt to lift an over weight vehicle, I was surprised to see a 7k lift have a problem with a 6500 lb vehicle.

A few days later, went to change oil in daily driver focus. Once done and ready to lower vehicle, lift would start to lower then stop about 6" into lowering. Raised to next stop, released safeties and started to lower again, again seemed to bind/stop another foot or 2. Raised to nearest stop. Looked around and noticed floor near opposite post was wet as was cylinder. After a few attempts, finally got vehicle lowered to ground and in process watched as fluid was flowing out top of slave cylinder!

Removed cylinder and returned to hydraulic place that rebuilt. Upon tear down, they found a long gouge from mid point to near top of inner barrel, ripped seal, and gouge on piston. This prompted me to remove main cylinder to have it inspected as they couldn't find what caused the damage to occur. No problems found on main cylinder.

Slave cylinder barrel had to be made as well as repair to the piston. Fortunately this was all covered under warranty from the rebuild.

Re-installed cylinders and so far so good. No issues after lifting many cars.

Son keeps asking about trying the suburban again? While it seems that something was left in the cylinder during initial rebuild, I'm still a bit leery about attempting heavier vehicles.
 
Last edited:
OP
S

stngfever

Well-known member
Joined
Apr 2, 2013
Messages
89
Location
West Michigan
One item I found invaluable are these jack pads for lifting pinch weld vehicles!

So far I've used them on:

Mustang
Focus
Audi
Dodge van


h8tow8

New member
Joined
Oct 29, 2015
Messages
2
great job on the lift!
I just bought the exact same model.
you mentioned the slider blocks for $44, where did you find them?
or would you want to sell me some of the ones you aren't using?

Also; how did you attach the outlets to the cross plate on the column?
 
OP
S

stngfever

Well-known member
Joined
Apr 2, 2013
Messages
89
Location
West Michigan
great job on the lift!
I just bought the exact same model.
you mentioned the slider blocks for $44, where did you find them?
or would you want to sell me some of the ones you aren't using?

Also; how did you attach the outlets to the cross plate on the column?
These are Great lifts! I'll have to dig up my notes to see who had them for $44. I bought a block of the material. A friend works in a machine shop where he milled new ones for me.

I used beam clamps to attach the conduit and outlets.

The conversion to wide version is easy and we'll worth doing!
 

h8tow8

New member
Joined
Oct 29, 2015
Messages
2
Thanks for the tip on the beam clamps. Outlets on the post are real handy.
I think mine is already a wide model, it's got a small 12" extension in the center of the hydraulic line. What is the center to center distance of the rear mounting bolts on your lift?
About the sliding blocks, do you still have the original ones? If so I wouldn't mind buying those from you.
If you could find the source for new ones that would also be appreciated. I'd rather not machine replacements.
 

nine4gmc

Well-known member
Joined
Mar 24, 2012
Messages
14,357
Location
Dallas
Great job, I would love to find a lift and now I think I would have the confidence to go completely through it if needed. Thanks for posting!
 

Bell5879

New member
Joined
Mar 16, 2016
Messages
1
I have purchased a weaver lift with the model # AFH-88. I have a full parts list, but unfortunately I have no installation instructions and I have not been able to locate an owner's manual. Does anyone know where I can find one or at least the measurements to set the upright columns? Thanks.
 
OP
S

stngfever

Well-known member
Joined
Apr 2, 2013
Messages
89
Location
West Michigan
I have purchased a weaver lift with the model # AFH-88. I have a full parts list, but unfortunately I have no installation instructions and I have not been able to locate an owner's manual. Does anyone know where I can find one or at least the measurements to set the upright columns? Thanks.

Unfortunately, I wasn't able to locate an owners manual for the AFH-88, however, I do have manuals for a couple of similar style weavers. Send me a p.m. with your e-mail address and I'll send them to you.

As for width of the posts, easiest way is to use the width of the trough. This will sit between the openings of the posts.

Before you determine exact dimensions, I would suggest you consider turning it into the wide version (AFH-88W) if it hasn't been done already.

The wide version is 12" wider, requires extending trough, cover plate, equalizing chains, and hydraulic line.

I purchased 65r chain and end links from motion industries.

I also replaced all 10 bearings while mine was apart (4 - 6305-2RS, and 6 - 6307 2ZJEM)
 

Kevin54

MEMBER EMERITUS
Joined
Jan 12, 2005
Messages
29,341
Location
Urbana, Ohio
I have purchased a weaver lift with the model # AFH-88. I have a full parts list, but unfortunately I have no installation instructions and I have not been able to locate an owner's manual. Does anyone know where I can find one or at least the measurements to set the upright columns? Thanks.

Unfortunately, I wasn't able to locate an owners manual for the AFH-88, however, I do have manuals for a couple of similar style weavers. Send me a p.m. with your e-mail address and I'll send them to you.

As for width of the posts, easiest way is to use the width of the trough. This will sit between the openings of the posts.
Before you determine exact dimensions, I would suggest you consider turning it into the wide version (AFH-88W) if it hasn't been done already.


The wide version is 12" wider, requires extending trough, cover plate, equalizing chains, and hydraulic line.

I purchased 65r chain and end links from motion industries.

I also replaced all 10 bearings while mine was apart (4 - 6305-2RS, and 6 - 6307 2ZJEM)


^^^^THIS^^^^........the plate that goes across the bottom determines where your inside bolts will go. set the post on the wall side first so you get your spacing from the wall out. Set your plate, and you can use it as a template for your other two holes, then use that to set the post for the rest of the holes.

I thought it was going to be a rough job setting the lift I bought from Diesel Dan, but after asking a few questions, and learning how simple it was, I decided to go for it with the help from my neighbor. The biggest part of the whole thing was renting a good hammer drill and bit to drill the holes. I used the expanding anchors to bolt the post down. All in all, it took maybe 2 hours tops to have the lift installed, not counting electric. It's not a big job at all.

BTW.....STNGFEVER.....nice job on the refurbishing of the lift. I think you'll get many years use out of it. And it looks great.
 

jekquist

Well-known member
Joined
Apr 6, 2016
Messages
65
Location
Pinckney, MI
Awesome job I plan on doing the same thing to my bear lift soon. Where did you find the parts breakdown? That would be great to have.
 
To avoid these ads, REGISTER NOW!
Top Bottom