To avoid these ads, REGISTER NOW!

21'x21' ///M Garage Build

OP
N

neogenesis2004

Well-known member
Joined
Jan 21, 2014
Messages
49
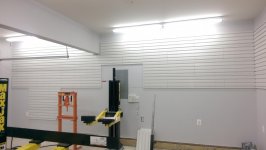
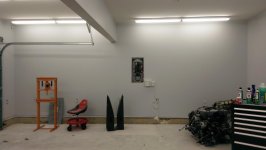
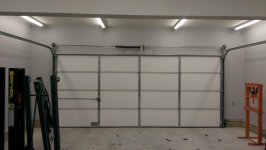
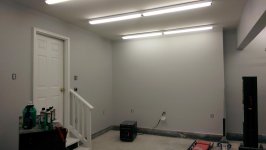
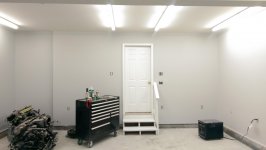
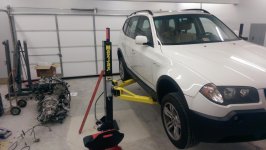
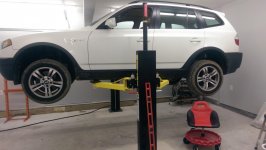
I'll just leave these here....

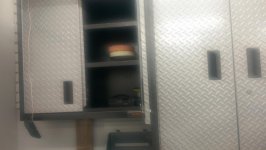
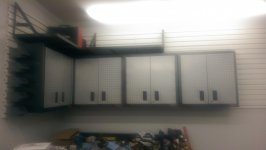
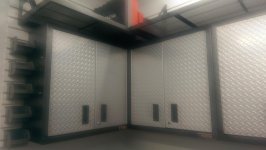
I'll move the workbench in tomorrow and start hanging some gearwall and cabinets over it over the next few nights. I am planning on drilling for the maxjax anchors on Saturday.
 

Attachments

  • IMAG0117.jpg
    IMAG0117.jpg
    135.3 KB · Views: 205
  • IMAG0116.jpg
    IMAG0116.jpg
    134.9 KB · Views: 198
  • IMAG0115.jpg
    IMAG0115.jpg
    129.7 KB · Views: 210
  • IMAG0114.jpg
    IMAG0114.jpg
    139.2 KB · Views: 162
  • IMAG0112.jpg
    IMAG0112.jpg
    126.8 KB · Views: 170
To avoid these ads, REGISTER NOW!
OP
N

neogenesis2004

Well-known member
Joined
Jan 21, 2014
Messages
49
I'm getting pretty excited. I did a good amount of research on other build threads to get a consensus on how much lighting to put in. The common theme seemed to be that you can't really have too much but you can definitely have not enough, so I went on the strong side. I was worried about them being maybe too bright but it really turned out perfectly I think.
 

bonecrrusher

Well-known member
Joined
Aug 18, 2011
Messages
578
Location
Charlotte, NC
Its amazing how different just some drywall and paint can make - garage looks awesome!

Don't worry about the MaxJax install - it's fairly simple.

Just get your arm distance spacing correct.
 
OP
N

neogenesis2004

Well-known member
Joined
Jan 21, 2014
Messages
49
I was going to do a first set at like 126 and then another set at 132 (or whatever the bolt hole spacing is). I put them at 128 once and backed the M3 in and the arms were barely fitting when all the way in. So I'd like it a little bit wider for working on those to give me a little room for error instead of backing in and out 10X for an inch or two. What did you put yours at for your cars? The Corvette and the G8 GT are both fairly wide like the M3, dunno about the jack pads in relation though.

I bought like 3 sets of epoxy anchors \('0')/ so that I could have 2 widths and be able to move it slightly front to back if I need to. Another reason I made my new pads so large, gotta be able to roll with whatever that giant beam deals me. I did my measurements pretty methodically, but you never know...
 
Last edited:

bonecrrusher

Well-known member
Joined
Aug 18, 2011
Messages
578
Location
Charlotte, NC
I put them in at 126" outside edge of the base plate to the other outside edge.

Lifts up my Vette, G8, and SS just fine.

That beam *****... haha.
 
OP
N

neogenesis2004

Well-known member
Joined
Jan 21, 2014
Messages
49
I got my work bench moved in, put a few plates on the outlets, and put up my new brush type garage door seals. I also drilled and epoxied in the anchors for the maxjax. Unfortunately... When hammering them in they like to apparently shoot out excess epoxy like a rocket. So some of my wall and ceiling have a small spray on them now. Ugh... I'll take a plastic scrapper to it tomorrow and put up some touch up paint if need be. On the positive side, the maxjax is currently torqued down to 80 lbs and not a slip. I'll assemble the rest in the morning, take a break to watch f1, and then mount some gearwall and cabinets.
 

bonecrrusher

Well-known member
Joined
Aug 18, 2011
Messages
578
Location
Charlotte, NC
Sounds good - I will have to put up some plastic sheeting when I move into my new shop.

Did your epoxy anchors come with the lift?
 

diggler306

Well-known member
Joined
Jan 25, 2012
Messages
227
Location
Saskatoon, SK
Great job so far! Loving all that light. If my count is correct, 32 bulbs? I'm struggling trying to figure out how many T8's to put up in my 24x24 right now, so it's nice to see how much light you're getting in your 21x21.

Subscribed!
 
OP
N

neogenesis2004

Well-known member
Joined
Jan 21, 2014
Messages
49
@Bone - I had to buy the epoxy anchors separate through GES. I bought the lift through costco and then immediately called them to see if I could get the epoxy anchors substituted and pay the difference. They were not will to do that though. My plan all along was to use them though so I bought a set at that time. I also more recently went ahead and ordered 2 additional sets (more than I need) because I want to drill more and have a matrix of additional spots. I want to be able to go a set of holes further apart, and a set of holes closer to the rear wall. That way I can have flexibility in lifting things to max height around the beam in the ceiling. for example, the M3 I need to back in to clear the windshield but a small pickup truck might do better with the lift posts closer to the wall and pulled in front first so the rear of the cab clears the beam. I'll measure and all before I drill for additional anchors of course.

@dig - Yes, 32 bulbs total. I love it, although based on my next post I'll still need some additional under car lighting. Mostly just spot lighting. I have them all wired up to a single switch. When doing research on lighting I read some people wiring them up in banks. In all honesty I didn't see the point for a 2 car garage. IMO the room isn't big enough for me to need to worry about only illuminating part of it. If I were you I'd go with the same lighting setup I have. If you look at my outer most lights you'll see they are fairly close to the walls. If you have an additional 3 ft you could just add 1.5ft of distance to each fixture from the wall and things would still be even. I have the lights spaced further apart under the lift to give me the most clearance possible to the ceiling.
 
OP
N

neogenesis2004

Well-known member
Joined
Jan 21, 2014
Messages
49
I had a hell of a lot of trouble with the 45 deg fittings I bought along with all the other higher quality fittings I bought, to include some of the nice flat face quick disconnects. I must have just ordered the wrong size, they kept leaking. I eventually went ahead and used the 45 deg fittings that came with the lift and the rest are the ones I purchased separately. Attached is a pic of me leak testing with the X3 up on the lift about 1" over mid height. I have the stop bars in as a backup but all the weight is on the hydraulics. So far I'm about 6 hrs in with 0 leaks. I can't go any higher in this case. The height at mid rise is absolutely perfect for doing brakes, which I will be doing on it on Friday after I get back from visiting family for the holiday. Still no Gearwall up to take pics of. I never have as much time as I think I will, and I never get as much done in that time as I'd like...
 

Attachments

  • IMAG0001.jpg
    IMAG0001.jpg
    137.4 KB · Views: 115
To avoid these ads, REGISTER NOW!
OP
N

neogenesis2004

Well-known member
Joined
Jan 21, 2014
Messages
49
I just backed the X3 in to test full height clearance and get it ready to go for new rotors and pads tomorrow. As you can see in the pics, my measurement couldn't have been much better. The first pic is just at normal height to show the car in the garage. The second I held the camera up higher so you can get a better view of the clearance. I'd guess it at around 4-6".
 

Attachments

  • IMAG0004 (1).jpg
    IMAG0004 (1).jpg
    136.9 KB · Views: 106
  • IMAG0006 (1).jpg
    IMAG0006 (1).jpg
    135.9 KB · Views: 100

ckpitt55

Well-known member
Joined
Jan 15, 2011
Messages
108
Location
PA
nice garage and nice cars. bimmer fan myself.

whats the deal with the rolling chassis? ls swapping it?? :)
 
OP
N

neogenesis2004

Well-known member
Joined
Jan 21, 2014
Messages
49
@Bone - I need to go in the garage to look at the sticker to be 100% but online I see GVW between 3600-4000 lbs depending on trim/engine. The MaxJax doesn't seem to break a sweat with it.

@ckpitt55 - Getting it was sort of a split second decision. I was looking for a spare transmission and found one on ebay that was local, attached to a fully dressed blown motor. The deal was nuts as I could sell off the accessories and parts on the engine and get the ****** for free. When I went to pick it up the guy had like 5 E46 M3's in various states of undress. The one I ended up getting was the one the engine came from. The guy urns out to own a car lot and always buys M3's at auction when they go for cheap since he is an enthusiast. I got a good deal on both things and plan on putting it back to stock most likely. Making it my daily and selling off the current driver one. Then look on to the next thing.... who knows what....
 
OP
N

neogenesis2004

Well-known member
Joined
Jan 21, 2014
Messages
49
Been a while since I posted. I already have used the Maxjax to do the brakes and rear wheel bearings on the X3. It was so nice to be able to be able to stand and do most of the work. The rolly chairs I have are nice but I would like it if they went about 2 in lower. As is though I can lean back and roll under the car no problem.

I took off work all next week to burn some leave, and just to be able to get some house <cough>garage</cough> work done. I started hanging gearwall yesterday, and finished it up today. I'm going to start putting up cabinets tomorrow when my brother comes over. I irritated an old shoulder injury so I'm not going to push it and try to lift and cabinets on my own. I'll post more pics tomorrow.

Gearwall.... I used a nice 40 tooth carbide tipped saw blade and it cut them like butter. Left better edges than the factory. It would have looked better with the 8ft pieces but I practically stole the 4ft ones when they were on BOGO so I'm not complaining. One major peeve.... There is a definite crown to the gearwall. Because of this, the sides are not perfectly vertical and cause gaps. If you held a speed square to it you'd never know, unless your square was like 4ft on each side. The gaps are apparent up close but once you have the wall covered it kind of fades away visually. I tried to keep a brick pattern as much as possible using whole and 1/2 pieces. Had to make some odd sizes though here and there.

I also special ordered some grey FRP panels that I plan to glue horizontally to the walls on the bottom 4ft. They will wrap around the lift side of the garage and also the walls by the toolbox/workbench. This will make cleanup super simple.
 

Attachments

  • uploadfromtaptalk1419201535605.jpg
    uploadfromtaptalk1419201535605.jpg
    132.5 KB · Views: 97
  • uploadfromtaptalk1419201546322.jpg
    uploadfromtaptalk1419201546322.jpg
    140.1 KB · Views: 88
  • uploadfromtaptalk1419201560022.jpg
    uploadfromtaptalk1419201560022.jpg
    152.3 KB · Views: 75
OP
N

neogenesis2004

Well-known member
Joined
Jan 21, 2014
Messages
49
Pics of cabinets as promised.
 

Attachments

  • uploadfromtaptalk1419286823042.jpg
    uploadfromtaptalk1419286823042.jpg
    142.5 KB · Views: 80
  • uploadfromtaptalk1419286830470.jpg
    uploadfromtaptalk1419286830470.jpg
    142.5 KB · Views: 77
OP
N

neogenesis2004

Well-known member
Joined
Jan 21, 2014
Messages
49
I spent this afternoon putting up some of the FRP around the lift. So the whole part of that task is like 2/3 done. I might get to the other part tomorrow night if my brother will be around to help me. The sheets are too big to put in to place alone.

I also put up some towels holders and gearlofts but I don't have any pics of the later.
 

Attachments

  • uploadfromtaptalk1419892701145.jpg
    uploadfromtaptalk1419892701145.jpg
    140.3 KB · Views: 52
  • uploadfromtaptalk1419892708807.jpg
    uploadfromtaptalk1419892708807.jpg
    137 KB · Views: 53
  • uploadfromtaptalk1419892719960.jpg
    uploadfromtaptalk1419892719960.jpg
    143.2 KB · Views: 48
  • uploadfromtaptalk1419892735784.jpg
    uploadfromtaptalk1419892735784.jpg
    139.3 KB · Views: 42
OP
N

neogenesis2004

Well-known member
Joined
Jan 21, 2014
Messages
49
Haven't posted in a while, I've used the maxjax now for several jobs including a fwd clutch job, a couple brake jobs, rwd rear wheel bearings. It's definitely the best tool I've ever bought. Probably nearly paid for itself in labor and time saved.

Anyway, I've been checking craigslist daily looking for a decent used welder. On the docket is subframe reinforcements on both of my e46 m3s to start. I've owned a mig welder in the past so I have some experience. I found a Hobart handler 175, lightly used and to make it really a great deal it came with a decent mask, argon regulator, cart, and best of all a 80cuft cylinder. All for $500. It's a thoroughbred tank so hopefully I can go exchange it at tractor supply without any problems.
 

Attachments

  • uploadfromtaptalk1423634638464.jpg
    uploadfromtaptalk1423634638464.jpg
    136.2 KB · Views: 13
  • uploadfromtaptalk1423634661583.jpg
    uploadfromtaptalk1423634661583.jpg
    137.8 KB · Views: 15
  • uploadfromtaptalk1423634677922.jpg
    uploadfromtaptalk1423634677922.jpg
    139.1 KB · Views: 15
OP
N

neogenesis2004

Well-known member
Joined
Jan 21, 2014
Messages
49
Do you mean in the corner? I have them so that the edges of the cabinet shells touch each other. This gives the inner doors the ability to open a little over 90deg with the other cabinet closed. For me it's working perfectly. Likewise, the larger tall cabinets next to the 30" cabinets closer to the door only allow one of the smaller cabinet doors to open just over 90deg since the tall cabs are deeper, but that still gives me full access. I also have a couple gearloft shelves above the corner set that I don't think I've posted. They are holding my boxed tools like bearing pullers, power tools, etc... Fits perfectly to the top of the gearwall. I'll get a pic of that in a min.
 
OP
N

neogenesis2004

Well-known member
Joined
Jan 21, 2014
Messages
49
These pics didn't come out that great but they are decent enough. I tried to open the doors in the couple spots I thought you might be asking about. Also included a pic of the few shelves I've added and the tall cabinet on the other side. Over there I plan on putting a 24" premier cabinet because the 30" would hang low enough to not fit the engine lift.
 

Attachments

  • uploadfromtaptalk1423707225718.jpg
    uploadfromtaptalk1423707225718.jpg
    135.2 KB · Views: 25
  • uploadfromtaptalk1423707254297.jpg
    uploadfromtaptalk1423707254297.jpg
    136.7 KB · Views: 24
  • uploadfromtaptalk1423707279928.jpg
    uploadfromtaptalk1423707279928.jpg
    135.2 KB · Views: 22
  • uploadfromtaptalk1423707305649.jpg
    uploadfromtaptalk1423707305649.jpg
    136.2 KB · Views: 22
  • uploadfromtaptalk1423707326598.jpg
    uploadfromtaptalk1423707326598.jpg
    134.4 KB · Views: 23
  • uploadfromtaptalk1423707348086.jpg
    uploadfromtaptalk1423707348086.jpg
    141.8 KB · Views: 21

bonecrrusher

Well-known member
Joined
Aug 18, 2011
Messages
578
Location
Charlotte, NC
I spy a Porter Cable and buffing pads in your shelf - nice.

Yeah I was talking about the corner with the 2 - 30" cabinets mounted next to each other. It looks like I will have a similar corner and I am going to hate to waste that space.

I like what you did with the Gearloft above it - I have one of those and always had some junk to throw up there.
 
To avoid these ads, REGISTER NOW!
Top Bottom