To avoid these ads, REGISTER NOW!

21x21 Multipurpose Attached Garage Renovation

FarmerPete

Well-known member
Joined
Jul 24, 2013
Messages
258
Location
Lansing, MI
A quick introduction to my project. I'm an IT Server Administrator at my day job. I've never done much mechanical or construction in my life. Having said that, a half year ago, I decided that was going to change. I had a pretty decent workshop/space in my basement. I decided that I'd like to move as much of that as possible into the garage. I'm on a pretty tight budget, but I want to do things right. We'll see how far this takes us.

The garage is 21.5' x 21.5' attached garage. It was originally built in the mid 60's. The garage is located in Lansing Michigan. I've lived in the house for 6 years now. The last 3 of them with my wife.

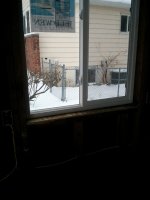
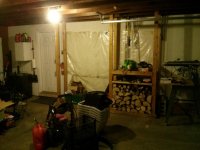
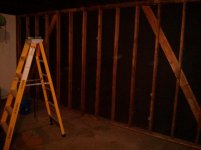
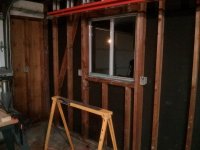
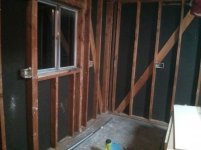
So here are some of the glorious before shots. The first few have a bunch of furniture that we were storing for a friend over the summer. It's long gone.

attachment.php

attachment.php


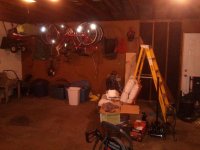
Just a bunch of normal yard/household stuff in the garage now.

attachment.php


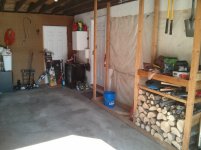
You'll see that one of the previous owners LOVED his peg board. That entire back wall is covered in it. The basement workshop was the same way. Unfortunately, he overloaded parts of it and it's really wavy/bulging at some parts. It's also unsalvageable.

attachment.php


Here you can see my firewood stack. I normally burn 1-2 face cords each winter in my home's wood burning stove. It's just supplemental heat. I like to always have some on hand in case my furnace isn't working for whatever reason. I've got an additional stack of wood outside seasoning. I haven't decided how I'm going to handle the wood stack in the garage yet.

attachment.php
 

Attachments

  • 2013-07-25 17.33.44.jpg
    2013-07-25 17.33.44.jpg
    135.6 KB · Views: 1,979
  • 2013-07-25 17.33.53.jpg
    2013-07-25 17.33.53.jpg
    137.6 KB · Views: 1,972
  • 2013-09-16 21.02.04.jpg
    2013-09-16 21.02.04.jpg
    144 KB · Views: 1,971
  • 2013-09-16 21.02.15.jpg
    2013-09-16 21.02.15.jpg
    141 KB · Views: 1,971
  • 2013-09-16 21.02.28.jpg
    2013-09-16 21.02.28.jpg
    138.4 KB · Views: 1,966
To avoid these ads, REGISTER NOW!
OP
F

FarmerPete

Well-known member
Joined
Jul 24, 2013
Messages
258
Location
Lansing, MI
I removed all of the pegboard and the drywall from the non-attached garage wall. Took a lot longer than I thought it would. So many nails! The pegboard just disintegrated when you pulled on it, so getting it out in large chunks was virtually impossible. After a few nights of demo, I got down to the clean slate I wanted.


attachment.php


attachment.php


One wall down.

attachment.php


Two walls down.

attachment.php


I always kept the curtains closed on the windows in the garage. I was unpleasantly surprised to see some rotting in the sill. This is the best picture I have of the rotting, but it doesn't do the problem justice. I'm also amazed at how much light I get through these windows. They're the north wall, so I didn't think it would be a ton. I'm still looking into options for replacing the windows, and I'll probably opt for some kind of privacy film on them vs a curtain.

attachment.php
 

Attachments

  • 2013-09-25 07.48.53.jpg
    2013-09-25 07.48.53.jpg
    136.2 KB · Views: 1,934
  • 2013-09-21 14.19.01.jpg
    2013-09-21 14.19.01.jpg
    131.8 KB · Views: 1,937
  • 2013-09-17 21.35.31.jpg
    2013-09-17 21.35.31.jpg
    142.3 KB · Views: 1,939
  • 2013-09-17 21.34.25.jpg
    2013-09-17 21.34.25.jpg
    143.5 KB · Views: 1,942
  • 2013-09-16 22.18.31-1.jpg
    2013-09-16 22.18.31-1.jpg
    121.9 KB · Views: 1,943

mark5767

Banned
Joined
May 16, 2013
Messages
141
Location
Minnesota
Looks like you're off to good start!

I'm loving my 21x21 so far with some basic improvements, they do have potential, but space is limited. I'm pretty strict on what is allowed in the garage. In general no toys, lawn & garden, patio stuff, garbage carts, etc... anything that can survive out of the garage stays out.

A shed would be great, but in the meantime I use the plastic storage units that go on sale for pretty cheap around this time of year. They work great for all the things mentioned above. Definitely recommended for the wood stack, I had mine near the back door in a large plastic bin with doors that opened in the front so it was easy to access the wood. Built a simple wooden cradle that fit inside and it didn't take much to clear the snow off and it stayed perfectly dry. Actually was easier to use than keeping in the garage!

Good luck with the upgrades, once you get going it can be pretty fun!
 

CNGsaves

Well-known member
Joined
Sep 26, 2012
Messages
13,233
Location
KS and OK
Looking good so far. Be sure to plan all your ELECTRICAL to be roughed in before you start with insulating. Also, plan outlets much higher in garage (ie like 49" tall) so they are above bench height.

Plan also for natural gas line for hanging heater, airline system, or anything you want done before walls are closed up in sheetrock.

Also, gotta recommend taking firewood OUT of garage . . . and most especially away from heated wall like you have it now. Maybe keep a plastic tub over near man door to outside for a few sticks (ie close to outdoor rack of wood). Termites are real threat from firewood like that. Also cover the stack of wood outdoors with some sort of roof and keep it OFF the ground.
 
Last edited:
OP
F

FarmerPete

Well-known member
Joined
Jul 24, 2013
Messages
258
Location
Lansing, MI
Next up, time to tackle the electrical. When I moved in, the garage had a total of four sets of outlets (including the opener), which is pretty good all things considering. Unfortunately, everything is on shared circuits. Three sets of outlets and the two Edison style lights are on a circuit that's shared with 5 other lights in the house, and several house outlets. The fourth outlet in the garage is actually tied into the kitchen's wiring. My house already had a sub panel in the basement that serviced an addition to the house. I made the executive decision to move the sub panel over to the garage. The old sub panel is a Siemens 12 spot main lug box. I was tempted to reuse it, but after adding up all of the circuits I wanted to run in the garage, the box would have been 100% full unless I used double breakers. I decided that I'd just fork over the money and get a better/bigger box.

The old sub was 60 amps, and I decided I'd go with 60 for the new sub panel. I'm only running a 100 amp service, and I don't think I'd want to spend the money to replace the breaker in the main panel (it's a Pushmatic brand box. The breakers are incredibly expensive unless you go used).

First I ripped out the drywall where I wanted to put the sub panel. I was hoping that I could get a clear hole into the basement from inside the stud cavity. No such luck. I'd have to drill at an angle to do it. Since this wall has to be fire rated, I thought I would stick with running conduit anyways. After cleaning up after my demo, I filled in the area with mineral wool R-15 insulation. I then put up a half panel of 1/2" OSB and 5/8" type-x drywall. The previous wall material was made up of 1/2" fiberboard covered with drywall. Since I couldn't find fiberboard at any of the big box stores, I made the executive decision to use OSB instead. I'm still undecided about whether I'll pull down the entire attached wall, but I'm going to stick with just the 3' in the corner that I already did for now.

Here's the new QO sub panel installed on the wall. I'm going to have to run the conduit through the wall at the bottom. Hopefully, I can do that in the next day or so. I ran a wire to the outlet there and poked it in through a compression fitting on the back of the panel. I'm not planning on running any additional outlets on the attached garage wall. I may try to predrill a couple holes to make it possible to fish the wires later if/when I do more demo.


attachment.php


attachment.php
 

Attachments

  • 2013-10-13 17.00.39.jpg
    2013-10-13 17.00.39.jpg
    99.1 KB · Views: 1,880
  • 2013-10-13 17.01.00.jpg
    2013-10-13 17.01.00.jpg
    132.3 KB · Views: 1,880
OP
F

FarmerPete

Well-known member
Joined
Jul 24, 2013
Messages
258
Location
Lansing, MI
Looking good so far. Be sure to plan all your ELECTRICAL to be roughed in before you start with insulating. Also, plan outlets much higher in garage (ie like 49" tall) so they are above bench height.

Plan also for natural gas line for hanging heater, airline system, or anything you want done before walls are closed up in sheetrock.

Also, gotta recommend taking firewood OUT of garage . . . and most especially away from heated wall like you have it now. Maybe keep a plastic tub over near man door to outside for a few sticks (ie close to outdoor rack of wood). Termites are real threat from firewood like that. Also cover the stack of wood outdoors with some sort of roof and keep it OFF the ground.


I hear ya on the firewood. It's just so convenient to not have to even step outside to get the wood. I think I might cut down on how much is stored inside, but I would have a hard time eliminating it entirely. Maybe leave a size close to what is stacked in the pictures. During the winter, I normally start with the space to the left of that stack completely filled.

A shed is in my future. I'm hoping that I can get the funds to construct one next Spring. I'm thinking a 12x8 or so. I'll have to work on the misses though.

I'm not going to plum any compressed air nor natural gas. I'm planning on insulating the walls, but I'm just trying to take some of the edge off the cold/heat. My plan is to install two 50 amp 220 runs to have a place to plug in a welder/compressor at some point. I also figure it might be nice to have the 50 amp circuits if these newfangled electric cars catch on. I submitted for the electrical permit last week. I think I listed 16 outlets and 8 circuits that I'm installing. I'm also planning on running two Cat5e lines from the house.
 
Last edited:
OP
F

FarmerPete

Well-known member
Joined
Jul 24, 2013
Messages
258
Location
Lansing, MI
Found the picture with the more rotten window frame. I could maybe pop the wood out and lay fresh down. I'm thinking of replacing the windows. I am waiting to get a quote on doing so. At the least, I'll sand it down and hopefully it's just a surface issue.

attachment.php
 

Attachments

  • 2013-09-25 07.49.29.jpg
    2013-09-25 07.49.29.jpg
    139.4 KB · Views: 1,804
OP
F

FarmerPete

Well-known member
Joined
Jul 24, 2013
Messages
258
Location
Lansing, MI
Spent some time getting the electrical outlet boxes mounted. Made me wish I had a chalk line. :-( I've got the conduit situation figured out. I didn't want to run THHN the entire way, (it would be difficult to run the conduit for THHN in the basement), so I'm going to take the existing 6/3 romex that goes to my soon to be decomissioned sub panel in the basment and run it to a junction box attached to the end of the conduit in the basement ceiling. I'll attach it to some THHN that will run through the conduit and into the subpanel. Should work out nicely. I'm going to have to run another conduit from the basement so that I can get the two circuits on the old subpanel moved over to the new one. I'll do the same thing with some #12 thhn there. I'm also going to run a conduit for low voltage lines (Cat5e). Should be ready to start running the wire soon. It's been two weeks since I filled out my electrical permit app with the township, and haven't heard back. Not sure if I should be concerned. I had been waiting to get the permit before I started moving the old subpanel feed/circuits. With the winter kicking in, I would like to get the walls put back together sooner rather than later. Shouldn't take me too much longer till I can start to rebuild.

Here's the electrical outlet placement:
attachment.php


My workbench is going to be an L shape in this corner. Hence the 3 double gang and 1 triple gang boxes. I'll have to add another box for the Cat5e drop.

attachment.php


attachment.php


I patched up the wall here. I am still not 100% decided about redoing the entire wall, so I'm holding off on finishing the drywall repair until I make that decision.
attachment.php
 

Attachments

  • 2013-10-22 21.29.29.jpg
    2013-10-22 21.29.29.jpg
    139.8 KB · Views: 1,701
  • 2013-10-22 21.30.09.jpg
    2013-10-22 21.30.09.jpg
    141 KB · Views: 1,696
  • 2013-10-22 21.30.21.jpg
    2013-10-22 21.30.21.jpg
    132.7 KB · Views: 1,696
  • 2013-10-23 22.25.53.jpg
    2013-10-23 22.25.53.jpg
    126.4 KB · Views: 1,688
OP
F

FarmerPete

Well-known member
Joined
Jul 24, 2013
Messages
258
Location
Lansing, MI
Not a lot of pictures to post, but I got the sub panel live last night. I decided that running #6 THHN through conduit *****. :lol_hitti 
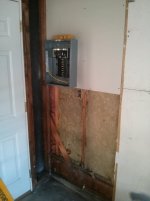
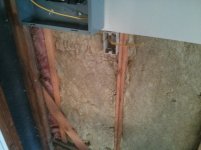
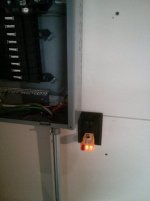
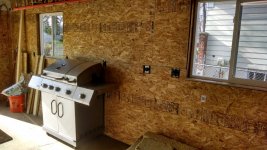
I also decided that the previous owner who wrote, "Basement Outlets" on a circuit that was on the old sub panel (that I'm moving to the garage) needs to be shot. Apparently "Basement Outlets" equals "Kitchen Microwave". For the record, my kitchen is not in the basement. Anyways, I now have to get the 3 old panel circuits moved to the new location. Shouldn't be too hard. Just need to use some more conduit, but I don't think the #12 will give me much difficulty after dealing with #6. I just can't take my time doing it now, since I have a slightly frustrated wife wondering when she can use the microwave next.

attachment.php
 

Attachments

  • 2013-10-27 21.23.20.jpg
    2013-10-27 21.23.20.jpg
    112.9 KB · Views: 1,561
OP
F

FarmerPete

Well-known member
Joined
Jul 24, 2013
Messages
258
Location
Lansing, MI
Still making good progress on the electrical.

Done:
  1. Relocate sub panel from basement to garage
  2. Run two 20 amp circuits and one 15 amp circuit from old sub panel location to the new location in garage.
  3. Wire two 240v 50amp outlets for future needs.
  4. Wire 8 120v 20 amp outlets along North wall.
  5. Run two CAT 5e wires from the basement patch panel to the garage.

To Do:
  1. Wire 6 120v 20 amp outlets along East wall.
  2. Convert light switch at house door to a 3/way switch and put a light switch by work bench.
  3. Wire 2 outlets (4 receptacles) in ceiling for new lighting.

I haven't decided what to do with the lighting exactly yet. I have a bunch of dual T-8 fluorescent light fixtures that I got crazy cheap from Menards. I'm planning on installing 4 fixtures. I currently have two edison sockets wired to a switch at the door to the house. The lights and garage door opener are on a 15 amp circuit that feeds in to my main breaker panel. I like the idea of keeping something light related on the main panel. That way, if I need to shut off the power to my sub panel, I can still have lights in the garage. I'm torn on if I should just keep the lighting and opener on the current wiring, or if I should just move everything over. I may leave the garage opener, since that would give me 1 outlet and the opener's lights on the main panels feed. Definitely not the ideal light to work with, but it's a lot better than nothing in the garage. Decisions decisions decisions... I guess the real question is, do I need to go buy 12/3 or 14/3, and how much of it. Hmmm.

I have to say I've learned so much about electrical doing this. I was out with friends the other night and a friend was mentioning that they had a breaker that wouldn't reset in their panel. Their dad was recommending they feed the wire from the defective breaker and add it to a working breaker. Apparently their dad is an electrician. I'm not an electrician, but that sounded like a bad idea for anything longer than it would take to get to Home Depot and back. I know it should be safe, but why do that when a new breaker costs $5? I explained to them the process of replacing a breaker an even had the exact breaker they needed in my basement (it was from my old sub panel in the basement that was no longer being used). I guess it's nice getting rid of some of the fear of working with electrical. Understanding how it works, and how to do it right. Hopefully I'm doing it right. Everything is working, and I feel I'm overdoing things if anything.
 
OP
F

FarmerPete

Well-known member
Joined
Jul 24, 2013
Messages
258
Location
Lansing, MI
More pictures. Electrical is hopefully done. It took me way too long to do. I certainly made a few mistakes that I corrected. I'm confident that what I've done is safe and will work. Hopefully the inspector will agree.
 

Attachments

  • 2013-11-21 20.18.54.jpg
    2013-11-21 20.18.54.jpg
    133.8 KB · Views: 45
  • 2013-11-21 20.19.15.jpg
    2013-11-21 20.19.15.jpg
    141.7 KB · Views: 42
  • 2013-11-21 20.19.57.jpg
    2013-11-21 20.19.57.jpg
    138 KB · Views: 39
  • 2013-12-01 15.54.51.jpg
    2013-12-01 15.54.51.jpg
    141.7 KB · Views: 43
  • 2013-12-01 15.55.04.jpg
    2013-12-01 15.55.04.jpg
    141.3 KB · Views: 48
  • 2013-12-01 15.55.29.jpg
    2013-12-01 15.55.29.jpg
    146.2 KB · Views: 42
  • 2013-12-01 16.06.50.jpg
    2013-12-01 16.06.50.jpg
    140.5 KB · Views: 46

GreyWolves

New member
Joined
Oct 18, 2012
Messages
1
Hey FarmerPete,
Electric work is Not a tinkering trade. Just because it works, does not mean, it is done correctly. The local inspector should agree. I've read so many of these post of guys doing there own electrical work, so many silly things.
A gardner will never burn your garage(house) down.
Please consult a professional in your area.
 
To avoid these ads, REGISTER NOW!
OP
F

FarmerPete

Well-known member
Joined
Jul 24, 2013
Messages
258
Location
Lansing, MI
Hey FarmerPete,
Electric work is Not a tinkering trade. Just because it works, does not mean, it is done correctly. The local inspector should agree. I've read so many of these post of guys doing there own electrical work, so many silly things.
A gardner will never burn your garage(house) down.
Please consult a professional in your area.
If you look above, you'll see that I mentioned in one of my earlier posts that I had applied for a permit.
I submitted for the electrical permit last week.
I have every intention of getting it inspected. On a side note, I know it's not a replacement for an inspection by any means, but the guys in the electrical section of the forum seem to think I did pretty good, especially for someone who has only swapped an outlet out a couple times before this project. I take my families safety very seriously, and I've made sure that I did everything above MY standards, even when I could have legally done it more easily. I've also done a ton of research on the web to make sure that for any tricky situation, I knew what was the right way to do it. So far. the only real complaint anyone has had is that I may have over taxed my staples by putting several wires through a staple that is only UL listed for 1. That doesn't mean it can't support more than 1. It just isn't listed as supporting more than 1. So now I get to go buy some new stacking staples and redo some of the securing. Oh Joy! Just what I really wanted to do with my weekend. :willy_nil
 
OP
F

FarmerPete

Well-known member
Joined
Jul 24, 2013
Messages
258
Location
Lansing, MI
Haven't done anything the last two weeks. Between Thanksgiving, my sons birthday, my birthday, and other social things, I haven't had enough time to get out to finish everything. The one part that should be done soon is the windows. As we speak, there is a crack team of guys on my roof re-roofing. It takes some real crazies to get on a snow covered roof in 20 degree weather and re-shingle. Part of the deal is they're going to replace the windows in my garage. For the small charge I'm paying, it was worth it to make sure the new windows are water tight. I've never worked with flashing or vinyl siding before. Hopefully they'll be done with everything before Christmas.
 
OP
F

FarmerPete

Well-known member
Joined
Jul 24, 2013
Messages
258
Location
Lansing, MI
The new windows are in. The roof is done. The reroofing job unexpectedly made a HUGE mess in my garage. The garage decking is 1x6 boards. Shingle dust was covering half of my garage floor when I got home. Luckily, it cleans up easily with a shop vac. I covered everything with a tarp for their second half of the job, and that worked well. The roofers came in and cleaned up the garage after they were done. It's actually cleaner than when they started!


At first I was a little disapointed that they used OSB for the window sill. I suppose it's not a big deal though, since I'm going to be using OSB for the wall covering anyways. Eiterh way, it looks SOOO much better than before. I'll have to come up with some kind of a privacy method, but I love getting all that light in through the window.

attachment.php


attachment.php
 

Attachments

  • 2013-12-17 14.04.43.jpg
    2013-12-17 14.04.43.jpg
    105.3 KB · Views: 960
  • 2013-12-17 14.04.34.jpg
    2013-12-17 14.04.34.jpg
    144.8 KB · Views: 958

captain14

Well-known member
Joined
Dec 19, 2012
Messages
7,048
Location
Near College Park Maryland 20740
Can you take a photo of the window with the interior lights on so I can see the OSB wood they used? I just replaced all My basement windows in the brick/block walls. My concern
Was not so much the install but removing the metal frame mounted in the block wall.
 
OP
F

FarmerPete

Well-known member
Joined
Jul 24, 2013
Messages
258
Location
Lansing, MI
Can you take a photo of the window with the interior lights on so I can see the OSB wood they used? I just replaced all My basement windows in the brick/block walls. My concern
Was not so much the install but removing the metal frame mounted in the block wall.

Hopefully these will help better. You can see they replaced the window sill in post #7 with the OSB. It wouldn't have been my choice. I would have used a nicer piece of lumber myself. I'm not too concerned. The price was right, they are experienced, and I'm 100% sure that the windows will keep the water out.

attachment.php


attachment.php
 

Attachments

  • 2013-12-18 17.38.56.jpg
    2013-12-18 17.38.56.jpg
    70.9 KB · Views: 825
  • 2013-12-18 17.39.18.jpg
    2013-12-18 17.39.18.jpg
    65.1 KB · Views: 820

captain14

Well-known member
Joined
Dec 19, 2012
Messages
7,048
Location
Near College Park Maryland 20740
That's much better view. Maybe this will give you a chance to Practice some trim carpentry on the Window frame.

Maybe something simple to dress it up?

Is there adequate caulk and sealing on the exterior to keep the OSB dry? It will wick up and ruin the wood I think.
 
OP
F

FarmerPete

Well-known member
Joined
Jul 24, 2013
Messages
258
Location
Lansing, MI
I'm sure it's fine. I can see lots of caulk outside. I'm sure they used flashing and whatnot as well.

Sent from my Nexus 4 using Tapatalk
 

GrandmaSideways

Well-known member
Joined
Jan 27, 2011
Messages
221
Looking good! Same size as my garage so I'm sure I can glean some ideas from your thread!
As for the window, I am in the same dilemma. I want to block the windows off from possible prying eyes while still allowing lots of ambient light. The solution I've been considering is the rustoleum frost coating (http://m.homedepot.com/p/Rust-Oleum-Specialty-11-oz-Frosted-Glass-Spray-Paint-1903830/100195608) but I have to do further research into seeing how well it works, etc...
 

BMS

Well-known member
Joined
May 5, 2007
Messages
48
Location
Northern Virginia
You can get window film that will "frost" the glass for you and prevent being able to see in but still allow light in. If you can't find it online, look for a local sign or glass company.
 
OP
F

FarmerPete

Well-known member
Joined
Jul 24, 2013
Messages
258
Location
Lansing, MI
After much obsessing with my electrical, I finally called for and passed my electrical inspection. Time to start making progress. I've got the insulation ready to go. I'll try to get that in tomorrow, assuming I can stand the 20F weather IN the garage. So cold.

attachment.php
 

Attachments

  • 2014-01-28 10.02.07.jpg
    2014-01-28 10.02.07.jpg
    75.8 KB · Views: 198
OP
F

FarmerPete

Well-known member
Joined
Jul 24, 2013
Messages
258
Location
Lansing, MI
So, it's been a bit since I last updated this thread. It's been a cold and miserable winter. I managed to get out into the garage a few times and completed insulating the walls. I'm not sure if I'll ever heat the garage, but I figured now is the time to insulate if I want to! By the way, if you're considering buying insulation, buy the stuff that doesn't itch. I would have been done insulating in a few days if it wasn't for the horrible itching that lasts a week.

My garage just got a little more crowded for the next few months. You see my deck had an accident. Apparently it wasn't built right, and all the snow caused it to detach from the house. Luckily, the deck is only a foot off the ground, so it wasn't catastrophic. It looks like my grill and smoker will be in the garage for a bit.

attachment.php
 

Attachments

  • 2014-03-31 18.24.40.jpg
    2014-03-31 18.24.40.jpg
    142.1 KB · Views: 123
OP
F

FarmerPete

Well-known member
Joined
Jul 24, 2013
Messages
258
Location
Lansing, MI
So, onward to covering the walls up. I decided long ago to use OSB. I picked it because of a few reasons. First, I like that it is durable. I'm not the most careful guy, and I can totally see myself smashing a hole in drywall. Second, I like the idea of being able to hand stuff anywhere. And finally, a bad drywall job looks much worse than a bad OSB job (IMHO). OSB is now up and ready to paint.

Here is my side wall. Ready to be primed. Also note the temporary grill location. Grrrrr
attachment.php


I really like putting up OSB. I'm not particullarly good at it (please don't look too closely), but it certainly gives a sense of accomplishment. It's also like a big jigsaw puzzle where your get to use a pair of scissors. I used a bit of caulk to try to fill in any seems that were left. Hopefully it will look good painted.
attachment.php


You can see that I planned ahead and put all of my outlets exactly 48" from the ceiling. Looking back at it, I should have put them all 48.25" from the ceiling, but oh well. It worked pretty well. A lot less cutting, and I could use the outlets to help steady the boards before I screwed them in. Working with a 8x4' of 1/2" OSB is hard by yourself!
attachment.php


Here is my super secret wiring chase. Just some 2x4's with L brackets and OSB screwed into them. The top 2x4 had to be ripped in half (not a fun task for a 2.5" piece of wood using a radial saw).
attachment.php
 

Attachments

  • 2014-04-26 17.33.21.jpg
    2014-04-26 17.33.21.jpg
    153.6 KB · Views: 122
  • 2014-04-26 17.33.29.jpg
    2014-04-26 17.33.29.jpg
    157 KB · Views: 122
  • 2014-04-26 17.33.37.jpg
    2014-04-26 17.33.37.jpg
    151.3 KB · Views: 121
  • 2014-04-26 17.33.48.jpg
    2014-04-26 17.33.48.jpg
    142.7 KB · Views: 121
To avoid these ads, REGISTER NOW!
Top Bottom