To avoid these ads, REGISTER NOW!

24 X 24 makes my life easier

To avoid these ads, REGISTER NOW!

Bull

Super Moderator
Joined
Dec 12, 2005
Messages
16,189
Location
MA
P08-08-11_1414.jpg


LKDelta1.jpg


P06-27-11_20211.jpg
 
OP
L

Lkdelta

Well-known member
Joined
Sep 21, 2010
Messages
1,131
Location
40 mi.east of syracuse
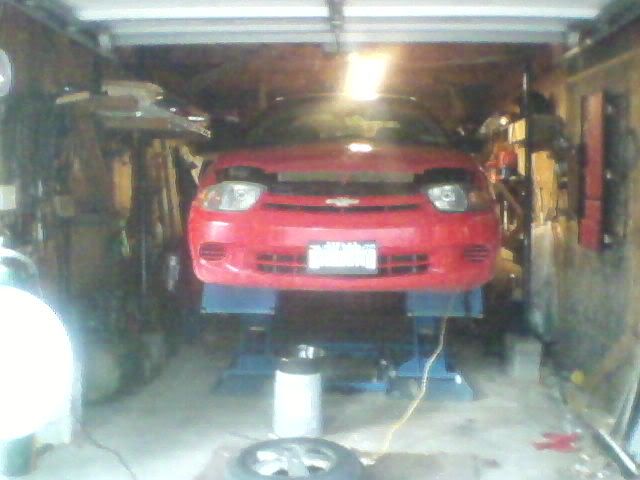
That lift is all the way up and that is a standard 5 gallon bucket with the drainpan on it.

(pic on the right)
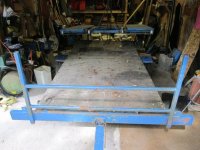
I can lift the car-lift with a chain-fall and back a trailer under it
completely portable:thumbup:


(pic on the left)
Can do this with it too..for oil changes, tire removal/changing
 

Attachments

  • P04-16-12_16.15.jpg
    P04-16-12_16.15.jpg
    51.9 KB · Views: 54
  • garage floor 005.jpg
    garage floor 005.jpg
    134 KB · Views: 53
Last edited:
OP
L

Lkdelta

Well-known member
Joined
Sep 21, 2010
Messages
1,131
Location
40 mi.east of syracuse
Is that picture of the red car taken in the garage you are moving out of or did you split your 24x24 into two 24x12's?

2" X 4" X 9' stud wall, sheathed,.... right down the middle, starting between the garage doors and going to the back wall.

There is a cross over doorway "just to the right" of that creeper hanging on the wall

24 ft span would have been too long for the loft.
 
Last edited:

rubberrodder

Well-known member
Joined
Jul 6, 2007
Messages
616
Location
Tacomatose Wa.
I am planning to do a 24x24 with a loft/second floor to replace my, ahem... "four supports for a sagging rain diverter". I am keeping an eye on this thread.
 
To avoid these ads, REGISTER NOW!
OP
L

Lkdelta

Well-known member
Joined
Sep 21, 2010
Messages
1,131
Location
40 mi.east of syracuse
In ground scissor lift started...

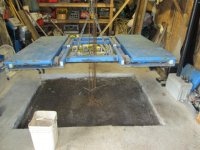
I've started the project to make the Atlas Quik Bay 7000 scissor lift flush with my floor
Basic description.. and then, with details of each pic
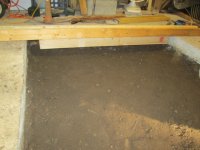
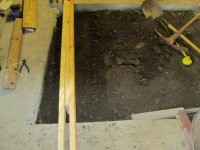
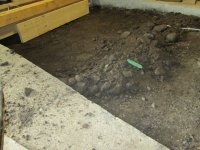
Got the hole dug to allow a 4" pad approx 4.25" below grade.
That makes my lift pads flush with the garage floor

1.Pick the lift up
2.set it on the trailer
3.get my 4.25" depth below grade, set for the concrete screed
 

Attachments

  • garage lift level project resize 015.jpg
    garage lift level project resize 015.jpg
    129.9 KB · Views: 72
  • garage lift level project resize 016.jpg
    garage lift level project resize 016.jpg
    134.5 KB · Views: 62
  • garage lift level project resize 018.jpg
    garage lift level project resize 018.jpg
    124.5 KB · Views: 61
Last edited:
OP
L

Lkdelta

Well-known member
Joined
Sep 21, 2010
Messages
1,131
Location
40 mi.east of syracuse
more progress

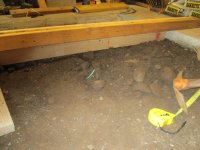
1 & 2 When I start pouring, the 2X4 with the 2X8 sandwiched in the middle
will be my best effort to maintain a consistant level, 4.25" below grade for the top of the concrete pad

3.I then added another piece of 2x8.... 8.25" deep to get a consistant depth in the bottom of the hole
 

Attachments

  • garage lift level project resize 019.jpg
    garage lift level project resize 019.jpg
    118.1 KB · Views: 42
  • garage lift level project resize 020.jpg
    garage lift level project resize 020.jpg
    117.1 KB · Views: 36
  • garage lift level project resize 021.jpg
    garage lift level project resize 021.jpg
    112.3 KB · Views: 40
Last edited:
OP
L

Lkdelta

Well-known member
Joined
Sep 21, 2010
Messages
1,131
Location
40 mi.east of syracuse
some more progress
1.Working my way across digging
2.The hole is now 4" deeper than the top of the pad will be.
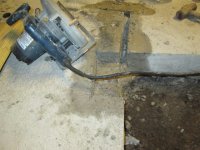
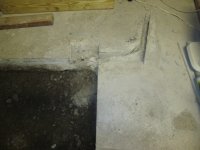
3.Cut a channel for my hydraulic hose

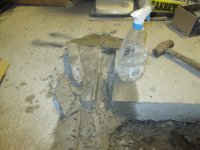
4.I used the spray bottle from a cheap bottle of glasscleaner
It was full of water to keep the circ saw blade cool, and keep dust down
Spray it on the back edge of the saw blade so it gets pulled into the cut

5.Cut a channel over toward the wall for the hydraulic hose from the control unit.
A masonary blade on the circ saw and a couple of passes starting with a dive cut got me 2" deep

make the passes about 1" apart, and then simply break the piece out between the cuts with a chisel
 

Attachments

  • garage lift level project resize 022.jpg
    garage lift level project resize 022.jpg
    139.8 KB · Views: 50
  • garage lift level project resize 024.jpg
    garage lift level project resize 024.jpg
    103.3 KB · Views: 52
  • garage lift level project resize 025.jpg
    garage lift level project resize 025.jpg
    122.5 KB · Views: 51
  • garage lift level project resize 026.jpg
    garage lift level project resize 026.jpg
    113.7 KB · Views: 60
  • garage lift level project resize 003.jpg
    garage lift level project resize 003.jpg
    95.1 KB · Views: 49
Last edited:
OP
L

Lkdelta

Well-known member
Joined
Sep 21, 2010
Messages
1,131
Location
40 mi.east of syracuse
Mixing the bags and pouring them in the hole, to follow soon
Still doesn't make sense to dig a hole, just to fill it back in again:headscrat
 
Last edited:
OP
L

Lkdelta

Well-known member
Joined
Sep 21, 2010
Messages
1,131
Location
40 mi.east of syracuse
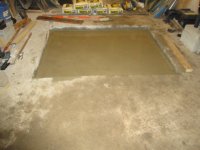
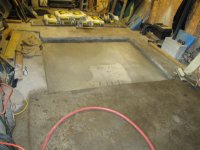
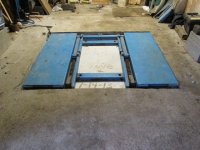
Used some of the bags (18) and mixed by hand,
after seeing the weather forecast to only get hotter during the week

Left to right and then top down to bottom row

1.Pad just poured
2.Pad starting to set, looking across "at grade level"
3.set for couple days
4.lift is reset and ready for use.
5.looking across the surface and nothing visible above grade level
 

Attachments

  • garage floor 001.jpg
    garage floor 001.jpg
    93.8 KB · Views: 67
  • garage floor 002.jpg
    garage floor 002.jpg
    104.2 KB · Views: 58
  • garage floor 004.jpg
    garage floor 004.jpg
    118.1 KB · Views: 60
  • garage floor 008.jpg
    garage floor 008.jpg
    126.1 KB · Views: 78
  • garage floor 009.jpg
    garage floor 009.jpg
    132.2 KB · Views: 61
Last edited:
To avoid these ads, REGISTER NOW!
Top Bottom