To avoid these ads, REGISTER NOW!

Between 485 & 705 SQ/FT 25' x 24' Single Bay Auto Garage

Workspaces between 485 and 705 squarefeet.
To avoid these ads, REGISTER NOW!

Bessy

Well-known member
Joined
Dec 18, 2012
Messages
995
Location
Ontario, Canada
I've put together a quick 2D cad drawing that shows the positioning of everything. I'm still struggling with where to locate the lift depth wise.

* Not deep enough and I limit the height I can lift to.
* Too deep and it's difficult to pull the engine out of the 964.

Screen Shot 2020-02-29 at 9.08.11 PM by duncanrellis, on Flickr
Are you mainly worried about work around space front and back of a vehicle, or ceiling clearance?

I'd consider positioning the lift to optimize vertical clearance. Then, if front/back clearance is an issue in either case, address that through forward/reverse loading vehicles as needed. You can make room around the vehicle front or back by ensuring anything along the wall in front of the lift is moveable. if you do need a few extra inches to work between the wall and the vehicle, pull the toolbox or whatever you have in front of the lift out of the way temporarily.

Sent from my Pixel 3a using Tapatalk
 

thickhead

Well-known member
Joined
Apr 4, 2014
Messages
817
Location
Connecticut
i understand the stress of getting the lift in the right place, but if it it is too close to the garage door by a little bit you can expand access hugely by opening the door. Expanding access to the back part of the garage would be a bit more of a pain, unless you just put another overhead door there too. Make it a drive through!

I think I would just put the lift in the right spot to not be parked on it all the time. Pull in, roll front tires off the lift pad and park it there. Nothing to ever trip over and always out of the way when the car is inside.
 
Last edited:

thickhead

Well-known member
Joined
Apr 4, 2014
Messages
817
Location
Connecticut
Tape marks between wheels are 12’7” and 7’1” from the door. Third tape mark is 32” from overhead door to bumper of the car. Front bumper is 9’ from the wall in your 26’ depth build (8’ if 25’ depth). Tried using the measurements from your drawings. Also, I think with the 2x6 walls your 26’ deep garage will be more like 25’ but maybe you already accounted for that.
 

Attachments

  • 721F27F9-0E5E-4803-A089-7B9C6DE9B498.jpg
    721F27F9-0E5E-4803-A089-7B9C6DE9B498.jpg
    112.8 KB · Views: 88
  • 5824AE09-3870-45D8-90D4-EAC7D8B1A239.jpg
    5824AE09-3870-45D8-90D4-EAC7D8B1A239.jpg
    133.8 KB · Views: 81
Last edited:
OP
D

DEllis

Well-known member
Joined
May 16, 2014
Messages
250
Location
Carlisle, PA
Tape marks between wheels are 12’7” and 7’1” from the door. Third tape mark is 32” from overhead door to bumper of the car. Front bumper is 9’ from the wall in your 26’ depth build (8’ if 25’ depth). Tried using the measurements from your drawings. Also, I think with the 2x6 walls your 26’ deep garage will be more like 25’ but maybe you already accounted for that.


Thanks for that. I did account for the wall thickness in my drawing.


Sent from my iPad using Tapatalk
 
OP
D

DEllis

Well-known member
Joined
May 16, 2014
Messages
250
Location
Carlisle, PA
They hauled off the old shed today. Probably the last progress for awhile until things get restarted

f5a87bfbd0a1eb16a6055d3be8d88f4c.jpg


Sent from my iPad using Tapatalk
 

Attachments

  • f5a87bfbd0a1eb16a6055d3be8d88f4c.jpg
    f5a87bfbd0a1eb16a6055d3be8d88f4c.jpg
    240.3 KB · Views: 1
OP
D

DEllis

Well-known member
Joined
May 16, 2014
Messages
250
Location
Carlisle, PA
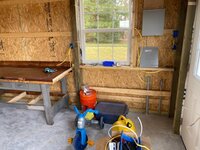
In the meantime we started filling up the new shed. Some electrical roughed in but I can’t run a trench because the rental places are all closed

ea1e925fe3c75a49c82a84d5b92cefe1.jpg
4ae258a4836c0d997a2d90dcccc982d2.jpg
8529085eac006356dcb9da3aabe8ab80.jpg


Sent from my iPad using Tapatalk
 

Attachments

  • ea1e925fe3c75a49c82a84d5b92cefe1.jpg
    ea1e925fe3c75a49c82a84d5b92cefe1.jpg
    141.9 KB · Views: 0
  • 4ae258a4836c0d997a2d90dcccc982d2.jpg
    4ae258a4836c0d997a2d90dcccc982d2.jpg
    148.6 KB · Views: 0
  • 8529085eac006356dcb9da3aabe8ab80.jpg
    8529085eac006356dcb9da3aabe8ab80.jpg
    146.7 KB · Views: 2

Vahispd

Well-known member
Joined
Nov 21, 2012
Messages
141
Location
SE VA
The new shed looks really good and the cupola and shutters are a nice touch.

Allowing some room to place another type of vehicle on the lift may be prudent. I have found that sheds and shops become too small after you start filling and using them, sometimes quicker than we think. And that is expressed on GJ fairly often too. I have tools and equipment now, for work that I had absolutely no thought of performing a few years ago, but circumstances change and having space to adapt is a good thing.
 

Kevkx125

Well-known member
Joined
Dec 26, 2013
Messages
3,394
Location
DOUGLASSVILLE, PA
Looking good and I bet it feels good to have power to the shed. Looking forward to the garage build and pics

Enjoy the build, hope it goes well.
 
OP
D

DEllis

Well-known member
Joined
May 16, 2014
Messages
250
Location
Carlisle, PA
It rained a little last night. The contractor had extended the gutters away from the build so there was very little water in the foundation. It had evaporated by the end of the day.

Landscaper is coming back Monday to place straw over the area he graded and seeded.
 

PhantomEB

Well-known member
Joined
Feb 6, 2006
Messages
6,817
Location
Medicine Hat, AB, Canuckistan
All that room, I sure hope one day it becomes a very nice garden tool, project car storage. My better half wants an attached or detached very close by. I got no problem trundling thru 50’ of snow to a heated shop if need be.
 
To avoid these ads, REGISTER NOW!
OP
D

DEllis

Well-known member
Joined
May 16, 2014
Messages
250
Location
Carlisle, PA
Our well pump died today, so we're over at my in-laws for the night. Well company showing up tomorrow to tell me the damage. Was hoping it was just the pressure switch when I came in from outside and there was no water, but no such luck.
 
Joined
Apr 2, 2017
Messages
8
Hey, nice build man. I have a question about the foundation process. Was it was dug out, then concrete poured and then after it dried, the hollow concrete cinderblocks were put down and filled to use anchors to build using the pressure treated wood?
 
OP
D

DEllis

Well-known member
Joined
May 16, 2014
Messages
250
Location
Carlisle, PA
Hey, nice build man. I have a question about the foundation process. Was it was dug out, then concrete poured and then after it dried, the hollow concrete cinderblocks were put down and filled to use anchors to build using the pressure treated wood?

Yes, that's pretty much right. They dug, poured a 12" deep concrete footing, and then laid the block on top of that. Anchors were set in the cinder block by the mason.
 
To avoid these ads, REGISTER NOW!
Top Bottom