To avoid these ads, REGISTER NOW!

25 x 42 Garage and work shop

livy73

Active member
Joined
Oct 8, 2014
Messages
30
Location
Binghamton NY
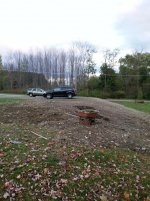
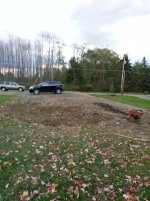
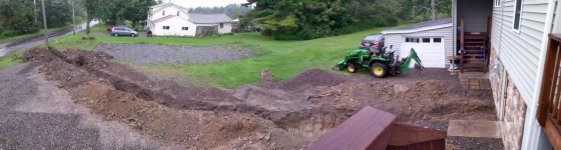
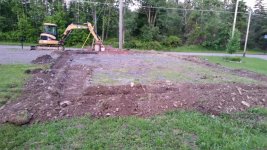
It's been a long time coming and a lot of research but I finally got my garage project started. It is detached and final dimensions ended up being 25 x 42 with a small jog/set back for septic tank access. Let me start with the pictures of the area before the garage started.
 

Attachments

  • DSCN1501.jpg
    DSCN1501.jpg
    149.2 KB · Views: 109
  • DSCN1505.jpg
    DSCN1505.jpg
    146 KB · Views: 91
To avoid these ads, REGISTER NOW!
OP
L

livy73

Active member
Joined
Oct 8, 2014
Messages
30
Location
Binghamton NY
Since I helped build my mom's garage I knew I had to add a lot of fill so the foot print would be at least as big as hers..lol
 

Attachments

  • Phone Pictures 231.jpg
    Phone Pictures 231.jpg
    112.8 KB · Views: 156
  • Phone Pictures 230.jpg
    Phone Pictures 230.jpg
    141.2 KB · Views: 163
  • Phone Pictures 229.jpg
    Phone Pictures 229.jpg
    131.7 KB · Views: 226
OP
L

livy73

Active member
Joined
Oct 8, 2014
Messages
30
Location
Binghamton NY
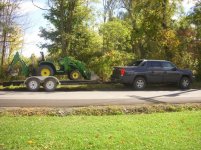
Luckily for all the fill I've had my dads John Deere backhoe to use.
 

Attachments

  • 20130913_182626.jpg
    20130913_182626.jpg
    151.9 KB · Views: 105
  • 20140920_153223.jpg
    20140920_153223.jpg
    147.7 KB · Views: 123
  • DSCN1506.jpg
    DSCN1506.jpg
    148 KB · Views: 134
Last edited:
OP
L

livy73

Active member
Joined
Oct 8, 2014
Messages
30
Location
Binghamton NY
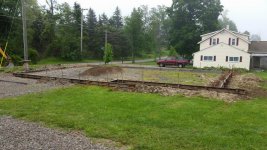
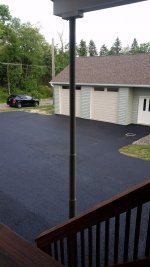
Finally the last of the fill is in and graded off. Keep in mind this is over a three year period and probably 15 loads of clean fill. I topped off the area where the garage will sit with some good shale and that is where the Ford Edge is parked.
 

Attachments

  • 20141008_182530.jpg
    20141008_182530.jpg
    149.1 KB · Views: 86
  • 20141008_182522.jpg
    20141008_182522.jpg
    145.1 KB · Views: 89
OP
L

livy73

Active member
Joined
Oct 8, 2014
Messages
30
Location
Binghamton NY
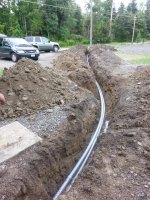
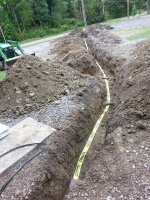
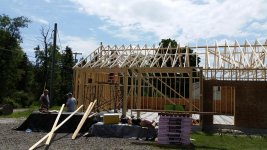
Next on the list was to pull the overheard electric off of the house and bury underground. I also upgraded to a 200amp service in the house and ran a line back out to the garage where I can install 100amp service. I didn't want another meter on the garage and shouldn't need any more juice out there. As you can see in these pictures the backhoe came in handy once again. I scraped off the #2 stone and went to town. Hit a spring 6ft in..and had to dig a drain to the ditch. Found an old basket ball hoop post and concrete! Laid the electric, back filled and marked and had the ground covered back over all in the two days. 1st to dig, second to bury and back fill!
 

Attachments

  • 20140822_084318.jpg
    20140822_084318.jpg
    149.6 KB · Views: 92
  • 20140822_093517.jpg
    20140822_093517.jpg
    153 KB · Views: 114
  • 20140822_134121.jpg
    20140822_134121.jpg
    149.9 KB · Views: 124
Last edited:
OP
L

livy73

Active member
Joined
Oct 8, 2014
Messages
30
Location
Binghamton NY
Thanks @ 1/2 cup. I have found a lot of neat info on here and thought I should share. I'm pretty far along with the build and will try to put as much as I can on now. Here are the rest of the electrical pics.
 

Attachments

  • 20140822_183007.jpg
    20140822_183007.jpg
    171.9 KB · Views: 65
  • 20140823_091211.jpg
    20140823_091211.jpg
    151 KB · Views: 84
  • 20140823_100119.jpg
    20140823_100119.jpg
    149.8 KB · Views: 80
  • 20140823_144328.jpg
    20140823_144328.jpg
    153.2 KB · Views: 72
OP
L

livy73

Active member
Joined
Oct 8, 2014
Messages
30
Location
Binghamton NY
I finished the electric in the fall of 2014. Unfortunately I fell on my dirt bike and tore my ACL and broke the top of the tibia off so I was on the shelf for quite a few months. Next came the three month process of zoning and variances with the town. That's a whole new story to tell but in June I began laying out my monolithic pad.
 

Attachments

  • 20150702_133447.jpg
    20150702_133447.jpg
    147.1 KB · Views: 107
  • 20150626_072807.jpg
    20150626_072807.jpg
    145 KB · Views: 88
  • 20150624_205226.jpg
    20150624_205226.jpg
    159.7 KB · Views: 90
OP
L

livy73

Active member
Joined
Oct 8, 2014
Messages
30
Location
Binghamton NY
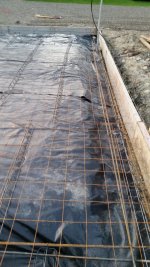
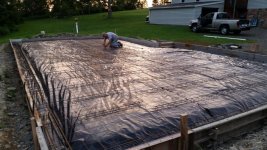
I removed all of the grass/organic material that was on the far side of the pad on top of my shale and added a few loads of crusher run then plate tamped. After it finally quit raining for three weeks we got it ready to pour the second week of July. I put down a vapor barrier and then the rebar in the perimeter and mesh thru the center. The perimeter is 12" deep by 14" tall. The center section of the floor is 6" and I poured 4000psi concrete.
 

Attachments

  • 20150710_204038.jpg
    20150710_204038.jpg
    153.1 KB · Views: 103
  • 20150710_204128.jpg
    20150710_204128.jpg
    154.8 KB · Views: 105
  • 20150710_204111.jpg
    20150710_204111.jpg
    144.9 KB · Views: 101
  • 20150710_204137.jpg
    20150710_204137.jpg
    156.1 KB · Views: 94
Last edited:
OP
L

livy73

Active member
Joined
Oct 8, 2014
Messages
30
Location
Binghamton NY
That was my dad in the pictures working his **** off. This has been a nights and weekend project for me with help from friends. I did pay the guys to do the flat work. We set a string line and pinned in the forms and the first truck came at 7am Sat! 22.5 yards total.
 

Attachments

  • 20150711_065955.jpg
    20150711_065955.jpg
    153.7 KB · Views: 106
  • 20150711_073128.jpg
    20150711_073128.jpg
    146.3 KB · Views: 124
  • 20150711_082013.jpg
    20150711_082013.jpg
    147.6 KB · Views: 107
OP
L

livy73

Active member
Joined
Oct 8, 2014
Messages
30
Location
Binghamton NY
I had to get my daughter out of bed at 9am because the third truck was there and I didn't want her to miss it. I used the guys with front unload trucks because they could put the concrete right where we needed it. No wheel barrows! We did have to lay down one set of the front forms but that was easy to throw back in. I water cured it with tarps for the next 4 days.
 

Attachments

  • 20150711_124203.jpg
    20150711_124203.jpg
    151.3 KB · Views: 113
  • 20150711_092035.jpg
    20150711_092035.jpg
    148.5 KB · Views: 116
  • 20150711_090050.jpg
    20150711_090050.jpg
    156.6 KB · Views: 108
OP
L

livy73

Active member
Joined
Oct 8, 2014
Messages
30
Location
Binghamton NY
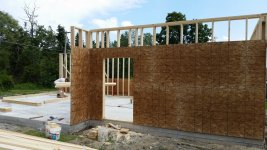
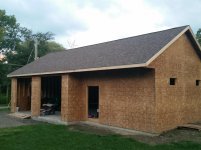
Next was framing! I had the lumber delivered and precut the 2 x 6 for the walls so they were ready to go. We used pressure treated for the floor plate and double 2 x 6 for the top. We sheeted as much of the walls as we could before we stood them up. This was a days worth of framing and then it rained!
 

Attachments

  • 20150719_073853.jpg
    20150719_073853.jpg
    148.6 KB · Views: 99
  • 20150719_073905.jpg
    20150719_073905.jpg
    150.1 KB · Views: 96
  • 20150719_073931.jpg
    20150719_073931.jpg
    151.9 KB · Views: 97
OP
L

livy73

Active member
Joined
Oct 8, 2014
Messages
30
Location
Binghamton NY
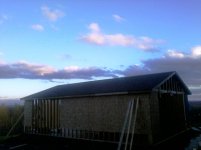
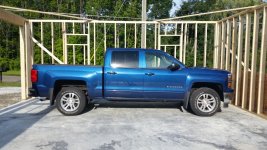
Me and two friends did the walls. I didn't start the sawing and nailing until after 7:30am so it was kinda quite for our neighbors. We used the chevy as a ladder to set the headers over the garage doors. They are 9 x 9. The walls are 10ft tall also.
 

Attachments

  • 20150719_160121.jpg
    20150719_160121.jpg
    150.9 KB · Views: 115
  • 20150719_160220.jpg
    20150719_160220.jpg
    152.5 KB · Views: 117
  • 20150719_184159.jpg
    20150719_184159.jpg
    149.8 KB · Views: 122
Last edited:
OP
L

livy73

Active member
Joined
Oct 8, 2014
Messages
30
Location
Binghamton NY
Then the trusses came! I had a few more friends come to help throw them up. I used scissor trusses over the garage doors as I plan on having a car lift. They ended up working nice. I have 14'3" to the peak inside. Good thing I applied for the extra height variance. Our town is 16ft max and I requested 18'. I also have a picture of my truck inside. Fits good but just like everyone else I know this garage is too small before I started building it but that's another story.
 

Attachments

  • 20150726_165722.jpg
    20150726_165722.jpg
    146.5 KB · Views: 124
  • 20150725_123832.jpg
    20150725_123832.jpg
    155.8 KB · Views: 141
  • 20150720_180411.jpg
    20150720_180411.jpg
    157.9 KB · Views: 199
  • 20150723_202325.jpg
    20150723_202325.jpg
    153.2 KB · Views: 132
OP
L

livy73

Active member
Joined
Oct 8, 2014
Messages
30
Location
Binghamton NY
Roof and siding

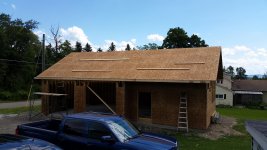
Did the roof. It was hot, in the 90's but worked in the mornings and early evenings until it was done. also added a picture of the garage from the back of my yard.
 

Attachments

  • 20150801_141616.jpg
    20150801_141616.jpg
    148.7 KB · Views: 100
  • 20150814_201119.jpg
    20150814_201119.jpg
    151.4 KB · Views: 114
  • 20150815_161100.jpg
    20150815_161100.jpg
    147.3 KB · Views: 122
OP
L

livy73

Active member
Joined
Oct 8, 2014
Messages
30
Location
Binghamton NY
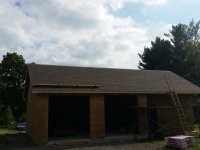
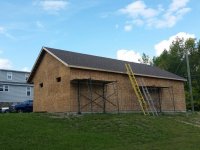
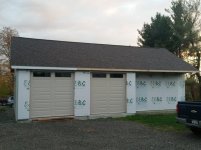
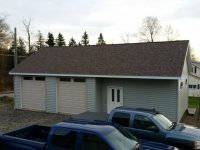
I went with a teak colored shingle! I will have to update the house next year! Also the siding came so that was nice to motivate me a little!
 

Attachments

  • 20150909_174350.jpg
    20150909_174350.jpg
    122.9 KB · Views: 81
  • 20150819_163421.jpg
    20150819_163421.jpg
    140.7 KB · Views: 84
  • 20150823_161433.jpg
    20150823_161433.jpg
    146.2 KB · Views: 92
  • 20150824_195130.jpg
    20150824_195130.jpg
    135.7 KB · Views: 119
OP
L

livy73

Active member
Joined
Oct 8, 2014
Messages
30
Location
Binghamton NY
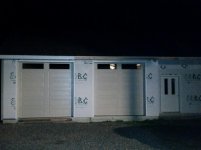
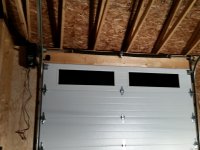
Here are some images of the siding going on and also of the door after installation. I am really happy with the tan color and the tracks that follow the scissor trusses.
 

Attachments

  • 20151014_181642.jpg
    20151014_181642.jpg
    133 KB · Views: 117
  • 20151014_181221.jpg
    20151014_181221.jpg
    141.9 KB · Views: 94
  • 20150928_184943.jpg
    20150928_184943.jpg
    138.8 KB · Views: 86
  • 20150928_184902.jpg
    20150928_184902.jpg
    138.6 KB · Views: 85

customtronic

Well-known member
Joined
Jul 22, 2014
Messages
311
Location
Olympia, WA
Awesome! It looks great. I had a much easier time. I have a barn that I converted over so all I had to do was build some walls, tear down some walls, partial concrete pour, electrical and garage doors.
 
To avoid these ads, REGISTER NOW!

sbd4de3

Well-known member
Joined
Sep 20, 2014
Messages
131
Nice place Livy!! Great use of the most dependable vehicle in the world as a ladder!! :)

Steve
 
OP
L

livy73

Active member
Joined
Oct 8, 2014
Messages
30
Location
Binghamton NY
I buried some sch 40 pvc under ground to the ditches so all the eve's water is off the property and also put in a drain basin so when I pave the driveway I have a nice outside area to wash vehicles. Also got another load of shale to grade in front of the doors. I hope I can pave it first thing in the spring.
 

Attachments

  • 20151025_131408.jpg
    20151025_131408.jpg
    149.7 KB · Views: 80
  • 20151031_132519.jpg
    20151031_132519.jpg
    148 KB · Views: 92
  • 20151031_142723.jpg
    20151031_142723.jpg
    148.9 KB · Views: 89
Last edited:
OP
L

livy73

Active member
Joined
Oct 8, 2014
Messages
30
Location
Binghamton NY
thanks I love my 2015 Silverado. I had a 2013 and bought the 15 on impulse and couldn't be happier. It fills up the bay nice also. I knew that this garage wasn't nearly big enough before I started but I'll make it work and get creative with storage. Guess I should talk about the garage design a but more. I put all the window's up high. No one can see in a 7ft window and they still let plenty of light in. I also custom ordered the entry door and went with a 42" wide unit so I can get my motorcycles in easier. I also went with fiberglass and will paint it to match the overhead doors. I put two vertical windows in it.
 

Attachments

  • 20151011_154912.jpg
    20151011_154912.jpg
    140.6 KB · Views: 57
  • 20151021_193306.jpg
    20151021_193306.jpg
    139.2 KB · Views: 56
OP
L

livy73

Active member
Joined
Oct 8, 2014
Messages
30
Location
Binghamton NY
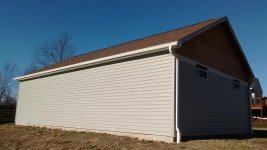
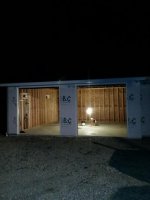
more siding up and insulation arrived today. Just the peaks left finish up and gutters coming soon. Then on to inside work.
 

Attachments

  • 20151119_072751.jpg
    20151119_072751.jpg
    146.2 KB · Views: 68
  • 20151119_175916.jpg
    20151119_175916.jpg
    130.5 KB · Views: 55
OP
L

livy73

Active member
Joined
Oct 8, 2014
Messages
30
Location
Binghamton NY
slow progress, been putting up more siding and soffit but need to get my **** in gear. Gutters are up today and look good. Bring on the rain!
 

Attachments

  • image000001.jpg
    image000001.jpg
    146.4 KB · Views: 59
  • image000000.jpg
    image000000.jpg
    147.4 KB · Views: 52
OP
L

livy73

Active member
Joined
Oct 8, 2014
Messages
30
Location
Binghamton NY
another pic of the front all done before the gutters went on. I plan on painting the man door to match the overhead doors also.
 

Attachments

  • 20151121_155755.jpg
    20151121_155755.jpg
    130.2 KB · Views: 82
OP
L

livy73

Active member
Joined
Oct 8, 2014
Messages
30
Location
Binghamton NY
I sealed the floor with Kingdom Cure. We have been having nice weather that gives us 45 deg nights and 55 deg days in Nov so I got a window to get it sealed. The 5 gallon pail was supposed to cover about 1000sq ft so I figured that was good. You can roll it on or spray it. I used a garden sprayer (that wasn't designed or recommended for this product) and did the two bays in front of the over head doors. It came out nice and looks (is) thick. Just hope its not slippery when wet. I finished the other side with a foam roller. Definitely not as thick as the sprayer (which was clogged and $20 thrown out) but good coverage. I did have to do two coats with the roller.
 

Attachments

  • 20151113_184322.jpg
    20151113_184322.jpg
    136.5 KB · Views: 95
  • 20151116_192133.jpg
    20151116_192133.jpg
    141.9 KB · Views: 93
  • 20151104_204801.jpg
    20151104_204801.jpg
    125.5 KB · Views: 85
OP
L

livy73

Active member
Joined
Oct 8, 2014
Messages
30
Location
Binghamton NY
All the siding is done and its snowing finally in NY. Also started working on my liftmaster 8500 garage doors openers.
 

Attachments

  • 20151213_160123.jpg
    20151213_160123.jpg
    147.8 KB · Views: 50
  • 20151219_124158.jpg
    20151219_124158.jpg
    140.4 KB · Views: 51
  • 20151228_214312.jpg
    20151228_214312.jpg
    129.1 KB · Views: 52
OP
L

livy73

Active member
Joined
Oct 8, 2014
Messages
30
Location
Binghamton NY
Getting some insulation up finally.. need to figure out what to sheet it with next and then start working on the electrical. I want to run it in etm conduit on the exterior of the sheeting for a more industrial look and ease of upgrading.
 

Attachments

  • 20160128_192617.jpg
    20160128_192617.jpg
    131.2 KB · Views: 44
  • 20160126_191419.jpg
    20160126_191419.jpg
    139.5 KB · Views: 42
OP
L

livy73

Active member
Joined
Oct 8, 2014
Messages
30
Location
Binghamton NY
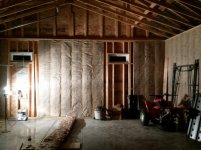
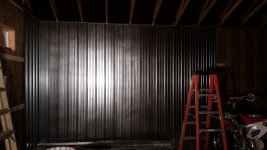
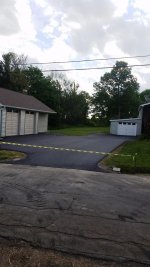
Made a little interior progress this summer. Insulation in the walls and galvanized wall panels going up. The single biggest improvement is the driveway which I had paved. Maybe do a top coat in another year!
 

Attachments

  • 20160607_212544.jpg
    20160607_212544.jpg
    146 KB · Views: 61
  • 20160621_191217.jpg
    20160621_191217.jpg
    148.8 KB · Views: 63
  • 20160621_190742.jpg
    20160621_190742.jpg
    147.8 KB · Views: 62
OP
L

livy73

Active member
Joined
Oct 8, 2014
Messages
30
Location
Binghamton NY
A few recent pictures of the inside when it was closer to being complete. Still lacking a few key tools but they are coming.
 

Attachments

  • 20170521_222901.jpg
    20170521_222901.jpg
    149.4 KB · Views: 108
  • 20170512_235556.jpg
    20170512_235556.jpg
    132.5 KB · Views: 107

fdrunner

Active member
Joined
Apr 2, 2017
Messages
42
Livy 73,

I was wondering what was your outside/inside pitch of your scissor truss? Any particular reason why you didn't do scissor trusses throughout the roof system?
 
OP
L

livy73

Active member
Joined
Oct 8, 2014
Messages
30
Location
Binghamton NY
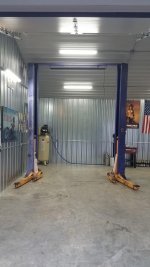
the roof is a 6/12 pitch outside..probably closer to a 4/12 inside. I only did them (scissor trusses) over the car bays because I figured less area to heat and it breaks up the transition from car garage to bike shop. I have around 14'3" to the peak inside the car part size. Just got a 2post lift to install and hoping it all works out good.
 

Attachments

  • 20181026_173114.jpg
    20181026_173114.jpg
    77.3 KB · Views: 59
  • 20181026_173148.jpg
    20181026_173148.jpg
    72.8 KB · Views: 53

fdrunner

Active member
Joined
Apr 2, 2017
Messages
42
Lift looks good in the garage! Have you put your Silverado on your lift yet, with your garage being 25' deep how much working room you have in front of it? Also, how was roofing the 6/12 pitch, able to walk/roof it comfortably?
 
OP
L

livy73

Active member
Joined
Oct 8, 2014
Messages
30
Location
Binghamton NY
No I haven't got the lift wired yet. hopefully this weekend. As far as the roof pitch goes I have no problem walking it and did a similar pitch on the house. First day on the roof my ankles are a little sore from not being used to it but overall no issues with the pitch. Tore the dormers off my daughters bedroom and redid it with the same pitch last fall. Worked out really nice and even with the same sq footage the room feels huge.
 

Attachments

  • 20170829_192521.jpg
    20170829_192521.jpg
    152.5 KB · Views: 6
  • 20180212_174901.jpg
    20180212_174901.jpg
    92.7 KB · Views: 6
To avoid these ads, REGISTER NOW!
Top Bottom