To avoid these ads, REGISTER NOW!

3 car garage in Virginia

Brink38334

Active member
Joined
Nov 1, 2015
Messages
44
Location
Woodford, Virginia
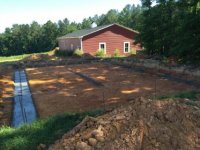
If you stare long enough you can start to see a 45'x32' three car garage. After spending many hours reading LOTS of strings on this forum, I submitted my plans to the city, and after permit approval, started to dig. The location of the garage is cut into the slight rise you see in my second post that will have more pictures. This makes the slab below grade. My first learning point is how big of a pile 140 yards of compacted clay turns into once dug up.
My plan calls for a 28" wide, 8" deep footer with a 4' high stem wall. The thickness of the stem wall will be 8" or 12" depending on if it is a face of the garage that will be bricked and thus require a brick ledge. The slab will be 6" 4000 psi with #6 rebar 12" OC. I am also planning to insulate and run PEX for radiant heat. 2 bays of the garage will have attic trusses, and the bay with the lift will have scissor trusses for more clearance. A plan to build 8' stick walls with 2x6s. These will sit on the 2' of stem wall that extends above the slab height giving me 10' ceilings, and another 10' at the apex from the scissor trusses.
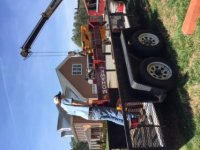
I read a book once that said "begin with the end in mine" so the first pic was my purchase even befor my permits were submitted. I will post more pics up to footer poured as soon as I figure out post more than one thumbnail. Might need to use my laptop instead of my iPad.
 

Attachments

  • image.jpg
    image.jpg
    20.7 KB · Views: 410
To avoid these ads, REGISTER NOW!
OP
B

Brink38334

Active member
Joined
Nov 1, 2015
Messages
44
Location
Woodford, Virginia
Union man, I'm just south of Fredericksburg.
The thumbnail below is the location on the to-be garage.
 

Attachments

  • image.jpg
    image.jpg
    28.3 KB · Views: 228
OP
B

Brink38334

Active member
Joined
Nov 1, 2015
Messages
44
Location
Woodford, Virginia
And after lots of digging and passing my footer inspection, I was ready for the fist load of concrete.
 

Attachments

  • image.jpg
    image.jpg
    28.3 KB · Views: 257

Vette60

Well-known member
Joined
Mar 15, 2006
Messages
448
Location
Glen Allen, VA
Hi There - look forward to following you build...should be fun to see if come along.

N. Quigs - Take it your with the Henrico Fire Department, Station 11? I'm in Glen Allen, off of Mill Road.

R.
 

N.Quigs

Active member
Joined
Jun 8, 2016
Messages
35
Location
Richmond, Virginia
Hi There - look forward to following you build...should be fun to see if come along.

N. Quigs - Take it your with the Henrico Fire Department, Station 11? I'm in Glen Allen, off of Mill Road.

R.

Yup, sure am. I was actually just working at Station 15 right at Mountain and Mill Road the other day. Lots of nice houses around that area.
 
OP
B

Brink38334

Active member
Joined
Nov 1, 2015
Messages
44
Location
Woodford, Virginia
Small progress over the weekend digging the drainage ditches from the footer through the trees to daylight on the back side. The tree roots were a major obstacle and too a lot of hand digging, and some use of my pressure washer to bore under the roots. When finished I was the color of red clay, but I have a big enough hole/ditch to run 2 pipes, one for French drain, and a second for my down spouts for the gutter.
After a few bids for pouring the stem wall close to $10k, I decided I don't want to part with my money that easily so decided to go it alone. It will cost me $1200 to rent forms and all the hardware necessary for the wall, to include shop drawing of how the forms go together, $2K for the concrete, and bribing some friends the day of the pour, but if all goes well, I will spend my long weekend saving $6800.
I'm still struggling posting pics on here. I started a photo album with bigger pictures than the thumbnail, but have not figured out how to link the album to this string yet.
 
OP
B

Brink38334

Active member
Joined
Nov 1, 2015
Messages
44
Location
Woodford, Virginia
Over the 4th I made the most of a mostly rainy weekend. The one clear day I dug a ditch for a french drain to solve address a drainage issue I have with my pole barn Below are some pics of the trench...having dug a few ditches by hand I was glad I have a backhoe for my tractor. Got the ditches dug and Geotextile fabric played in and the pipes set in place to check drainage angle. The gravel company comes back to work tomorrow after the holiday so hopefully I can get it filled soon.
View media item 61758

View media item 61760

View media item 61761
Also went to pick up my forms for the stem wall on Tuesday. This will be a busy weekend this weekend seeing how far I can get. Between now and Friday I will work on drying out the red clay swamp that is sitting on top of my footer.
View media item 61763
 
OP
B

Brink38334

Active member
Joined
Nov 1, 2015
Messages
44
Location
Woodford, Virginia
Just learned the secret to getting full size pics for me....Create an album and use my laptop.

Below are full size pics of the progress so far. I will spare the pics of the footer covered in mud and water since it is depressing. Below is a chronological sequence of where I am at so far.

Had to start with my final goal of a nice lift, so bought the lift first:View media item 61554
Staking out the location
View media item 61555
The start of the dig. Didn't take me long to realize I need bigger equipment to dig and move this clay
View media item 61556
Dig complete and rebar laid in, ready for inspection
View media item 61559
Grade stakes installed and marked..
View media item 61558
Glad I learned about a Ufer Ground before it was too late. Installed and painted green for inspector.
View media item 61560
After the pour:
View media item 61561
From a different angle after a little time to cure before the first rain.
View media item 61563

More picture after I make some more progress this weekend.
 
OP
B

Brink38334

Active member
Joined
Nov 1, 2015
Messages
44
Location
Woodford, Virginia
OP
B

Brink38334

Active member
Joined
Nov 1, 2015
Messages
44
Location
Woodford, Virginia
It was far from an easy weekend, but the forms for the stem wall are set. I will install the brick ledge cut outs on Monday, inspection Wednesday, pour the stem wall Thursday, and then spend next weekend taking down the forms and loading them up to be returned.

Below is the end of the day today.

An empty trailer:
View media item 61868
And the forms all set:
View media item 61869
 

Bib Overalls

Well-known member
Joined
Dec 4, 2006
Messages
3,318
Location
Jonesboro, Arkansas
I have a hard time finding $10K in your stem walls. Sweat equity adds up fast.

Unless you are an experienced cement finisher I suggest you hire that part out. One finisher and a couple of helpers can get the job done before noon.
 
OP
B

Brink38334

Active member
Joined
Nov 1, 2015
Messages
44
Location
Woodford, Virginia
Bib, couldn't agree more, I have a crew of three coming Thursday morning for the pour. I didn't think it was worth $10k either. I think when it all said and done I will have about $4k into rentals, concrete, and some lumber. I'm looking forward to the framing phase.
 
OP
B

Brink38334

Active member
Joined
Nov 1, 2015
Messages
44
Location
Woodford, Virginia
Another Hot but productive day in Virginia. The forms are off and back on the trailer to go back to the rental company, the outside of the stem wall is sealed, and I got a start on plumbing the drainage. If all goes well, tomorrow I will finishing running my drain lines to daylight, gravel and geotextile fabric places, and start the backfill. I am running 2 drainage lines, one with holes around the footer, and a second that is solid for my gutters. If you are thinking the top of the stem wall for each garage opening and the man door look rough, you are correct. After pouring to the top of the form I was talking to the concrete guy I will probably have do the pour for the slab and he said he would want to pour the openings the same time as the slab so he can taper down near the door so rainwater stays out, and to make it look smooth. What he said made sense so we dug out about 4" of concrete. Below are a few pics of todays progress.


View media item 61965
Brick ledge face:

View media item 61966
Forms loaded back up and ready to be returned:
View media item 61968
and the front face of the garage:
View media item 61967
 

Spdstr280Z

Well-known member
Joined
Apr 29, 2015
Messages
158
Location
Georgia
If you stare long enough you can start to see a 45'x32' three car garage.

In a world where most people, builders and owners alike, exaggerate the size of garages, you just called over 1,400 square feet "3 car". Your three car garage is bigger than my first house... Congrats, and great job on doing the forms yourself and saving some money !

Jason
 
To avoid these ads, REGISTER NOW!
OP
B

Brink38334

Active member
Joined
Nov 1, 2015
Messages
44
Location
Woodford, Virginia
Thanks Jason.

Other than finishing up the drainage plan, backfill , insulating the inside of the stem wall, and filling the first 6 of 12 inches of compacted gravel under the slab, I am on hold until my trusses arrive. In the mean time I will keep reading all the great posts about radiant heat.
 
OP
B

Brink38334

Active member
Joined
Nov 1, 2015
Messages
44
Location
Woodford, Virginia
Finally back at it after a few weeks working on other things. Earlier this week I had all my lumber and trusses delivered. I had high hopes for a banner weekend until Saturday morning arrived and all three of the helpers I had lined up didn't make it, leaving me to be a one man show for the weekend. Since my last post I insulated the inside stemware up to floor level, and moved in the first load of gravel. Here is what it looked like at the start of the weekend.
View media item 62889
The bucket of my tractor was a very useful tool, this time serving as mobil scaffolding.

View media item 62890
By Sunday night I had the framing complete with one sheet of bracing attached.
View media item 62892
Hopefully next weekend it will be a little cooler than 98 deg, and I will be able to get a few hands to help out so I can set these:
View media item 62891
 
OP
B

Brink38334

Active member
Joined
Nov 1, 2015
Messages
44
Location
Woodford, Virginia
Things kinda stalled for a couple weeks with the challenge of setting trusses. Not something one can do alone. Fortunately I found a few hands to help so I'm back at it again. Below was a big day, setting 26 trusses in a day, 3 guys, no crane.
View media item 63687View media item 63688View media item 63689
This weekend was spent shoring up everything and starting to frame in the 3 gable dormers.
View media item 63690
ran out of light before I could take a picture tonight so will post some updates tomorrow. If all goes well I will start to shingle soon.
 

Bib Overalls

Well-known member
Joined
Dec 4, 2006
Messages
3,318
Location
Jonesboro, Arkansas
Impressive, particularly for someone who has a regular job. Don't know what you do for a living and don't care. I just hope that by Monday morning a weekend's worth of laboring hard on something different has you mentally ready to mine salt again.
 
OP
B

Brink38334

Active member
Joined
Nov 1, 2015
Messages
44
Location
Woodford, Virginia
a couple weeks ago I had a good productive weekend, and just ahead of the heavy week long rain in Virginia. It was a good feeling to get a roof on.
View media item 64110
Last weekend was spent getting ready for several inspections, and prepping for the slab pour. first was to finish bringing the gravel to grade and compacting, or in my case, fill, compact, fill compact, check grade, fill compact.......It becomes a battle of patience vs perfection.
View media item 64335View media item 64336
Next is the vapor barrier and insulation:
View media item 64337
Then stringing lots of rebar and laying in the PEX
View media item 64338
After all that work to keep my slab dry I was not excited about driving in grade stakes that would pierce the insulation and vapor barrier so to mark grade for the slab, I hung racket balls on braided fishing line so the bottom of the ball will mark the top of the slab. Don't know how well that will work but I will find out tomorrow.
View media item 64339
The last couple steps to be ready for the pour was a pressure test of the PEX tubing and manifold, and laying out the lift location.
View media item 64340
I have read several posts on GJ on positioning lifts in the ideal spot and help from the manufacturer. I can say I am very pleased with Mohawk. When I told the sales rep I bought the lift from that I was finally ready to pour he volunteered to stop by and check things out. So tonight after hours he came by with lift templates and we verified lift location relative to rebar and PEX, as well as ensured the lift position would accomodate any of my vehicle and still have room to close the garage door and work in front of the vehicle.

Tomorrow is the slab pour. 24 yards of 4000 psi concrete! I will post some pictures over the weekend.
 

marty_p

Well-known member
Joined
Aug 1, 2008
Messages
1,411
Location
SE LoUiSiAna
Can't wait to see your progress over the weekend. And you may want to drink an extra pot of coffee this morning with this big day ahead of you! :thumbup:
 

Bib Overalls

Well-known member
Joined
Dec 4, 2006
Messages
3,318
Location
Jonesboro, Arkansas
Everything I see is first class. 2 by 6 studs and rebar lined up like a company of Marines on the parade ground. I can't imagine anything less in your garage.
 
OP
B

Brink38334

Active member
Joined
Nov 1, 2015
Messages
44
Location
Woodford, Virginia
Thanks all, the rebar size and spacing is based on the requirement for the Mohawk System I lift. The lift requires #6 rebar 12" OC and 5 1/2" of 4000psi concrete. I added a little safety factor and went with 6" of concrete.

The pour went pretty well:
View media item 64349View media item 64350
and I think the hanging balls worked out well to set the grade. If I used grade stakes they would get buried and would not be of much value if the concrete was too thick.
View media item 64351
We finished with the power trowel after dark on Friday night. This morning I got up early, soaked the slab and covered it with a layer of plastic. And it has been raining here all day so not very picturesque. More pics once the sun comes out.
 
OP
B

Brink38334

Active member
Joined
Nov 1, 2015
Messages
44
Location
Woodford, Virginia
Its been a pretty good weekend all things considered. With the pour complete Friday night things got windy and rainy, not as bad as those along the coast, but enough to keep me out of the rain. The next couple pics are my slab going through curing. I'm sure there are lots of blogs on this on the site, but I have not seen it mentioned much with the reading I have done so far. The below pic is the morning after the pour. I spent about an hour saturating the slab with water, and then covered it with plastic. My goal is to keep it as saturated as I can for 28 days following the pour. Some of the reading I did talks about the strength of concrete that cures submerged vs covered in wet burlap vs covered in plastic. All are significantly stronger than concrete that simply air dries.
View media item 64411
While my concrete cures, I will be spending the next 26 days stringing electrical, installing windows and doors.
 
OP
B

Brink38334

Active member
Joined
Nov 1, 2015
Messages
44
Location
Woodford, Virginia
The past 4 weeks have been busy although not tremendous change in appearance. While the concrete cured I was busy stringing wire. I went through about 750 feet of 12/2 romax, 120 feet of 30amp wire and 100ft of 50 amp wire. I spent some time looking in the lighting posts, and after reading a lot of plans a posts by 'Planktronics" I refined my plan for 34 two bulb LED fixtures. they are on order and should be in at the end of the month. I've also stuffed about 1/2 the insulation and hung sheet rock on the surfaces where the garage doors mount. My brick masons have started the exterior brick. I had power hooked up today, the garage doors should go in during the next and if all goes well I will get the epoxy down on the floor this coming weekend. So hopefuly my pictures in about a week will show significant progress. Below are some pics of where I am now.

Stinging wire:View media item 65033
Stuffing insulation:
View media item 65034
Sheetrock that goes under the garage door:
View media item 65035
And the start of the brick work:
View media item 65036
 
OP
B

Brink38334

Active member
Joined
Nov 1, 2015
Messages
44
Location
Woodford, Virginia
At this point my efforts are focused on getting the garage functional for the lowest cost possible. Then slow down the money burn as I finish things up. Hopefully over the next few weeks I will have all the basics functioning. This weekend was spent installing bunch of insulation, hanging some drywall, scrubbing and acid washing the floor, and putting down the primer coat of Armorpoxy while the brick mason kept plugging away. Below are the latest pics:

Slab cleaned, acid washed, and power sprayed:View media item 65142
After a day of drying and the primer coat on the slab:
View media item 65143
And the face of the garage with bricking complete:
View media item 65144
 
To avoid these ads, REGISTER NOW!
Top Bottom