Mike.VA
Well-known member
Glen,
Great build.
Congrats on your progress.
Mike.VA
Great build.
Congrats on your progress.
Mike.VA


As I mentioned some time ago, we decided to dress up the rear blank wall of the garage. We can't see it since it's only a few feet from the property line but we thought it unfair for the neighbors to have to look at that ugly wall.
So, I installed fake windows and shutters by just screwing them to the existing vinyl siding. My wife applied reflective material to the inside of the glass to prevent a hot house effect with possible melting of the siding.
While the windows are not real, the neighbors are pleased with the look.
Glen
trashmanssd,
As a suggestion, if you need more than the 30 ft hose that comes with this unit, try to buy the 50 ft hose at the same time you buy the vac. I added another 20 ft to mine but it was a slightly larger size and I had difficulty finding the right size connectors to join the hoses and to be able to use the accessories that came with the vac.
Glen
Hi Glen, great build and thanks for sharing!
Quick question - what's the first floor height and are you happy with the lighting setup?
Joe,
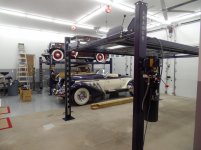
We used 3/4" waferboard T&G 4x8 flooring for the attic. With our trusses on 24" centers and the 3/4 floor, there is no flex or bounce at all even when I jump on it. If the center chord of your trusses are engineered properly, I would see no reason to spend the additional money to install trusses on 16" centers.
Glen
")