To avoid these ads, REGISTER NOW!

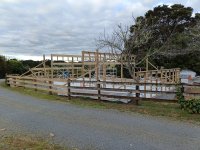
4 Barrel barn build.

OP
W

Woodboxkiwi

Well-known member
Joined
Jun 10, 2026
Messages
47
Hey, don't know if you are planning to paint the floors but both me and a friend have done epoxy floors using Epotread from Regis coatings in Christchurch. They are super easy to deal with and will sell you everything (paint, rollers, acid, paint trays etc) you need to get the job done for a pretty reasonable prices. It all comes palleted up and their shipping up to Taupo wasn't too expensive.
We are using resene aquapoxy. I have used it in the past and had great success with it. The product stands up to a beating and makes cleaning up a lot easier. The weather looks good tomorrow so we hope to coat the rest with a first cover then.
 
To avoid these ads, REGISTER NOW!
OP
W

Woodboxkiwi

Well-known member
Joined
Jun 10, 2026
Messages
47
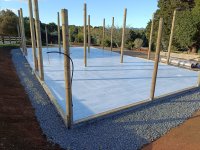
Today was our coldest start for the year, frost on the ground but no water on the floor. So we just had to wait for the ground temp to get to 15°C before we could get more epoxy down.
IMG20260729155230.jpg
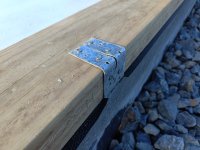
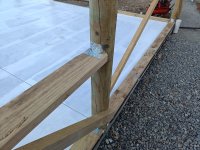
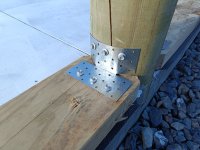
While we waited, I got the lumberlok brackets all screwed on and Paula nailed off the bottom plate brackets.
IMG20260729155235.jpg
Pretty much rinse and repeat all the way around.
IMG20260729155304.jpg
As soon as the temperature hit 15°C we mixed another batch of epoxy and finished the first coat all over. The next coat will have a light gray tint rather than the blinding white!
I better get the lawns finished before it gets dark.
 
OP
W

Woodboxkiwi

Well-known member
Joined
Jun 10, 2026
Messages
47
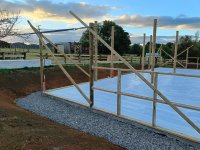
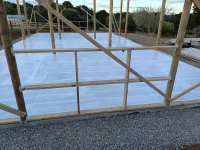
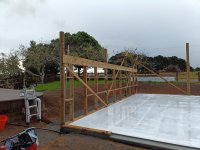
I braced the poles to get the 2 outside walls plumb before starting to frame out the 6x2 walls.IMG20260730171202.jpg
It was certainly nice to get the chopsaw out and start cutting framing timber.
IMG20260730171212.jpg
Very satisfying to get the brackets on finally!IMG20260730171230.jpg
 
OP
W

Woodboxkiwi

Well-known member
Joined
Jun 10, 2026
Messages
47
A couple of really productive days on the end wall framing. We got the 300mm x 50mm end beams up on the poles and bolted today. Lots of brackets and screws.
IMG20260801171503.jpg
I realized a little while back that the beam scarf joint was not going to land on a pole, so I have redesigned the joint and will use the recommended nail plates and will bolt a doubling board on the back side.IMG20260801171517.jpg
Tomorrow we are going on a rod run with our club and coming back here for a feed and inspection.
 

jollygreengiant

Well-known member
Joined
Nov 10, 2013
Messages
2,382
Location
Ontario, Canada
Very cool build, I'll be following this one.

What's your plan for the exterior finish? Metal, wood?

It's interesting that you are using round poles. I've never seen that in modern builds.
 
OP
W

Woodboxkiwi

Well-known member
Joined
Jun 10, 2026
Messages
47
Very cool build, I'll be following this one.

What's your plan for the exterior finish? Metal, wood?

It's interesting that you are using round poles. I've never seen that in modern builds.
We are cladding in corrugated steel to match the existing house.
The round poles are machined to be parallel. They are more expensive but you don't have to deal with twist like a square timber.
Thanks for following.
 

Stuart in MN

Well-known member
Joined
Sep 8, 2005
Messages
23,377
Location
Minneapolis
We are cladding in corrugated steel to match the existing house.
The round poles are machined to be parallel. They are more expensive but you don't have to deal with twist like a square timber.
Thanks for following.
I never thought about that - a square pole can often have a twist so the faces aren't flat, but if there's a twist in a round pole it won't matter, it's still round.
 
OP
W

Woodboxkiwi

Well-known member
Joined
Jun 10, 2026
Messages
47
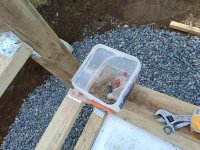
Another day, another wall framed up. Also added the required strap steel bracing elements to the centre section of both walls.
IMG20260805165738.jpg
Tomorrow I will remove the temporary timber braces, trim the poles down to their final height, then make a start on the 8x2 top plate on both end walls......
IMG20260805165742.jpg
.....or I might do something completely different, who knows. We will see what the weather presents us. There is a ❄️ front moving up the country.
 
OP
W

Woodboxkiwi

Well-known member
Joined
Jun 10, 2026
Messages
47
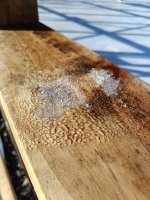
As predicted, today started out a bit chilly with a coating of frost on everything. This is very unusual around here. We think we are hard done by if we get 3 or 4 frosts in a year!IMG20260806085119.jpg

So, as promised, I trimmed the tops off the poles and fitted the top plate on the North wall.
While I was there and nailing off a few nail plates I figured it was a good time to finish the scarf joint with a backing board and a handful of bolts to tie it all together.
IMG20260806133618.jpg
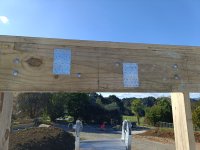
With the top plate on and nail plates on.

IMG20260806142309.jpg
8x2 doubler bolted on the back side.

IMG20260806142329.jpg
The front (inside) side with doubler hidden and only bolts visible.

Happy with todays progress, a lovely warm day in the sun. More of the same tomorrow, only on the South wall, where I have just trimmed the poles ready for the top plate in the morning.
 
OP
W

Woodboxkiwi

Well-known member
Joined
Jun 10, 2026
Messages
47
South wall top plate on and nail plates etc all done today.IMG20260807170854.jpg
Another frosty start to the day, but a trip into town first thing meant that I missed the worst of it.
IMG20260807170918.jpg
Tomorrow I will start on the West wall, the longest and highest with 2 sections that are bracing elements.
IMG20260807171630.jpg
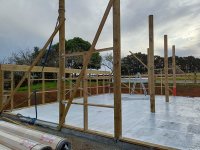
So getting the poles in a nice plumb position is probably the best start.
 

Stuart in MN

Well-known member
Joined
Sep 8, 2005
Messages
23,377
Location
Minneapolis
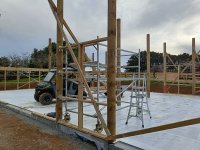
Seeing the UTV parked there does help with the sense of scale - without something as a reference it was a little difficult to figure out the spaces inside the building.
 
To avoid these ads, REGISTER NOW!
OP
W

Woodboxkiwi

Well-known member
Joined
Jun 10, 2026
Messages
47
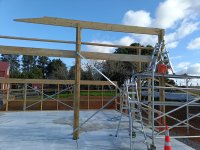
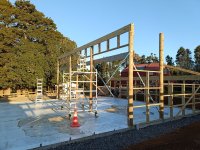
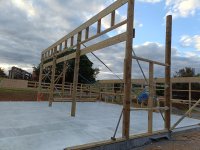
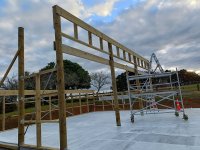
The West wall work has ceased for the day. Those of you with the sharp eye for detail will notice the girt spacing is 600mm on one section from the corner. This anomaly is due to the span of these girts being greater than all the others. I must remember this fact when it comes time to fasten the cladding steel!
IMG20260808164233.jpg
More of the same, maybe tomorrow, maybe Monday.
IMG20260808164245.jpg
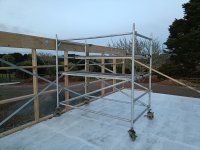
I asked on the local community FB page if anyone had a mobile scaffold platform that I could borrow for a month or so to make it a bit safer to do the above ground beams and framing.....turns out the neighbors two doors up have one! Ask and ye shall be loaned! Seek and ye will probably spend the day wondering what it was you were seeking!
 
OP
W

Woodboxkiwi

Well-known member
Joined
Jun 10, 2026
Messages
47
Maybe I’m mistaken but don’t you have to wait before coating the concrete spot can cure?
We poured the concrete on the 13th then first coat of epoxy on the 28th, that's 2 full weeks to cure before we sealed it.
 
OP
W

Woodboxkiwi

Well-known member
Joined
Jun 10, 2026
Messages
47
Another couple of small wall sections sorted today.IMG20260811163819.jpg
These sections are finished with double diagonal strap bracing.
IMG20260811163834.jpg
Plenty of temporary bracing to get the poles plumb before I filled in the gaps with 6x2s.
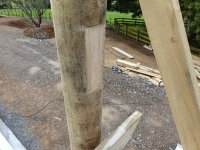
This afternoon I marked up on the poles the spots where I will cut rebates for the next horizontal beams to seat and fasten for the rafters to land on.
 
OP
W

Woodboxkiwi

Well-known member
Joined
Jun 10, 2026
Messages
47
Yesterday was abandoned due to the weather. Today made up for it though. I started out cutting a rebate in each pole (8 in all) ready to receive the beams.
IMG20260813132357.jpg
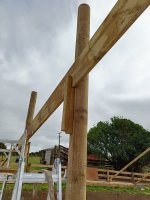
One at a time I marked and cut each beam before lifting into position 3 metres up the pole. One end at at a time, walking them up the pole in small steps.IMG20260813132303.jpg
Utilizing a 'dog' screwed to the pole to hold one end while I position the other and bang in a screw to hold it until the bolts are in.IMG20260813111218.jpg
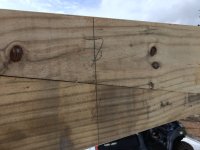
Each beam has a scarf joint in the middle, on which I marked a center line to get the length spot on.
IMG20260813133335.jpg
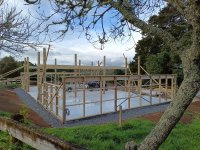
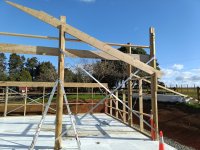
In all I managed to get 4 beams bolted onto poles today.IMG20260813163300.jpg
So that gives me the outer and inner end of the lower sections of the roof.
 
OP
W

Woodboxkiwi

Well-known member
Joined
Jun 10, 2026
Messages
47
Miserable rainy days recently, but it is the middle of winter here! This morning I attached the strap bracing on a few more poles where the engineer requires it.
IMG20260815152636.jpg
These 2 bays have strapping in between poles in the shop floor area, but this won't be a problem as I will be putting full height pallet racking along both of these areas.
IMG20260815152723.jpg
Straps attached both ends with a bunch of 65mm 12g screws.
IMG20260815152650.jpg
Any additional loading can be added with these tensioners.
IMG20260815152702.jpg
I am over using the cut off saw sitting on a couple of boards on the ground, so I whipped up a quick and dirty bench and supports. This will be nice while I cut the ends of all of the rafters with the angles etc.
 
OP
W

Woodboxkiwi

Well-known member
Joined
Jun 10, 2026
Messages
47
Back on the job again today. The theme for the day was "working at heights".
First off was marking and cutting the rebates for the top beam. Once the four rebates were cut I marked out and cut the first of the top beams on the new bench I showed you all in the last post.
IMG20260818152655.jpg
Working on my own can be very rewarding, but at times challenging also.
To get a 6 metre long 300 x 50mm beam 4 metres up the side of a couple of posts is fun. Step one, screw a couple of dogs onto the posts and place end up.
IMG20260818152759.jpg
Step 2, lift other end onto the ladder....
IMG20260818153313.jpg
Step 3, climb ladder and lift end to top dog....
IMG20260818154206.jpg
Step 4, move work platform into position and lift end higher......IMG20260818154443.jpg
Step 5, locate, drill holes and insert bolts.....done.
3 more to go!
Don't panic, I strapped the top ladder to the platform and it was quite steady.
 
To avoid these ads, REGISTER NOW!
Top Bottom