To avoid these ads, REGISTER NOW!

40 Ton Hydraulic Press Upgrade

gregthor

Well-known member
Joined
Feb 24, 2010
Messages
267
Location
MICHIGAN
Hi Guys and Gals,
It’s time to redo my 40 ton hydraulic press. I bought this press a few years ago at an auction. I bought it more as a “DIY kit” than a complete model. The description at the auction said Meyers Hydraulic press, unknown size” I looked at it and I saw some nice features. First, I wanted a 30 or 40 ton and it looked like The C channels for the bed were too large to be a 20 ton so I guessed a 30 or 40 ton. Second, it had counter weights for raising the bed. Lastly, the cylinder can slide sideways, and it looked like a good starting point to make a nice press. The press has a brass tag that reads P40. I contacted Meyers Hydraulics, they are still in business but no longer make presses like this. They confirmed P40 means it’s a 40 ton press. I was happy about that.
View media item 47639
View media item 47648
View media item 47647
As a side note, if you are shopping and find a press without any marking a good way to estimate tons is look at the bed section. As you can see these are 8 inches tall. Compare that to a know 20 ton press and you will see what I mean.


The press actually worked but leaked like a sieve. So I bought a rebuilt Enerpac pump and some new hydraulic lines. That fixed the leaks. The old pump was from a tilt cab truck. I also threw away the old counterweight cables and cut off the home made bracket to hold the old pump. The cables were shot for the counterweight system so now it takes two men and a boy to raise or lower the bed. In this condition I was able to limp along with the press for a few years. But now it is time to re do the press!!!

The old pump

View media item 47641
I have few plans for the press, One idea is to build a platform for the pump so it has a home and not sitting on the floor.

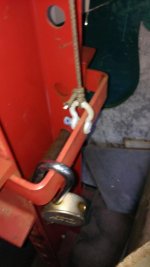
Another goal is to fix this safety issue. The cylinder can move sideways if you loosen this nut. But the nut only engages about 3 threads. Yikes!! What happens if someone loosens it 4 turns?? I think it’s gonna hurt if that cylinder falls.

View media item 47640
I have a small shop so I will be designing and mounting wheels on it so I can move it.

First order of business is the frame, after disassembly, I inspected the frame by looking at each weld for cracks, they all looked good. I checked the straightness of the uprights. They bow out a little but I can live with it. I then deburred , sanded and prepped for painting. The bottom was a little rusty so I wire brushed and coated the bottom with rust converter.
View media item 47649
Top was straight
View media item 47644
Right side had .06in bow
View media item 47645
Left side had .09 bow.
View media item 47646
These inspection took place under the watchfull eye of the Chief inspector Katie as you can see.

Next came the platform for the pump.

I designed a platform for the pump. My son then made these on his free time at the fab shop he works at part time. I fired up the welder, got a few levels& C clamps and I went to town.

View media item 47653
View media item 47654
View media item 47655
Note how I skillfully took pictures that don't show my welds http://www.garagejournal.com/forum/images/smilies/evil.gif

Now the pump has a nice home.
View media item 47656
Well thats all for now, I will post more as progress is made.

Greg
 
To avoid these ads, REGISTER NOW!

454ragtop

Well-known member
Joined
Mar 24, 2008
Messages
5,011
Location
Carver, MA
Might consider a manual winch to raise and lower the table, added one to my 20T, works excellent. Unlike the counterweight, it doesn't care what's on table when you raise or lower it.
HTH, Jim
 

Ed ke6bnl

Well-known member
Joined
Aug 1, 2005
Messages
495
Location
Agua Dulce, Calif.
MY boy brought over some big I beam and want to make a 30 ton made a wide 12 ton many years ago and will give that one to my boy and want a wide heavy one in a fixed location for my house has to be outside though but the other one has been outside for about 15 years and still going strong. lets see some pictures of the table lift mechanism.
 

454ragtop

Well-known member
Joined
Mar 24, 2008
Messages
5,011
Location
Carver, MA
Here's some pics for you guys. Basically a manual boat winch, found at a swap meet for $8., made an extension to get the handle past the frame, and cut a small slot on the top of the uprights and welded on a bracket for the garage door cable pulleys. Pretty simple really, thought about fabbing a winch since it didn't need to be that big, but when I found one was easier just to bolt it on. Other pics show the knob I made on the lathe for the release valve on the jack and an adjustable ram made from a broken bottle jack. Last pic shows what I was up against to get out to the shipping container where my press is located.
HTH, Jim
 

Attachments

  • WP_20150128_004.jpg
    WP_20150128_004.jpg
    104 KB · Views: 426
  • WP_20150128_005.jpg
    WP_20150128_005.jpg
    81.2 KB · Views: 401
  • WP_20150128_006.jpg
    WP_20150128_006.jpg
    82.6 KB · Views: 395
  • WP_20150128_007.jpg
    WP_20150128_007.jpg
    102 KB · Views: 388
  • WP_20150128_008.jpg
    WP_20150128_008.jpg
    113.4 KB · Views: 390
  • WP_20150128_009.jpg
    WP_20150128_009.jpg
    138.5 KB · Views: 368
  • WP_20150128_011.jpg
    WP_20150128_011.jpg
    149.4 KB · Views: 362

Ed ke6bnl

Well-known member
Joined
Aug 1, 2005
Messages
495
Location
Agua Dulce, Calif.
Here's some pics for you guys. Basically a manual boat winch, found at a swap meet for $8., made an extension to get the handle past the frame, and cut a small slot on the top of the uprights and welded on a bracket for the garage door cable pulleys. Pretty simple really, thought about fabbing a winch since it didn't need to be that big, but when I found one was easier just to bolt it on. Other pics show the knob I made on the lathe for the release valve on the jack and an adjustable ram made from a broken bottle jack. Last pic shows what I was up against to get out to the shipping container where my press is located.
HTH, Jim

OK I see you mounted the winch to one side and goes around top to the other side. That is different then I had in mind but I like it
 
OP
G

gregthor

Well-known member
Joined
Feb 24, 2010
Messages
267
Location
MICHIGAN
454- nice set up

I like the winch idea. My boat trailer does need a new winch….( not really but that’s my story)

But I think I would use the winch AND the counter weights. That way when my clumsy arthritic fingers don’t behave and I get the winch in neutral, the only weight to fall will be the work piece. Plus I already have the counterweights, they came with the press. Each counterweight weighs 29 lbs and each channel weighs 29lbs. So it is balanced with no work piece on it. Then with the counterweights the winch is only dealing with the weight of the work piece.
At first I will use just the counterweights than add the winch later. Any reason why the cables with just counterweights would have to cross side to side? I can see why with a winch but without a winch does it offer any benefit having the cable cross over to the other side?
 
OP
G

gregthor

Well-known member
Joined
Feb 24, 2010
Messages
267
Location
MICHIGAN
Dear GJ friends,

I was out to the barn this weekend and worked on the counterweight system for my 40 ton press.
First I made some brackets for holding the pulley out of some ½ diameter rod. I heated them and bent to 90deg.

View media item 47635
Then I drilled for a cotter pin.
View media item 47638
The ½ in rods will hold the pulleys.
View media item 47636
Next was a trip to Lowes for some cable hardware.
View media item 47896
Here are the counterweights, they are 4 inch diameter and weigh 29 pounds each. One ready for paint, one still needs cleaning.
View media item 47895
Next came a little fixturing and tack welding.
View media item 47897
Then came welding. I think the press was a little thick for my Millermatic 135. I should have pre-heated it with a torch first prior to welding.
View media item 47898
I added a tack weld to keep the pulley from going in too far.
View media item 47899
After a little pre fitting, then crimping the cables the counterweight sits here when the bed is all the way up.
View media item 47900
The excess wire will be trimmed and after painting the S hook will be crimped closed.
View media item 47901
I had to modify the right side. I didn’t design enough clearance for the counterweight with my new pump platform. Oops my bad!!
View media item 47903
Results – The counterweight system works perfect. The counterweight system sure isn’t pretty when you compare it to the hanging weights of an Austrian made Vienna clock but hey the clock won’t push 40 ton of force either!!
View media item 47902
That's it for now, Greg
 

ez-duzit

Well-known member
Joined
Jun 24, 2013
Messages
5,101
Location
Marina del Rey
Handling the weight of some of the related components can be challenging. In case you might become interested in bending metal with your press, perhaps you've seen the Swag metal break?

attachment.php


Toward the completion of a DIY version, I have collected a 4-way female die and punch to fit the size of my Carolina 50-ton press. Just handling that 4-way die is a huge strain for 1 person. IIRC it's 3-1/2"+ square. I was thinking of installing a winch to handle the weight of the break.

brake-dies_zpsc3a199bd.jpg
 

404

Well-known member
Joined
Aug 23, 2014
Messages
3,463
Location
Mass
Here's some pics for you guys. Basically a manual boat winch, found at a swap meet for $8., made an extension to get the handle past the frame, and cut a small slot on the top of the uprights and welded on a bracket for the garage door cable pulleys. Pretty simple really, thought about fabbing a winch since it didn't need to be that big, but when I found one was easier just to bolt it on. Other pics show the knob I made on the lathe for the release valve on the jack and an adjustable ram made from a broken bottle jack. Last pic shows what I was up against to get out to the shipping container where my press is located.
HTH, Jim

Took me a while to figure out, that winch is genius. Your design guarantees equal force on both ends. :thumbup:
 
OP
G

gregthor

Well-known member
Joined
Feb 24, 2010
Messages
267
Location
MICHIGAN
Hi Everyone,

ez duzit - yes the swag brake is on my radar!!!

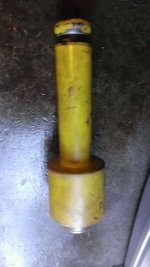
I got back to the press and worked in fixing the cylinder sliding bolt that was too short. This is the bolt on top of the cylinder.
View media item 47651
A quick cut with the 4 ½ in angle grinder and the short bolt was gone.
View media item 47652
The new bolt with the head cut off and the olive drab green plating belt sanded off and 2 gussets. I added the gussets since the weld will be smaller than original weld because the original weld went all around the bolt head and my weld will only be around the shank diameter.
View media item 47664
A little bit of measurement to find the center.
View media item 47665
And then a little marking with a sharpie.
View media item 47666
A trial fit up
View media item 47667
The tack welds.
View media item 48093
Because I keep my barn at 40 at night and 60 when I am there I decided to pre heat prior to welding.
View media item 48094
All welded and ready to try out.
View media item 48095

That’s better, enough length for a hardened washer and several threads above the nut. But it didn’t slide nice…
View media item 48096
So I tore it apart and found this weld from the factory that had run off the end of the part and caused point loading and interferance making it difficult to slide. I filed it off and now it slides great.
View media item 48097

Next phase is to put wheels on it.

Greg
 

zcbauer89

Well-known member
Joined
Dec 27, 2011
Messages
598
Location
NW OH
This is an excellent project. I'm really enjoying the progress on this. Good work!
 
To avoid these ads, REGISTER NOW!

marinusdees

Well-known member
Joined
Oct 30, 2012
Messages
1,325
Location
Edgewood, Washington
I just used a counterweight to keep the slack out of the cable, not to counterbalance the weight of the table. Given the elegance of the winch set-up shown by the pictures, I'm glad i couldn't post pictures of my much more primitive set up. but, it works for me. I'm not earning a living with this thing, I'm just damn near 80 years old and need all the help I can get.
 

Beefbuzz

Well-known member
Joined
Feb 17, 2013
Messages
72
Location
Idaho
Here's some pics for you guys. Basically a manual boat winch, found at a swap meet for $8., made an extension to get the handle past the frame, and cut a small slot on the top of the uprights and welded on a bracket for the garage door cable pulleys. Pretty simple really, thought about fabbing a winch since it didn't need to be that big, but when I found one was easier just to bolt it on. Other pics show the knob I made on the lathe for the release valve on the jack and an adjustable ram made from a broken bottle jack. Last pic shows what I was up against to get out to the shipping container where my press is located.
HTH, Jim

I am stealing your winch design, simple and effective, I love it.
:rocker:
 

sz0k30

Well-known member
Joined
Feb 12, 2014
Messages
886
Location
SE Michigan
Lots of shots of small localized areas. It sure would be nice to see a few photos of the entire press to get an overall picture.
 

Outlawmws

Well-known member
Joined
Aug 9, 2011
Messages
39,296
Location
The Badlands
454 and gregthor, I like the winch and counterweight ideas! I did put a small winch on the press I built 30 years ago, but its direct drive and I put it on top with the cable "centered" and it struggles a bit. the counterweights would solve that easily!

I would need to replace my pulleys with doubles (which I already have "in stock"), and, Hmm... I'd want the weights inside my columns, (I used 5X5 box tubing 1/4" wall... but the pins to locate the table go through there.. Hmm keep the weights flat against the outside wall and thin... and Lead... I think that would work!)

Gregthor, what is the depth of your channel table, and the span between the supports? I'm curious how that compares to mine.
 

All

Well-known member
Joined
Mar 28, 2013
Messages
607
Subscribed. I need to refurbish my 50T Carolina press, and this thread is producing some great ideas and contributions for inspiration.
 

454ragtop

Well-known member
Joined
Mar 24, 2008
Messages
5,011
Location
Carver, MA
On my press, the winch has so much mechanical advantage no counter weight is needed. Real easy to move the table, even with a heavy casting and tooling on it.
HTH, Jim
 
OP
G

gregthor

Well-known member
Joined
Feb 24, 2010
Messages
267
Location
MICHIGAN
Hi Guys,

Well this project ground to a scretching halt when I had to shift projects to a 4 bedroom house I bought to flip (or flop). The tenants moved out voluntarily and I now am spending every free moment on the house. It was built in 1893 so it needs some special attention. As soon as I finish it I will finish the press. But here are some more pictures and dimensions of the press.

Take care,
Greg


Here is a overall shot of the press
View media item 57102
The bed is just over 24inch wide.
View media item 57103
The bed is about 10 3/4 deep.
View media item 57104
The support pins at 1 inch dia.
View media item 57105
The bed has 8 inch tall C-Channel
View media item 57106
The press is almost 66 inch tall
View media item 57107
The opening between channels in the bed is just over 6 in
View media item 57108
Side angle shot
View media item 57109
Side shot
View media item 57110
Back shot
View media item 57111
Katie being camera shy
View media item 57112
Axel not being camera shy
View media item 57113
Dogs looking at cabinet where dog treats are stored hoping there stupid owner would stop taking pictures of them with a shop press and give them the treat they were promised...
View media item 57114
 

Outlawmws

Well-known member
Joined
Aug 9, 2011
Messages
39,296
Location
The Badlands
Greg, that all came out very nice! Well done!

Your table used the same size channel as mine, and my gap is just above 5" (to clear the posts)

My top cross piece is HEAVY 5X5X3/8 I beam that I arc welded in with SS rod, and it has 3" gussets on all 4 corners.

The span was 32" the table is held together with 8 1/2 or 5/8 grad 8 bolts (Two on each side of each post)
 

dodge610

Well-known member
Joined
Aug 22, 2010
Messages
5,467
Location
North Canton Ohio
Following this thread i bought a 50 ton Manley press from a closed auto parts store a few years back. Finally got it out of storage and brought it home. Restoring it now also the manual table raising cranks are shot and need to put new cables and crank handles on it. Just got some great ideas on how to fab up the new cranking handles. Will post pics as i go need to find a good source of 1/4 inch plate steel to mount wheels on it also. For ease of moving in the garage thank you gentlemen. Any links would be greatly appreciated.
 
To avoid these ads, REGISTER NOW!
Top Bottom