To avoid these ads, REGISTER NOW!

44 Bikes Frame Shop

fortyfour

Well-known member
Joined
May 9, 2011
Messages
537
Location
Lyndeborough, NH
A little about myself: I'm an industrial Designer by trade. In a previous life I was a goldsmith and silversmith. My mothers father was a Union Welder and apparently his specialty was Tig Welding. Although I did not know him very well (he passed away when I was pretty young), somehow his skills and attention to detail were passed along through the wind. My interest in metals must have been fused in my brain sometime when I was young poking around his shop and admiring his well used tools.

I own a small design studio specializing in Product Design, Graphic Design and all things in between. I've always had a true passion for bicycles. Especially mountain bikes or anything two wheeled that touches dirt and the rider is the power source. My life long goal has always been to start a small custom frame shop. As luck would have it, when my wife and I moved from Providence, RI to New Hampshire, I had an opportunity to apprentice under a long time frame builder (Ted Wojcik) and hone my skills once a week in exchange for graphic design and redesigning his brand identity. I came to the bench already possessing many practical skills and knowledge but Ted was kind enough to help hone those skills even further but pass on some much coveted "trade secrets" and those little tips that make all the difference. Much respect and gratitude goes out to anyone willing to pass along their skills and knowledge. I hope to one day do the same.

Let me just say this too: pretty much everything I do I do it on my own terms. I'm very DIY almost to a fault. So when tackling this project, I want everything on my own terms. I even started my design business to help fund this project. When it's done, I want that satisfaction of knowing I did it myself, I did it to the best of my ability and the result will be a product that's made here in the USA by hand one at a time and a business built on honesty, hard work and expertise. I figure if I can pull that off, I can finally go to sleep at night knowing I'm doing my part to help build back what's been torn down. Even if it's only one bicycle frame at a time.

So naturally, the other life long goal of always building something from scratch is to have that place to create. A place to envision that "big idea" or where those mistakes turn into something unexpected. One factor when we moved to New Hampshire was to have a nice piece of land, not too much mind you - just enough to feel like we weren't elbow to elbow and to have a place for a shop. Mission accomplished: Our property has a 22 x 30 horse barn about 150' from our house. Naturally the apprenticeship came to a close about a year and a half ago and I made the decision to stop lolly-gagging around and bring production home as it were. I always have wanted a shop/studio of my own, now seemed like the right time to do it. My focus now turned to going after building out the shop:


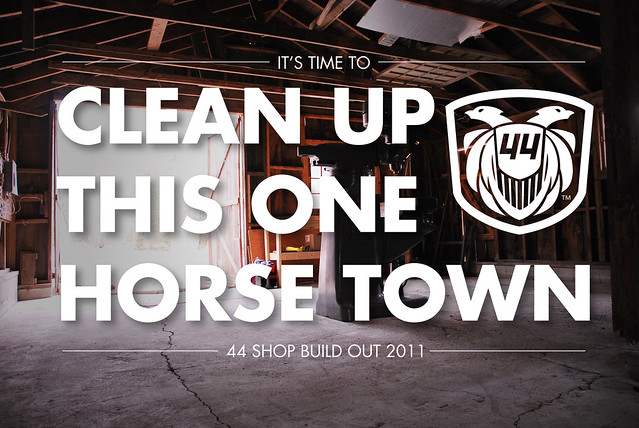
Shop Report: 4.9.2011 by BLACK CAP Studio, on Flickr

From the front (it overlooks one of our large vegetable gardens across the way):


Shop - Front by BLACK CAP Studio, on Flickr

From the back side:


Shop - Rear by BLACK CAP Studio, on Flickr

The previous owners had let too many of the trees grow too big too close to the shop - I traded a friend a custom frame in exchange for cutting down 4 trees. (Bartering is alive and well in the Granite State)

The first thing to do was to remove the horse stalls and get things ready for the build out. So weekends here and there along with the occasional day off coupled with running your own business and all that goes along with just plain living equates to things moving slower than you'd like. Here's a shot from inside the space showing what it looked like at the time. Just a lot of work ahead of me.


Some Perspective by BLACK CAP Studio, on Flickr

Removing 6" of heavy packed clay by pick, shovel and wheel barrow almost certainly killed me. I was broken off by the time that was done. But what doesn't kill you makes you stronger as they say. My family heritage is Pennsylvania German. I'm not sure if that is a blessing or a curse as I always seem to take the manual labor approach to everything. A tight budget also makes the DIY decisions a bit easier as well. Since I finished that I've gotten to know a lot more people in town who own, among other things, tractors with front end loaders. A good thing to get to know your neighbors...

Next up was stripping the wire from the old structure and digging a 160' trench for the 2" pipe for my new power line for the shop. Unfortunately, half the distance is up a steep slope, and the access to the south side of the house is pretty tight from any direction not to mention I was on a tight budget too making renting a ditch witch not possible. So again-manual labor:


Out of the woods by BLACK CAP Studio, on Flickr

The final approach to the house for the line goes right through a garden bed. That had to be meticulously taken apart and tended to (my wife has a green thumb. She was kind enough to let me tear this apart for the shop...):


The Grand Finale by BLACK CAP Studio, on Flickr

This was the tool of choice as the hole got deeper. Shovel, pick and hoe all in one. I picked this up when I was about 12:


1968 Folding Shovel by BLACK CAP Studio, on Flickr

And finally laying the pipe. Yes those are rocks and I only dug the minimum 18". I encountered too many to count (again, it's the granite state). One of which was the size of a small bus. I simply dug around that one and moved it out of the way by 4 inches. That took some time...


Running power to the Shop. by BLACK CAP Studio, on Flickr

Thanks for looking - more on the way.
 
To avoid these ads, REGISTER NOW!
OP
F

fortyfour

Well-known member
Joined
May 9, 2011
Messages
537
Location
Lyndeborough, NH
Re:Frame Shop - Second installment

With the line run and covered, I now switched gears to the build out of the space while I wait to purchase the materials and for my electrician friend to have a day to actually run the power out to the shop. I have gotten to know a very nice fellow up the road from us who owns his own timber frame business. He was kind enough to tip me off when he would have a lot of scrap SIP's (structurally insulated panels) on hand. I scored about 10 4'x10' SIP's not too long ago. Pretty much enough to insulate the entire shop. Have I mentioned it's good to have good friends? If not, I'm saying it now! Here's a shot starting to chop up the SIP's to be fitted into the stud walls.


Progress by BLACK CAP Studio, on Flickr

Safety First, cuts by Makita second:


Cuts by Makita by BLACK CAP Studio, on Flickr

The barn was built with studs every 24", so with much head scratching and asking questions from those who knew more than I did, the best approach would be to cut the panels up and foam them in place. Perhaps there is a better solution, but that's the path I took.

Stripping wire:


Shop Update: 4.11.2011 by BLACK CAP Studio, on Flickr

When you make progress after what seems like an eternity, it's time for a little celebration. I was pretty stoked when I finished insulating the North facing wall:


A manly wall of OSB / 44blog by BLACK CAP Studio, on Flickr

All the while I've been searching classifieds, craigslist and talking to anyone and everyone about supplies. Mainly windows. My wife's uncle had the misfortune of having a lot of snow load damage his roof. The inspectors were weary of the large casement window's mechanisms on the south side of his home being damaged. The windows themselves were undamaged. At a family get together I inquired what would happen to these windows and he loved the idea of them having a second life and being recycled into the shop. A quick trip with a u-haul van and I had 6 30x70 windows. We even managed to poke through the dumpster to get enough of the casements to rebuild 2 of them so they worked. So this really became the icing on my cake and has opened up some really amazing possibilities. Just after picking them up:


2x3=6 by BLACK CAP Studio, on Flickr

I took a week to myself in some down time from the design business to build out the south facing wall. From the inside:


Inside before ply install by BLACK CAP Studio, on Flickr

From the outside with one window installed. Both ends open so it funnels air in. With the windows and doors open, there is a great amount of air that circulates through the shop. I'm pretty stoked on this:


Shop Progress 7.2.2011 by BLACK CAP Studio, on Flickr

Starting to install the ply. Hind site is 20/20, i should have put the ply/paper first then installed the windows. I was so excited about installing the windows I couldn't help myself. Not to mention that day was about 900 degree's.


Shop Progress - 7.3.2011 by BLACK CAP Studio, on Flickr

Paper and trim installed. Starting to put the board's back up:


Almost buttoned up by BLACK CAP Studio, on Flickr

Once all that was finished, the east facing wall was next on my agenda. The floor is terribly uneven, cracked and heaved. The builders really didn't do a good job of creating the structure. I often joke to myself it would be easier to take the whole thing apart, pour a slab, and rebuild the structure. But you gotta work with what you've been handed sometimes, making spirit and the challenge of problem solving that much sweeter. Here's what I'm dealing with. The front used to have two large openings with what i believe used to have two sliding doors. At some point that was taken apart (and deposited across the lane...) and a flimsy stud wall put up in it's place. Not to mention a huge set of 10' doors (also pretty shaky...). before and after taking that wall apart:


Time to chop by BLACK CAP Studio, on Flickr

Also luck would have it that all of my close friends are on vacation, traveling or just not in town when I've got time to work on this. So things don't get built exactly in the order they should I suppose. The other thing is attempting to build a stud wall on a heaved floor is for the birds. It was easier to build as I go. Shot from inside/outside as this wall begins to take shape:


Frames of a wooden kind. by BLACK CAP Studio, on Flickr

The previous owners left a 2 ton truck jack behind. That little thing has come in hand more times that I can count to move a wall up by a 1/4 of an inch, support a structure when I'm tearing things apart, etc. I'll have to take a pic of it. I named it "Moe". The ring leader of this knucklehead "do-we-cheetum-and-how" operation...

A shot of the completed wall and with both windows installed. This corner gets full southern exposure and should provide some really nice passive solar heat in the winter:


Shop Update 7.12.2011 by BLACK CAP Studio, on Flickr

More on its way soon...
 
OP
F

fortyfour

Well-known member
Joined
May 9, 2011
Messages
537
Location
Lyndeborough, NH
Re: Frame Shop - 3rd Installment

Skipping ahead-I decided to make the large entry way a bit smaller. 8'x8' instead of about 10'x10'. It's a little more manageable and when I eventually have the floor poured, i will have a pad poured out front for when additional machinery is purchased. I can then simply roll it in.


Today's pound fest by BLACK CAP Studio, on Flickr

Keystone over the center - a nod to my Pennsylvania roots.

Here's a nice shot from inside the structure. I picked up that Bridgeport for song some time ago. She's been patiently waiting for her final resting place in the shop. Its nickname is "the Dutchman".


New View on Sunday by BLACK CAP Studio, on Flickr

A small composite before / after shot of the shop:


Before - After by BLACK CAP Studio, on Flickr

I decided just to use OSB to skin the walls. Partly because I personally just can't stand working with drywall, but mostly because it's quick to cut, good structurally and it's a shop space. I'll paint the inside a nice bright yellow I believe:


Mojo Repair Shop by BLACK CAP Studio, on Flickr

The next phase (and the current one) was to build the internal wall to divide up the space. Naturally everyones knee jerk reaction is to go after the entire space, but upon reflection I wanted a cozy space. And the cost of insulating a 30 x 20 space as opposed to a 20 x 22 space seemed better to start with. Not to mention that 20 times 22 is 440 (a conveniently nice number). I don't intend to fill the space either: Bridgeport (check), Lathe, small drill press and an alignment table will be the biggest items. Some work benches, tool carts etc. will take up the rest of the space. Here's a shot of the completed stud wall (built the same as the rest of the barn every 24"):


STUDS by BLACK CAP Studio, on Flickr

Here's the finished wall with OSB. The stack of SIP's behind the Bridgeport is getting smaller as I finish up the insulation on the backside of this wall. I think it JUST might do the entire shop:


The wall of OSB by BLACK CAP Studio, on Flickr

The bridgeport will find it's home in the far corner next to that large opening. Purposely put there so when the time is right to pour a floor, I can just raise it up and the short distance to the other side of the floor will be a snap. That's one thing that's been fun: planning the build out on a budget with future projects in mind but still achieving what you envision the space to be. I like to take the "what does this WANT to be" approach a lot. Let the space speak for itself and you just kind of guide it along.

Now it's time to take a break from the build out (the ceiling will be the last step as I have to shore up some rafters, etc.) and move onto the power source. My buddy called in the order and I picked this up this past thursday:


Power Supplies by BLACK CAP Studio, on Flickr

Pulling 200 ft of 10ga copper wire is going to be a treat. Luckily for this job, all of my friends come home from their travels just in time to help me out on this one. To be continued.

If anyone's wondering, here's a few pics of two of my personal builds:

In Process:


Pieces parts by BLACK CAP Studio, on Flickr

Build:


New Setup by BLACK CAP Studio, on Flickr

In Process:


Seat Stays by BLACK CAP Studio, on Flickr

Weld Detail:


FORK - Weld Detail by BLACK CAP Studio, on Flickr

Build:


Fat Snake by BLACK CAP Studio, on Flickr

Thanks for looking...
 

Bib Overalls

Well-known member
Joined
Dec 4, 2006
Messages
3,318
Location
Jonesboro, Arkansas
Impressive project. I like your self reliant approach to things. Having dug many a fox hole with an entrenching tool I feel confidant in saying "you are the man."
 
OP
F

fortyfour

Well-known member
Joined
May 9, 2011
Messages
537
Location
Lyndeborough, NH
Thanks for the kind words everyone. Part of this whole process is to stop spending all of my time behind a computer and transition into being on my feet in a shop. It was a complete shock to my system when I had to make that transition from my natural process of sketching, designing and working with my hands fabricating concepts and working out ideas in 3d to sitting using CAD and graphic software where shop time was limited or not available at all. It's definitely liberating to be approaching that balance again and on my own terms.

One graphic I recently did that's been personally inspiring:


Support the Local No. 44 by BLACK CAP Studio, on Flickr
 

Nealcrenshaw

Well-known member
Joined
Mar 20, 2008
Messages
3,401
Location
Cleveland,OH
Very impressed! You do good work sir! Make yourself at home! There's ton s of stuff on this board that i'm sure you're like.
 

PeteMoore

Well-known member
Joined
Jan 25, 2011
Messages
453
Location
N.Ireland
Impressive project. I like your self reliant approach to things. Having dug many a fox hole with an entrenching tool I feel confidant in saying "you are the man."

2nd that

And you are truly a man after my own heart when you are chasing a dream entirely under "your terms".

If only that dream was even remotely achievable here in Northern Ireland, i would be chasing it so hard right now. In the mean time, im subscribing and i wholeheartedly wish you the very best of luck
 
OP
F

fortyfour

Well-known member
Joined
May 9, 2011
Messages
537
Location
Lyndeborough, NH
Again-thanks for the kind words to all. I found this forum looking up insulation methods actually - it's a great forum and I felt like I finally had a little something that I could contribute.

Once power is officially "on" it will be time to finish tooling up. The Bridgeport's going to come out of her long slumber. Late last fall, my timber framing friend was kind enough to let me use his in the meantime to finish up my most important piece of tooling: the frame jig. That was a blast to make. A shot below.


Even BIGGER - 44 Frame Jig by BLACK CAP Studio, on Flickr

More shots of that process here
 

magnusk750

Well-known member
Joined
Nov 6, 2010
Messages
501
Location
Estonia
I must also say I like when a owner of a small company, apparently a one man company, can admit that he is on a tight budget. I'm there myself and sometimes it's quite annoying when it's expected that just because you run something yourself there must be loads of money in it. For me it's rather the other way, I could make much better having an ordinary 9-5 job as a civil servant but I prefer dealing with my business on a shoestring.
 
OP
F

fortyfour

Well-known member
Joined
May 9, 2011
Messages
537
Location
Lyndeborough, NH
Is that frame jig made with 80/20 ?

Yes, parts of it are indeed made from 80/20. The rest of the parts I machined to my specifications from solid stock. I find it very stable for tig welding / tacking jigs. It's very versatile. I specifically used the heavier 40-4040, 40-8016 and 40-8080 metric t-slot profiles. I watched a few ebay stores till the right sized scrap/cutoffs appeared for sale. There are a few more tools I need to make and I'll be incorporating this into them. I used it for my fork jig's main beam as well:


IT LIVES. by BLACK CAP Studio, on Flickr
 
OP
F

fortyfour

Well-known member
Joined
May 9, 2011
Messages
537
Location
Lyndeborough, NH
For me it's rather the other way, I could make much better having an ordinary 9-5 job as a civil servant but I prefer dealing with my business on a shoestring.
Agreed! Before all of this I was a shoe designer for a number of years. Commuting back and forth. Working day and night only to have projects cut, shelved or scrapped all together began to wear thin. Makes you think "What am I doing?" That's when I had that realization, quit and set to work starting my own business on my own terms. Granted it's a lot of work and money can be tight at times with the ebb and flow of a business. But the satisfaction of doing things on your own terms and working with clients you were meant to work with is worth the headaches that come along with a business. Not to mention I get to set the volume on the player...
 

studlyrs

Well-known member
Joined
Mar 12, 2009
Messages
129
Location
Salem, OR
Great work on the shop and bikes. I checked out your website and blog. I always wondered how many guys on this journal frequent mtbr.com.
 

kngkong

Well-known member
Joined
Oct 25, 2009
Messages
368
Location
Wellington, New Zealand
Hey FortyFour,

Really nice shop in a beautiful setting.
Ill be out your way in a couple weeks :)

Have got a similar goal of getting out of my current work and making a go on my own. Congratulations on living the dream!
 
To avoid these ads, REGISTER NOW!

c/o say

Well-known member
Joined
Mar 8, 2011
Messages
322
Location
Indiana
That is going to be one sharp shop I like the fact your using the old siding. And yes its very good to get to know your neighbors. I call it networking. Keep up the good work. BTW the bikes are damm nice too.
 
OP
F

fortyfour

Well-known member
Joined
May 9, 2011
Messages
537
Location
Lyndeborough, NH
Thanks - the old boards are really nice and wide. It would be a shame not to reuse them I agree. Still noodling the two large doors. Anyone have a good source for strap hinges with pintles that don't cost an arm and leg? Preferably the lift off type. Thanks in advance.
 

Bib Overalls

Well-known member
Joined
Dec 4, 2006
Messages
3,318
Location
Jonesboro, Arkansas
Thanks - the old boards are really nice and wide. It would be a shame not to reuse them I agree. Still noodling the two large doors. Anyone have a good source for strap hinges with pintles that don't cost an arm and leg? Preferably the lift off type.

Why don't you make them? I have seen them made out of tubing and plate with bronze/oilite bushings.
 

onewaydave

Well-known member
Joined
Sep 28, 2009
Messages
961
Location
Down the road from Dorothy and Toto
Ditto on the praise from all those above.

I'm a roard bike type myself, too old now, but always dreamed of making frames. You do very nice work and seem to have been down wind from your Granddad.

One thing I don't get. You named a useful, efficient tool that works (in the grand scheme of things) that is low cost of both initial investment and maintenance after a lawyer?

I named it "Moe". The ring leader of this knucklehead "do-we-cheetum-and-how" operation...

I would have preferred to read that you named it after the 3 Stooges character.

Won't mention when I got my entrenching tool (thankfully I wasn't infantry and therefore didn't have to prove I could use it that much. There are other, more modern manual digging devices I would prefer.

Your land, site and buildings are beautiful and I agree that your wife has a green thumb.

Dave.
 

shopnut

Well-known member
Joined
Feb 22, 2006
Messages
4,237
Location
Florida
Love all the windows - certainly not the typical place you see a bridgeport in.

Keep up the good work.
 
OP
F

fortyfour

Well-known member
Joined
May 9, 2011
Messages
537
Location
Lyndeborough, NH
One thing I don't get. You named a useful, efficient tool that works (in the grand scheme of things) that is low cost of both initial investment and maintenance after a lawyer?

I would have preferred to read that you named it after the 3 Stooges character.

SPREAD OUT. It is named after Moe Howard! "Do-we-cheatem-and-how" was their numbskull lawyer outfit in one of their episodes.
 

flybefree

Well-known member
Joined
May 18, 2008
Messages
1,111
Location
Ohio/Kentucky
44- great story, I think the bike is a work of art...right up my alley, hard tailed american steel. Best of luck in your business.

Shaun
 
Last edited:

red92s

Well-known member
Joined
Dec 16, 2009
Messages
334
Love the shop, love the bikes. Worked in an independent bike store for a most of high school, lost the love when I found beer in college, recently reunited now that I am a working stiff. First thing I did was track down the two bike I always wanted, but could never afford when working at the shop as a 17 year old: An Ibis hardtail and an Ibis road bike.
 

Pneuking

Active member
Joined
Feb 12, 2011
Messages
39
Mtbr.com'er here too. I decided to read this post just b/c of the bike aspect. Custom bike construction is by far one of the neatest fabrication exhibition of skill and flavor around. Fat tire, rigid, or single speed is not everyones flavor, but I cannot deny the craftsmanship is top notch and there is an attraction.
 

abstamaria

Well-known member
Joined
Jun 24, 2010
Messages
1,338
Location
Manila
Very nice, 44. I browsed through your thread and will read more carefully tonight. You have a lovely place.

In 1877, I had a 10-speed frame built for me by Colin Laing, an English builder who moved to the US. He made it out of Reynolds 531, but with Columbus Superlight chainstays, which he preferred. It was beautiful and I have it still. And I correspond with Colin still also.

I love the lines of a steel road frame, but ride a mountain bike more. Old age.

Thanks for posting.

Andres
 
OP
F

fortyfour

Well-known member
Joined
May 9, 2011
Messages
537
Location
Lyndeborough, NH
44 Frame Shop - Progress Report

So last night I cut the last remaining 3 4'x10' SIP's for the stud wall's insulation. Very happy to be done cutting foam I have to say. Today I finished up my work this morning and headed out to the shop for a few hours of clean up and finishing some loose ends. Started in on the ceiling. Here's a shot of the southern corner looking west: (Yes, those are two holes in the floor...)


Progress Report #001: 8.11.2011 by BLACK CAP Studio, on Flickr

Another shot of the North corner of the shop looking west again:


Progress Report #002: by BLACK CAP Studio, on Flickr

After some clean up, the space for the Bridgeport is all set. Just need to move it into that far left corner. When I have the floor poured, I'll just simply move it the short distance through that large opening for the time being. When I do move it, I'm going to put it up a bit so I can get something easily under it like a pair of machine skates or a dolly. In hind site, when I had purchased it I rented a forklift the day we brought it home and I should have put it up on blocks. Oh well... Next time!

And something shop related for all the machinists out there. I picked up a used Gerstner Journeyman's chest a while back (close to their #52 Journeyman chest today) and it was in pretty tough shape. I spent this spring refurbishing it and putting all new felt in it. Here's a few shots of that. It's currently in my studio beside my desk. An arm's reach away for when duty calls to break out the precision on a product design project.


H. Gerstner & Sons - Open #2 by BLACK CAP Studio, on Flickr


H. Gerstner & Sons Machinist box by BLACK CAP Studio, on Flickr

Dayton, Ohio! Still made there too.


H. Gerstner & Sons, Dayton, Ohio by BLACK CAP Studio, on Flickr

This will definitely take up residency in the shop.

Many of my tools are inherited or in many of the machinist tools case I have, previously owned by machinists. It's always nice to know what their back story is. Some have the names of the machinists on them or their initials. Pretty cool to put them back into service.
 

M-technik-3

Well-known member
Joined
Feb 16, 2008
Messages
1,785
Location
Western Mass
Cool bike and digging the windows in the shop. Would love to install some big windows like that but it invites curious Ex's. They get tend to snoop, and then there is theft. What you can see you can't steal.
 
To avoid these ads, REGISTER NOW!
Top Bottom