
You are using an out of date browser. It may not display this or other websites correctly.
You should upgrade or use an alternative browser.
You should upgrade or use an alternative browser.
5wndwcpe's new coop.
- Thread starter 5wndwcpe
- Start date



Dustoff 35
Well-known member
Looks great, keep the pics coming!
jdub63
Well-known member
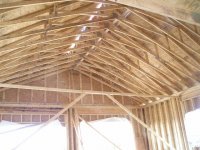
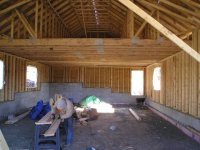
This is really nice.... What is the pitch on the roof? What is the overall height in each area? Are the wall studs 2x6? Looking forward to more pictures...
jonny01blaze
Well-known member
Woo hoo, Look at that structure. Looks great! I love the combinatons of trusses, Half loft half cathedral ceiling. Unless I missed you saying it what are the plans for the loft, just storage or bonus room?
This is really nice.... What is the pitch on the roof? What is the overall height in each area? Are the wall studs 2x6? Looking forward to more pictures...
The roof is an 8/12. The front half is about 11'-2" at the wall and 16' or so to the inside of the scissor truss. The back half is 9'-2" from floor to ceiling. The walls are 2 x 6 but I plan on packing them out to eliminate the ledge on the block. The walls will end up about 9 1/2" thick. Lotsa insulation !
Woo hoo, Look at that structure. Looks great! I love the combinatons of trusses, Half loft half cathedral ceiling. Unless I missed you saying it what are the plans for the loft, just storage or bonus room?
Thanks for the comments fellas. Everyone accuses me of planning to live up there.
 Although I did express my dismay to the GC that the loft wasn't wide enough to accomodate a pool table, as it only measures 12' x 30' x 8'. The guy just stared at me.
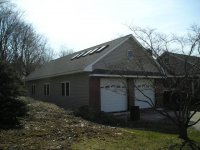
Right now it's just going to be storage for big stuff, hoods , fenders etc. but I just added 4 skylights and a window up there just in case....Film at 11:00
Last edited:
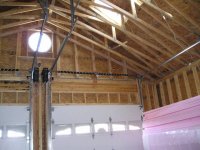
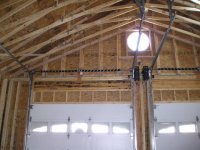
How do you plan on running the tracks for the garage doors? Looks like a long drop from the peak to the tracks in the middle? I'm sure you have a plan for it though (I put my loft in front for this reason, but I'm the only one I know that's done it that way).
How do you plan on running the tracks for the garage doors? Looks like a long drop from the peak to the tracks in the middle? I'm sure you have a plan for it though (I put my loft in front for this reason, but I'm the only one I know that's done it that way).
It looks a little deceiving from the ground. The drop from the finished ceiling to the overhead door tracks should be about 2 1/2 '. Not ideal, but not the end of the world either.




Bevis
Well-known member
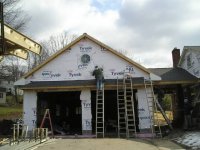
something is better than none...



jonny01blaze
Well-known member
I love the progression on this garage! I've been watching since the first post and I like everything done so far. Keep up the great work, progress is slow and worth it and your garage proves that.
Red'n'WhiteRebel
Well-known member
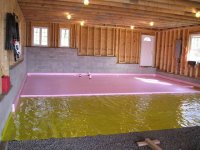
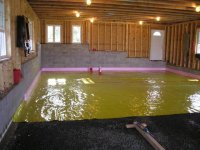
That is one sweet shop man. The detailed progress pics of the floor got my attention as that's exactly what I plan to do in my build. I'm just waiting for an engineer's stamp and we're off to the bldg. dept. Do you have any shots of the heating loops going in?. Besides the Mopar , what else is goin' in there? Oh, and just so you know, we all have health coverage up here but we're not all unarmed.
That is one sweet shop man. The detailed progress pics of the floor got my attention as that's exactly what I plan to do in my build. I'm just waiting for an engineer's stamp and we're off to the bldg. dept. Do you have any shots of the heating loops going in?. Besides the Mopar , what else is goin' in there? Oh, and just so you know, we all have health coverage up here but we're not all unarmed.
LOL good to hear.

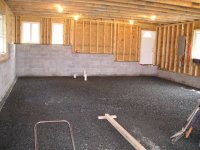
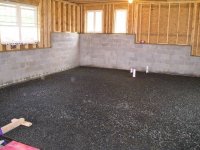
The yellow vapor barrier you see is called Stego, 15mil. thick and friggin' expensive at $315.00 a roll. Even the tape for the seams was $32.00 a roll.
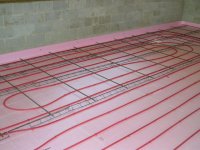
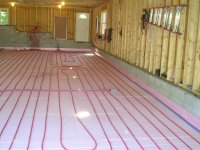
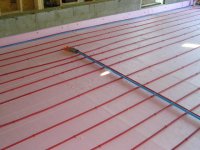
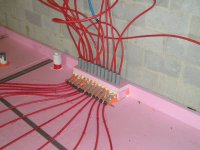
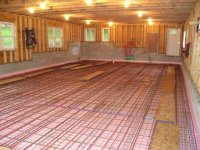
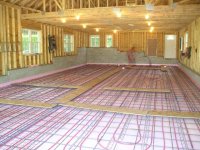
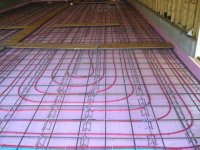
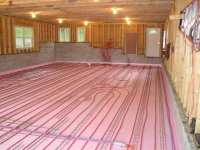
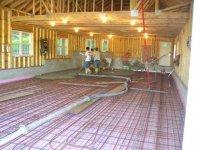
 The radiant tubing will be 6 loops @ 300' each of 1/2" PEX and with any luck will be going down next week. I'll be sure to post pics as I go.
 Actually, there is a whole gaggle of Mopars scattered around in various friends and relatives garages that will call this place home. Here's the list:
1968 GTX convertible
1968 GTX hardtop
1968 Sport Satellite convertible
1968 Satellite hardtop
1968 Satellite sedan
1972 Duster
1933 PD 5 window coupe
I got a feeling they ain't all gonna fit.

Red'n'WhiteRebel
Well-known member
In floor heating definitely is mucho $$$ up front, but it's hands down the best heating system for a shop. You'll be wrenchin' on Mopars in comfort.
autoist
MEMBER EMERITUS
Would love to see a photo of the house & garage together...bet its an awesome sight!
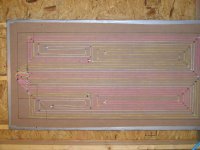
Update: Here's some shots of the radiant tubing going down. The piece of cardboard with the string on it is a scale mock up of the floor. I used mason line and push pins to run different configurations until I was satisfied with the layout and then just transferred it to the floor.
Attachments


Red'n'WhiteRebel
Well-known member
Nice job 5wndw. This is THE "how it's done" thread for radiant heat. I gotta ask, what's a slab bolster?
Nice job 5wndw. This is THE "how it's done" thread for radiant heat. I gotta ask, what's a slab bolster?
Slab bolsters (SBU) http://www.vimcoinc.com/images/docs/22-23.pdf are wire supports that come in different heights which act to suspend the rebar (and/or wwr) in the middle of the slab. They perform the same function as chairs, but being a contiuous 5' piece, they are much more stable.
Last edited:
blkhonda1991
Well-known member
nice build...im not sure exactly where you live but im surprised that size garage was allowed!
Last edited:
nice build...im not sure exactly where you live but im surprised that size garage was allowed!
Attaching it to the house makes all the difference, though the inspector did ask me several times "You're sure you're not running a business here? Seems a garage of this size, in this neighborhood is, uh, a little unusual.

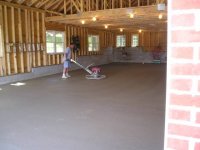
got the crete poured yet?
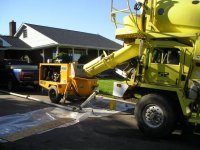
Went down yesterday and we started out a little rough. The contractor showed up at 6:45 am (WooHoo !) and got right to it. He brought a trailered pump with him. The first cement truck showed up and they began to pump the mix into the garage when the line clogged before the 'crete came out the end. I think they expected this as one guy was following the sound of the concrete as it travelled down the hose. Once they decided where it was jammed up, the owner came over and gave the hose a few love taps with a baby sledge. 2.3 seconds later and five feet away....BAM !
The hose ruptures sending concrete everywhere.
 Now the second cement truck shows up closely followed by the third one. This, mind you, before the first one has even started to unload. Typical. To be continued........
Attachments

Last edited:
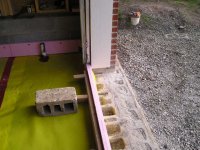
How did you engineer the thermal break with your foam at the garage door? Got pictures?
Not a very good shot, but I ran the (6.75") eps across the opening and backed it up with a 2x6 on the outside. I added a 1.25" thick piece of foam to the top of this and had them finish the floor to this height. When the floor has cured, I'll remove that piece and the overhead doors will sit down into the pocket. I will lose some efficiency due to the concrete being exposed, but it was a trade off for having a positive seal on the doors.
Attachments

Last edited:


PAToyota
Well-known member
... though the inspector did ask me several times "You're sure you're not running a business here?
Must be a PA thing... They asked me that question the whole way through my project...

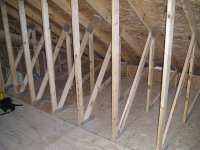
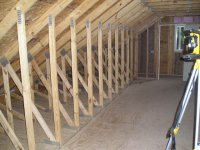
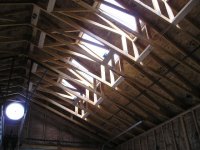
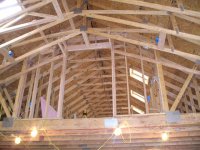

Theres progress all right! WHen do you think you can move in and start using your shop. I like your shop build and have taken note of things for when i build a shop.
Josh
Unfortunately, due to budget constraints and my "not seeing eye to eye" with the GC I'm finishing the place myself. Therefore , just like Uncle Joe, things are moving kinda slow.... I'm hoping to be in there and working by x-mas. The original goal was the end of Oct., but working by yourself, you just don't seem to get squat done.
Red'n'WhiteRebel
Well-known member
"A while"???? It's been months man. Sometimes life gets in the way don't it.
It's lookin' real good. I'll be doing my infloor heat soon. Hope it turns out like yours did.
Cheers.
It's lookin' real good. I'll be doing my infloor heat soon. Hope it turns out like yours did.
Cheers.