Rick_Br
Well-known member
This power feed came to me with a Delta 17" drill press
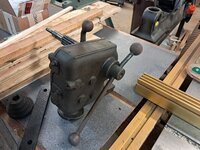

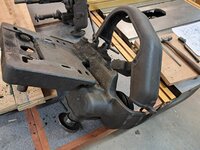
I believe this was introduced in the early 1940's and was replaced with a newer design in the late 1950's. This is driven from the motor - which is double shafted - and has a pulley on the lower shaft which is the power source for the power feed. The unit has a unique motor, pinion and depth stop. Here is a link to the early Delta brochure
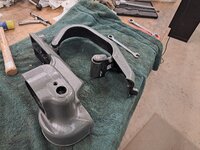
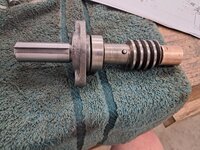
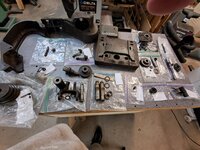
I plan on using this as a fill in project so updates may be sporadic. So far I have gotten the rear drive section disassembled
The only questions at this point relate to a bearing - Anew departure 3202 which is open both sides. That bearing is available or I could use a standard 6202 with seals. I believe this bearing is in an oil bath so maybe open both sides is appropriate and I could just clean up the original and use it?
just below that bearing is an oil seal which I pretty much destroyed trying to get it out. It is marked 500006? I think - not sure about the 6 or what may come after it if anything. It seems to have an 1.125" OD and a .360" thickness. The ID is hard to determine due to my heavy hand but it fits on a .656" shaft. This Timken Seal seems close - Timken P/N 481528. The width/thickness is off by an 1/8" but I'm not sure that is a concern. The OEM version is 23/64" and the pocket it sits in is 1/2". What do you think - will this work?
Here is the parts schematic - the b earing and oil seal are on the lower right hand side of the schematic

I thought maybe this project would be of some interest
Rick
I believe this was introduced in the early 1940's and was replaced with a newer design in the late 1950's. This is driven from the motor - which is double shafted - and has a pulley on the lower shaft which is the power source for the power feed. The unit has a unique motor, pinion and depth stop. Here is a link to the early Delta brochure
I plan on using this as a fill in project so updates may be sporadic. So far I have gotten the rear drive section disassembled
The only questions at this point relate to a bearing - Anew departure 3202 which is open both sides. That bearing is available or I could use a standard 6202 with seals. I believe this bearing is in an oil bath so maybe open both sides is appropriate and I could just clean up the original and use it?
just below that bearing is an oil seal which I pretty much destroyed trying to get it out. It is marked 500006? I think - not sure about the 6 or what may come after it if anything. It seems to have an 1.125" OD and a .360" thickness. The ID is hard to determine due to my heavy hand but it fits on a .656" shaft. This Timken Seal seems close - Timken P/N 481528. The width/thickness is off by an 1/8" but I'm not sure that is a concern. The OEM version is 23/64" and the pocket it sits in is 1/2". What do you think - will this work?
Here is the parts schematic - the b earing and oil seal are on the lower right hand side of the schematic
I thought maybe this project would be of some interest
Rick