To avoid these ads, REGISTER NOW!

Adding a cinder block foundation to existing shop

Hagg

Active member
Joined
Mar 4, 2010
Messages
40
Location
Lubbock, TX
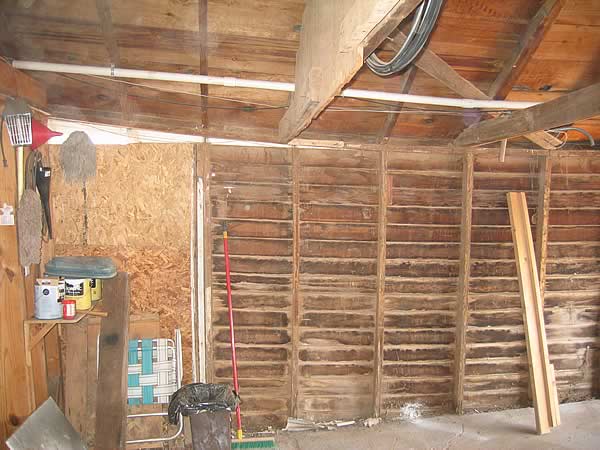
I have a 20x50 shop that has seen better days. The property we bought used to part of an old dairy farm and some of the structures are still here. I believe my shop used to be some part of it, based on how odd the dimensions are and the fact that it has two drains in the floor. Anyway...the slab is below ground level now, so water floods in when it rains. The previous owners did little to maintain this building. All the wood sill plate is gone and most of the studs are rotten. I came up with a fix, though. I want to put a single layer cinder block foundation all the way around. Seemed simple enough except that I can't get the blocks to stick to the concrete. I've tried different mortar mix consistencies, even tried adding concrete bonding adhesive to the mortar mix. No help. I read that using mortar mix may be the issue, but not sure. Any ideas? :headscrat
 
Last edited:
To avoid these ads, REGISTER NOW!

poppop

Well-known member
Joined
Mar 30, 2010
Messages
45
Location
Keedysville,Md
Use a type S mortar mixed 1 part mortar to 3 parts sand.Concrete needs to be clean.You can drill into the concrete on 4 foot center and drive a short piece of rebar in and grout the cell.
 

theoldwizard1

Well-known member
Joined
Feb 22, 2011
Messages
43,106
Location
SE MI
If the ground level outside is above the floor, there is only one solution. Trench the outside, install drainage pipe and run it to a dry well or someplace that is lower. Back fill with gravel.

Been there, done that. THIS WORKS !
 

pmiranda

Well-known member
Joined
Jul 15, 2008
Messages
1,504
Location
Austin, TX
Are you trying to do this with the walls intact? How are you dealing with the rotted sills?
I kinda think maybe it needs to be nuked and redone, although if the rest of the structure and the roof are in good shape that would be a shame.
 

Falcon67

Well-known member
Joined
Jun 11, 2009
Messages
18,371
Location
Merkel, TX
Drill for a bar every few feet, construction adhesive, then fill.

>Are you trying to do this with the walls intact?
Can be done.
garageC.jpg


Brace it up, cut out the sill, add block. I used some 4x4 permanent supports, but same difference. Could have done bolts, a plate and sistered studs.
garageP.jpg
 

theoldwizard1

Well-known member
Joined
Feb 22, 2011
Messages
43,106
Location
SE MI
Drill for a bar every few feet, construction adhesive, then fill.

>Are you trying to do this with the walls intact?
Can be done.
That fixes the rotten sill plate and the wall. (Nice job !)

It will not keep water out if the grade is above the floor.
 

Falcon67

Well-known member
Joined
Jun 11, 2009
Messages
18,371
Location
Merkel, TX
True but concrete block takes a lot longer to rot from water infiltration than wood. My issue (above) was that the bottom of the wall was actually below grade by about 3".
 
OP
H

Hagg

Active member
Joined
Mar 4, 2010
Messages
40
Location
Lubbock, TX
Drill for a bar every few feet, construction adhesive, then fill.

>Are you trying to do this with the walls intact?
Can be done.
garageC.jpg


Brace it up, cut out the sill, add block. I used some 4x4 permanent supports, but same difference. Could have done bolts, a plate and sistered studs.
garageP.jpg

This is essentially what I have. I'll get some pictures up soon. We jacked up a portion of the wall with a 12' header beam we made, then cut about 16" off the bottom of the studs to clear the blocks. I'm just going to add new studs and nail the old ones to them, that way I don't have to worry about taking all the siding off the old ones. Just need to get the blocks to stick. Going to start again on Friday.
 

kmk7110

Well-known member
Joined
Jan 19, 2013
Messages
79
Location
Madison WI
Subscribed. 2 of my walls are a bit below grade about 3 inches as well. I went and replaced the sill plate with treated and used groundbreaker on it afterwords as well as 1 ton of 2 inch wash along the wall. Water is not there anymore except one area where I couldn't get groundbreaker. Would like to see how this comes out.
 
OP
H

Hagg

Active member
Joined
Mar 4, 2010
Messages
40
Location
Lubbock, TX
OK, so here is what I'm dealing with. I got halfway down one wall and figured out the mortar wasn't sticking to anything, really. We were able to knock it off the blocks as well. We tried several different consistencies but none seemed to work. I took what I had left back to Lowe's and picked up some type S. That stuff works a lot better for what I'm doing. We also wet the blocks and used a concrete bonding agent for the slab. Every 2 1/2' I also put a rebar stake into the slab for extra reinforcement. I'm going to see how well the new procedures worked in the morning. If all is well, going to finish up this wall and work on the two side walls. The front wall will have to wait until next weekend. I'll post a picture of our "walkthrough" door that is 2' off the ground...

<a href="http://s1225.beta.photobucket.com/user/draggahj/media/Shop/20130208_151137.jpg.html" target="_blank"><img src="http://i1225.photobucket.com/albums/ee395/draggahj/Shop/20130208_151137.jpg" border="0" alt=" photo 20130208_151137.jpg"/></a>

<a href="http://s1225.beta.photobucket.com/user/draggahj/media/Shop/20130208_151116.jpg.html" target="_blank"><img src="http://i1225.photobucket.com/albums/ee395/draggahj/Shop/20130208_151116.jpg" border="0" alt=" photo 20130208_151116.jpg"/></a>

<a href="http://s1225.beta.photobucket.com/user/draggahj/media/Shop/20130208_151403.jpg.html" target="_blank"><img src="http://i1225.photobucket.com/albums/ee395/draggahj/Shop/20130208_151403.jpg" border="0" alt=" photo 20130208_151403.jpg"/></a>

Here is the header I made.
<a href="http://s1225.beta.photobucket.com/user/draggahj/media/Shop/20130208_151348.jpg.html" target="_blank"><img src="http://i1225.photobucket.com/albums/ee395/draggahj/Shop/20130208_151348.jpg" border="0" alt=" photo 20130208_151348.jpg"/></a>
 
OP
H

Hagg

Active member
Joined
Mar 4, 2010
Messages
40
Location
Lubbock, TX
Hey, my pictures are up now, thanks Mr. Moderator!

New process works well. Thanks for all the ideas, fellas. I got one side wall done and the back wall 3/4 complete. I had to let the blocks dry before I put weight on them. More progress pictures coming soon.
 

NUTTSGT

Super Moderator
Staff member
Joined
Sep 14, 2009
Messages
50,869
Location
Northern Central Ohio
That fixes the rotten sill plate and the wall. (Nice job !)

It will not keep water out if the grade is above the floor.

I agree, you're doing nice work. But you need to get some drainage and possibly lower the grade around the shop.


If I was doing what you are doing, I'd drill a hole in the concrete, stick in some rebar for every block and fill it with concrete.
 

Motown 454

Well-known member
Joined
Sep 25, 2008
Messages
1,359
I agree, you're doing nice work. But you need to get some drainage and possibly lower the grade around the shop.


If I was doing what you are doing, I'd drill a hole in the concrete, stick in some rebar for every block and fill it with concrete.

I agree!
 
OP
H

Hagg

Active member
Joined
Mar 4, 2010
Messages
40
Location
Lubbock, TX
It rained last night. No water came in where we have placed the blocks. Good news so far. We dug out around the slab and have plans to make a drain along the bad wall. Adding gutters on that side as well so hopefully it will cure our leakage issues.

Oh, here's my "walkthrough" door I mentioned earlier. Not real sure what the PO was doing here.
<a href="http://s1225.beta.photobucket.com/user/draggahj/media/Shop/20130209_144526.jpg.html" target="_blank"><img src="http://i1225.photobucket.com/albums/ee395/draggahj/Shop/20130209_144526.jpg" border="0" alt=" photo 20130209_144526.jpg"/></a>
 

sophijo

Well-known member
Joined
Apr 7, 2012
Messages
131
Location
SE Michigan
I've done that a couple times...a full depth basement once.
......block is good at compression not so much at "torque".
......consider two block height while your at it
......what's the footing like...below frostline
......how about a form and poured concrete, Rfx
......regrade; slope away from building
 
To avoid these ads, REGISTER NOW!

ozyborn

Well-known member
Joined
Apr 26, 2011
Messages
685
My garage was is same bad shape. But with no footings or slab, just resting on the dirt. So I got to jack it up the same way, cut out the rotten wood, hand dug all the footings and poured then all around. Then blocked up from there. I still wish I would have raised it at the same time to give me 9ft sidewalls. I really wish I had done that..
 
OP
H

Hagg

Active member
Joined
Mar 4, 2010
Messages
40
Location
Lubbock, TX
I've done that a couple times...a full depth basement once.
......block is good at compression not so much at "torque".
......consider two block height while your at it
......what's the footing like...below frostline
......how about a form and poured concrete, Rfx
......regrade; slope away from building

The footings are great, at least 18" deep. They did something right on this building. My dad's cousin is bringing out his tractor to clear away all the dirt. I started to clean off the little slab in front of the door and found that it kept going. It's about 6'X6' with almost 8" of dirt on top. West Texas is notorious for wind, which over the past 30+ years has left a few layers of sand/dirt on my property. I have a cotton farm on the west side of me. So, we have a lot of dirt to move. Going to spread it around my property and make some drainage off to the south.
 
OP
H

Hagg

Active member
Joined
Mar 4, 2010
Messages
40
Location
Lubbock, TX
My garage was is same bad shape. But with no footings or slab, just resting on the dirt. So I got to jack it up the same way, cut out the rotten wood, hand dug all the footings and poured then all around. Then blocked up from there. I still wish I would have raised it at the same time to give me 9ft sidewalls. I really wish I had done that..

I actually thought about that, but it would end up being a complete rebuild. I'm tearing up the walls as it is by jacking it up. The east wall is the worst. As I leveled out the roof beams the wall pretty much stayed where it was. I have to cover up a lot of open space now. So I left the 8' on the back. The front is almost 10', at least. Should be plenty of room once we finish up.
 

NUTTSGT

Super Moderator
Staff member
Joined
Sep 14, 2009
Messages
50,869
Location
Northern Central Ohio
Oh, here's my "walkthrough" door I mentioned earlier. Not real sure what the PO was doing here.
<a href="http://s1225.beta.photobucket.com/user/draggahj/media/Shop/20130209_144526.jpg.html" target="_blank"><img src="http://i1225.photobucket.com/albums/ee395/draggahj/Shop/20130209_144526.jpg" border="0" alt=" photo 20130209_144526.jpg"/></a>

The PO put those block in with the door at that height ?
 
OP
H

Hagg

Active member
Joined
Mar 4, 2010
Messages
40
Location
Lubbock, TX
The PO put those block in with the door at that height ?

Yep. He did it to the other door too. He found a double steel door frame and had it installed about a foot high. No doors in it, though. I can't figure out why.
 
OP
H

Hagg

Active member
Joined
Mar 4, 2010
Messages
40
Location
Lubbock, TX
Maybe he thought he couldn't cut the concrete block :dunno:


You can get in a "zone" when laying brick/block and just cruise on by!

Well, you see...that's the weird part. Its the only place in the shop that had block. If you look on the left side of the pic, the blocks just end. It does the same thing on the right side.

<a href="http://s1225.beta.photobucket.com/user/draggahj/media/Shop/20130209_144505.jpg.html" target="_blank"><img src="http://i1225.photobucket.com/albums/ee395/draggahj/Shop/20130209_144505.jpg" border="0" alt=" photo 20130209_144505.jpg"/></a>
 

DEnd

Well-known member
Joined
Oct 25, 2008
Messages
218
Those new sill plates really should be pressure treated. The concrete will hold moisture up against them , and the pressure treatment will help keep rot from setting in.
 

theoldwizard1

Well-known member
Joined
Feb 22, 2011
Messages
43,106
Location
SE MI
Going to spread it around my property and make some drainage off to the south.

Yep. Water has to go somewhere and last time I checked, water does not go uphill all on its own !


I dug a good sized (6' round, 5' deep) dry well in the lowest part of my yard. The pit is lined with landscape cloth. The center is a 3' round, 4' high plastic dry well with no bottom. Back filled with 3/4" crushed limestone (do not use river rock/pebble; you need coarse rock back fill) to 4', then top soil.

It still overflows in spring and I have to pump it to the street or I will have a lake for several days.

But I have no water coming that side of the garage !! :D :D
 
OP
H

Hagg

Active member
Joined
Mar 4, 2010
Messages
40
Location
Lubbock, TX
Those new sill plates really should be pressure treated. The concrete will hold moisture up against them , and the pressure treatment will help keep rot from setting in.


I thought about using treated lumber but decided on insulation. I'm putting it between the wood and the blocks. Its the blue stuff in the pic. Should do the job for a few decades.

<a href="http://s1225.beta.photobucket.com/user/draggahj/media/Shop/20130217_160459.jpg.html" target="_blank"><img src="http://i1225.photobucket.com/albums/ee395/draggahj/Shop/20130217_160459.jpg" border="0" alt=" photo 20130217_160459.jpg"/></a>
 
OP
H

Hagg

Active member
Joined
Mar 4, 2010
Messages
40
Location
Lubbock, TX
Progress...

This is a shot of the garage bay, taken from the workshop area.
<a href="http://s1225.beta.photobucket.com/user/draggahj/media/Shop/20130217_160629.jpg.html" target="_blank"><img src="http://i1225.photobucket.com/albums/ee395/draggahj/Shop/20130217_160629.jpg" border="0" alt=" photo 20130217_160629.jpg"/></a>

Finally finished a wall.
<a href="http://s1225.beta.photobucket.com/user/draggahj/media/Shop/20130217_160448.jpg.html" target="_blank"><img src="http://i1225.photobucket.com/albums/ee395/draggahj/Shop/20130217_160448.jpg" border="0" alt=" photo 20130217_160448.jpg"/></a>

and blocked in the third wall...
<a href="http://s1225.beta.photobucket.com/user/draggahj/media/Shop/20130217_160528.jpg.html" target="_blank"><img src="http://i1225.photobucket.com/albums/ee395/draggahj/Shop/20130217_160528.jpg" border="0" alt=" photo 20130217_160528.jpg"/></a>
 

DEnd

Well-known member
Joined
Oct 25, 2008
Messages
218
I thought about using treated lumber but decided on insulation. I'm putting it between the wood and the blocks. Its the blue stuff in the pic. Should do the job for a few decades.

And that's really the better option too. That creates a capillary break that PT sills do not.
 
OP
H

Hagg

Active member
Joined
Mar 4, 2010
Messages
40
Location
Lubbock, TX
Made a lot of progress this weekend. Started removing the tree stumps from around the shop. That's not a fun project. Quite the pain, but necessary. Two of them are in the way of my new garage door. Also took out the flying walkthrough door, which was the highlight of the day. It was such a hassle to use.

Here is the shop as it looked on Friday morning.
<a href="http://s1225.beta.photobucket.com/user/draggahj/media/Shop/20130223_144051.jpg.html" target="_blank"><img src="http://i1225.photobucket.com/albums/ee395/draggahj/Shop/20130223_144051.jpg" border="0" alt=" photo 20130223_144051.jpg"/></a>

Door gone!
<a href="http://s1225.beta.photobucket.com/user/draggahj/media/Shop/20130223_111206.jpg.html" target="_blank"><img src="http://i1225.photobucket.com/albums/ee395/draggahj/Shop/20130223_111206.jpg" border="0" alt=" photo 20130223_111206.jpg"/></a>

trees...
<a href="http://s1225.beta.photobucket.com/user/draggahj/media/Shop/20130223_093402.jpg.html" target="_blank"><img src="http://i1225.photobucket.com/albums/ee395/draggahj/Shop/20130223_093402.jpg" border="0" alt=" photo 20130223_093402.jpg"/></a>
 
OP
H

Hagg

Active member
Joined
Mar 4, 2010
Messages
40
Location
Lubbock, TX
Garage door going in between these blocks
<a href="http://s1225.beta.photobucket.com/user/draggahj/media/Shop/20130224_160523.jpg.html" target="_blank"><img src="http://i1225.photobucket.com/albums/ee395/draggahj/Shop/20130224_160523.jpg" border="0" alt=" photo 20130224_160523.jpg"/></a>

ready for blocks
<a href="http://s1225.beta.photobucket.com/user/draggahj/media/Shop/20130224_121438.jpg.html" target="_blank"><img src="http://i1225.photobucket.com/albums/ee395/draggahj/Shop/20130224_121438.jpg" border="0" alt=" photo 20130224_121438.jpg"/></a>

Framed in the bathroom
<a href="http://s1225.beta.photobucket.com/user/draggahj/media/Shop/20130224_160558.jpg.html" target="_blank"><img src="http://i1225.photobucket.com/albums/ee395/draggahj/Shop/20130224_160558.jpg" border="0" alt=" photo 20130224_160558.jpg"/></a>
 
OP
H

Hagg

Active member
Joined
Mar 4, 2010
Messages
40
Location
Lubbock, TX
For those of you thinking about tackling cinder blocks, I've learned a few things during this project from other guys on here, internet research, and painful trial and error and error and error.

1. Use the right mortar. Guys at Lowe's have no idea what mortar to use (mostly). DO NOT use type N. It *****. Type S is the way to go, and mix it wet.
2. Wet the blocks before you lay them. Helps the mortar stick.
3. Use concrete bonding adhesive. Paint it on, don't mix it in the mortar. That did absolutely nothing. Can't testify to how much it helps, but anything is better than nothing.
4. Make sure you break out the bottom of the cinder blocks, if you use the 4" ones. Some of ours were almost completely closed.
5. Get a concrete mixer.
6. If you have water problems like me, paint the exterior of the blocks with waterproofer, like Drylok. We had a few rain spells and water would seep its way into the blocks.
 
Last edited:
OP
H

Hagg

Active member
Joined
Mar 4, 2010
Messages
40
Location
Lubbock, TX
and this is my shop this morning...

<a href="http://s1225.beta.photobucket.com/user/draggahj/media/Shop/20130225_142503.jpg.html" target="_blank"><img src="http://i1225.photobucket.com/albums/ee395/draggahj/Shop/20130225_142503.jpg" border="0" alt=" photo 20130225_142503.jpg"/></a>
 

NUTTSGT

Super Moderator
Staff member
Joined
Sep 14, 2009
Messages
50,869
Location
Northern Central Ohio
Made a lot of progress this weekend. Started removing the tree stumps from around the shop. That's not a fun project. Quite the pain, but necessary. Two of them are in the way of my new garage door. Also took out the flying walkthrough door, which was the highlight of the day. It was such a hassle to use.

Here is the shop as it looked on Friday morning.
<a href="http://s1225.beta.photobucket.com/user/draggahj/media/Shop/20130223_144051.jpg.html" target="_blank"><img src="http://i1225.photobucket.com/albums/ee395/draggahj/Shop/20130223_144051.jpg" border="0" alt=" photo 20130223_144051.jpg"/></a>

I'm seeing now why there was two block under the walk in door. Chances are, your shop used to be attached to a larger bldg. I'd guess the floor in it was higher than what your shop has currently.

How deep is that snow in front of your shop ?
 
OP
H

Hagg

Active member
Joined
Mar 4, 2010
Messages
40
Location
Lubbock, TX
I'm seeing now why there was two block under the walk in door. Chances are, your shop used to be attached to a larger bldg. I'd guess the floor in it was higher than what your shop has currently.

How deep is that snow in front of your shop ?


No idea about the extra building. This used to be a dairy farm so there is no telling what used to be here. I have two slabs of concrete on the south and west sides of my house that used to hold buildings.

The snow is about 4' right now. Across the street is a middle school football field so there is nothing to stop the snow drifts. My street gets clobbered when it snows. The mailman warned me, now I see why.
 
To avoid these ads, REGISTER NOW!
Top Bottom