To avoid these ads, REGISTER NOW!

Adding a handle to a pancake compressor

NUTTSGT

Super Moderator
Staff member
Joined
Sep 14, 2009
Messages
51,089
Location
Northern Central Ohio
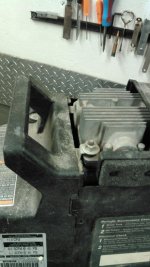
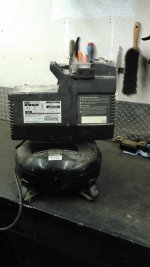
A few years back, I did some horse trading, welding/labor for a Cman pancake compressor. I've used the compressor a few times but combination plastic handle shroud wasn't cutting it anymore.

It was two halves that kept coming apart. There were two tabs on each side and a screw but they were about useless when it came time to pick it up. I needed more.
 

Attachments

  • Copy KIMG0008.jpg
    Copy KIMG0008.jpg
    61.9 KB · Views: 82
To avoid these ads, REGISTER NOW!
OP
N

NUTTSGT

Super Moderator
Staff member
Joined
Sep 14, 2009
Messages
51,089
Location
Northern Central Ohio
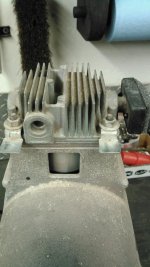
Since there were two tabs attached to two different head studs, I figured I could work off those. These tabs went under the plastic handle. If they were good enough for the factory, they should be fine for me. So I worked my design from those. Fortunately, they were attached on top of the head stud nuts so I didn't have to compromise the head gasket.
 

Attachments

  • Copy KIMG0009.jpg
    Copy KIMG0009.jpg
    75 KB · Views: 52
  • Copy KIMG0010.jpg
    Copy KIMG0010.jpg
    77 KB · Views: 48
OP
N

NUTTSGT

Super Moderator
Staff member
Joined
Sep 14, 2009
Messages
51,089
Location
Northern Central Ohio
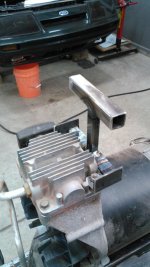
I wanted to use some angle for the mounting tabs. I thought maybe some flat stock would bend over time with the weight of the compressor. Even though it's small, the little ****** is heavy.

Well, apparently I didn't take a few pictures that I thought I did. So off to the finished handle.

I added a piece of flat stock between the angles. Since it was welded top/bottom it should be ok and not bend. If it does, I'm guessing it'll be minimal and not matter.

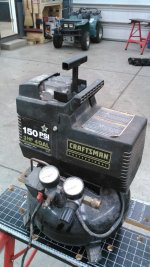
To simplify the design, I went with a T-Handle rather than an inverted "U" with two upright sides. I used a piece of 1/2" tubing for the upright, as to not create too much of a space between fingers. The horizontal handle is 3/4" tubing and works good to fit in your hand.
 

Attachments

  • Copy KIMG0011.jpg
    Copy KIMG0011.jpg
    74.3 KB · Views: 50
  • Copy KIMG0012.jpg
    Copy KIMG0012.jpg
    90 KB · Views: 43
  • Copy KIMG0013.jpg
    Copy KIMG0013.jpg
    72.3 KB · Views: 59
To avoid these ads, REGISTER NOW!
OP
N

NUTTSGT

Super Moderator
Staff member
Joined
Sep 14, 2009
Messages
51,089
Location
Northern Central Ohio
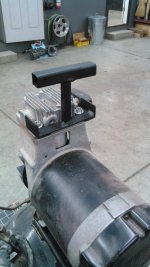
Welded and cleaned up, just need some paint. I did a quick coat with some Rustoleum paint & primer in one. I've found it dries faster than regular Rustoleum but may not be as durable. It'll work for this project.

Once painted, I bolted the handle on and test fit the shroud. I knew it would need a bit of work so I broke out the silver Sharpie and air saw.

Minutes later, the shroud was cut, on and a screw put in each side. Project completed.
 

Attachments

  • KIMG0016.jpg
    KIMG0016.jpg
    70.2 KB · Views: 46
  • KIMG0017.jpg
    KIMG0017.jpg
    102.6 KB · Views: 59

fasteddie

Well-known member
Joined
May 25, 2018
Messages
697
Location
NJ
Very nice. That seems like a very hefty motor and pump for a little pancake. Is it a 3 gallon?
 
To avoid these ads, REGISTER NOW!
Top Bottom