
Tim The Tool Man
Well-known member
I have recently received a couple PM's asking if I would share how I added a Router table insert to my Ridgid TS2400LS portable table saw so I thought I would just post my answer up here.
I have the older Ridgid portable table saw:
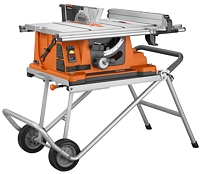
My modifications started with my fixing a problem with the saw. I feel that this is a great saw with plenty of power, accuracy, and portability, but it had one flaw I couldn't get past. The switch was relatively inaccessible which was a real safety concern for me because I like to keep track of all my digits. So I picked up a different switch that sticks out further and allows me to bump it off with my knee if need be.
Then shortly after that I was doing some finish cabinetry work at a job site and because this was a highly customized and elaborate layout I kept having to take notes, mare up wood blanks and bring them home to my shop each evening to mill various pieces. just very time consuming. That got me to thinking that if I had a router table on site I could move a lot faster... I looked at those crappy plastic Skill and Ryobi brands but there was no guarantee of accuracy or enough beef to allow me to mill large materials. Then there were those expensive Kregg or Bosh table tops but they were well, expensive and it would be one more thing for me to store when not in use. Then I thought, hey there is a space in my job site table saw that might accommodate a router. This modification ought to work with any brand saw that has an extendable table top.
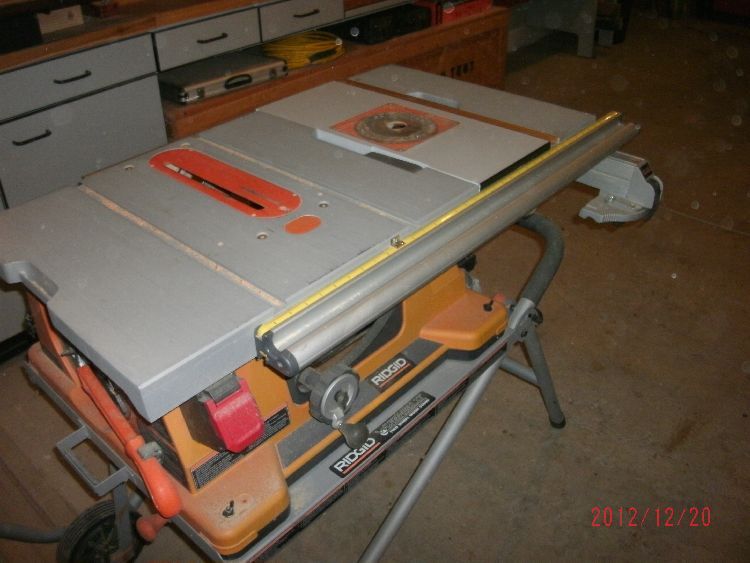
So here is what I did. I extended the top all the way, measured the opening, and made a blank out of cabinet grade plywood and melamine. Because I am **** I laminated the blank to match my saw's aluminum top and painted the bottom to match - this also helps with any moisture related issues if it were to sit in my truck over night or something. Anyhow the key to the blank is that it needs to have male and female tongues and grooves that match up with the saw's front and rear fence. I then routed a ¾” wide slot along the far edge of the blank to accept a T-slot miter gauge channel that I picked up from the Woodworker’s store(online) and glued and screwed it in place.

Once I had my blank I found a router that I thought would fit and had a screw on face plate. It is a Ryobi but in hindsight I should have selected a Ridgid brand for appearance sake, after all I am ****. I then made a squareish plexiglass face for the router and mirrored an impression of that face onto the blank. Next I bored a hole to allow the router to fit into my blank. I next dropped the whole assembly into the space on my saw expecting it to all drop into place. That didn’t happen. The plastic housing on my saw was in the way towards the base and the miter gauge was stored where the router body would ultimately sit.
To solve these issues I carefully cut out the base of my saw to accept the router at it’s fullest extension. The saw has a thick blow molded housing and I was able to cut through only the outside portion of the side, I kept all the cuts rounded avoiding sharp turns in an attempt to minimize creating weak points. It worked out fine the saw it just as solid as it was the day I bought it. For the miter gauge I created a slot near the base of the saw to accept it as a new storage area. That too works fine, I just kept the new slot slightly undersized to prevent it from sliding out.
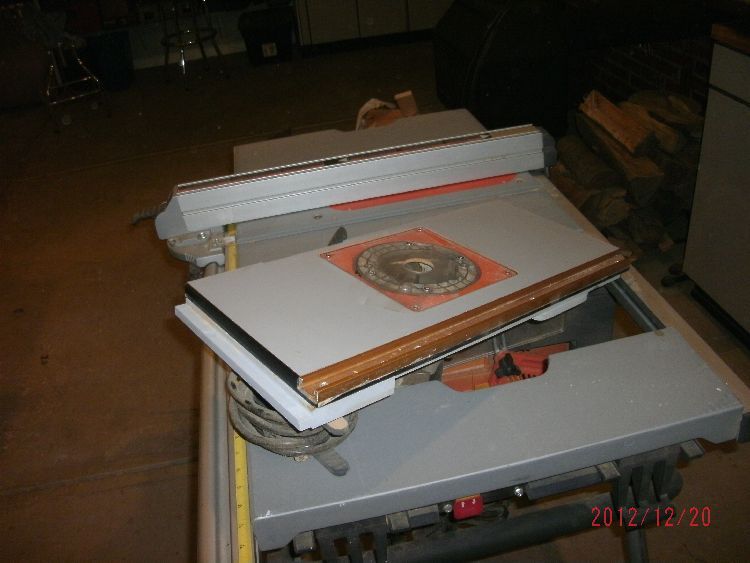
Now the blank and router fit fine, so onto a fence. I wanted this to have a vacuum port to keep my job sites clean so I built a long box out of MDF and bought a vacuum adapter from woodworkers supply and drilled it all out to fit over an average sized router bit. I then added a hardwood fence with more aluminum channels to accept feather boards and a guard. Over the back top of the fence I included a chunk of plywood with bolts and wing nuts that allow me to attach the whole assembly to my saw’s stock fence. I even put bit storage on top of the fence but I ended up storing only my old crappy bits on it. I leave my good bits in a case. Once again I painted everything to match because, as I said, I’m ****.
 ]
]

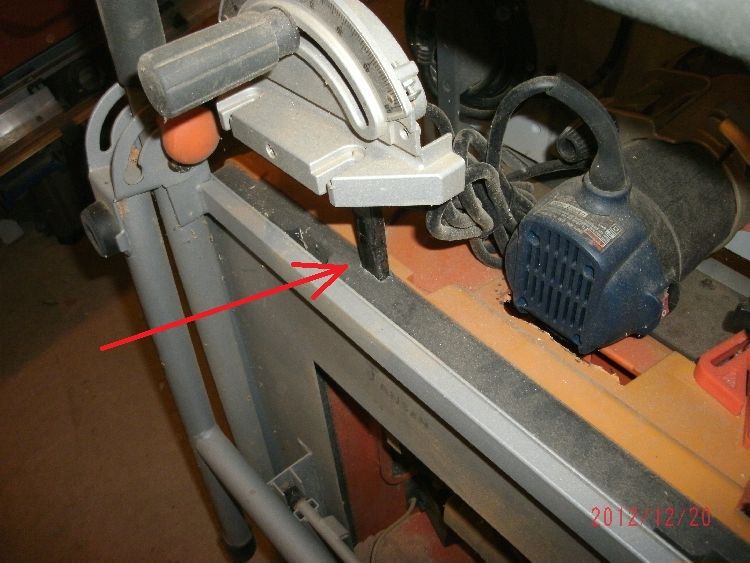
The last few things I did were add a Kreg router switch to the underside of my saw’s wing. The cool thing about it is that it has 2 plug sockets on the back, one for the router on one for a shop vac. I also made a quick little cord reel out of scrap wood to keep everything tidy.


If I use decent router bits, I can achieve milled cuts comparable to my shop’s real not so portable router table but do it on site saving tons of time. When I'm not using it it stores nicely out of the way in my shop and I don't need to make any more room for a separate router table. Overall the thing works great with my only complaint being that the router fence is a bit clumsy to store, it has no home on my saw, and it is kinda heavy for what it is.

Well I hope someone can make use of this idea in a small garage shop or on a jobsite like me. If you are in the market for a saw, here is a review for the Ridgid: http://www.asktooltalk.com/reviews/stationary/ridgid-table-saw.php
I have the older Ridgid portable table saw:
My modifications started with my fixing a problem with the saw. I feel that this is a great saw with plenty of power, accuracy, and portability, but it had one flaw I couldn't get past. The switch was relatively inaccessible which was a real safety concern for me because I like to keep track of all my digits. So I picked up a different switch that sticks out further and allows me to bump it off with my knee if need be.
Then shortly after that I was doing some finish cabinetry work at a job site and because this was a highly customized and elaborate layout I kept having to take notes, mare up wood blanks and bring them home to my shop each evening to mill various pieces. just very time consuming. That got me to thinking that if I had a router table on site I could move a lot faster... I looked at those crappy plastic Skill and Ryobi brands but there was no guarantee of accuracy or enough beef to allow me to mill large materials. Then there were those expensive Kregg or Bosh table tops but they were well, expensive and it would be one more thing for me to store when not in use. Then I thought, hey there is a space in my job site table saw that might accommodate a router. This modification ought to work with any brand saw that has an extendable table top.
So here is what I did. I extended the top all the way, measured the opening, and made a blank out of cabinet grade plywood and melamine. Because I am **** I laminated the blank to match my saw's aluminum top and painted the bottom to match - this also helps with any moisture related issues if it were to sit in my truck over night or something. Anyhow the key to the blank is that it needs to have male and female tongues and grooves that match up with the saw's front and rear fence. I then routed a ¾” wide slot along the far edge of the blank to accept a T-slot miter gauge channel that I picked up from the Woodworker’s store(online) and glued and screwed it in place.
Once I had my blank I found a router that I thought would fit and had a screw on face plate. It is a Ryobi but in hindsight I should have selected a Ridgid brand for appearance sake, after all I am ****. I then made a squareish plexiglass face for the router and mirrored an impression of that face onto the blank. Next I bored a hole to allow the router to fit into my blank. I next dropped the whole assembly into the space on my saw expecting it to all drop into place. That didn’t happen. The plastic housing on my saw was in the way towards the base and the miter gauge was stored where the router body would ultimately sit.
To solve these issues I carefully cut out the base of my saw to accept the router at it’s fullest extension. The saw has a thick blow molded housing and I was able to cut through only the outside portion of the side, I kept all the cuts rounded avoiding sharp turns in an attempt to minimize creating weak points. It worked out fine the saw it just as solid as it was the day I bought it. For the miter gauge I created a slot near the base of the saw to accept it as a new storage area. That too works fine, I just kept the new slot slightly undersized to prevent it from sliding out.
Now the blank and router fit fine, so onto a fence. I wanted this to have a vacuum port to keep my job sites clean so I built a long box out of MDF and bought a vacuum adapter from woodworkers supply and drilled it all out to fit over an average sized router bit. I then added a hardwood fence with more aluminum channels to accept feather boards and a guard. Over the back top of the fence I included a chunk of plywood with bolts and wing nuts that allow me to attach the whole assembly to my saw’s stock fence. I even put bit storage on top of the fence but I ended up storing only my old crappy bits on it. I leave my good bits in a case. Once again I painted everything to match because, as I said, I’m ****.
The last few things I did were add a Kreg router switch to the underside of my saw’s wing. The cool thing about it is that it has 2 plug sockets on the back, one for the router on one for a shop vac. I also made a quick little cord reel out of scrap wood to keep everything tidy.
If I use decent router bits, I can achieve milled cuts comparable to my shop’s real not so portable router table but do it on site saving tons of time. When I'm not using it it stores nicely out of the way in my shop and I don't need to make any more room for a separate router table. Overall the thing works great with my only complaint being that the router fence is a bit clumsy to store, it has no home on my saw, and it is kinda heavy for what it is.
Well I hope someone can make use of this idea in a small garage shop or on a jobsite like me. If you are in the market for a saw, here is a review for the Ridgid: http://www.asktooltalk.com/reviews/stationary/ridgid-table-saw.php