To avoid these ads, REGISTER NOW!

Aeroworks Garage

PittsS1

Well-known member
Joined
Sep 12, 2011
Messages
108
Location
Minnesota
Hi All,

Ground has been broken on the start of my new attached garage. Unlike a lot of you, I don't work much on cars, but have an old biplane that I'm rebuilding (haven't worked on it since buying the house 7 years ago). Also do some fab work and plan to pick up some machine tools in the future, but airplanes are going to be the primary inhabitant (for those pilots out there, I had a Pitts S1 for a number of years, since sold, and currently have a Cessna 150L).

Specs:
32 wide x 30 deep attached garage. One 16x8 door, one 8x7. Scissor trusses will give me 9' ceiling at the doors and about 11.5 foot at the peak. For various reasons, I couldn't go higher than this, but it's much better than what I had (20x22, sagging, falling apart, slab broken up to where I could dig in the sand base, etc). Trench drain (yes, the city approved this to be tied into sanitary sewer! lucky me...), heated slab, and lots of insulation (eventually).

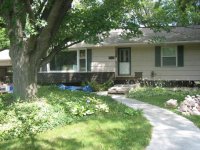
A bit of background: I had planned to build this garage from the minute we bought this house in 2005. We love the neighborhood and plan to be here for the long haul. It's got a 1500 ft^2 footprint, but basement ceilings were only 6'10" high, with plumbing and ductwork at about the 6' mark. Totally unusable and a waste of such a large space. So, I demolished a massive chimney, lifted the house off the foundation, added two courses of block and a double sill plate, and gained 19” of headroom so we now have 8’5” in the basement. In the process, I remodeled about 500 square feet of the upstairs, totally changing the layout (adding beams to open it up, adding mudroom, etc), moved the staircase, installed my own furnace, ductwork (zoned), plumbing, electrical, excavated and waterproofed/drain tiled half the foundation and added huge windows and window wells in basement, and various other tasks. The only thing I’ve hired out to date is the house lifting and block work. It's been a massive undertaking spread out over the last 1.5 years, working on it almost every weekend and most weeknights.

So finally, it’s time for my garage. :) More posts/pics to follow...
 
Last edited:
To avoid these ads, REGISTER NOW!
OP
P

PittsS1

Well-known member
Joined
Sep 12, 2011
Messages
108
Location
Minnesota
The house lifted, the footings, the plans, and the machine that made quick work of the garage.

You can see the old garage roofline on the house from before the house lifting.
 

Attachments

  • IMG_8624.jpg
    IMG_8624.jpg
    152.8 KB · Views: 159
  • IMG_0736.jpg
    IMG_0736.jpg
    147.7 KB · Views: 153
  • elevations..jpg
    elevations..jpg
    52.4 KB · Views: 157
  • IMG_0734.jpg
    IMG_0734.jpg
    143.7 KB · Views: 150
Last edited:

Omphaloskeptic

Well-known member
Joined
Oct 11, 2008
Messages
2,346
Location
Ultima Ratio, Wa.
:thumbup:PittsS1,m welcome! Please keep us posted on your progress and let's see some pictures of your toys, past and present. I think we all would love to see pictures of the renovation from day 1! Could you to start a thread of your biplane restoration on this site if it gets the blessing of the moderators. lol
 
OP
P

PittsS1

Well-known member
Joined
Sep 12, 2011
Messages
108
Location
Minnesota
I wish I had time to put a house projects thread, as well as an airplane rebuild thread up. Maybe in the future... but this is all I have time for now!

Tons of progress in the last week.

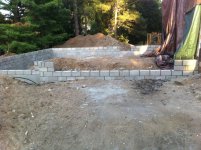
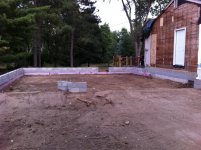
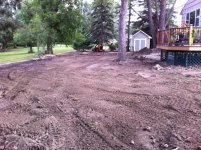
The footings got poured on Thursday the 8th. Block work was done by Tuesday of the following week. This is the only part of the build which I will be hiring out, and I’m glad to have made that decision. About 625 blocks in the foundation, plus another 100 in the stoop by the front door of the house, and they got it finished out in about 8 hours total. Expensive, but worth it in my book. Sometimes I shudder to think that I’ll have twice the cost in concrete work and dirt moving than all the rest of the materials for the garage, but it is what it is. I also had about 120 yards of fill brought into the back yard to grade it nicely.

When the excavator finished the garage base yesterday at noon, I started framing. I got the two back wall sections framed (16 foot each) and waited until I had more help as I had
 

Attachments

  • IMG_0791.jpg
    IMG_0791.jpg
    146.9 KB · Views: 75
  • IMG_0776.jpg
    IMG_0776.jpg
    148.4 KB · Views: 58
  • IMG_0739.jpg
    IMG_0739.jpg
    148.4 KB · Views: 58
OP
P

PittsS1

Well-known member
Joined
Sep 12, 2011
Messages
108
Location
Minnesota
Today I lifted those into place, and framed the end wall (28 ft.). It had to be balloon framed to the underside of the last scissor truss so I ended up with a 2.5 pitch wall, and there are different plate heights front and back. So the top plate of the wall you see in the pictures will be the finished ceiling profile. The trusses are pretty weird and assymetrical. I did this to keep the peak height down so the garage didn’t dwarf the house, and to match the house roofline (4.9 pitch). Took a bit of trigonometry. However, I worked my way down the wall and a buddy and I stood them up, and when I measured the resulting plate heights everything was within about 1/16”. That’s what happens when two engineers go to work framing. That said, I suspect an experienced crew could have had this thing done by now. I have to give it to the foundation guys, however, as they left me with a very square, level base to work off, which makes my job much easier.

I’m hoping to get the front wall framed tomorrow, though it is supposed to rain. I will be working, however, as I have to get this thing done before winter! Headers aren’t here yet so I’ll have to leave those out for the time being. Due to the narrow walls and the overabundance of hardware required in the building code these days, I have a lot of screwing around to do with anchors, etc.

**As a side note, when I lifted my house, it literally was connected to the foundation only by HVAC, plumbing, electrical, and a staircase. There was no sill plate, the joists just sat on the foundation, and the center bearing wall in the basement (now partially replaced by a 22’ I-beam) was not nailed to the floor joists or anchored to the floor! When they lifted it, the whole 50’ long wall just fell over. And it’s been this way for 57 years. And my garage will have 4, 4200lb anchors, 4 1000lb straps, nails in a 3” grid around the doors, and ½” anchor bolts every 6’. I did have cores filled and anchor bolts installed in the house, as well as copious amounts of Simpson products on the beam, etc., so it should be good for at least another 57 years, right? Makes you wonder how they every got by without this stuff, and whether the hardware manufacturers are writing the building code these days**

So that brings us up to date on the build. After so many years planning, dreaming, and wanting this garage, I’m pretty satisfied to see the progress!
 

Attachments

  • IMG_0794.jpg
    IMG_0794.jpg
    148 KB · Views: 78
  • IMG_0800.jpg
    IMG_0800.jpg
    152.4 KB · Views: 72
  • IMG_0807.jpg
    IMG_0807.jpg
    146.6 KB · Views: 88
  • IMG_0806.jpg
    IMG_0806.jpg
    149.3 KB · Views: 85
OP
P

PittsS1

Well-known member
Joined
Sep 12, 2011
Messages
108
Location
Minnesota
Not a lot of progress made in the last week. Got some short walls framed for the door openings, and got a front house stoop poured today. Hoping to take three days this weekend to work on it, and that I don't have to set up the rain tent again for any bad weather.

Got to try my hand at a little block work. At the rate I layed those 5 blocks, it would have taken me about 200 hrs. labor to do the whole foundation. I now definitely know I'm not a mason.

Still trying to decide on windows. I currently don't have plans for any as I think they'll take up valuable storage space (since I don't have any in the attic), and I worry about being able to see into the garage, even though I live in a nice neighborhood. On the other hand, some natural light might be nice.

Also trying to figure out what to do for drains. Had originally planned a trench drain across the whole front, but re-thinking that in favor of a drain more centered in the two car bay. I'm leaving the back 10' and the single car bay totally flat, so it would be easier to slope to one point in the center of the bigger bay.... so many decisions and winter is approaching!
 

Attachments

  • IMG_0817.jpg
    IMG_0817.jpg
    149.2 KB · Views: 67
  • IMG_0816.jpg
    IMG_0816.jpg
    150.8 KB · Views: 68

gilr

Well-known member
Joined
Jul 26, 2008
Messages
301
Location
Richmond, VA
This is going to be a great garage. I've been lurking on this site for well over a year, but the fact you are a pilot and rebuilding a biplane piqued my interest. Will you be able to get the biplane in and out with the wings attached? I'm building a Vans RV-12 in a two car garage, which only works due to the fact the wings are removable. Building a plane is far more prep intensive than I ever imagined. I will be following your progress and interested in how you configure your space for use in renovating your plane.
 
To avoid these ads, REGISTER NOW!

Omphaloskeptic

Well-known member
Joined
Oct 11, 2008
Messages
2,346
Location
Ultima Ratio, Wa.
The new roof pitch looks like it will blend very nicely with that of the house; good choice!

I would go with a dead-flat floor and have the trench drain out front. It makes lofting much easier (heh-heh), and gives you less headache when and if you choose a floor finish material.

Think you'll have it closed-in before winter?
 
OP
P

PittsS1

Well-known member
Joined
Sep 12, 2011
Messages
108
Location
Minnesota
OK, time for an update. I honestly don't know how you guys keep threads up to date! I've been working (real work), working (garage work), and family time almost every minute of the day for the last few weeks. Can't seem to find a spare minute anywhere. (though I did manage to take a couple really quick flights in the Cessna last week- I am paying hangar rent, insurance, etc. on it so may as well use it when I can...)

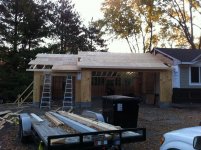
Oh well, I'll try to bring it all up to speed... but first a side not, or excuse, depending on how you gauge my progress: I am building 95% of this thing myself. I had help setting trusses, and a couple hours help on the roof, but the rest has been done solo. Most of the time, I fit in a couple hours after work, and full weekends. Takes a little extra time and ingenuity when doing such things as hoisting 40 sheets of 5/8 CDX onto the roof, wrestling 16' subfascia and fascia, rolling out I&W and tar paper in the wind, installing 4x8 sheathing on gable ends, etc... but I think it'll all be worth it in the end! I've made about 6 jigs to date to accomplish various tasks.

So I got all the walls framed, and the trusses showed up a couple days late on a Saturday evening. The delivery guy almost knocked them off the truck, and I watched in horror as they all layed there, bent over the edge of the flatbed. Then he had troubles unloading them, dragging them through the dirt, etc. I was pretty pissed, but given they were a week late to arrive, and then 3 days late on delivery, I was just glad to have them.

On a Sunday morning, we started setting trusses. They are 32' with 18" overhangs, and weighed about 115lb each. I had 5 guys total, and it went really smoothly. I think we started full bore about 9:30, and had them all in place (minus one... a longer story below) by about 12:30. Not too bad for 18 trusses.

My old power mast was in the way of the house end truss. I installed the front portion, and bent the back half past the mast until Xcel could come move it. This simple, 15 minute task (literally took two guys 15 minutes) took about 10 phone calls and 3.5 weeks to accomplish. I was so close to doing it myself it's not even funny.

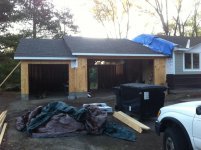
Once the trusses were up, I sheathed it over the course of a week and framed the gable overhangs (last minute change, so no dropped end truss). I then roofed the front of it, and waited. And waited. Couldn't finish sheathing the back side until that damn mast was gone. Waited some more.

Finally the mast was moved last Friday, and I roofed the back last weekend. I still have to tie into the house roof, and frame one more overhang on the house, and then framing is done. The rest is dried in. It seems like there is always a huge list of misc. tasks to do, which gets old after a while.

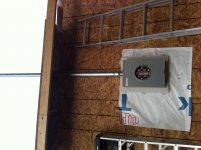
I put the 200A panel in the garage (where I will use the most power!), and sub'd the 100A house panel off that. That required a long run of #4 copper ($225- OUCH!) and an electrician friend to bend the PVC conduit. It's really slick to heat and bend rather than have a ton of elbows, and made pulling the conductors a breeze.

So as it sits today, I have 90% of it dried in, panel is in, and I just started wiring some lights in the garage. I'm pretty excited, but still don't have a slab... need to trench and put in floor drains first. It's getting cold in Minneapolis, and I'm worried about getting it finished! I realize people pour all year round, but the slab probably has me stressed out more than any other part of this build!

For now, I'm planning on:

6" conbit (crushed road base) in place
~2" sand (just for leveling)
6mil vapor barrier
2" XPS insulation
Mesh, mainly to tie the pex to
1/2" rebar, 12" centers
5", 4000psi slab
Round drain in middle of two car portion, and smaller round drain at single car door (for parking the skidloader, snowblower over, etc.)

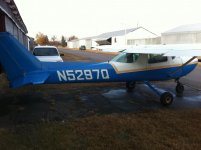
So that's it, if you made it through this novel, and here are some pics (mostly of the process, will get an up-to-date shot tomorrow). Oh yeah, I threw in a bonus pic of my Cessna 150, and the shop will mostly be used to restore my 1968 Starduster biplane.

That's it for tonight- had to stay up too late just to post this!
 

Attachments

  • IMG_0894.jpg
    IMG_0894.jpg
    151.8 KB · Views: 73
  • IMG_0922.jpg
    IMG_0922.jpg
    139.3 KB · Views: 73
  • IMG_0966.jpg
    IMG_0966.jpg
    145 KB · Views: 78
  • IMG_0983.jpg
    IMG_0983.jpg
    145.4 KB · Views: 67
  • IMG_0915.jpg
    IMG_0915.jpg
    149.4 KB · Views: 90
Last edited:

BUGTHUG

Well-known member
Joined
Nov 12, 2010
Messages
2,960
Location
Kansas
I see cars in there, where is the plane going? Unless youre talking about a remote control plane?
 

flybefree

Well-known member
Joined
May 18, 2008
Messages
1,111
Location
Ohio/Kentucky
Dude you are doing it ironman style! The only way I can keep up with my thread is I am a desk jockey who eats lunch at my desk. Love the fact that you are rebuilding a biplane...the guy that signed me and my Dad's tickets built a Starduster...touest check pilot I ever had. Keep up the hard work...and go Navions!

Shaun
 

scutty83

Well-known member
Joined
Apr 25, 2011
Messages
56
Location
Southwest Missouri
Awesome work on the garage, love the big door/little door concept. I am doing the same sort of thing on my 30x30 pole barn build. Also gotta see pics of the Pitts and 150. I'm a corporate beechjet pilot and my dad owns an old '65 model C150. Good to see fellow aviators out there!
 
OP
P

PittsS1

Well-known member
Joined
Sep 12, 2011
Messages
108
Location
Minnesota
Thanks for the compliments!

Scutty, must be fun to fly for a living! It was my goal for many, many years, until many things got in the way. I'm just thankful I can afford to fly for fun whenever I want, even if my day job isn't the most exciting in the world. (see below for some airplane pics...). As far as the two different doors, although I give up some headroom on the one, I think it makes it look more balanced, and keeps the garage from looking bigger than the house (though the square footage is about 2/3 that of the house :) ). Awesome work on your pole barn! I wish I had that kind of room on my property and could have taken advantage of a steeper pitch and attic trusses. Good call on that!

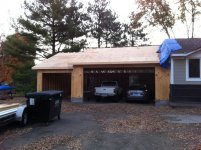
We finally have light! (though no slab yet... ugghhh working on that.) I just installed two 8' T8 fixtures with daylight bulbs and it is seriously bright in there! Plans call for a lot more, but this will get me through the slab prep/pour and any other interior work for the time being. Basic electrical is roughed in (garage door outlets, couple lights, single outlet to get permit signed off).

Everything is officially dried in. I ended up adding a 1' rake overhang on the house to match the garage overhangs. Between taking out the old, framing in the new, and shingling it to match (and hopefully not leak), it was a full day. Got everything in Tyvek and can rest a bit easier as we've been having decent weather here in MN for this time of year. Goal is to have the slab done within two weeks, which means it needs to be graded, floor drains installed, insulation, pex, rebar, and pour (hiring out the pour obviously).

Well, on to the pics... and a couple of the old Pitts. Wish I hadn't sold it... oh well. The Cessna is a bit more civilized and actually has some heat for winter flying.
 

Attachments

  • IMG_1034.jpg
    IMG_1034.jpg
    128.5 KB · Views: 44
  • IMG_1006.jpg
    IMG_1006.jpg
    166.5 KB · Views: 34
  • IMG_1059.jpg
    IMG_1059.jpg
    142.6 KB · Views: 42
  • IMG_1070.jpg
    IMG_1070.jpg
    145.4 KB · Views: 39
Last edited:

StevenMorgan

Well-known member
Joined
Oct 20, 2011
Messages
137
Location
Paris, KY
Nice looking garage, Pitts and 150! I am wondering how one goes from a S-1S to a Cessna! I have an Aerobat and Pitts S-2B in pieces right now...
Thanks for helping motivate me to build my pole garage/restoration shop!
 
To avoid these ads, REGISTER NOW!
Top Bottom