To avoid these ads, REGISTER NOW!

After 6months of planning - Finally some progress!

scott93

Active member
Joined
Nov 29, 2006
Messages
40
Location
Ontario, Canada
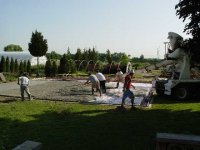
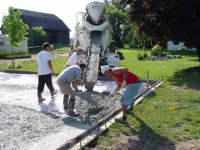
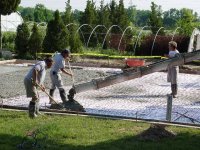
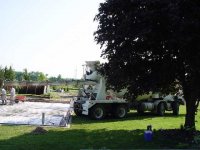
Well, i must say thanks to all the members who have contributed to this message board. I've been watching some of the projects here for the last year and have learned a lot, and gained some great ideas! So finally after 6months of fighting with the town about size (they never will let you build it as big as you want), getting variances approved and all the other red tape that comes along with getting permits i'm finally ready to start.

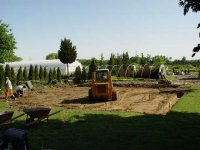
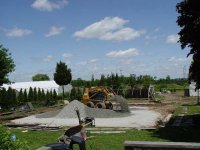
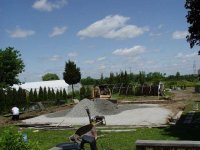
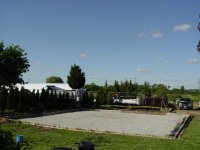
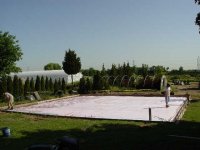
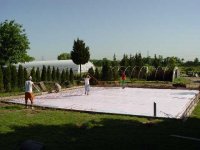
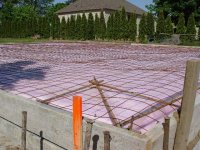
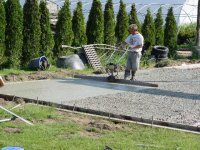
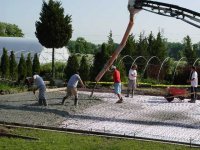
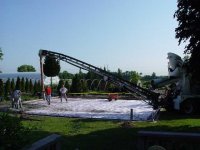
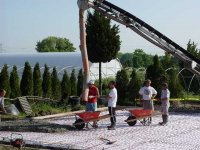
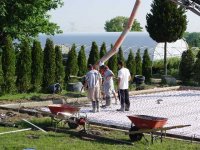
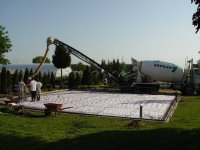
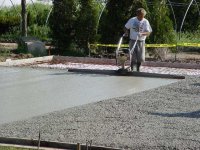
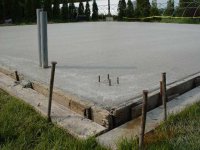
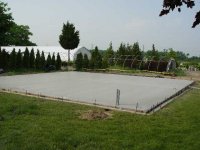
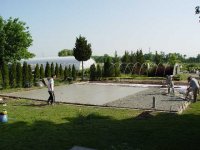
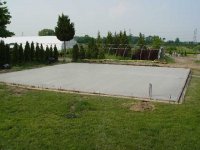
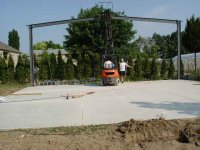
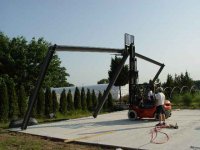
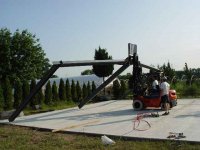
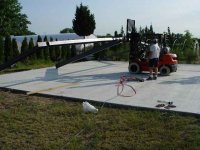
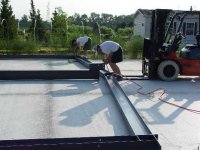
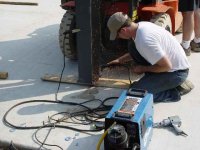
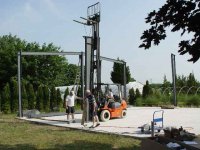
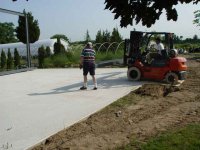
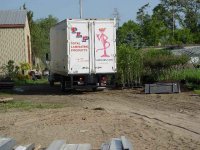
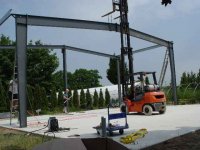
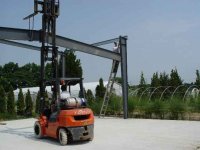
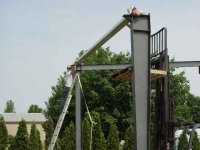
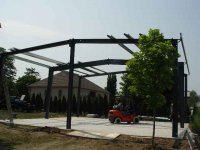
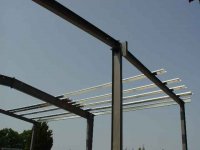
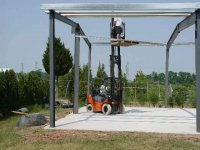
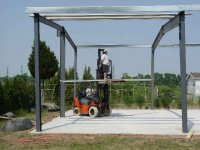
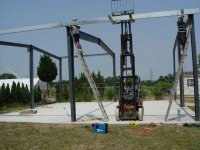
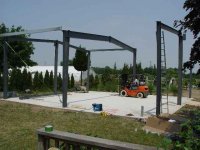
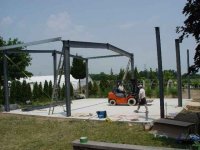
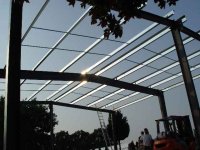
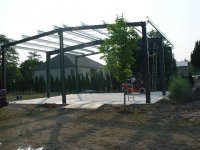
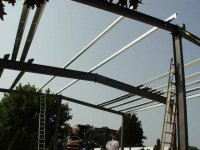
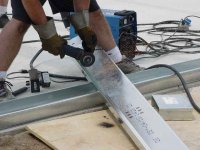
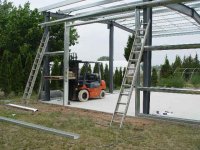
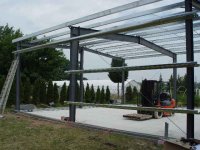
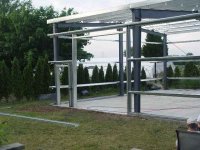
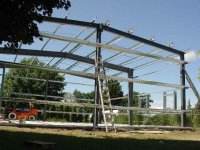
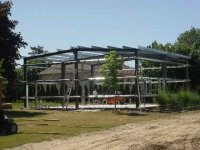
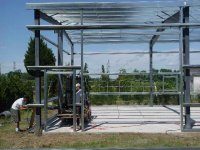
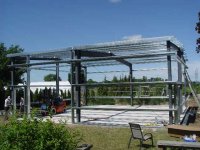
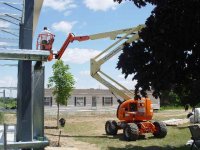
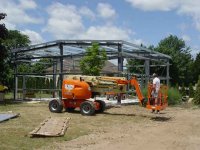
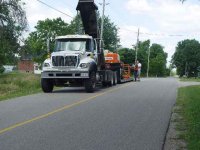
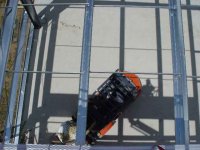
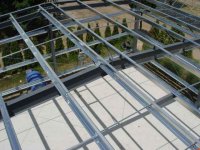
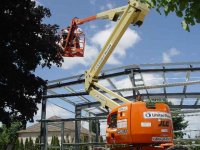
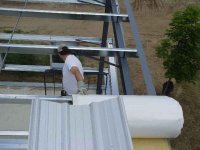
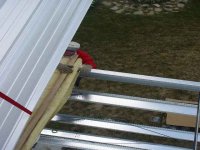
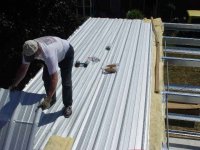
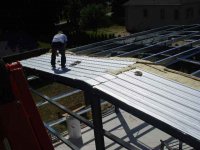
My project is a 40x40x16 steel building.

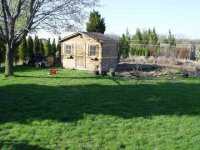
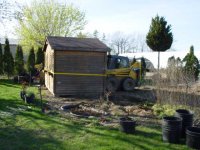
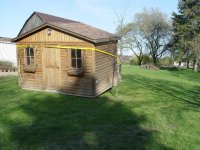
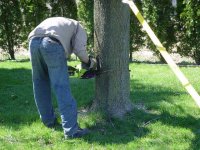
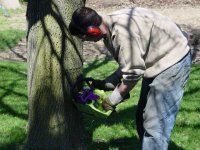
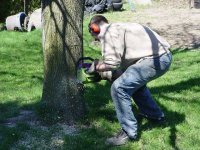
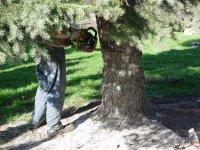
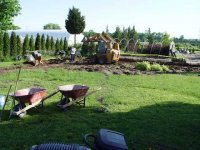
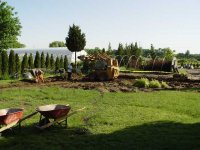
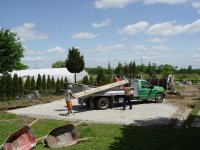
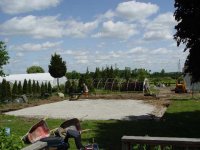
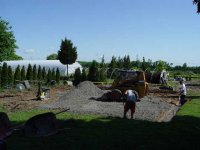
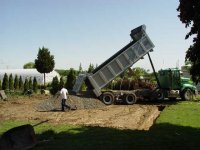
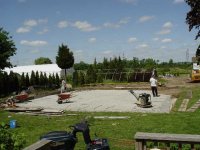
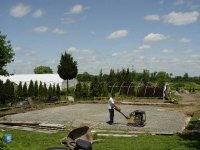
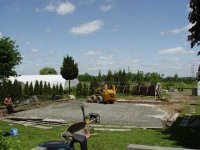
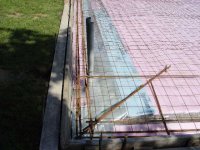
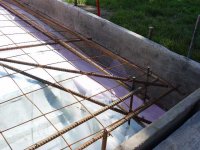
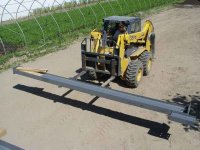
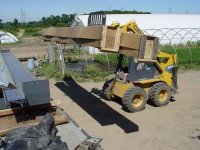
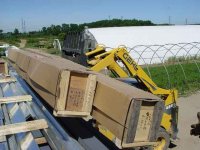
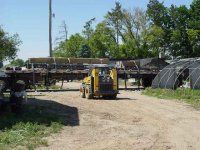
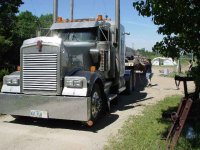
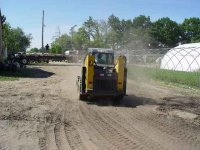
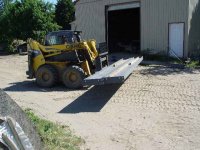
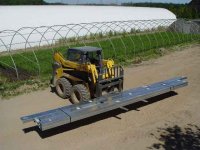
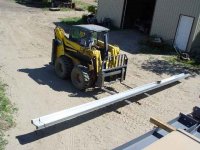
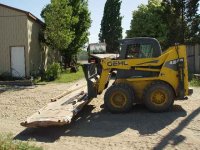
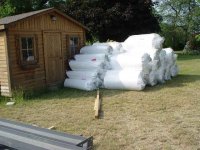
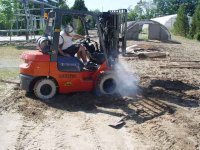
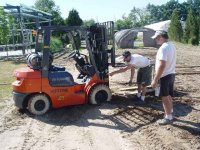
First things first - need to get the site cleared. So my neighbor came over with his skid-steer and we picked up the old garden shed and moved it out of the building area.

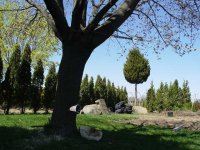
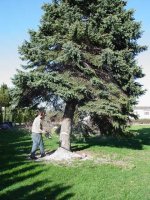
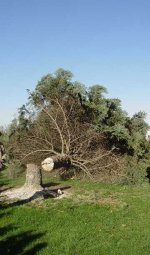
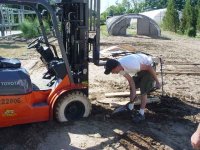
Also dug up the existing garden that was around the shed and put the plants into pots to use once the new building is up.
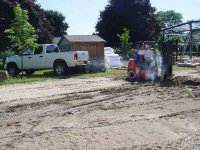
 

Attachments

  • DSC03931.jpg
    DSC03931.jpg
    52.2 KB · Views: 112
  • DSC03932.JPG
    DSC03932.JPG
    42 KB · Views: 142
  • DSC03935.JPG
    DSC03935.JPG
    50.8 KB · Views: 128
To avoid these ads, REGISTER NOW!
OP
S

scott93

Active member
Joined
Nov 29, 2006
Messages
40
Location
Ontario, Canada
Next up was to remove a couple trees that were in the way. First was a maple tree that was right near the front corner of the building, the other was a large spruce that was right in the way of where the access driveway to the shop will be. Both had the come out. So i borrowed a chainsaw form a friend and started cutting
 

Attachments

  • DSC03936.JPG
    DSC03936.JPG
    56.5 KB · Views: 73
  • DSC03937.JPG
    DSC03937.JPG
    64.5 KB · Views: 64
  • DSC03939.JPG
    DSC03939.JPG
    52.5 KB · Views: 63
  • DSC03941.JPG
    DSC03941.JPG
    65.4 KB · Views: 58
OP
S

scott93

Active member
Joined
Nov 29, 2006
Messages
40
Location
Ontario, Canada
I then put a little tension on the tree to get it to fall in the direction i wanted and came in for the back cut.

The tree came down exactly where i wanted - not bad for my first time cutting down a tree.
 

Attachments

  • DSC03946.JPG
    DSC03946.JPG
    75.4 KB · Views: 50
  • DSC03944.JPG
    DSC03944.JPG
    64.1 KB · Views: 58
  • DSC03943.JPG
    DSC03943.JPG
    63 KB · Views: 65
  • DSC03947.JPG
    DSC03947.JPG
    65.8 KB · Views: 70
OP
S

scott93

Active member
Joined
Nov 29, 2006
Messages
40
Location
Ontario, Canada
Now onto the spruce.
Came down pretty quickly.
 

Attachments

  • DSC03949.JPG
    DSC03949.JPG
    74.6 KB · Views: 45
  • DSC03953.JPG
    DSC03953.JPG
    75.4 KB · Views: 56
  • DSC03954.JPG
    DSC03954.JPG
    32.6 KB · Views: 46
OP
S

scott93

Active member
Joined
Nov 29, 2006
Messages
40
Location
Ontario, Canada
Now onto removing the stumps. Normally i do most work myself, but it was actually cheaper to have a tree service come in and grind out the stumps rather than rent the machine for 4hrs - so that was a no brainer!
After about a week of cutting up the trees and making firewood - i had all my permits sorted out and i was ready to begin with the foundation.
 
OP
S

scott93

Active member
Joined
Nov 29, 2006
Messages
40
Location
Ontario, Canada
For the foundation i hired a crew to do it. It is a floating slab foundation, insulated with vapor barrier.

The crew showed up earlier in the morning and began clearing the area
 

Attachments

  • DSC03961.JPG
    DSC03961.JPG
    41.5 KB · Views: 94
  • DSC03959.JPG
    DSC03959.JPG
    41.9 KB · Views: 75
  • DSC03958.JPG
    DSC03958.JPG
    40.1 KB · Views: 67
  • DSC03957.JPG
    DSC03957.JPG
    46.3 KB · Views: 63
  • DSC03956.JPG
    DSC03956.JPG
    56.1 KB · Views: 70
  • DSC03955.JPG
    DSC03955.JPG
    49.3 KB · Views: 83
OP
S

scott93

Active member
Joined
Nov 29, 2006
Messages
40
Location
Ontario, Canada
2 loads of gravel, and the forms start going up
 

Attachments

  • DSC03968.JPG
    DSC03968.JPG
    38.8 KB · Views: 73
  • DSC03967.JPG
    DSC03967.JPG
    38.6 KB · Views: 63
  • DSC03966.JPG
    DSC03966.JPG
    42.6 KB · Views: 91
  • DSC03965.JPG
    DSC03965.JPG
    39.6 KB · Views: 58
  • DSC03964.JPG
    DSC03964.JPG
    39.4 KB · Views: 64
  • DSC03963.JPG
    DSC03963.JPG
    35.5 KB · Views: 61
  • DSC03962.JPG
    DSC03962.JPG
    39.8 KB · Views: 55
OP
S

scott93

Active member
Joined
Nov 29, 2006
Messages
40
Location
Ontario, Canada
Gavel is done, forms are up - just need to add insulation and re-bar
 

Attachments

  • DSC03974.JPG
    DSC03974.JPG
    31.1 KB · Views: 81
  • DSC03973.JPG
    DSC03973.JPG
    37.1 KB · Views: 67
  • DSC03972.JPG
    DSC03972.JPG
    40.9 KB · Views: 51
  • DSC03971.JPG
    DSC03971.JPG
    42.4 KB · Views: 48
  • DSC03970.JPG
    DSC03970.JPG
    40.6 KB · Views: 73
  • DSC03969.JPG
    DSC03969.JPG
    41.5 KB · Views: 51
OP
S

scott93

Active member
Joined
Nov 29, 2006
Messages
40
Location
Ontario, Canada
Insulation and re-bar going in
 

Attachments

  • DSC03975.JPG
    DSC03975.JPG
    33.2 KB · Views: 84
  • DSC03976.JPG
    DSC03976.JPG
    31.4 KB · Views: 52
  • DSC03977.JPG
    DSC03977.JPG
    35 KB · Views: 52
  • DSC03978.JPG
    DSC03978.JPG
    52.5 KB · Views: 77
  • DSC03979.JPG
    DSC03979.JPG
    50.7 KB · Views: 135
OP
S

scott93

Active member
Joined
Nov 29, 2006
Messages
40
Location
Ontario, Canada
Had the inspector out this afternoon and he gave it a pass - so we're ready to pour. Concrete truck should be here tomorrow.
 

Attachments

  • DSC03983.JPG
    DSC03983.JPG
    46.8 KB · Views: 85
  • DSC03982.JPG
    DSC03982.JPG
    38.7 KB · Views: 67
  • DSC03980.JPG
    DSC03980.JPG
    60.9 KB · Views: 69

AGBill

Well-known member
Joined
Dec 11, 2006
Messages
62
Your earthwork and slab prep are looking great! I understand your excitement on finally making some progress after fighting the permit process.

I am about 6 months ahead of you with an identical 40' X 40' X 16H metal building. Here is the link to my pictures if you have not already seen them:

http://www.garagejournal.com/forum/showthread.php?t=7277

I am currently framing with metal studs inside the building for an office, bath and utility/compressor room. Will post more pictures after I make more progress.

Keep the pictures coming!

Bill
 
OP
S

scott93

Active member
Joined
Nov 29, 2006
Messages
40
Location
Ontario, Canada
Bill - yours is one of the threads that i followed very closely - as it is the exact same building i am putting up. Thanks for the inspiration! Looks like you had a lot more site prep to do with your retaining wall. I am planning on putting up a storage loft above half of the building (20x40), and leaving the other half open for taller vehicles and a lift.


The concrete trucks are here pouring right now - i will have pictures up later tonight. I expect the building to show up in about 2 weeks. By then i hope to have the epoxy coating down already on the floor.
 
OP
S

scott93

Active member
Joined
Nov 29, 2006
Messages
40
Location
Ontario, Canada
Well, the concrete is all in - 3 trucks arrived and made a nice divet in my grass!
 

Attachments

  • DSC03998.JPG
    DSC03998.JPG
    76.9 KB · Views: 102
  • DSC03996.JPG
    DSC03996.JPG
    61.7 KB · Views: 58
  • DSC03990.JPG
    DSC03990.JPG
    52.6 KB · Views: 45
  • DSC03988.JPG
    DSC03988.JPG
    35.2 KB · Views: 37
  • DSC03986.JPG
    DSC03986.JPG
    57.2 KB · Views: 52
  • DSC03984.JPG
    DSC03984.JPG
    69 KB · Views: 48
  • DSC03985.JPG
    DSC03985.JPG
    35.5 KB · Views: 63
OP
S

scott93

Active member
Joined
Nov 29, 2006
Messages
40
Location
Ontario, Canada
a few more
 

Attachments

  • DSC04007.JPG
    DSC04007.JPG
    59.1 KB · Views: 62
  • DSC04005.JPG
    DSC04005.JPG
    64 KB · Views: 67
  • DSC04004.JPG
    DSC04004.JPG
    69.1 KB · Views: 80
  • DSC04003.JPG
    DSC04003.JPG
    37.1 KB · Views: 28
  • DSC04001.JPG
    DSC04001.JPG
    66.1 KB · Views: 41
  • DSC04000.JPG
    DSC04000.JPG
    71 KB · Views: 47
  • DSC03999.JPG
    DSC03999.JPG
    39.5 KB · Views: 36
OP
S

scott93

Active member
Joined
Nov 29, 2006
Messages
40
Location
Ontario, Canada
more pics...
 

Attachments

  • DSC04013.JPG
    DSC04013.JPG
    32.4 KB · Views: 122
  • DSC04012.JPG
    DSC04012.JPG
    41.4 KB · Views: 78
  • DSC04011.JPG
    DSC04011.JPG
    37.2 KB · Views: 61
  • DSC04010.JPG
    DSC04010.JPG
    70.1 KB · Views: 40
  • DSC04009.JPG
    DSC04009.JPG
    40.2 KB · Views: 29
  • DSC04008.JPG
    DSC04008.JPG
    68.6 KB · Views: 33
  • DSC04007.JPG
    DSC04007.JPG
    59.1 KB · Views: 26
OP
S

scott93

Active member
Joined
Nov 29, 2006
Messages
40
Location
Ontario, Canada
Slab is all done now - they have stripped the forms and put in some relief cuts (don't have pics of that yet).

Building is scheduled to arrive next week! :bounce:
 

Attachments

  • DSC04015.JPG
    DSC04015.JPG
    38.4 KB · Views: 111
OP
S

scott93

Active member
Joined
Nov 29, 2006
Messages
40
Location
Ontario, Canada
shenders - you can get a special primer for "new" concrete so that you don't have to wait the 28-30days. Although i might have to wait until after the building is up now since it looks like something has come up for this weekend.
 
OP
S

scott93

Active member
Joined
Nov 29, 2006
Messages
40
Location
Ontario, Canada
Update - the truck arrived today with the building.
Used my neighbour's skid-steer to offload the truck.
 

Attachments

  • DSC04022.JPG
    DSC04022.JPG
    38.5 KB · Views: 32
  • DSC04021.JPG
    DSC04021.JPG
    32.9 KB · Views: 18
  • DSC04020.JPG
    DSC04020.JPG
    39.9 KB · Views: 34
  • DSC04019.JPG
    DSC04019.JPG
    38.8 KB · Views: 28
  • DSC04018.JPG
    DSC04018.JPG
    50.6 KB · Views: 24
  • DSC04017.JPG
    DSC04017.JPG
    41.5 KB · Views: 35
  • DSC04016.JPG
    DSC04016.JPG
    45.8 KB · Views: 27
To avoid these ads, REGISTER NOW!
OP
S

scott93

Active member
Joined
Nov 29, 2006
Messages
40
Location
Ontario, Canada
Some more shots.
You can see my neighbour's pole barn in the background that he uses for his tree/shrub business.

and (last pic) you can see how dusty it gets here with the sandy soil we have.
 

Attachments

  • DSC04030.JPG
    DSC04030.JPG
    42.1 KB · Views: 27
  • DSC04028.JPG
    DSC04028.JPG
    44.1 KB · Views: 18
  • DSC04027.JPG
    DSC04027.JPG
    45.3 KB · Views: 14
  • DSC04026.JPG
    DSC04026.JPG
    36.9 KB · Views: 15
  • DSC04025.JPG
    DSC04025.JPG
    41.8 KB · Views: 16
  • DSC04024.JPG
    DSC04024.JPG
    41.6 KB · Views: 14
  • DSC04023.JPG
    DSC04023.JPG
    44.9 KB · Views: 18
OP
S

scott93

Active member
Joined
Nov 29, 2006
Messages
40
Location
Ontario, Canada
a few more shots.

4th pic - is the bundle of siding/roof sheet metal - there were 3 bundles of this, each one weighs over 2000lbs! which is pretty much the max limit for that skidsteer!

And finally the beams are all layed out ready to be assembled, and the truck is cleared and ready to leave.

Now the fun begins - when i try to lift the columns up and put the building together.
 

Attachments

  • DSC04036.JPG
    DSC04036.JPG
    52.9 KB · Views: 25
  • DSC04035.JPG
    DSC04035.JPG
    51.7 KB · Views: 27
  • DSC04034.JPG
    DSC04034.JPG
    46.4 KB · Views: 20
  • DSC04037.JPG
    DSC04037.JPG
    48.6 KB · Views: 27
  • DSC04033.JPG
    DSC04033.JPG
    46.1 KB · Views: 15
  • DSC04032.JPG
    DSC04032.JPG
    43.7 KB · Views: 20
  • DSC04031.JPG
    DSC04031.JPG
    36.9 KB · Views: 11
OP
S

scott93

Active member
Joined
Nov 29, 2006
Messages
40
Location
Ontario, Canada
Well, finally - the building is going up!
i'm a little behind on my updates because i've been working every daylight hour available on the building.

On Monday i picked up this forklift from Hertz.

Then we assembled the end column.
 

Attachments

  • DSC04042.JPG
    DSC04042.JPG
    22.4 KB · Views: 21
  • DSC04041.JPG
    DSC04041.JPG
    16.8 KB · Views: 18
  • DSC04040.JPG
    DSC04040.JPG
    41.9 KB · Views: 25
  • DSC04045.JPG
    DSC04045.JPG
    37.2 KB · Views: 16
  • DSC04044.JPG
    DSC04044.JPG
    57.6 KB · Views: 27
OP
S

scott93

Active member
Joined
Nov 29, 2006
Messages
40
Location
Ontario, Canada
We then tried lifting the whole end column together - which worked but not too well as the outter columns kinda "twisted" and we had to re-square the end wall once it was up.
 

Attachments

  • DSC04054.JPG
    DSC04054.JPG
    39.6 KB · Views: 28
  • DSC04052.JPG
    DSC04052.JPG
    38 KB · Views: 25
  • DSC04051.JPG
    DSC04051.JPG
    31.6 KB · Views: 12
  • DSC04049.JPG
    DSC04049.JPG
    33.1 KB · Views: 19
  • DSC04048.JPG
    DSC04048.JPG
    37.6 KB · Views: 15
  • DSC04047.JPG
    DSC04047.JPG
    36.7 KB · Views: 19
OP
S

scott93

Active member
Joined
Nov 29, 2006
Messages
40
Location
Ontario, Canada
While we were putting up the end wall the truck with the insulation arrived.

For the center column, we put the ends up first and then the cross beam - this worked MUCH better and the wall wasn't all twisted when it went up, except the concrete guy screwed up with the bolt holes - so a slight notch of the beam was required to get it to fit straight - thank god i bought that plasma cutter last year - this project would have been impossible without it!
 

Attachments

  • DSC04067.JPG
    DSC04067.JPG
    34.1 KB · Views: 53
  • DSC04065.JPG
    DSC04065.JPG
    44.7 KB · Views: 17
  • DSC04063.JPG
    DSC04063.JPG
    44.1 KB · Views: 19
  • DSC04062.JPG
    DSC04062.JPG
    43.4 KB · Views: 15
  • DSC04055.JPG
    DSC04055.JPG
    35.9 KB · Views: 19
  • DSC04061.JPG
    DSC04061.JPG
    41.7 KB · Views: 10
  • DSC04053.JPG
    DSC04053.JPG
    46.6 KB · Views: 10
OP
S

scott93

Active member
Joined
Nov 29, 2006
Messages
40
Location
Ontario, Canada
Once the center columns were up - we tied it back to the end wall for support before we put up the center cross section (yes yes - i know - standing on a forklift is very bad :lol_hitti ).
 

Attachments

  • DSC04076.JPG
    DSC04076.JPG
    33.3 KB · Views: 18
  • DSC04075.JPG
    DSC04075.JPG
    35.6 KB · Views: 12
  • DSC04073.JPG
    DSC04073.JPG
    14.2 KB · Views: 12
  • DSC04072.JPG
    DSC04072.JPG
    39.4 KB · Views: 12
  • DSC04071.JPG
    DSC04071.JPG
    30.3 KB · Views: 11
  • DSC04070.JPG
    DSC04070.JPG
    38.2 KB · Views: 30
  • DSC04068.JPG
    DSC04068.JPG
    34.1 KB · Views: 28
OP
S

scott93

Active member
Joined
Nov 29, 2006
Messages
40
Location
Ontario, Canada
Then we moved onto the other end wall.
And tied it into the center.
Then we moved onto the roof joists which are called "purlins" in a metal building.
 

Attachments

  • DSC04087.JPG
    DSC04087.JPG
    31.5 KB · Views: 10
  • DSC04086.JPG
    DSC04086.JPG
    20 KB · Views: 15
  • DSC04084.JPG
    DSC04084.JPG
    37.2 KB · Views: 12
  • DSC04083.JPG
    DSC04083.JPG
    36.1 KB · Views: 10
  • DSC04082.JPG
    DSC04082.JPG
    34.4 KB · Views: 9
  • DSC04081.JPG
    DSC04081.JPG
    35.8 KB · Views: 9
  • DSC04080.JPG
    DSC04080.JPG
    35 KB · Views: 7
OP
S

scott93

Active member
Joined
Nov 29, 2006
Messages
40
Location
Ontario, Canada
After we positioned all the purlins ontop we started spacing them out and bolting them down.

That was all we got done on Monday. Not a bad start considering none of us have ever put up a steel building before - most any of us have built is a wooden shed!
 

Attachments

  • DSC04092.JPG
    DSC04092.JPG
    36.6 KB · Views: 9
  • DSC04091.JPG
    DSC04091.JPG
    36.9 KB · Views: 9
  • DSC04090.JPG
    DSC04090.JPG
    31.7 KB · Views: 5
  • DSC04089.JPG
    DSC04089.JPG
    36.2 KB · Views: 8
  • DSC04088.JPG
    DSC04088.JPG
    32.6 KB · Views: 5
OP
S

scott93

Active member
Joined
Nov 29, 2006
Messages
40
Location
Ontario, Canada
Well Tuesday rolled around and it was looking a little grey in the sky. We busted *** in the morning to try and get the structure all finished so we could have our building inspection done for the "framing" before it started to rain - so i don't have any detailed pictures of it going up - but we put up all the "purlins" on the side of the building, and started to frame in the garage door and man-door openings. Not long after the rain started coming down pretty hard! - Luckily we saw it coming and packed up all our gear just in time.
 

Attachments

  • DSC04097.JPG
    DSC04097.JPG
    31.7 KB · Views: 70
  • DSC04095.JPG
    DSC04095.JPG
    35.2 KB · Views: 37
  • DSC04094.JPG
    DSC04094.JPG
    49 KB · Views: 19
  • DSC04093.JPG
    DSC04093.JPG
    41.4 KB · Views: 19
OP
S

scott93

Active member
Joined
Nov 29, 2006
Messages
40
Location
Ontario, Canada
After the rain let up we were able to finished up the end and back wall by the end of day Tuesday.

on a good note - the building inspector came by and said everything is looking good. We can continue and put on the roof and siding and just call him for a final inspection when we're pretty close to finished! :bounce:
 

Attachments

  • DSC04101.JPG
    DSC04101.JPG
    34.5 KB · Views: 17
  • DSC04102.JPG
    DSC04102.JPG
    41.4 KB · Views: 24
OP
S

scott93

Active member
Joined
Nov 29, 2006
Messages
40
Location
Ontario, Canada
Wednesday started out pretty well - but there were so many little things to finish up on the framing - a lot more cutting than i expected for a pre-fabbed building!
We got all framing done, and called it an early day as we were all pretty sore and sun-burnt!
 

Attachments

  • DSC04108.JPG
    DSC04108.JPG
    45.4 KB · Views: 29
  • DSC04107.JPG
    DSC04107.JPG
    43.9 KB · Views: 11
  • DSC04106.JPG
    DSC04106.JPG
    40.7 KB · Views: 18
  • DSC04105.JPG
    DSC04105.JPG
    43.8 KB · Views: 19
  • DSC04104.JPG
    DSC04104.JPG
    42.6 KB · Views: 14
OP
S

scott93

Active member
Joined
Nov 29, 2006
Messages
40
Location
Ontario, Canada
Thursday - we tried to bring over the roofing and siding material - but it seemed that the ground was a little too soft for the 2wd forklift we had.

We tried jamming wood under the wheel - but all that did was make the forklift do a nice burnout!! :thumbup: So i went and grabbed the pickup and pulled it out.
 

Attachments

  • DSC04118.JPG
    DSC04118.JPG
    50.3 KB · Views: 43
  • DSC04117.JPG
    DSC04117.JPG
    54.6 KB · Views: 44
  • DSC04116.JPG
    DSC04116.JPG
    24.5 KB · Views: 24
  • DSC04115.JPG
    DSC04115.JPG
    56.1 KB · Views: 35
  • DSC04113.JPG
    DSC04113.JPG
    57.9 KB · Views: 13
  • DSC04112.JPG
    DSC04112.JPG
    53 KB · Views: 18
  • DSC04111.JPG
    DSC04111.JPG
    52.9 KB · Views: 23
OP
S

scott93

Active member
Joined
Nov 29, 2006
Messages
40
Location
Ontario, Canada
We started to put up the insulation for the roof - but it was far to windy to stay on. (Sorry no pics - everyone was hanging onto the sheets of insulation, but you can see how we had to ******** the top of the ladders to the building, as they were getting blown over!!). With my friends fearing for their lives - we decided to pack it in early again and get a good night's sleep to start up friday when the winds were supposed to be a lot less.
 

Attachments

  • DSC04119.JPG
    DSC04119.JPG
    46.1 KB · Views: 22
  • DSC04120.JPG
    DSC04120.JPG
    44.2 KB · Views: 16
  • DSC04121.JPG
    DSC04121.JPG
    42.7 KB · Views: 20
OP
S

scott93

Active member
Joined
Nov 29, 2006
Messages
40
Location
Ontario, Canada
Well, Friday morning came, and the winds were still here - not as bad as the previous day, but there was no way we could figure to safely get the insulation and roof panels up on the building. So we called around to see if anyone had a scissor lift, and there were none in the area - so we went over to the local United Rentals and picked up this machine.
 

Attachments

  • DSC04128.JPG
    DSC04128.JPG
    46.6 KB · Views: 24
  • DSC04127.JPG
    DSC04127.JPG
    41.5 KB · Views: 15
  • DSC04126.JPG
    DSC04126.JPG
    42.9 KB · Views: 15
  • DSC04125.JPG
    DSC04125.JPG
    39.2 KB · Views: 9
  • DSC04124.JPG
    DSC04124.JPG
    46 KB · Views: 15
  • DSC04123.JPG
    DSC04123.JPG
    42.3 KB · Views: 18
  • DSC04122.JPG
    DSC04122.JPG
    38.4 KB · Views: 13
OP
S

scott93

Active member
Joined
Nov 29, 2006
Messages
40
Location
Ontario, Canada
Had to have the machine delivered as it weighed more than 12,000lbs load trailer would carry! Once we figured out the controls - i was able to get some nice shots of my neighbour's tree/shrub farm as well as some nice overhead shots of the structure.
 

Attachments

  • DSC04135.JPG
    DSC04135.JPG
    31.2 KB · Views: 21
  • DSC04134.JPG
    DSC04134.JPG
    42.7 KB · Views: 23
  • DSC04133.JPG
    DSC04133.JPG
    21.4 KB · Views: 19
  • DSC04132.JPG
    DSC04132.JPG
    26.8 KB · Views: 35
  • DSC04130.JPG
    DSC04130.JPG
    46.1 KB · Views: 13
OP
S

scott93

Active member
Joined
Nov 29, 2006
Messages
40
Location
Ontario, Canada
After we figured out the best way to use the new machine we got down to business, we started really going - got 75% of the roof done, and had to quit at sundown as the mosquito's were getting to be unbareable! Sorry no pics of the full progress - too busy screwing the roof down and the daylight was gone - i'll snap a few more pics as we finish up the roof tomorrow morning.
 

Attachments

  • DSC04136.JPG
    DSC04136.JPG
    30.1 KB · Views: 16
  • DSC04137.JPG
    DSC04137.JPG
    28.7 KB · Views: 12
  • DSC04138.JPG
    DSC04138.JPG
    47.5 KB · Views: 16
  • DSC04139.JPG
    DSC04139.JPG
    37.9 KB · Views: 15
  • DSC04141.JPG
    DSC04141.JPG
    35.3 KB · Views: 26
  • DSC04142.JPG
    DSC04142.JPG
    20.8 KB · Views: 19
  • DSC04143.JPG
    DSC04143.JPG
    22.4 KB · Views: 16

Falcon05Dad

Well-known member
Joined
Feb 2, 2006
Messages
85
Location
Miamisburg, OH/Sparta, TN
Congratulations on your progress, Scott. All the planning does pay off, eventhough you want it to be done quickly and start using it. Being in the middle of a build also, I know the satisfaction you're feeling as it goes together. Good luck the rest of the way.

Greg
 
To avoid these ads, REGISTER NOW!
Top Bottom