lalojamesliz
Well-known member
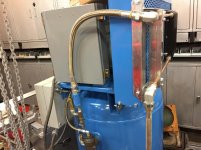
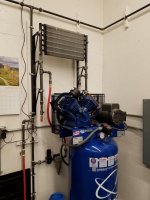
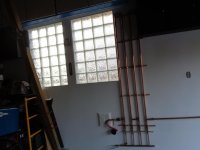
I'm finishing up my compressor install and remembered I have a B&M trans cooler I bought for a car I'm building. That car is a long ways away from being done so I might as well use it for this.
The only problem I have is deciding what to use to connect the compressor outlet to the cooler because of the heat and pressure it will see.
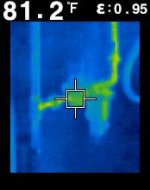
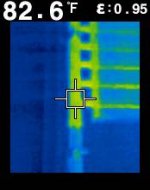
I read temps peak at 300+ and yesterday when I aired it up to 100 psi my temp gun read 160 degrees Fahrenheit on the tube that goes from the compressor to the tank in that short time. It still needed another 75psi to automatically shut off.
I was looking at the copper tubing Home depot sells
https://www.homedepot.com/p/Everbil...r-Coil-Tubing-1-2-in-O-D-3-8-L-10RE/203654407
With some of these connections
https://www.lowes.com/pd/NIBCO-1-2-in-x-1-2-in-Copper-Threaded-Adapter-Fitting/3505126and of course I'll solder them.
The psi rating is more than high enough on the tubing. I'd love to just use air hoses but I doubt they will withstand the heat for long.
If anyone here has a aftercooler what have you used successfully to plumb your cooler?
My first big use for this compressor will be a spray on liner for my son's tacoma and I don't want water in the air supply to ruin it. I'll use a water filter right after the cooler also
The only problem I have is deciding what to use to connect the compressor outlet to the cooler because of the heat and pressure it will see.
I read temps peak at 300+ and yesterday when I aired it up to 100 psi my temp gun read 160 degrees Fahrenheit on the tube that goes from the compressor to the tank in that short time. It still needed another 75psi to automatically shut off.
I was looking at the copper tubing Home depot sells
https://www.homedepot.com/p/Everbil...r-Coil-Tubing-1-2-in-O-D-3-8-L-10RE/203654407
With some of these connections
https://www.lowes.com/pd/NIBCO-1-2-in-x-1-2-in-Copper-Threaded-Adapter-Fitting/3505126and of course I'll solder them.
The psi rating is more than high enough on the tubing. I'd love to just use air hoses but I doubt they will withstand the heat for long.
If anyone here has a aftercooler what have you used successfully to plumb your cooler?
My first big use for this compressor will be a spray on liner for my son's tacoma and I don't want water in the air supply to ruin it. I'll use a water filter right after the cooler also
")