To avoid these ads, REGISTER NOW!

Air compressor mounting??

Pziddy29

Well-known member
Joined
Feb 11, 2015
Messages
86
Location
Northern NJ
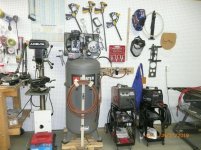
So I will be installing some Supra tiles in my garage tomorrow. I have a few questions. Should I put the pvc tiles under the compressor as well?? Then drill through the pvc tile and into the floor to mount???air compressor is a good heavy 600lbs 80 gallon IR. My other option is to not put tiles under it and mount it to the floor or mount it on some rubber spacers to the floor or have it stand with rubber spacers/feet on top??? I am considering the spacers as I drained it today first time in 3 years a lot of water came out. Considering mounting it higher for easier access to drain. Any suggestions??


Sent from my iPhone using Tapatalk
 
To avoid these ads, REGISTER NOW!

csp

Well-known member
Joined
Mar 23, 2010
Messages
5,719
Location
Franktown, CO
Run a line from the drain port to the outside area where you have better access.

My 80 gallon tank sits on anti-vibration pads and is not bolted down, though where it sits the danger of it ever tipping is next to zero. It does not move.
 

Kaizen

Well-known member
Joined
Jan 9, 2015
Messages
6,948
Location
New England
I’d mount with anchors on anti vibration pads. Run the tiles normally and make cuts like you would on tile around pipes.


Sent from my iPhone using Garage Journal
 
OP
P

Pziddy29

Well-known member
Joined
Feb 11, 2015
Messages
86
Location
Northern NJ
Run a line from the drain port to the outside area where you have better access.

My 80 gallon tank sits on anti-vibration pads and is not bolted down, though where it sits the danger of it ever tipping is next to zero. It does not move.


The drain port is a twist style fitting if I twist counter clockwise water comes out of the knob I think I would need to change to a different style drain tin utilize your idea. My air compressor came with a mounting kit with rubber isolators bolts and washers but no anchors. Sorry this is why I’m not sure if I should pay the pvc tiles first then hammer drill through tile and concrete for the anchors.


Sent from my iPhone using Tapatalk
 
OP
P

Pziddy29

Well-known member
Joined
Feb 11, 2015
Messages
86
Location
Northern NJ
I’d mount with anchors on anti vibration pads. Run the tiles normally and make cuts like you would on tile around pipes.


Sent from my iPhone using Garage Journal


I don’t have any pipes on the floor question is more or less if I should bolt it down I wonder if I used 2 or 3hockey pucks for each foot if it would vibrate on top of the pvc tile or not. This would give me decent access to drain port.


Sent from my iPhone using Tapatalk
 

Kaizen

Well-known member
Joined
Jan 9, 2015
Messages
6,948
Location
New England
I don’t have any pipes on the floor question is more or less if I should bolt it down I wonder if I used 2 or 3hockey pucks for each foot if it would vibrate on top of the pvc tile or not. This would give me decent access to drain port.


Sent from my iPhone using Tapatalk


Yea so I used that as a comparison for how to install the tiles around the legs of the compressor because you won’t find many videos on what you need to do but will on tile install. Get it?
I ordered specific isolation pads to reduce any vibration. Just install piping to put the drain more accessible. Better yet install an auto drain.


Sent from my iPhone using Tapatalk
 

infinkc

Well-known member
Joined
Jan 19, 2012
Messages
862
wow, you need to drain that thing more often. I bought this auto drain since i hate draining mine also. I did plug it into a wall timer so it only auto drains from 10-1 at night at the longest setting. No need to have it drain all the time if you dont use the compressor much. I just have the drain tube running into a plastic container with a lid that has a few holes on the top to let the air out. https://www.amazon.com/dp/B075H8K97T/?tag=atomicindus08-20

I also just use these pads with my 80gal. doesnt move. If it was me i would put the floor down then put these pads on top then the compressor, no bolts.
https://www.homedepot.com/p/Husky-Heavy-Duty-Vibration-Pad-for-Air-Compressors-HDA12200/305308562
 

nadogail

Well-known member
Joined
Jan 23, 2009
Messages
31,935
Location
Coronado, CA
IMHO, No matter how you mount your compressor you can find someone who will tell you you did it wrong.

Mine sits on the floor on it's wheels and rubber pads, just like it came from the box.

I did pull the drain out of the bottom of the tank and replaced it with a Street Ell, ******, and Ball Valve. The advantage is that I can blow the water out of the tank without having to get down on my knees.
 
OP
P

Pziddy29

Well-known member
Joined
Feb 11, 2015
Messages
86
Location
Northern NJ
Auto drain is a nice idea. However I think just running a different way to drain it will be best. Thanks for the suggestions guys I’ll keep you updated.

Anyone know the size of the fitting I need if I want to check th drain valve? Part number is 32027120 it says its a 1/4 drain valve. Im guessing all the fitings are npt?? So some sealing paste is probably also a good idea to use?

This is the stocker unit that currently installed:

https://www.ebay.com/i/293105379080...MIiJ2spf-I6gIVDU2GCh2t-wcIEAQYBCABEgJEb_D_BwE
 
Last edited:

csp

Well-known member
Joined
Mar 23, 2010
Messages
5,719
Location
Franktown, CO
The drain port is a twist style fitting if I twist counter clockwise water comes out of the knob I think I would need to change to a different style drain tin utilize your idea.

That's exactly what I'm suggesting. Unscrew the entire fitting it has from the tank and install whatever it takes in 1/4" NPT pieces to get it out to the side of the tank with a ball valve on the end.

You can get these parts at any big box hardware store in the plumbing section. You'll need a short ****** to get it out of the bottom of the tank, a 90 degree fitting, another ****** of ** inches to get it out from under the tank (use your tape measure to figure out how long before going to the store), and a ball valve at the end. The ball valve might be in the tool section with the rest of the air compressor accessories. I would suggest Teflon tape vs pipe dope since it's small.
 
Last edited:
To avoid these ads, REGISTER NOW!
OP
P

Pziddy29

Well-known member
Joined
Feb 11, 2015
Messages
86
Location
Northern NJ
Tanks guys pun intended. Ended up getting a cheap relocation hose made by husky has a ball end valve. Basically a 90 degree elbow with a 10” braided hose with a ball end valve on the end so I don’t have to get under it. Just need to mount the ball end valve to the compressor leg. Will probably make some sort of bracket.
 
Last edited:

nadogail

Well-known member
Joined
Jan 23, 2009
Messages
31,935
Location
Coronado, CA
When I replaced the drain on my compressor i screwed a Street Ell into the bottom of the tank and ran a ****** over to a ball valve that I can operate with my toe.

Yes it spits a little water out to the floor, but not enough to worry about wiping up.
 

sz0k30

Well-known member
Joined
Feb 12, 2014
Messages
884
Location
SE Michigan
Here's my setup. 60 gallon on vibration pads, on the wood pallet it came on. With an easily accessible drain.
 

Attachments

  • P1080276.jpg
    P1080276.jpg
    148 KB · Views: 63

Kevin54

MEMBER EMERITUS
Joined
Jan 12, 2005
Messages
29,341
Location
Urbana, Ohio
Don't screw up a floor or tiles by drilling holes. The only reason to bolt one down is to keep someone from stealing it. Just set it on isolation pads. If you don't have isolation pads, you can set it on conveyor belting under the feet. A 3" square under each will keep it in place for years to come.
 
OP
P

Pziddy29

Well-known member
Joined
Feb 11, 2015
Messages
86
Location
Northern NJ
Thanks guys yes I ended up putting the compressor on the anti vibration pads I purchased yesterday with the hose. I had already laid the floor down hence why I wanted to removed the compressor from the pallet and also get the hose one before I moved it into position. Floor is almost finished. Looks dusty as I’m still not done laying floor a lot of of stuff I. The garage that I still have to move into position.I also need to change the 220v outlet and run a different wire for the compressor something a little longer and more flexible.fe5140ce72af5c21c52f0b7414e6ea3a.jpg


Sent from my iPhone using Tapatalk
 

Attachments

  • fe5140ce72af5c21c52f0b7414e6ea3a.jpg
    fe5140ce72af5c21c52f0b7414e6ea3a.jpg
    67.2 KB · Views: 3

LS6 Tommy

Well-known member
Joined
Dec 27, 2013
Messages
26,162
Location
Northern NJ
I also need to change the 220v outlet and run a different wire for the compressor something a little longer and more flexible.fe5140ce72af5c21c52f0b7414e6ea3a.jpg

I was going to say, that wiring is a little hinky. If it was in my garage it would be hard wired or on a whip.

Tommy
 

Attachments

  • fe5140ce72af5c21c52f0b7414e6ea3a.jpg
    fe5140ce72af5c21c52f0b7414e6ea3a.jpg
    62.6 KB · Views: 4
Last edited:

brownbagg

Well-known member
Joined
Mar 20, 2006
Messages
5,208
Tanks guys pun intended. Ended up getting a cheap relocation hose made by husky has a ball end valve. Basically a 90 degree elbow with a 10” braided hose with a ball end valve on the end so I don’t have to get under it. Just need to mount the ball end valve to the compressor leg. Will probably make some sort of bracket.

tractor supply has a little kit that has all the stuff together for $19, its cheaper just to put together your self
 
OP
P

Pziddy29

Well-known member
Joined
Feb 11, 2015
Messages
86
Location
Northern NJ
I was going to say, that wiring is a little hinky. If it was in my garage it would be hard wired or on a whip.

Tommy


Yes temporary setup as I’m short on time will be changed to something more flexible.


Sent from my iPhone using Tapatalk
 
To avoid these ads, REGISTER NOW!
Top Bottom