To avoid these ads, REGISTER NOW!

And so it begins: 50x140

To avoid these ads, REGISTER NOW!
OP
M

mkarlin

Well-known member
Joined
Jun 18, 2016
Messages
220
Location
Northeast
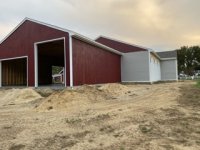
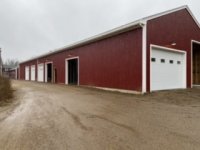
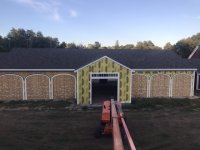
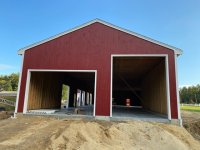
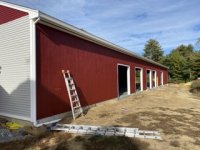
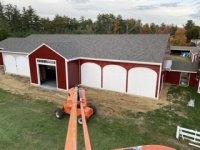
Clapboards continue to go up
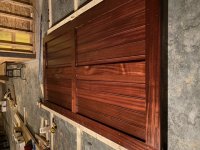
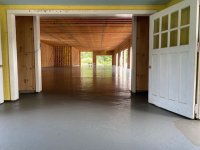
Filled and sanded the nail holes and a coat of primer for the faux doors

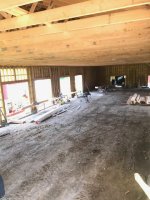
Also an interior shot of the inground lift


Next week final grading and foam, wire mesh, and radiant tubing


Little nervous about timing since I need to get it all done before sept 9 since the concrete guy is coming that day
 

Attachments

  • CF710B66-FF1C-475F-9C47-D2B3A18A8366.jpeg
    CF710B66-FF1C-475F-9C47-D2B3A18A8366.jpeg
    88.6 KB · Views: 199
  • A274A867-BE0F-4806-8B58-F4C0C9A7C2EE.jpeg
    A274A867-BE0F-4806-8B58-F4C0C9A7C2EE.jpeg
    28.4 KB · Views: 186
  • 4CB79BE4-4C0B-4141-B27C-97C7E0E99E31.jpeg
    4CB79BE4-4C0B-4141-B27C-97C7E0E99E31.jpeg
    88.6 KB · Views: 170
OP
M

mkarlin

Well-known member
Joined
Jun 18, 2016
Messages
220
Location
Northeast
Teaser!!! Spent the last two weeks getting the floor ready for concrete in thursday!

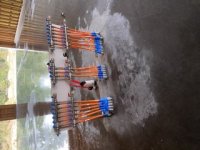
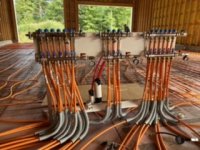
Did the radiant heat with my wife’s cousin and help from the wife and in-laws. Took three days to lay all the tubing. Some tubing is under the mesh becuAse I was worried about the control guys and the base is so dense was hard to remove lateral. Planning on a 5 in slab but the spots with 3 sheets of 6 ga wire mess and a little high dirt had me worries so ran it under.

Could not be happier
 

Attachments

  • A9A58A6F-0482-479A-8A12-09776EA12728.jpg
    A9A58A6F-0482-479A-8A12-09776EA12728.jpg
    111 KB · Views: 218

78SC4X4

Well-known member
Joined
Apr 21, 2018
Messages
370
Location
Port Orchard Wa
That is an amazing amout of tubing........... Can't wait to see the rest of the system. Thanks for keeping us posted on progress.
 

loganb

ALLIANCE MEMBER
Joined
Dec 29, 2011
Messages
5,642
Location
Omaha, NE
Re: And so it begins: 6700sq ft

Awesome update...can't wait to see the time-lapse of the upcoming pour!

Sent from The Garage Journal mobile app
 
OP
M

mkarlin

Well-known member
Joined
Jun 18, 2016
Messages
220
Location
Northeast
Re: And so it begins: 6700sq ft

Awesome update...can't wait to see the time-lapse of the upcoming pour!

Sent from The Garage Journal mobile app

Thanks Loganb. I see you are from Omaha. I am from Nebrasks (Columbus)
 
OP
M

mkarlin

Well-known member
Joined
Jun 18, 2016
Messages
220
Location
Northeast
Pressure tested this am. So far holding pressure.

Now to tidy up the sweeps and lines
 

Attachments

  • 4BF59C9C-0612-488B-930D-B13C7F4B5574.jpeg
    4BF59C9C-0612-488B-930D-B13C7F4B5574.jpeg
    40.3 KB · Views: 187
Last edited:
OP
M

mkarlin

Well-known member
Joined
Jun 18, 2016
Messages
220
Location
Northeast
Time for an update- has been 2 weeks of all out.
Concrete is being poured in the morning.

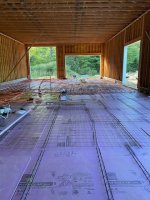
Base solid, 15ml Stego vapor barrier, 2 in formular 250 XPS, 6 gauge wire mesh on 1.5 in bolsters with 5/8 in pex attached to the wire mesh.
5 in concrete slab, 4000 PSI
 

Attachments

  • 62085129532__792D8190-2F03-4C1C-9073-C75DD8F75CFA.jpeg
    62085129532__792D8190-2F03-4C1C-9073-C75DD8F75CFA.jpeg
    41.7 KB · Views: 160
  • IMG_2906.jpeg
    IMG_2906.jpeg
    89.7 KB · Views: 158
  • IMG_4222.jpeg
    IMG_4222.jpeg
    106.6 KB · Views: 170
  • IMG_7224.jpeg
    IMG_7224.jpeg
    62.1 KB · Views: 167
  • IMG_7291 3.jpeg
    IMG_7291 3.jpeg
    125 KB · Views: 163
  • IMG_7297.jpeg
    IMG_7297.jpeg
    115.4 KB · Views: 168

loganb

ALLIANCE MEMBER
Joined
Dec 29, 2011
Messages
5,642
Location
Omaha, NE
Re: And so it begins: 6700sq ft

Thanks Loganb. I see you are from Omaha. I am from Nebrasks (Columbus)
Yep, just moved into Omaha suburbs(Sarpy county) this summer after 5 years in Chicagoland. Wife and I are both from this neck of the woods and a forced job change gave us an opportunity to get back and closer to family!

Excited to see it with a slab very soon!

Sent from The Garage Journal mobile app
 
OP
M

mkarlin

Well-known member
Joined
Jun 18, 2016
Messages
220
Location
Northeast
The floor got poured, with only one hiccup
Background: 5 in slab, 4000PSI
base was very solid, I did the the stego 15 mil vapor barrier, 2in XPS, and the radiant tube placement to wire mesh (6 ga on 1.5 in bolsters) with and did the foam and 6 ga mesh. I zipped the pex to the mesh every 2 feet.

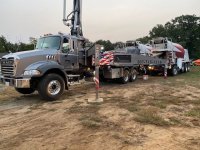
They had to bring in a pump truck, and unloaded 2 concrete trucks at a time in to the hopper.

When they were running the tubing for the pump truck, the disc/support they used to slide it started to catch on some of the tubes and broke some of the zip ties. Most fixed either with new zip ties or with a rebar gun, but two sections of tubing floated up right after the screed, and had to be tied back down.
(they used a laser screeder)
The concrete guy was originally going to control cut it but said he was worried about those two tubes that floated even thought they got tied back down, he was worried other zip ties could have popped. (I was also very concerned)

So we elected to not do control cuts. would rather have a crack than cut tubing.

The group said they were impressed with the prep. All the work of the subfloor prep, foam, and tubing was a family affair (three of use). I am a little disappoint with myself that the tubing floated and we could not cut the floor (but the radiant held pressure that is good).

But at least the mesh is in the middle of the slab, instead of on the ground.

All in all was good except for the control cuts.
I got alot of comments that I should have just stapled it to the foam.

I am sure I am missing something
More updates to come, it is finally feeling like a real building.
 

Attachments

  • IMG_7297 (1).jpeg
    IMG_7297 (1).jpeg
    115.4 KB · Views: 142
  • IMG_3750.jpeg
    IMG_3750.jpeg
    58 KB · Views: 134
  • IMG_3401.jpeg
    IMG_3401.jpeg
    121.6 KB · Views: 147
  • IMG_3100.jpeg
    IMG_3100.jpeg
    55.3 KB · Views: 139
  • IMG_2293.jpeg
    IMG_2293.jpeg
    76.8 KB · Views: 169
  • IMG_1970.jpeg
    IMG_1970.jpeg
    79.7 KB · Views: 142
  • IMG_0539.jpeg
    IMG_0539.jpeg
    63.1 KB · Views: 146

muckdp

Active member
Joined
Aug 26, 2011
Messages
44
Make sure you do your research on that Atlas scissor lift. I looked into doing a scissor lift, and decided the Atlas wasn't for me, and the other brands were too expensive. In my research I figured out that the Atlas was basically an overseas model that they import into the US. That means all the valves, fittings, electrical, hardware, etc, is all foreign, and not "US Standard". Not only does that make working on it yourself more difficult, but parts are a challenge to get even from atlas. I also recall being concerned about its reliability in general, though I can't remember why specifically. I ended up going with a traditional rotary 14k 4 post lift, and I'm glad I did. So just make sure you do your homework. That's a nice building, and nice setup, don't ruin it with a finicky breakdown-prone lift.

Good luck!
 
Last edited:
OP
M

mkarlin

Well-known member
Joined
Jun 18, 2016
Messages
220
Location
Northeast
Thanks for the suggestion, we ended up going with an inground 2 post 10K Challenger lift.

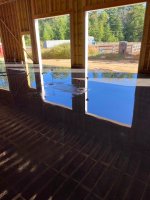
Here is an image without the arms, 2 days after the slab was pour (wetted down for the cure process).

Make sure you do your research on that Atlas scissor lift. I looked into doing a scissor lift, and decided the Atlas wasn't for me, and the other brands were too expensive. In my research I figured out that the Atlas was basically an overseas model that they import into the US. That means all the valves, fittings, electrical, hardware, etc, is all foreign, and not "US Standard". Not only does that make working on it yourself more difficult, but parts are a challenge to get even from atlas. I also recall being concerned about its reliability in general, though I can't remember why specifically. I ended up going with a traditional rotary 14k 4 post lift, and I'm glad I did. So just make sure you do your homework. That's a nice building, and nice setup, don't ruin it with a finicky breakdown-prone lift.

Good luck!
 

Attachments

  • IMG_7463.JPG
    IMG_7463.JPG
    99.4 KB · Views: 151
Last edited:
To avoid these ads, REGISTER NOW!

78SC4X4

Well-known member
Joined
Apr 21, 2018
Messages
370
Location
Port Orchard Wa
Thanks for sharing your experience. Tubing on top of the mesh would be more efficient than stapled to the XPS, but it's unfortunate that it broke loose on you. I think I will probably staple to the XPS and put the mesh above the tubing to be safe.
 
OP
M

mkarlin

Well-known member
Joined
Jun 18, 2016
Messages
220
Location
Northeast
Thanks for sharing your experience. Tubing on top of the mesh would be more efficient than stapled to the XPS, but it's unfortunate that it broke loose on you. I think I will probably staple to the XPS and put the mesh above the tubing to be safe.


Yeah in the future that is that I would do. And if you really wanted them in the middle you could zip tie them to the underside of then mesh. Would be a lot of bending over but not horrible

All in all the slab only got 4 cracks in it. Two that were 1/8 inch wide that I will
Seal/fill and two hairline ones


Not bad for no control joints
 
OP
M

mkarlin

Well-known member
Joined
Jun 18, 2016
Messages
220
Location
Northeast
Got some painting done
 

Attachments

  • DADEF76D-F866-4C57-A728-35FF24624748.jpg
    DADEF76D-F866-4C57-A728-35FF24624748.jpg
    115.2 KB · Views: 164
  • E0DB84AE-3D29-4FBC-AE89-B1D6DF307E3D.jpg
    E0DB84AE-3D29-4FBC-AE89-B1D6DF307E3D.jpg
    79.4 KB · Views: 161
  • 0932EC5D-A243-40A5-A69E-C72DF0C064EA.jpeg
    0932EC5D-A243-40A5-A69E-C72DF0C064EA.jpeg
    32.6 KB · Views: 171
  • 7FCAA013-0AC8-445F-AC00-EC85A08530CB.jpeg
    7FCAA013-0AC8-445F-AC00-EC85A08530CB.jpeg
    34.4 KB · Views: 206
  • E1C144C7-5CE5-42E1-9436-1A77FB6F090A.jpg
    E1C144C7-5CE5-42E1-9436-1A77FB6F090A.jpg
    101.8 KB · Views: 181
OP
M

mkarlin

Well-known member
Joined
Jun 18, 2016
Messages
220
Location
Northeast
Some updates painting pics
 

Attachments

  • 3BE51B14-59ED-4537-BCAD-3F86E2F24585.jpeg
    3BE51B14-59ED-4537-BCAD-3F86E2F24585.jpeg
    90.8 KB · Views: 118
  • C6495D23-4C99-4B7A-8E44-AC65ED028B76.jpeg
    C6495D23-4C99-4B7A-8E44-AC65ED028B76.jpeg
    34.8 KB · Views: 113
  • 3B51965E-4F62-4203-A4A9-DE49D53A52BF.jpeg
    3B51965E-4F62-4203-A4A9-DE49D53A52BF.jpeg
    27.6 KB · Views: 104
  • EED9F962-A7A3-4B0A-95A6-77C73969CB13.jpeg
    EED9F962-A7A3-4B0A-95A6-77C73969CB13.jpeg
    39.3 KB · Views: 188

78SC4X4

Well-known member
Joined
Apr 21, 2018
Messages
370
Location
Port Orchard Wa
That's pretty cool. Thanks for putting that together.

What is the wheeled screed machine. Never saw that before...... and it didn't hurt the pex.
 
OP
M

mkarlin

Well-known member
Joined
Jun 18, 2016
Messages
220
Location
Northeast
Hoping to have it all painted by Sunday. Fingers crossed
 

Attachments

  • 5453B2DF-F276-4CC6-BFBB-E9A31133C27A.jpeg
    5453B2DF-F276-4CC6-BFBB-E9A31133C27A.jpeg
    101.8 KB · Views: 100
OP
M

mkarlin

Well-known member
Joined
Jun 18, 2016
Messages
220
Location
Northeast
Interior walls going in this week, updated electrical service getting installed and painting done
 

Attachments

  • 6837833B-D5C2-4940-B25C-0B5BD21EE84F.jpeg
    6837833B-D5C2-4940-B25C-0B5BD21EE84F.jpeg
    128.7 KB · Views: 166
  • 867B6C8D-2FBA-4758-9EEE-6A60814F46E3.jpeg
    867B6C8D-2FBA-4758-9EEE-6A60814F46E3.jpeg
    30.9 KB · Views: 125
OP
M

mkarlin

Well-known member
Joined
Jun 18, 2016
Messages
220
Location
Northeast
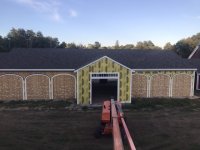
Some updates, have been wicked busy. Getting the electrical done and interior walls are up

The workshop is getting its own 100 amp sub panel. The building has a 200 amp panels, also installing the three phase converter. (Not pictures)

Also got the exterior lights up

Insulation is the next step, not doing spray foam.
 

Attachments

  • BAB5165E-F2C2-43FB-ADBB-611F57CFD422.jpg
    BAB5165E-F2C2-43FB-ADBB-611F57CFD422.jpg
    116.9 KB · Views: 133
  • 2AC52714-060C-469D-8907-9B783ADB7881.jpeg
    2AC52714-060C-469D-8907-9B783ADB7881.jpeg
    31.3 KB · Views: 156
  • 6DAE612D-FDA6-4CAA-A27F-2204B874F323.jpeg
    6DAE612D-FDA6-4CAA-A27F-2204B874F323.jpeg
    128.7 KB · Views: 127
  • F871C762-7C87-4453-B918-CA7745A51068.jpeg
    F871C762-7C87-4453-B918-CA7745A51068.jpeg
    117.5 KB · Views: 127
  • CFEF953D-8AF3-465E-BDB6-F5C573FE1DD6.jpeg
    CFEF953D-8AF3-465E-BDB6-F5C573FE1DD6.jpeg
    21.9 KB · Views: 128
  • 6242B321-907F-4632-8857-09343E5E135C.jpeg
    6242B321-907F-4632-8857-09343E5E135C.jpeg
    122.4 KB · Views: 152
  • B76C427A-B399-4635-BED9-5C6CA452785C.jpeg
    B76C427A-B399-4635-BED9-5C6CA452785C.jpeg
    135.4 KB · Views: 109

loganb

ALLIANCE MEMBER
Joined
Dec 29, 2011
Messages
5,642
Location
Omaha, NE
Re: And so it begins: 6700sq ft

:drool:

Congrats! Looking awesome

Sent from The Garage Journal mobile app
 
OP
M

mkarlin

Well-known member
Joined
Jun 18, 2016
Messages
220
Location
Northeast
Re: And so it begins: 6700sq ft

:drool:

Congrats! Looking awesome

Sent from The Garage Journal mobile app

Thanks Logan, I may live in the NE (northeast) now, but I am from Nebraska originally and Went to grad school at K-state.

:)
 

loganb

ALLIANCE MEMBER
Joined
Dec 29, 2011
Messages
5,642
Location
Omaha, NE
Re: And so it begins: 6700sq ft

Thanks Logan, I may live in the NE (northeast) now, but I am from Nebraska originally and Went to grad school at K-state.

:)
Glad you headed south for grad school. Grew up in KS and went to State but currently am one of the neighborhood rebels in Omaha not cheering for the Huskers

Sent from The Garage Journal mobile app
 

brainypencil

Well-known member
Joined
Dec 5, 2013
Messages
123
Some updates, have been wicked busy. Getting the electrical done and interior walls are up

The workshop is getting its own 100 amp sub panel. The building has a 200 amp panels, also installing the three phase converter. (Not pictures)

Also got the exterior lights up

Insulation is the next step, not doing spray foam.

Wow, Looking great!
 
To avoid these ads, REGISTER NOW!
Top Bottom