admranger
Well-known member
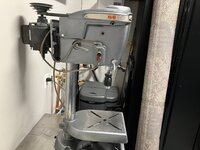
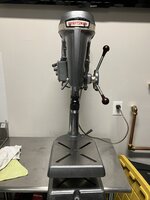
So I have had this Craftsman 150 drill press for a few years. My nephew bought it at my urging from a government auction in South Dakota.
I finally got off my lazy **** and decided to tackle this now that I'm retired. I have been watching Jeff's Shop rebuild series to get an idea of what I was in for, but decided to go ahead anyway.
Disassembly was going pretty well, but when it came time to take the chuck off the spindle, I ran into a problem. I used an old Park bicycle bottom bracket tool to turn the collar down onto the chuck. I had to slightly modify it for the tighter radius of the collar. Everything was going well until I ran out of threads and the chuck was still firmly attached to the spindle. Hmmm. Now what? I have it soaking with copious amounts of PB Blaster, but I'm not sure what to do if that doesn't help things out. Wedges? The chuck is a Jacobs 633C

 and as far as my old eyes can see there's nothing mechanical, like a screw or bolt, holding the chuck to the spindle. It appears to be just friction.
The good news is the motor spins freely and runs well. Unfortunate about the switch box that was mounted to the head, but these things happen. The drill itself does not spin very well at all. It is very stiff. Hoping to rectify that with the restoration.
Here's some pics for your enjoyment.


I finally got off my lazy **** and decided to tackle this now that I'm retired. I have been watching Jeff's Shop rebuild series to get an idea of what I was in for, but decided to go ahead anyway.
Disassembly was going pretty well, but when it came time to take the chuck off the spindle, I ran into a problem. I used an old Park bicycle bottom bracket tool to turn the collar down onto the chuck. I had to slightly modify it for the tighter radius of the collar. Everything was going well until I ran out of threads and the chuck was still firmly attached to the spindle. Hmmm. Now what? I have it soaking with copious amounts of PB Blaster, but I'm not sure what to do if that doesn't help things out. Wedges? The chuck is a Jacobs 633C
and as far as my old eyes can see there's nothing mechanical, like a screw or bolt, holding the chuck to the spindle. It appears to be just friction. The good news is the motor spins freely and runs well. Unfortunate about the switch box that was mounted to the head, but these things happen. The drill itself does not spin very well at all. It is very stiff. Hoping to rectify that with the restoration.
Here's some pics for your enjoyment.


.JPG")