To avoid these ads, REGISTER NOW!

Anybody have experience with encapsulated crawlspaces?

stm317

Well-known member
Joined
Aug 8, 2017
Messages
1,339
We'd like to have ours done at some point. We plan to live in our current home for another 20 years or so which makes the cost more tolerable. We haven't gotten any quotes yet, but are expecting it to be "not cheap" based on some research.

We live in central Indiana, so we see cold winters and warm/humid summers, and we're currently living with a vented crawl although the vents are closed as much as they can be.

I was hoping to hear from some of you and get your feedback. Has it had a noticeable impact for you? Would you do it again? Anybody do it themselves?

I meant to post this in Free Parking. If a Mod thinks it would be better there, feel free to move it. Thanks!
 
Last edited:
To avoid these ads, REGISTER NOW!

lowe.joshua51

Well-known member
Joined
Jan 24, 2018
Messages
78
Location
Southeast Kansas
I bought a house about 8 months ago and it too has a vented crawl space. I'm completely gutting it so as I'm taking out the subfloor (old 1x8's diagonally) I am laying down a vapor barrier from the top side. It's so much easier than I imagine it being working in the crawl space. When I replace the siding I'm going to do about 2 inches of exterior rigid foam insulation all the way to below ground. Most people put the insulation on the inside so if putting it on the outside is wrong please stop me!
 

arbutus

Member
Joined
Aug 11, 2014
Messages
8
Location
Michigan Upper Peninsula
Not quite the same, but we had a foundation issue and dug down to the footing around our basement to fix it. Before backfill I insulated the entire basement wall with R10 ground contact XPS foam sheet. I also blocked up two of the original 16x32 single pane basement windows, and removed and replaced the other two with egress size double pane windows. Insulation and window replacement raised the temperature at least 10 degrees without any additional heat. It used to be chilly, 55, but now it is comfortable enough for the kids to play.
 

matt_i

Well-known member
Joined
Mar 14, 2008
Messages
10,741
Location
SE Michigan
When I lived in middle Tennessee, I encapsulated the bare-dirt crawl space with heavy plastic sheeting and placed a dehumidifier on top. The dehumidifier had a small line that ran out under the footer downhill into the yard and into a grated section fed by PVC.

It made a slight difference in lowering the humidity of the house and a huge difference in the slightly musty smell I had inside was gone overnight & forever. A lot of people who had been in the house before & after asked what the heck I did.

I just used a garden variety dehumidifier, reading suggested they'd be good for ~3 years of service like this before crapping out. There were units meant for a more permanent installation which cost ~4-5x as much but could last a dozen years or so,
 

DC73

Well-known member
Joined
Dec 27, 2014
Messages
1,627
Location
Lubbock TX
Don't remember if it was GreenBuildingAdvisor.com or BuildingScience.com but one or both of them have some good info on crawl spaces. The right answer can be different for the various climate zones.

DC
 

vavet

Well-known member
Joined
Mar 6, 2012
Messages
5,330
Location
Ashland, VA
We had our house built about 3 years ago with a conditioned crawl space.

It’s clean, it’s climate controlled, meaning the area under our living area is conditioned, so our house should be more comfortable, and I firmly believe it is a better way to have a crawl space based on the humidity control for your floor joists and insulation.

The downsides: you have to be careful when you’re down there. You have to check behind any people who are down there (exterminators, plumbers, electricians, etc) to make sure they didn’t damage it or if they had a legit need to penetrate it, that it is resealed properly. Finding an exterminator to perform a termite inspection is next to impossible, depending on how it’s done.
 

kwschumm

Well-known member
Joined
Feb 13, 2016
Messages
1,220
Location
Olympia, WA
We're building a new house with a 3' encapsulated crawl space. Vapor retarder wrapped up stem walls and sealed, radon vent pipes (will be active fan), 4" gas permeable aggregate, 3" rat slab, mechanical venting and dehumidification. Check regulations in your area, here in WA they have definite requirements (example, vapor retarder to be Fortifier "Moistop Ultra 10", Class A, Type 1, installed per R408.3 - whatever that means).
 
OP
S

stm317

Well-known member
Joined
Aug 8, 2017
Messages
1,339
We had our house built about 3 years ago with a conditioned crawl space.

It’s clean, it’s climate controlled, meaning the area under our living area is conditioned, so our house should be more comfortable, and I firmly believe it is a better way to have a crawl space based on the humidity control for your floor joists and insulation.

The downsides: you have to be careful when you’re down there. You have to check behind any people who are down there (exterminators, plumbers, electricians, etc) to make sure they didn’t damage it or if they had a legit need to penetrate it, that it is resealed properly. Finding an exterminator to perform a termite inspection is next to impossible, depending on how it’s done.

I appreciate the pros/cons there. Thanks for the feedback! I also have concerns about keeping the vapor barrier from being punctured, but I figured I could lay something down in the higher traffic areas like rolls of vinyl or rubber flooring to reduce the chances of that if it comes to it. Do you think it's a good idea to try and salvage some of the scrap pieces of vapor barrier to use for future repairs?

I guess I'll need to check local codes to find out if there are any requirements for materials or pest inspection gaps.
 
Last edited:
OP
S

stm317

Well-known member
Joined
Aug 8, 2017
Messages
1,339
When I lived in middle Tennessee, I encapsulated the bare-dirt crawl space with heavy plastic sheeting and placed a dehumidifier on top. The dehumidifier had a small line that ran out under the footer downhill into the yard and into a grated section fed by PVC.

It made a slight difference in lowering the humidity of the house and a huge difference in the slightly musty smell I had inside was gone overnight & forever. A lot of people who had been in the house before & after asked what the heck I did.

I just used a garden variety dehumidifier, reading suggested they'd be good for ~3 years of service like this before crapping out. There were units meant for a more permanent installation which cost ~4-5x as much but could last a dozen years or so,

Can you elaborate on the final product at all? Did you run the vapor barrier up the walls and seal it completely? Was there any insulation being used? Any idea how much you spent?

This seems like a project that could be DIY-able with the right materials, but my crawl has some non-standard features that I'd have to figure out an appropriate technique for. It might be worth having a pro do it in a day or two and know that it's done correctly vs me more or less winging it and taking a month's worth of weekends. I guess we'll see how ridiculous the estimates are.
 

yeldogt

Well-known member
Joined
Jan 2, 2012
Messages
18,184
What is the current crawl space ? Any ductwork? Any water pipes?

Are we talking about 100year old house with dirt floor or 25 year old house with rat slab -- also what is the objective ?

When you see heavy plastic that incorporates the layer of thin foam -- typically done in areas with colder temps and Radon.

Years ago it was common to use heavy plastic with a layer of sand -- thick pressboard on the inside of the foundation -- ducts running through. They don't require much to fix.
 
Last edited:
OP
S

stm317

Well-known member
Joined
Aug 8, 2017
Messages
1,339
What is the current crawl space ? Any ductwork? Any water pipes?

Are we talking about 100year old house with dirt floor or 25 year old house with rat slab -- also what is the objective ?

When you see heavy plastic that incorporates the layer of thin foam -- typically done in areas with colder temps and Radon.

Years ago it was common to use heavy plastic with a layer of sand -- thick pressboard on the inside of the foundation -- ducts running through. They don't require much to fix.

The house was built in 1967. The crawlspace has a poured concrete footer with block walls (3 blocks high if my memory is correct). The floor appears to be dirt, but there are remnants of pea gravel and plastic vapor barrier in places, so somebody tried to do a little to make it nicer at some point. I can see evidence of fiberglass insulation that had been installed between the floor joists, but it's no longer there. It's usually just a sponge in a vented crawl anyway. There is ductwork, natural gas plumbing, water plumbing, and some electrical wiring down there. HVAC units and breaker boxes are not in the crawl though.

The goal is to seal the crawl entirely by blocking off the vents, insulating the rim joist and hopefully the walls, then installing a thick vapor barrier across the floor and also up the walls to the extent that local code will allow. The space will then be conditioned either by installing a dehumidifier (Preferable) or venting the HVAC directly into the crawl (would only work when HVAC was being used).
There should be multiple benefits to this:
- It will improve energy efficiency in the home
- It will make working in the crawlspace much nicer
- It will improve air quality in the house
- It will reduce moisture related wear/tear on the structure and the mechanicals inside the crawl space
- It will reduce bug/pest intrusion into the home

It's not a **** upgrade. Nobody is going to walk through the front door and say "Oh, I love your newly encapsulated crawlspace!" but it seems like something that would make the house a nicer place to live for the next couple of decades. In the unfortunate case that I'd have to do work down there, it would be a lot more pleasant to work in a clean, dry, bug-free environment and it should extend the life of the mechanical stuff that is routed through the crawl.
 
Last edited:

finn

Well-known member
Joined
Mar 27, 2005
Messages
16,340
Location
The UP, God's country
I did that on a project house. Excavated the sand in the shallow crawl to get a little working room, added drain tile, running to daylight, inside the footings, vapor barrier on the floor, 2” blue foamboard on the walls, spray foam on the rim joists, and removed the bats between the joists.
I was down there last week, and it was plenty warm to do plumbing work.
 

R6 Racer

Well-known member
Joined
Feb 21, 2010
Messages
1,632
Location
Northern Ontario Canada
Parents had a cottage/home with a crawl space. They insulated the inside of the exterior walls down to 1 foot below grade with pink foam board insulation. They also installed electrical heating lines onto the water lines to keep them from freezing, just encase it happened to get too cold under the house. They kept is sealed tight during the cold. Then opened it up & kept it very well ventilated during the unfrozen months. (Important)
That is up here in Ontario. I'm not sure how your winters compare.

Good luck, there's lots of ways to skin a cat.
Steve
 

yeldogt

Well-known member
Joined
Jan 2, 2012
Messages
18,184
The house was built in 1967. The crawlspace has a poured concrete footer with block walls (3 blocks high if my memory is correct). The floor appears to be dirt, but there are remnants of pea gravel and plastic vapor barrier in places, so somebody tried to do a little to make it nicer at some point. I can see evidence of fiberglass insulation that had been installed between the floor joists, but it's no longer there. It's usually just a sponge in a vented crawl anyway. There is ductwork, natural gas plumbing, water plumbing, and some electrical wiring down there. HVAC units and breaker boxes are not in the crawl though.

The goal is to seal the crawl entirely by blocking off the vents, insulating the rim joist and hopefully the walls, then installing a thick vapor barrier across the floor and also up the walls to the extent that local code will allow. The space will then be conditioned either by installing a dehumidifier (Preferable) or venting the HVAC directly into the crawl (would only work when HVAC was being used).
There should be multiple benefits to this:
- It will improve energy efficiency in the home
- It will make working in the crawlspace much nicer
- It will improve air quality in the house
- It will reduce moisture related wear/tear on the structure and the mechanicals inside the crawl space
- It will reduce bug/pest intrusion into the home

It's not a **** upgrade. Nobody is going to walk through the front door and say "Oh, I love your newly encapsulated crawlspace!" but it seems like something that would make the house a nicer place to live for the next couple of decades. In the unfortunate case that I'd have to do work down there, it would be a lot more pleasant to work in a clean, dry, bug-free environment and it should extend the life of the mechanical stuff that is routed through the crawl.


So .. the whole house is on a crawlspace? do you have a moisture problem -- how cold/ hot climate. Do you have radon?
 
Last edited:
OP
S

stm317

Well-known member
Joined
Aug 8, 2017
Messages
1,339
So .. the whole house is on a crawlspace? do you have a moisture problem -- how cold/ hot climate. Do you have radon?

Roughly 65% of the house is on the crawl.
We currently experience cold floors in the winter, and obvious creaks that aren't there in the warmer months.
The crawl space is dry, even when our yard holds a bunch of water. No known moisture problems. There is some evidence of corrosion from condensation on ductwork/plumbing.
As I said in the first post, I'm in Central Indiana. We have hot, humid summers and cold, mostly dry winters. Lowest temps during cold months are around -10F. Warmest temps are around 105F. It's not uncommon to have temperatures swing 40+ degrees in 24 hours.
Radon is possible, but not overly common, and not a known issue.

What are you getting at?
 
Last edited:
OP
S

stm317

Well-known member
Joined
Aug 8, 2017
Messages
1,339
Not sure if this can help you but Tjernlund (Ch-ern-lund) makes so nice ventilation products. Check out these Crawl Space Ventilators. They are an excellent outfit.

https://tjernlund.com/crawl_space_ventilation.htm

Thanks for the suggestion. I'd rather just eliminate the vents completely though. If this house were built today, it would not be allowed to have vents in the crawl. Full encapsulation will do a better job of controlling humidity and temperature than fancy vents.
 

Falcon67

Well-known member
Joined
Jun 11, 2009
Messages
18,371
Location
Merkel, TX
Not sure if this can help you but Tjernlund (Ch-ern-lund) makes so nice ventilation products. Check out these Crawl Space Ventilators. They are an excellent outfit.

https://tjernlund.com/crawl_space_ventilation.htm

After reading several "green" building papers and seeing several modern framing videos and discussions, that crawl vent stuff will be going away. Not how it's done anymore.
 

kwschumm

Well-known member
Joined
Feb 13, 2016
Messages
1,220
Location
Olympia, WA
Thanks for the suggestion. I'd rather just eliminate the vents completely though. If this house were built today, it would not be allowed to have vents in the crawl. Full encapsulation will do a better job of controlling humidity and temperature than fancy vents.

We've got one of those vent fans now. Great fan but it didn't solve the humidity problem, not its fault though. Here the ambient humidity is often 70-90+ % in the winter so it's not gonna dry out the crawl space much. Hardwood floors in the bedroom curl a tiny bit in the winter, they like humidity in the 40% range. A sealed and dehumidified crawl would certainly work better in high humidity situations.
 
To avoid these ads, REGISTER NOW!

yeldogt

Well-known member
Joined
Jan 2, 2012
Messages
18,184
Roughly 65% of the house is on the crawl.
We currently experience cold floors in the winter, and obvious creaks that aren't there in the warmer months.
The crawl space is dry, even when our yard holds a bunch of water. No known moisture problems. There is some evidence of corrosion from condensation on ductwork/plumbing.
As I said in the first post, I'm in Central Indiana. We have hot, humid summers and cold, mostly dry winters. Lowest temps during cold months are around -10F. Warmest temps are around 105F. It's not uncommon to have temperatures swing 40+ degrees in 24 hours.
Radon is possible, but not overly common, and not a known issue.

What are you getting at?

I'm trying to understand what's going on in the crawl space now. It was common in the 50's to do plastic and sand .. so they looked like dirt but were sand.

And depending on how much is exposed -- that can determine insulation needs. Without water and radon -- the job is easier. I would start with closing off the vents and making sure some HVAC goes into the crawl. NO returns .. you want it a bit pressurized.
 
OP
S

stm317

Well-known member
Joined
Aug 8, 2017
Messages
1,339
It's not sandy. It's dirt with some pea gravel sparsely applied in places and the remains of a vapor barrier that's not sealed in anyway. I'd like to get it to a point where nothing will be exposed. Whether I do it myself, or have it done, the final product will be completely sealed from the soil below, the block walls on the sides, and the rim joist. Think of it like a pool liner for a crawlspace. This is what I'm after:
crawl-space-waterproofing1.jpg


Just opening some ductwork so that the HVAC conditions the space would probably help, but without fully insulating the walls and rim joist first that would be pretty wasteful and I doubt that my systems are sized properly to handle conditioning an additional 1600+ sqft. It would also only condition the crawl when the HVAC was being used, and we sometimes go days or weeks without using it in more moderate seasons. Having a standalone dehumidifier down there that's capable of running as needed would be preferred.
 
Last edited:

Jeepster04

Well-known member
Joined
Jun 25, 2013
Messages
3,100
Ive always wanted to somewhat encapsulate my crawl space but I would just use thick black plastic and tapcon treated 2x4's to the block with a nice bead of silicone along the top.

Its nice having the block completely covered but I would leave part of the block exposed so you can see termite tubes.
 

yeldogt

Well-known member
Joined
Jan 2, 2012
Messages
18,184
It's not sandy. It's dirt with some pea gravel sparsely applied in places and the remains of a vapor barrier that's not sealed in anyway. I'd like to get it to a point where nothing will be exposed. Whether I do it myself, or have it done, the final product will be completely sealed from the soil below, the block walls on the sides, and the rim joist. Think of it like a pool liner for a crawlspace. This is what I'm after:
crawl-space-waterproofing1.jpg


Just opening some ductwork so that the HVAC conditions the space would probably help, but without fully insulating the walls and rim joist first that would be pretty wasteful and I doubt that my systems are sized properly to handle conditioning an additional 1600+ sqft. It would also only condition the crawl when the HVAC was being used, and we sometimes go days or weeks without using it in more moderate seasons. Having a standalone dehumidifier down there that's capable of running as needed would be preferred.

Well -- if it's open now and you don't have insulation on the floor you are heating it now. Without moisture and radon -- the benefits drop off. Remember -- the top of the block and the rim joint are where you are loosing heat if uninsulated and this is a separate item from the encapsulation of the crawl space foundation.

I'm doing a large project now and the old part will be plastic with a rat slab and foaming the walls and the rim.

Have you checked into the various cost? Insulating the rim and heavy plastic over the rest will be the best bang for the buck. Do you have termites?
 
OP
S

stm317

Well-known member
Joined
Aug 8, 2017
Messages
1,339
Well -- if it's open now and you don't have insulation on the floor you are heating it now. Without moisture and radon -- the benefits drop off. Remember -- the top of the block and the rim joint are where you are loosing heat if uninsulated and this is a separate item from the encapsulation of the crawl space foundation.

Have you checked into the various cost? Insulating the rim and heavy plastic over the rest will be the best bang for the buck. Do you have termites?

I see your point, but the heat loss occurring now would be radiant, not direct and that's much lower. The ductwork isn't open to the crawl at the moment. It's sealed up fairly well and since heat rises instead of falling, the warm air from the living space shouldn't really be lost to the crawlspace below. If anything, the radiant heat loss in the ducts should rise up into the living space above somewhat. Sealing up the vents and insulating would have an impact for sure, and it would probably be the most quantifiable impact but if I'm going to that much trouble, I'd rather fully encapsulate it and enjoy all of the other benefits too.

I'll be getting estimates in the coming weeks. Part of the reason that I posed the question here, was that I wanted some feedback from those who have gone through with encapsulation before I make strangers crawl around under my house. It sounds like a few users have tried their hand at doing something similar but not quite full encapsulation, and they've been happy with it. And a couple of others have done the full encapsulation with good results. That's encouraging.

The house had some old termite damage when we bought it 2 years ago. It was treated for termites externally. The termite damage seemed several years old, but I'm not an expert. I spent a month's worth of weekends in the crawlspace when we bought the house replacing damaged boards and cleaning things up, so no worries about structural integrity or damaged boards being sealed up never to be repaired again. I'll seek clarification on local codes for termite inspection before going through with the job to make sure that it's possible to be inspected if necessary.
 
Last edited:
OP
S

stm317

Well-known member
Joined
Aug 8, 2017
Messages
1,339
Another consideration that will impact this going forward is the fact that my wife is pregnant, so the potential air quality improvement would be nice. I'm assuming that both time and money will be in somewhat short supply when the baby arrives, so I'll use the estimates to figure out if I'll attempt something like this myself over a few weekends or cut a check and let the pros knock it out in a couple of days.
 

jeffer949

Well-known member
Joined
Sep 8, 2017
Messages
80
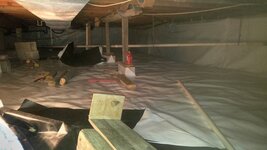
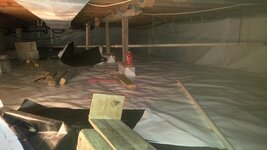
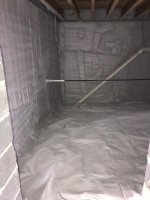
Cant find any from when I had finished. And have sold the house last year. Totally took care of the musty smell. I also installed a radon system with this. All vents where closed. and a humidifier installed. I did this all myself and did have a radon mitigation expert inspect my work afterwards and he openly admitted it was more meticulous than his work.

https://crawlspacerepair.com/ is where I got all my supplies. They also have some great videos and good info. My biggest advice is to make sure you use the foundation tape AND the foundation PINS. I put off installing the pins and my tape let go and the walls fell down and I had to re-attach them. If I had used the mechanical pins right away I wouldnt of had an issue. I would also recommend using sealant and tape at your seams. And never try to stretch your tape to get into a crevice. It will shrink and then you will have a leak. Not a big deal if you have a radon system installed. For my radon suction line I took 200 foot of 3" perforated drain tile and put a big U under my plastic and pulled from the middle. This worked well.

If your wanting to insulate the walls they recommend digging down so far under the dirt floor to install your foam. NEVER attach your vapor barrier to the floor joists as this will just allow moister to absorb into the wood and will rot it eventually. I would recommend spray foam for the rim joist insulation. I did the blue foam with expanding foam to seal the gaps. My rim joists where not all the same width. all with in a 1/4-3/8" but it made it to where I couldn't just cut all the pieces at once. it took me days to get it all done. I could of done it with spray foam in a day or less and had better insulation
1ec8b75b0cb667d2591a90eb3f094f90.jpg14cbb9e3fa2f73e7993aed173770c2de.jpg
 

Attachments

  • 14cbb9e3fa2f73e7993aed173770c2de.jpg
    14cbb9e3fa2f73e7993aed173770c2de.jpg
    82.4 KB · Views: 7
  • 1ec8b75b0cb667d2591a90eb3f094f90.jpg
    1ec8b75b0cb667d2591a90eb3f094f90.jpg
    54.2 KB · Views: 8
Last edited:

jeffer949

Well-known member
Joined
Sep 8, 2017
Messages
80
Another consideration that will impact this going forward is the fact that my wife is pregnant, so the potential air quality improvement would be nice. I'm assuming that both time and money will be in somewhat short supply when the baby arrives, so I'll use the estimates to figure out if I'll attempt something like this myself over a few weekends or cut a check and let the pros knock it out in a couple of days.

Be VERY weary of crawlspace encapsulation companies and radon companies. I found that many, at least in my area are quick start up companies and dont have that much experience and cut corners everywhere. I feel I did a better job than the companies I talked to. It was not that hard to do. Plan out your sheets as shown in videos at www.crawlspacerepair.com and go down with a plan. If you can have a helper it would make it much easier. I would recommend if your floor has alot of rock or concrete pieces everywhere to use a product like this under your vapor barrier https://crawlspacerepair.com/felt-550-protection-for-crawl-space-plastic It will help prevent punctures from crawling around. A good pair of soft knee pads will be a must. Hard shelled ones will puncture the barrier any time you kneel on a rock or something.

As others have said. Make sure you take care of any moisture problems before the barrier goes down.
 

yeldogt

Well-known member
Joined
Jan 2, 2012
Messages
18,184
Vented crawl spaces don't always vent all that well -- and that's a good thing .. if you live in an area with green grass (IE- humidity).

People who have wet musty crawl spaces in radon areas -- have to address the problem differently. One needs to install a radon mitigation system under whatever is used to enclose the crawl space -- the cover needs to be air tight so the system can create a negative pressure under it. You also want to have vents providing conditioned are (positive pressure) no HVAC returns. Wet .. requires drainage -- insulation under the plastic.

A dry crawl space requires less -- especially with no radon (make sure it's checked)

A properly encapsulated crawl soul be treated as part of the living space (it is) .. and should not require a dehumidifier when systems are running. I have always included dehumidifiers in my old stone house rehabs because humidity is a problem .. but the dehumidifiers are also for make up air -- not just to take care of the crawl.

You will be losing a lot of heat through uninsulated ductwork going through an unconditioned crawl -- there is direct transfer of heat to cold through the floor and the duct work. heat only rises in an increasing environment .. that's not what is occurring if the crawl is open.
 
OP
S

stm317

Well-known member
Joined
Aug 8, 2017
Messages
1,339
Be VERY weary of crawlspace encapsulation companies and radon companies. I found that many, at least in my area are quick start up companies and dont have that much experience and cut corners everywhere. I feel I did a better job than the companies I talked to. It was not that hard to do. Plan out your sheets as shown in videos at www.crawlspacerepair.com and go down with a plan. If you can have a helper it would make it much easier. I would recommend if your floor has alot of rock or concrete pieces everywhere to use a product like this under your vapor barrier https://crawlspacerepair.com/felt-550-protection-for-crawl-space-plastic It will help prevent punctures from crawling around. A good pair of soft knee pads will be a must. Hard shelled ones will puncture the barrier any time you kneel on a rock or something.

As others have said. Make sure you take care of any moisture problems before the barrier goes down.

Terrific info Jeffer! Many thanks. Any idea how large your crawlspace was? Willing to share a ballpark figure for what you spent to DIY?
 

Jackfre

Well-known member
Joined
Dec 26, 2010
Messages
4,411
Location
N CA
After reading several "green" building papers and seeing several modern framing videos and discussions, that crawl vent stuff will be going away. Not how it's done anymore.

You are correct of course, but "Going forward" doesn't treat the 99.99% of existing home stocks with these problems. These fans will fall somewhere on the good/better/best scale for individual cases. The new construction is a snap for this type of work. On a retrofit basis crawl-space work falls pretty high on the pitn scale. Believe me, I know:eyecrazy:

I would suggest that prior to moving forward with the encapsulation that you get an electrician under there and light that place up. You will get a better job faster if you can see under there. When we remodeled out home in '12 the guys laughed at me when I went under the house with a .38 loaded with snake shot but I was once trapped under a house with a couple rattlers. I changed under there. :shocking: Light it up!
 

jeffer949

Well-known member
Joined
Sep 8, 2017
Messages
80
Terrific info Jeffer! Many thanks. Any idea how large your crawlspace was? Willing to share a ballpark figure for what you spent to DIY?

The crawl space was around 1200 square feet if i recall. I actually saw the receipt in my email account when I was cleaning it out yesterday.


6 Mil Crawl Space Liner, DiamondBack $140.00

12 Mil Vapor Barrier 1000 Sq Ft, DiamondBack™ $250.00

Waterproof Seam Tape™ for Crawl Space Vapor Barrier$32.99x3 $98.97

Crawl Space
Foundation Pins Size: 100 Pack of Pins $19.99

Foundation
Seal Tape™ $25.99x2$51.98

Sub-Total: $560.94
Shipping: $0.00
Order Total: $560.94

If I was to do it again I would go with 20mil on the floor and 12 on the walls. But I was in a tight money situation. I am planning on doing my house I just purchased in the near future. Ill order everything and do it again. I will ask for help this time and get it done quickly. Remember, wrinkles in the vapor barrier and/or the tape are not your friend. You think you can just push the tape into the wrinkle and be good. But you will come back a months or years later and you will have lost your seal in that area.
 
OP
S

stm317

Well-known member
Joined
Aug 8, 2017
Messages
1,339
Thanks Jeffers! Info like that is exactly what I was looking for. I knew GJ would have some experience with this sort of thing. Seems like you got your money's worth for sure. Any idea how much time it took?
 

jeffer949

Well-known member
Joined
Sep 8, 2017
Messages
80
Ummm. I had alot of prep to do like flattening out the dirt and cleaning out old debris. As far as doing the vapor barrier. Id say in the 20-40 hour range working by myself. I had alot of supports i had to go around which takes a long time. If it had been like my current house. With only 5 supports to go around i honestly could get it done in under 20 hours. Also. Ill admit when i work by myself im not super fast. A helper keeps me motivated.

Sent from my SM-G950U using Tapatalk
 

Earp69

Well-known member
Joined
Sep 20, 2016
Messages
859
I'm headed down this road right now with my house except that I made the mistake of sealing off my crawl space while still having a moisture problem. Finally got a sump pit put in and an internal footer tile ran. Next is to clean up the crawl space and order some vapor barrier. It's a job

Sent from my SM-N910V using Tapatalk
 

mkholmes3

Active member
Joined
Dec 8, 2013
Messages
30
We live just outside Chattanooga, TN and recently finished construction on a 2,600 sq foot house on one level. I spent years researching crawlspaces and considerable time on greenbuildingadvisor.com . Our home is on the lake and is typical of a large amount of homes on the lake in that we have a "basement lot". Problem is that it's just my wife and I and we didn't want 5,200 sq ft of house. So we did a downstairs garage under part of it 14' x 40' and we use it to store the lawn equipment and jet skis in the winter. The rest is crawl space. A large part of it is 8' tall. We went with 10" poured walls. On the outside of the poured wall I put 1.5" of rigid foam insulation. We encapsulated the crawl space putting heavy plastic down and then up about 3' on the walls. Then we spray foamed with closed cell foam up the wall all the way to the rim board. Also spray foamed the exterior wall in the down stairs garage. We have a regular garage door that was as highly insulated as we could buy and a regular man door. We have the garage accessible to the crawl space by an opening that is 2' x 3' approximately 6' off the floor. In this opening I have this https://www.sylvane.com/santa-fe-ad...MIkI-b29vJ2QIVQjaBCh11gQdgEAQYAiABEgL9AvD_BwE
Piped to the outside so I never have to worry about emptying anything. The crawl space door on the other end of the house is completely sealed inside the opening once you swing open the small door in the side of the house. I did it in such a way that I can remove the "plug" if necessary and then seal it back. Sorry no pics of that. The weak point in my design is the garage door. Even though it's insulated and has the weather stripping on the side there is still air infiltration. I keep the door closed only opening to move equipment or toys in and out quickly. We also spray foamed the attic with closed cell foam. The entire outside of the house has the 1.5" rigid foam on it. We did 2" x 6" stud walls for the exterior walls and I personally caulked all the outside walls myself. We did blown in cellulose on the exterior walls. This was done on advise from some of the experts on the greenbuildingadvisor website.
If you think of your house as a total system in terms of insulation, encapsulation, etc it's a daunting task and there are many experts telling you there thoughts. I'm pleased with the results so far.
I will say that they still build here where we are with vented crawlspaces, put a/c units in attics that aren't spray foamed but that's not the way it should be done.
I've put some pics showing the crawlspace and also a couple showing the outside and the inside of the downstairs garage. Please ignore the mess. The lights are off amazon and are led cooler lights. Amazing amount of light and one of easiest installs that you could do. Have the same lights in the upstairs garage. Put them on an occupancy sensor so when you walk into the garage or open a garage door to drive in they come on. You could perform surgery in either garage.
 

Attachments

  • IMG_0098.jpg
    IMG_0098.jpg
    67.1 KB · Views: 66
  • IMG_0058.jpg
    IMG_0058.jpg
    45.6 KB · Views: 63
  • IMG_0107.jpg
    IMG_0107.jpg
    67.4 KB · Views: 73
  • IMG_0517.jpg
    IMG_0517.jpg
    142.3 KB · Views: 67
  • IMG_0344.jpg
    IMG_0344.jpg
    159.8 KB · Views: 66
  • IMG_0794.jpg
    IMG_0794.jpg
    77.8 KB · Views: 59

My Old Tools

Well-known member
Joined
Jun 4, 2014
Messages
5,446
Location
Hamrick Lake, TX
Rather than encapsulate and condition the crawl space, I'm thinking about 2" of closed cell foam on the underside of the floor including the joist. That should insulate the house from the crawl space for temperature and moisture. We don't curently have moisture problems down there (20 year old house) and will continue to ventilate. Just looking to tighten it up and cut hearing cost, make it more uniform on temp in the winter. Anybody see something I'm misding?
 

Earp69

Well-known member
Joined
Sep 20, 2016
Messages
859
Sounds like a lot more money to me

Sent from my SM-N910V using Tapatalk
 

jeffer949

Well-known member
Joined
Sep 8, 2017
Messages
80
Rather than encapsulate and condition the crawl space, I'm thinking about 2" of closed cell foam on the underside of the floor including the joist. That should insulate the house from the crawl space for temperature and moisture. We don't curently have moisture problems down there (20 year old house) and will continue to ventilate. Just looking to tighten it up and cut hearing cost, make it more uniform on temp in the winter. Anybody see something I'm misding?
From my research its a bad idea. The wood needs to breath from what ive heard.

Sent from my SM-G950U using Tapatalk
 
To avoid these ads, REGISTER NOW!
Top Bottom