skamp
Well-known member
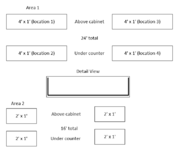
Hi, I was wondering if you can help validate my design for LED strip lighting for under counter and above counter lighting and provide any suggestions. The total length of the strips will be ~24' for one area and ~16' for the other area. My plan was as follows.
Place driver on top of the cabinet (location 1). Drivers in both areas will be wired to the same dimmer.
Run 18ga 2 wire to the other 3 locations (LED segments). All runs will be < 20 feet.
All 4 locations will be connected in parallel to the driver. Each location will have a strip about 6' in length.
Area 2 (16')
Same plan as area 1 except strip length will be about 4' per location.
Drivers - Area 1 will need ~105 watts, Area 2 will need ~70 watts. Was thinking of getting 2 of these 120 watt drivers. Was not sure if I get different wattages, if that will cause the dimming level to be different in the two areas due to possible different ELV curves between the drivers.
https://www.amazon.com/Emitever-Dim...er-Dimming/dp/B0B58WRF13?tag=atomicindus08-20
Wire - 18/2 CL2/3 security wire. Could go to 16/2 but each run is pretty short (less than 20 feet) and no run has more than ~30 watts. Looking at voltage drop tables 18/2 seemed fine for that length and wattage.
Dimmer - Both drivers will be run from the same dimmer. Was going to use a Lutron Sunnata PRO LED+ Touch. Says it supports up to 500W ELV.
https://www.prolighting.com/st-pro-n-sd.html
Channel - Was not sure if I should get normal channel or use 45* channel. Could use some advice here.
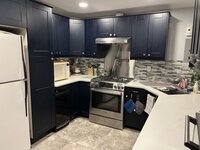
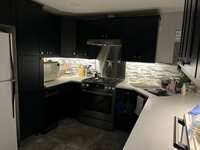
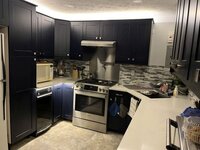
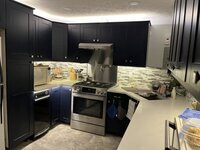
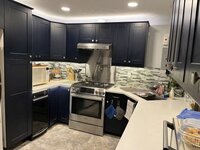
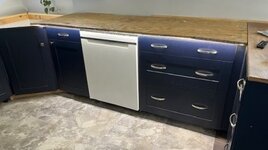
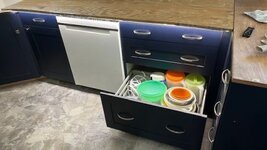
Below are the cabinets I will be lighting. Its basically a pair of 48"x12" and a pair or 24"x12" cabinets. Was going to mount the strips in a U shaped arrangement shown in the detail view. Appreciate any guidance here. Thanks!
Areas
Area 1 (24')Place driver on top of the cabinet (location 1). Drivers in both areas will be wired to the same dimmer.
Run 18ga 2 wire to the other 3 locations (LED segments). All runs will be < 20 feet.
All 4 locations will be connected in parallel to the driver. Each location will have a strip about 6' in length.
Area 2 (16')
Same plan as area 1 except strip length will be about 4' per location.
Products:
LED Strip - Auxmer 60LEDs 14.4W per meter 2700k 95CRI https://www.aliexpress.us/item/2251832766080638.htmlDrivers - Area 1 will need ~105 watts, Area 2 will need ~70 watts. Was thinking of getting 2 of these 120 watt drivers. Was not sure if I get different wattages, if that will cause the dimming level to be different in the two areas due to possible different ELV curves between the drivers.
https://www.amazon.com/Emitever-Dim...er-Dimming/dp/B0B58WRF13?tag=atomicindus08-20
Wire - 18/2 CL2/3 security wire. Could go to 16/2 but each run is pretty short (less than 20 feet) and no run has more than ~30 watts. Looking at voltage drop tables 18/2 seemed fine for that length and wattage.
Dimmer - Both drivers will be run from the same dimmer. Was going to use a Lutron Sunnata PRO LED+ Touch. Says it supports up to 500W ELV.
https://www.prolighting.com/st-pro-n-sd.html
Channel - Was not sure if I should get normal channel or use 45* channel. Could use some advice here.
Below are the cabinets I will be lighting. Its basically a pair of 48"x12" and a pair or 24"x12" cabinets. Was going to mount the strips in a U shaped arrangement shown in the detail view. Appreciate any guidance here. Thanks!
Last edited:

 )
)