To avoid these ads, REGISTER NOW!

Applying clear coats - painters advice needed!

katit

Well-known member
Joined
May 5, 2006
Messages
862
Location
St. Louis, MO
I think only here I can get help as I can't seem to find definite answer.

Bear with me because I am not automotive painter, just want to learn as much as possible.

Project in hand:
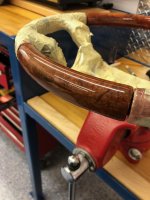
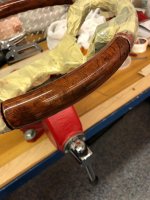
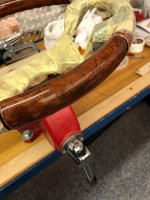
Old steering wheel with wood sections. Was covered in pretty thick layer of clear(epoxy?) Whatever they do in factory? I stripped it using chemical stripped. Veneer is very thin and I managed to get good surface. Then, I noticed color of wood was actually stain, so I cleaned it off with acetone and very light sanding with 1000 paper.

Then I applied wood stain and got color I need.

Now I need to apply clear coat and this is where I am hesitating.
Supplies I have:
U-Pol 2882 Fast Kit clearcoat
I have curing IR lamp
Compressor, gun, respirator

Questions I have:
1. How many coats I can safely apply to build decent thickness?
2. Instructions on cans very vague. Says to cure after 5 minutes. Means I will put lamp over after 5 minutes and hold it for 30 minutes?
3. Should I cure each coat or I can do another coat after 5 min and so on?
4. I think some sanding will be needed to remove orange peel or any drips between coats. How would you go about this?
5. What should I use for gun cleanup? Can't find anywhere..

So, basically if you can detail step by step how this project need to be approached I will appreciate it.
 

Attachments

  • IMG_1623.jpg
    IMG_1623.jpg
    62.9 KB · Views: 109
  • IMG_1633.jpg
    IMG_1633.jpg
    75 KB · Views: 106
Last edited:
To avoid these ads, REGISTER NOW!

Abeo

Well-known member
Joined
Oct 22, 2009
Messages
784
Location
Calgary, Ab
Bear with me because I am not automotive painter, just want to learn as much as possible.

I'm a hobbyist, so take my advice with a grain of salt:

Questions I have:
1. How many coats I can safely apply to build decent thickness? tech sheet says 2-3 coats. Any more than that, I'd be afraid of trapping solvents and messing with the cure. If you want more, I suggest 2-3 coats, let cure, sand away runs and unwanted texture, then apply 2-3 more coats
2. Instructions on cans very vague. Says to cure after 5 minutes. Means I will put lamp over after 5 minutes and hold it for 30 minutes? IR cure is typically for production environments. I'd just let it cure on it's own
3. Should I cure each coat or I can do another coat after 5 min and so on? no, let the coats flash off but don't cure them. They should be just tacky so that the next coat has something to bite into. Too wet means sags and runs. Too cured means it won't adhere.
4. I think some sanding will be needed to remove orange peel or any drips between coats. How would you go about this? see my response to 1. You can do some work while it's wet, but I don't think its necessary in this case. This isn't like a car door where you would see things pop out at you
5. What should I use for gun cleanup? Can't find anywhere..
gun wash... a gnarly solvent. Should be available where you buy body shop supplies.
 
OP
K

katit

Well-known member
Joined
May 5, 2006
Messages
862
Location
St. Louis, MO
Thanks for response! One thing I still want to do though is curing. I got lamp, so I wan to use it :) And if it means 30 minutes to cure after 2-3 coats it just much better than 24hr as I can sand and do other 2-3 coats in a same day.
 

Abeo

Well-known member
Joined
Oct 22, 2009
Messages
784
Location
Calgary, Ab
Make sure you also have good airflow and that the temps are well controlled where you are painting. My struggle has been keeping the shop temp up, and having solvents trapped in the paint while it skins over. Curing by UV is only part of the equation, you need the solvents to flash off correctly by means of temperature and airflow, while not getting dust and crud into it.
This is my experience with autobody work, that isn't porous. I'm not sure how the wood will respond... if it's spongy and soaks it up or what.
 
OP
K

katit

Well-known member
Joined
May 5, 2006
Messages
862
Location
St. Louis, MO
Make sure you also have good airflow and that the temps are well controlled where you are painting. My struggle has been keeping the shop temp up, and having solvents trapped in the paint while it skins over. Curing by UV is only part of the equation, you need the solvents to flash off correctly by means of temperature and airflow, while not getting dust and crud into it.
This is my experience with autobody work, that isn't porous. I'm not sure how the wood will respond... if it's spongy and soaks it up or what.

And this is all good points. My garage is "clean" area, I won't spray there.
Usually I spray outside next to garage. With weather the way it is right now - it might be 50-60F and humid/raining.

I am prepping paint, work piece in garage where it's 72. Then open door, spray, and move piece back to garage.

Yes, wood will definitely soak up. There is also a texture which need to "go". Thats why I am thinking 2-3 wet on wet coats and then 5 minutes and then UV cure for 30 minutes.

And if it's dry - then it will be a good time to sand. Or maybe wait another day? I hope after 2-3 coats I will seal wood and hopefully have enough to cover all voids. Then, follow up coats will build this "glass" surface.
 

Abeo

Well-known member
Joined
Oct 22, 2009
Messages
784
Location
Calgary, Ab
Time is the enemy of the production shop, and is a gift for doing things like this at your pace. I'd wait 24 hours before trying to fix the texture. I have a saying.... "if you want things bad, that's how you'll get it"
But I haven't personally messed with a IR cure, so I don't know if it's as good after a bake as letting it cure with time. I know the collision shop I worked at baked things to get them out of the booth quicker, but the clear was awfully soft.
You will know pretty quick when sanding if it's workable or not. I like having a separate piece that I paint alongside that I can poke and mess with to test the state of the coating.
 
OP
K

katit

Well-known member
Joined
May 5, 2006
Messages
862
Location
St. Louis, MO
But I haven't personally messed with a IR cure, so I don't know if it's as good after a bake as letting it cure with time.

From what I know - it is better. Don't remember details but IR is specifically penetrating layers and cures it so there is nothing trapped inside. It is not just for speed, end result is better as well from what I read. But again, I am not a pro either.

I bought this lamp just to speed it up and minimize any dust/stuff settling in my work. Faster it cures - less chance to mess it up.
 

Abeo

Well-known member
Joined
Oct 22, 2009
Messages
784
Location
Calgary, Ab
Let me know how it goes!

Also, make sure you are careful with the gun wash. Keep it off things that you don't want paint to come off of, and you don't have a lot of time with it on nitrile gloves (they swell, weaken, and break eventually). And don't use it as panel cleaner on newer coatings.
 
OP
K

katit

Well-known member
Joined
May 5, 2006
Messages
862
Location
St. Louis, MO
Let me know how it goes!

Also, make sure you are careful with the gun wash. Keep it off things that you don't want paint to come off of, and you don't have a lot of time with it on nitrile gloves (they swell, weaken, and break eventually). And don't use it as panel cleaner on newer coatings.
I am still not clear on gun wash. I don't know where close auto paint store is. Anything I can get at HomeDepot?
 

Kaizen

Well-known member
Joined
Jan 9, 2015
Messages
6,949
Location
New England
Forget about the lamp. Put it away till next time. You are curing a circle so the lamp will only be hitting half of it So some will cure and then you move it? Better to let it cure all at one consistent flash.
Something that small think I would be trying to use a spray can. Lots of work to set up and clean a gun


Sent from my iPhone using The Garage Journal mobile app
 
OP
K

katit

Well-known member
Joined
May 5, 2006
Messages
862
Location
St. Louis, MO
Something that small think I would be trying to use a spray can. Lots of work to set up and clean a gun

Yes, but what is alternative? 2k spray cans is not cheap. Thinking that I will need to do multiple coats over multiple days it may get expensive.

OTOH - mixing a little and then sprayin/cleaning is not bad. I done it before. Yes, setting up gun is pain but it adds maybe 10 minutes to a process.
 

Kaizen

Well-known member
Joined
Jan 9, 2015
Messages
6,949
Location
New England
Can’t you just use a wipe in polyurethane? Take a few days but should work. Not like they used 2k when that was made.


Sent from my iPhone using Tapatalk
 
OP
K

katit

Well-known member
Joined
May 5, 2006
Messages
862
Location
St. Louis, MO
Well. Not sure how it was made 20 years ago but there was layer about 1/32 of clear that spent time under TX sun and eventually started to crack. Have to be something hard and UV resistant
 

don long

Well-known member
Joined
Mar 31, 2012
Messages
8,896
Location
southern california
I think I'll jump in here,
I agree with Kaizen The heat lamp is not going to work well unless you just use it to warm up the room.
Question: are you using water base clear? I hope not (all together different when force drying.
Cleaning a gun is no problem with a gun cleaning lacquer thinner!

Because you are spraying on wood I'd consider using poly urethane
it is designed to go over wood.

I refinished my 22' shuffle board and sprayed the urethane on with my paint gun and it worked very well. I color sanded it just like I would a car door and I put about 3 coats down at a time then let it air dry over night sand it with 800 grit paper and resprayed it again 3 times. as a side note spray the first coat lightly wait about 10 minutes and go back and lay down a heavier coat wait another 10 minutes and then lay down another heavier coat of urethane and walk away

Here is my board for an example

115 by don long, on Flickr
 

Kaizen

Well-known member
Joined
Jan 9, 2015
Messages
6,949
Location
New England
Well. Not sure how it was made 20 years ago but there was layer about 1/32 of clear that spent time under TX sun and eventually started to crack. Have to be something hard and UV resistant


Have you tried a car forum for that model? They can tell you what will work. There is a reason no one uses wood steering wheels anymore. To my knowledge there isn’t a uv proof product out there. So no matter what you do it will eventually wear out. Good luck. Tough choice on a classic piece


Sent from my iPhone using Tapatalk
 
To avoid these ads, REGISTER NOW!
OP
K

katit

Well-known member
Joined
May 5, 2006
Messages
862
Location
St. Louis, MO
Have you tried a car forum for that model? They can tell you what will work. There is a reason no one uses wood steering wheels anymore. To my knowledge there isn’t a uv proof product out there. So no matter what you do it will eventually wear out. Good luck. Tough choice on a classic piece

I am probably the only guy who tries to do that on those forums :)
And it's for fun, not that I have a real problem with it. I know there is shops who specialize in wooden trim restorations but I don't know if they will tell me what they use. I already figured leather part, learned and did couple of steering wheels. Now I need to figure out wood part. I wouldn't call this car classic. Its Lexus LX470

It is _done_. I mean I already researched my best and decided on doing it with automotive 2k clear (brand/model in original post). What going to happen? I don't know. I know that wipe on poly and such will not stand test of time/sun for sure. And I'm looking for more "glassy" and deep finish. Has to be tough/hard as well.
 
Joined
Feb 25, 2019
Messages
12
Location
Oregon
Lacquer thinner or acetone for gun clean up will work. Home Depot should have both.
Id do 3 coats (light tack coat on the first) with at least 5 min flash between. Push that out to 10 min if the temps are in the 50s. After the 3rd coat, let it sit for 15min and then put the IR lamp to it. Make sure not to set the lamp to close.
For best results, let the part sit over night and sand the next day and re-shoot. You can try and rush it in one day, but the clear will still be pretty soft. The TDS says polish time is a min of 5 hours (which means it does not lock up hard enough to polish for 5 hours).

Id wait it out since you have come this far — that part of the steering wheel is starring you in the face.
 
Last edited:
OP
K

katit

Well-known member
Joined
May 5, 2006
Messages
862
Location
St. Louis, MO
Thank you! That's a plan! Will do it exactly like you said. Do you think 5-10 minutes flash time will be OK to keep mix in a gun? So, it will be like 30-40 minutes total?

How much would you mix? It's about 2/3 of the wheel (only bottom piece shown on pic)

Lamp instructions say 10-15 minutes. Do you think 10 minutes on each side is a good enough? And sure, I can wait for next day to sand an recoat.
 
Last edited:
Joined
Feb 25, 2019
Messages
12
Location
Oregon
Pot life is 6-8 hours, so you have plenty of time.
10-15 min on the lamp should be fine - you can move it around like you mentioned.
As for how much... that can vary on a lot of things (spray gun, size, painter, etc.). You can always make more while you wait during your flash time.
Good luck. You got this!
 

bradpac

Well-known member
Joined
Sep 8, 2013
Messages
721
Location
Central TX
The auto painter across the street from us would build wooden rail cars and models that all got automotive base/clear paint on them. Not sure of the process as he's since retired so I can't walk across and ask, but the finished products seemed to always turn out well and held up pretty good from years of use.
 
OP
K

katit

Well-known member
Joined
May 5, 2006
Messages
862
Location
St. Louis, MO
Update. Seems like curing light is not a good idea for this project. I did use it on regular oil paint on metal and it did cure it quick and looks good.

However, on this wood - it made clear bubble and "thin" if I can say this, basically, top where lamp was became very rough (with bubbles) where bottom is smooth and glossy.

Conclusion. Waiting 24+ hr before send and do another 3 coats with natural dry afterwards. And looking at how it comes out it seems that I will need total of 9 coats at least if I want it to look crystal clear and deep.

Also, I think it's good idea to turn wheel up/down every minute or so for 10-15 minutes to avoid sags..
 
Last edited:
OP
K

katit

Well-known member
Joined
May 5, 2006
Messages
862
Location
St. Louis, MO
Another update.
Sanding wasn't fun after first 3 layers. There was imperfections from wood underneath, there was bubbles/"hair" from UV cure of first 3 layers.

And, there was sags from the fact that I left wheel in one position.

After carefully cutting sags and sanding with 1000 and then 2000 I put on another 3 layers.

This time I was smarter. During "flash off" which I did 10 minutes this time, I was turning wheel upside-down every 1-2 minutes to prevent sags.

This is what it looks like. Very good for my taste, I started to sand it again and I see almost no peel anymore, sands pretty flat with minimal effort. So, I think I will put 3 more layers and call it a day.
 

Attachments

  • IMG_1709.jpg
    IMG_1709.jpg
    79.2 KB · Views: 46
  • IMG_1708.jpg
    IMG_1708.jpg
    78.2 KB · Views: 44
  • IMG_1707.jpg
    IMG_1707.jpg
    81.7 KB · Views: 42
  • IMG_1706.jpg
    IMG_1706.jpg
    83.5 KB · Views: 38
OP
K

katit

Well-known member
Joined
May 5, 2006
Messages
862
Location
St. Louis, MO
Looks great! Once you start messing with 2K paint, it's kind of addictive, huh?

It is nice. Especially understanding that you do "real" thing. I still have welding cart I made stinking for 3 days now after painted with oil-based stuff.

Eventually I want to be able to make small body work fixes myself, doesn't look too hard. No reason to pay crazy amounts for this kind of stuff.
 

toplessHO

Well-known member
Joined
Oct 20, 2014
Messages
14,146
Location
central florida
funny that I was doing almost the same thing
changed color and redid the wood finish,fixed a couple nicks
used urethane fast dry varnish made for wood floors.
Auto clear coat is good too.
BTW I dont use anything finer than 600 for recoats (and some times even 400 or 500)
This wheel I used 220 and you cant see any scratches.
 

Attachments

  • 20200404_175331.jpg
    20200404_175331.jpg
    142.6 KB · Views: 28
  • 20200404_185608.jpg
    20200404_185608.jpg
    142.4 KB · Views: 28

toplessHO

Well-known member
Joined
Oct 20, 2014
Messages
14,146
Location
central florida
forgot to add
I did 2 coats with foam brush
first coat let sit overnight,scuffed with a green scotchbrite pad until it was dull.
second coat was a little heavier,watched for any drips that will appear at the finger grip areas,smoothed it off with foam brush still wet . Not a hint of runs,brush marks etc.
alot easier than using spray equipment.
I normally dont brush on finishes but this turned out great and no clean up involved.
 
OP
K

katit

Well-known member
Joined
May 5, 2006
Messages
862
Location
St. Louis, MO
Another update.
Sanding wasn't fun after first 3 layers. There was imperfections from wood underneath, there was bubbles/"hair" from UV cure of first 3 layers.

And, there was sags from the fact that I left wheel in one position.

After carefully cutting sags and sanding with 1000 and then 2000 I put on another 3 layers.

This time I was smarter. During "flash off" which I did 10 minutes this time, I was turning wheel upside-down every 1-2 minutes to prevent sags.

This is what it looks like. Very good for my taste, I started to sand it again and I see almost no peel anymore, sands pretty flat with minimal effort. So, I think I will put 3 more layers and call it a day.

Couple month later. I think applying 9 coats (3 coats per day) trapping some inside. Wheel looked like glass, but now after driving and being installed inside hot cabin it cured little better and it's not "glass" anymore, I can feel just a slight variations.

So, 2 questions:

1. If I take it off now, sand and do final 2 coats, will that work(not lift clear, etc)?

2. For future, what is the best way to do it so it cures properly? Give it 2 days before recoat? Do 2 coats at a time?
 

toplessHO

Well-known member
Joined
Oct 20, 2014
Messages
14,146
Location
central florida
applying too much too fast as others have warned you,will end up badly.
The recoat window is normally for a couple coats not 9.
Multiple coats will get you bubbles from outgassing.
The clear you used is dependent on UV to cure it more so than a typical 2K.
Some of this stuff is spin dry with forced air and heat to help.
Every product is different so follow manufacturers instructions to a "T"

you may be able to do a cut and buff to fix
 
To avoid these ads, REGISTER NOW!
Top Bottom