To avoid these ads, REGISTER NOW!

Applying RTV ( What is your preferred method? )

richfinn

Well-known member
Joined
Jan 29, 2011
Messages
4,809
Location
Leeds, Yorkshire, England
Where do you cut the tube nozzle? They give you a choice of 5 'steps' to cut the nozzle at. I'm assuming Step-2 would be the most universal place to make the cut, but was interested in hearing where you cut yours at and what your personal preference is.

Use a suitable piece of wire as a gauge, push it down the clean nozzle from the threaded end when it stops that's the correct diameter to make your cut as you make new nozzles mark the diameter on them with a Sharpie.
 
To avoid these ads, REGISTER NOW!

gahrajmahal

Well-known member
Joined
Dec 12, 2008
Messages
2,520
Location
Cincinnati, Ohio
Where do you cut the tube nozzle? They give you a choice of 5 'steps' to cut the nozzle at. I'm assuming Step-2 would be the most universal place to make the cut, but was interested in hearing where you cut yours at and what your personal preference is.

Wamsutta, I was thinking about how to respond since I don’t have a lot of projects anymore where I’m applying a thin bead of RTV. Then I continued reading the rest of the posts and WWheeler’s gave an awesome answer followed by an even awesomer answer from richfinn. Guys and gals, this is why I love the Garage Journal!


Often, depending on the usage, the service data / repair guide you are following will specify how large the bead should be. General use I cut the nozzle to a 2mm-3mm opening so I can lay a thin bead is all it takes for machined surfaces. Sometimes something like a stamped steel oil pan will need a bit thicker. I don't pay attention to any steps in the tube. It's the diameter of hole. Start too small and slice off a couple mms at a time until I get the size hole I want. If you see a lot of RTV squeeze out you put way too large of a bead.

And as far as scraping old gasket material off, I like to use gasket remover spray, like CRC or Permatex. I spray it and let it sit on there for a few minutes, then I can usually scrape a surface clean with a plastic razor blade. Only if that isn't working do I resort to a carbide scraper, and I hesitate to even mention that because used wrong you can ruin the parts you are working on, especially aluminum, but used right they are the bee's ****. Oh, and I never use a roloc disc for mating surfaces that need a gasket of any type. Then I make sure to clean surfaces really well with brake clean and a shop towel.

Use a suitable piece of wire as a gauge, push it down the clean nozzle from the threaded end when it stops that's the correct diameter to make your cut as you make new nozzles mark the diameter on them with a Sharpie.
 
OP
W

Wamsutta

Well-known member
Joined
Jan 8, 2014
Messages
10,867
Location
Amarillo, Texas
Often, depending on the usage, the service data / repair guide you are following will specify how large the bead should be. General use I cut the nozzle to a 2mm-3mm opening so I can lay a thin bead is all it takes for machined surfaces.
That tells me 4mm should be plenty large enough for an oil pan.
 

rpcraft

Well-known member
Joined
Aug 14, 2014
Messages
1,057
Location
Waco
I use the various RTV's that come in the cheeze-whiz like cans. It's way easier to deal with and practically no mess. I have some silicone plugs from powder coating that I cap them off with and it keeps them fresh.
 

1Bad55Chevy

Well-known member
Joined
Feb 20, 2025
Messages
623
I use the various RTV's that come in the cheeze-whiz like cans. It's way easier to deal with and practically no mess. I have some silicone plugs from powder coating that I cap them off with and it keeps them fresh.
I use Right Stuff in those cans and its the easiest thing ever. People in this thread are putting WAY to much thought into gasket maker! I didn't even know there was an application gun for tube silicone!

If you use the cheeze whiz cans you regulate the bead width with speed of application. Don't over think this.... its just gasket maker!
 

rlitman

Well-known member
Joined
Oct 18, 2010
Messages
24,582
Location
Long Island
Hi all. It makes me very happy for all the love you are showing the Valco Cincinnati “Tube Grip”. I was part of the development of this really great tool. Let me tell the story as I remember. This was in the 90’s and ...
First, awesome story and thanks for sharing!

Second, this reminds of how many years passed between the invention of the tin can and the invention of the can opener. I have a number of geared tube squeezers designed for artists to get all the oil paint out of the lead tubes, but they're all about emptying the tubes and don't help apply a controlled bead. Tube Grip is a game changer for squeeze tubes for me, and gives just about cylinder/piston tube gun control, without the disadvantages of cylinder tubes (price, seal issues, etc).
 

L.Cheapo

Well-known member
Joined
Oct 23, 2014
Messages
5,880
Turns out I am some kind of idiot:


thumbnail_IMG_1946.jpg

Thinking about it now, I didn't try a standard Permatex tube today. Maybe it was too wide? I know this thing pissed me off for some reason. But I can't remember why. (likely operator error, it seems) :ROFLMAO:
 
OP
W

Wamsutta

Well-known member
Joined
Jan 8, 2014
Messages
10,867
Location
Amarillo, Texas
Valco Tube Squeezers:

I ended up getting both sizes.

The 2.0 inch is a little bit too narrow for the standard size 3 ounce tube.

The 2.50 inch works much better at flattening the tube.

I hope this saves somebody from buying both sizes like I did.
 

ecotec

Well-known member
Joined
Oct 5, 2010
Messages
5,416
Valco Tube Squeezers:

I ended up getting both sizes.

The 2.0 inch is a little bit too narrow for the standard size 3 ounce tube.

The 2.50 inch works much better at flattening the tube.

I hope this saves somebody from buying both sizes like I did.
Years too late…
 

L.Cheapo

Well-known member
Joined
Oct 23, 2014
Messages
5,880
Valco Tube Squeezers:

I ended up getting both sizes.

The 2.0 inch is a little bit too narrow for the standard size 3 ounce tube.

The 2.50 inch works much better at flattening the tube.

I hope this saves somebody from buying both sizes like I did.
Yep. That's what it is. I have the 2" version.
 

L.Cheapo

Well-known member
Joined
Oct 23, 2014
Messages
5,880
Your photo with the Toyota rubber grease looks like it should work alright. I see a small spring underneath. I’ve never seen that before. Maybe it’s a recent revision, or at least since I left the company in 2001.
It would work well with that Toyota tube, which is narrower than the standard Permatex tubes. I suppose those are intended for the 2.5" version. I bought this 2" one circa 2018.
 

bwringer

Well-known member
Joined
Jan 1, 2013
Messages
10,253
Location
Indianapolis
A Valco tube squeezerator changed my life. I can't believe I went as long as I did without one.

I also like the spray cheese containers, but they are stupid expensive, and there are times I've needed to use something very specific for a specific job that doesn't come in a spray container.

My Valco tube juicer salso howed up assembled wrong; I don't remember exactly what the issue was, but I had to stare at it a little while to work out where the plate and spring actually belonged. It's not so much the saved effort, it's the greater control over what you're doing.
 
To avoid these ads, REGISTER NOW!
OP
W

Wamsutta

Well-known member
Joined
Jan 8, 2014
Messages
10,867
Location
Amarillo, Texas
I asked Google A I this question :

What is the most common diameter of RTV that GM uses?

Answer :

General Motors (GM) specifies a bead diameter of 3 mm (0.118") for the sealant used as a formed-in-place gasket on their engine components. However, depending on the application and the specific type of RTV sealant, a bead size ranging from 1/16” to 1/4” (2 to 6 mm) may be appropriate.

This diameter applies to situations where RTV sealant is used as a formed-in-place gasket, specifically for areas such as engine components. For example, when sealing surfaces like transmission pans or other components requiring a continuous sealant bead, a 
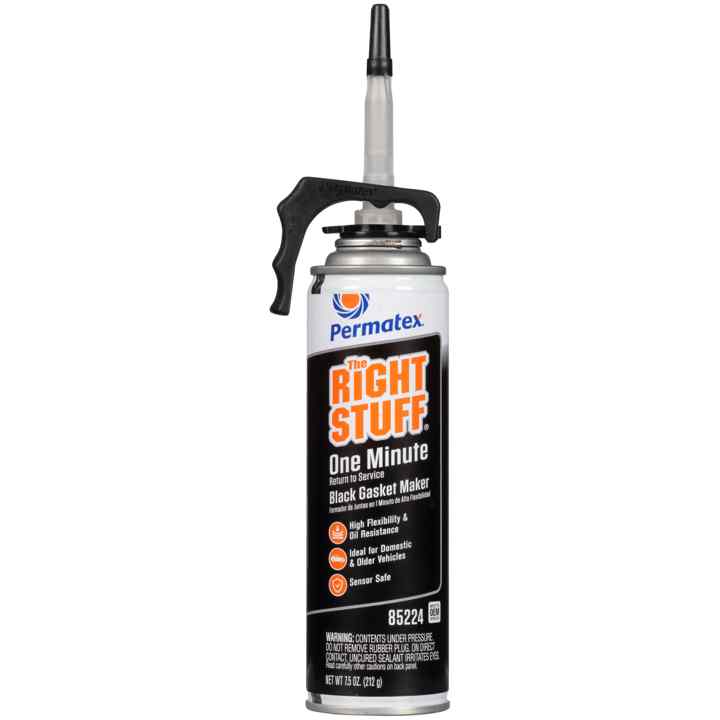
Permatex® recommends cutting the nozzle to produce a bead size between 1/16″ and 1/4″. However, a 1/8″ bead is often sufficient for most applications.

It's important to note that the curing time of the sealant can be influenced by the thickness of the bead, with a thicker bead (e.g., 1/4″) requiring a longer cure time compared to a thinner bead (e.g., 1/8″).
 
Last edited:

AEAdam

Well-known member
Joined
May 27, 2023
Messages
2,729
Location
SE PA
We have these situations at work and have done a bunch of testing. Without going into details, you want a really consistent bead size. A double bead, side by side with a gap in between can be good. Troweling it with your finger is okay, but not preferred because you sometimes end up with thin spots. We sometimes work sealants with an acid brush. We use those like they are a notched trowel and we’re laying tile.

The contact pressure around the fasteners is going to be a bit higher, so I think it’s ok to have a bit less there, but it must be continuous.

oh, and always remember to solvent wipe with acetone or isopropyl alcohol and let the surfaces fully dry before applying sealant.

We’ve had trouble trapping air bubbles, but that’s not a problem with a water pump or oil pan gasket.

I guess what I would say is neatness counts with jobs like this. We have found female mechanics do an amazing job of this sort of task. Consistency of bead size (even more than bead size) and careful torquing are key to producing a good gasket.
 
OP
W

Wamsutta

Well-known member
Joined
Jan 8, 2014
Messages
10,867
Location
Amarillo, Texas
I found two other things that will save you guys :

1. Don't have a leaky tube of sealant when playing around with the Valco. The two halves of the Valco will be glued together the next morning.

2. The top plate of the Valco will swivel 360 degrees if you separate the two halves. Make sure the "Valco" label is facing up.
 

Phang

Well-known member
Joined
Jul 30, 2008
Messages
113
Location
Singapore
Your photo with the Toyota rubber grease looks like it should work alright. I see a small spring underneath. I’ve never seen that before. Maybe it’s a recent revision, or at least since I left the company in 2001.

both sizes have that small spring now

the spring tension kept both halves in close position

strong enough to grip a tube lightly but not enough to squeeze out whatever is inside

20250812_082827.jpg
 

billford

Well-known member
Joined
Dec 26, 2016
Messages
81
I have a valco tube grip but I took a chance and bought a "tube squeezing machine", similar to the previous post.


Its only been a week but it seems to work pretty well, but it hasn't been fully tested in a shop environment. It mainly plastic compared to the metal valco. I have better control compared to the valco. I'd be happy if it lasted for at least 3 years before replacing.
 
Last edited:

xjfish

Well-known member
Joined
Feb 22, 2014
Messages
1,290
I prefer The Right Stuff tube in a caulking gun. Leave a little excess hanging out the end and pull off with 2 fingers at next use. Everything else just doesn't store well.
 

scooby074

Well-known member
Joined
Oct 26, 2008
Messages
5,231
Location
Nova Scotia
OEMs have gone to non hardening gaskets. Years ago in the Heavy Equip side. We used caulking tubes of Loctite 518 Flex-With-Flanges for most repairs. Solves the problem with excessive silicone getting sucked into places it shouldnt.
 

Ilikeike

ALLIANCE MEMBER
Joined
Jan 8, 2015
Messages
2,452
Location
Northern Ca.
I’ve just been squeezing it out of the tube and cutting down the plastic nozzle as needed
Since the 80s

Have I been doing it wrong all these decades ?
Dang it. lol.
 

dnschmidt

Well-known member
Joined
Oct 3, 2014
Messages
7,265
Location
Phoenix, AZ
The application of RTV has changed quite a bit over the years. I personally prefer Three Bond (Toyota, Yamaha Bond or Hondabond) but the application of the RTV changed when machined aluminum parts became more common. In the older days of stamped steel pans you needed a larger bead to make up for the variations inherent in the stamping process. With the machined pans you really need very little RTV to fill up the machining marks of the mating parts. For this application I like Elring Curil T2 which is a non-RTV (more like a Loctite) type product. It also has the advantage of being impervious to gasoline which no RTV can handle. I too love the Valco Tube Grip.
 

rust in the eye

Well-known member
Joined
Oct 2, 2017
Messages
2,743
Location
Chicagoland
Way too broad a question.
Much depends on the stiffness, straightness and texture of the surfaces to be joined. Some applications will have specific fasteners that will prevent overtightening and squeezing too much out.
Generally, myself, if joining two well machined surfaces without limiting fasteners I'll apply a nominal continuous bead and tighten to something a bit less than final torque, wait for the RTV to V a bit then final torque. USUALLY works well for me.
Field repairs of previously machine applied sealers is something tricky to do, for me anyhow.
 

no704

Well-known member
Joined
Apr 27, 2016
Messages
5,207
In a past life as a glass installer I learned to cut the dispenser tip to desired size. Then cut a V deeper on the top makes the bead have a triangle shape so it’s got a better chance to seal to an uneven surface.
 

teagueo

Well-known member
Joined
Mar 7, 2017
Messages
463
If you're using Hylomar or Permatex 85420 (both non-drying blue fuel resistant sealants), the best application method is to goop it all over liberally.

Then swipe away the excess like you're caulking a bathtub.

I have an old motorcycle that leaks on the fuel flange on the bottom of the tank - that stuff works...

Cleanliness is everything with any sealant.
 

billford

Well-known member
Joined
Dec 26, 2016
Messages
81
I’ve just been squeezing it out of the tube and cutting down the plastic nozzle as needed
Since the 80s

Have I been doing it wrong all these decades ?
Dang it. lol.

Topic of the thread is a person's preferred method.
Hand squeezing for decades is fine.

My preferred method changed from hand to a dispenser.
 

rlitman

Well-known member
Joined
Oct 18, 2010
Messages
24,582
Location
Long Island
In a past life as a glass installer I learned to cut the dispenser tip to desired size. Then cut a V deeper on the top makes the bead have a triangle shape so it’s got a better chance to seal to an uneven surface.
I followed the instructions and did that with my Jeep windshield, and it worked flawlessly with an electric gun, where I could set the flow rate and control my travel speed. It's not so easy to make that work with any manual squeeze gun, Tube Grip included. The last thing you want is something to turn out like this:
original.jpg
 
To avoid these ads, REGISTER NOW!
Top Bottom