

krouchchocolate
Well-known member
- Joined
- Sep 25, 2011
- Messages
- 265
Hey Guys,
Finally had the chance to install my epoxy that I purchased from armorclad. I did not know whether which company to go with (Legacy or Armorclad), but the 40% discount in savings that armorclad was offering was something I could not pass up.
I decided to grind my floor, then I acid etch it. Next time if I ever do this again, I will rent a edco grinder instead of using a diamabrush. That took forever!
I went with the 3 coat system. Primer, armorclad epoxy in a medium gray, and the military top coat. I loved the glossy look and how the floor felt when I laid down the epoxy, but I was kind of disappointed on how it looked after I had applied the military top coat with the anti skid. Used about 2/3 of the can on the anti skid and mixed it well before applying it to the floor each time. The floor did not look as shiny anymore and it feels kinda greasy when I walk on the floor. Wish I had known about this or I would had just coated it without the anti skid product. Not sure if this affected it or not.
Here are some of the pictures of my install on a 3 car garage!
1st day grinding the floors. Took a long time to grind it down with the diamabrush.

1st layer with the primer. For future people who are going to install the armorclad epoxy, do not be scared of how uneven it looked. I grinded my floor so some spots soaked up more primer than other spots!


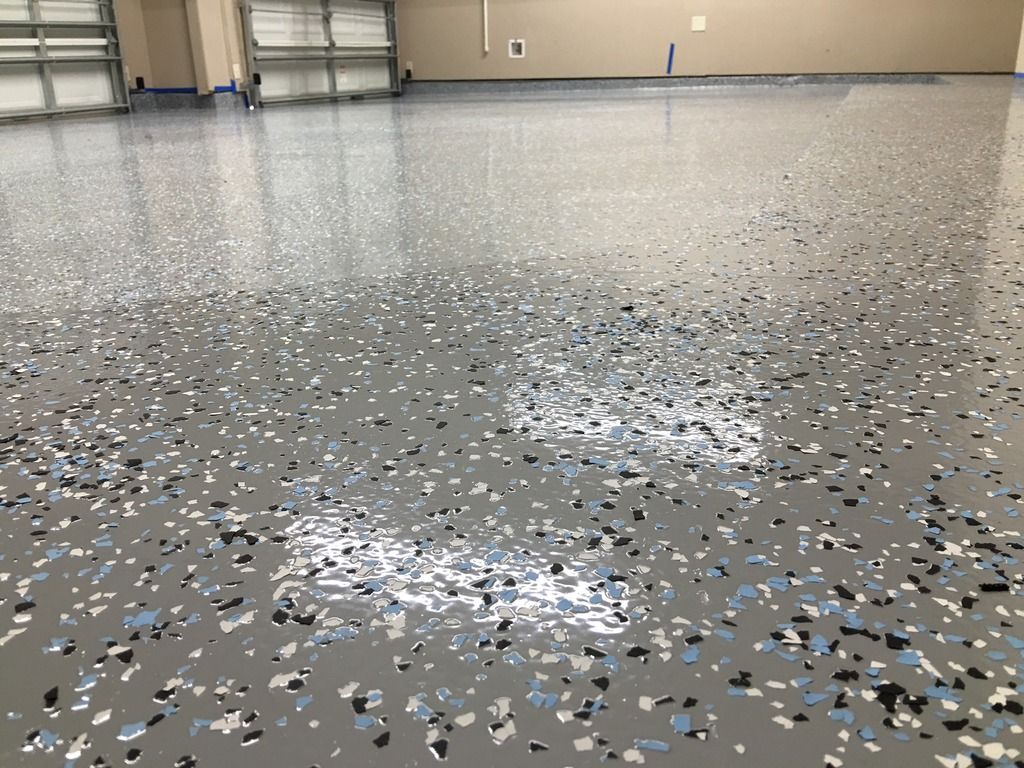
2nd layer with the epoxy. Best to have spike shoes and with a 2nd helper. My wife was the one who was painting the edges and throwing the flakes, while I was mixing up the batches and painting the epoxy down. I had loved how it looked after the 1st day it dried up. Very glossy and nice smooth feel to it. Wish I could have just kept it at this stage, but I knew it was best to have a final top coat to protect it.

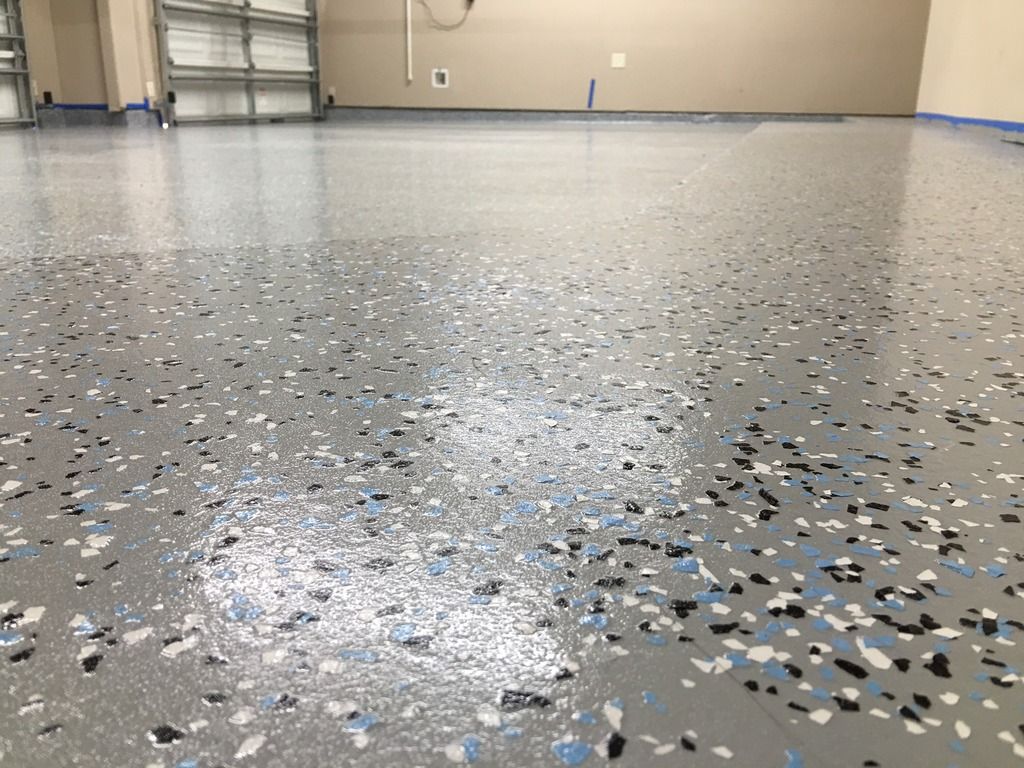
3rd Layer with the military top coat. As you can see in the picture, it gave it a more dull look, but more protection. Pretty cool that you can see the little anti skid sand stuff in the layer. Nonetheless, floor still looked great!


Have to give props to the armorclad team, chris helped me out a bunch. He was the one who recommended me the medium gray color and now I am glad I went with his opinion! They answered all of my questions that I had over the phone, even if I thought it was stupid!
My recommendation is to not use blue painters tape. Now I can't figure out to remove it from some spots! Wish I had some left over primer and top coat. I would have painted the 1" step in front of my garage.
Finally had the chance to install my epoxy that I purchased from armorclad. I did not know whether which company to go with (Legacy or Armorclad), but the 40% discount in savings that armorclad was offering was something I could not pass up.
I decided to grind my floor, then I acid etch it. Next time if I ever do this again, I will rent a edco grinder instead of using a diamabrush. That took forever!
I went with the 3 coat system. Primer, armorclad epoxy in a medium gray, and the military top coat. I loved the glossy look and how the floor felt when I laid down the epoxy, but I was kind of disappointed on how it looked after I had applied the military top coat with the anti skid. Used about 2/3 of the can on the anti skid and mixed it well before applying it to the floor each time. The floor did not look as shiny anymore and it feels kinda greasy when I walk on the floor. Wish I had known about this or I would had just coated it without the anti skid product. Not sure if this affected it or not.
Here are some of the pictures of my install on a 3 car garage!
1st day grinding the floors. Took a long time to grind it down with the diamabrush.

1st layer with the primer. For future people who are going to install the armorclad epoxy, do not be scared of how uneven it looked. I grinded my floor so some spots soaked up more primer than other spots!


2nd layer with the epoxy. Best to have spike shoes and with a 2nd helper. My wife was the one who was painting the edges and throwing the flakes, while I was mixing up the batches and painting the epoxy down. I had loved how it looked after the 1st day it dried up. Very glossy and nice smooth feel to it. Wish I could have just kept it at this stage, but I knew it was best to have a final top coat to protect it.


3rd Layer with the military top coat. As you can see in the picture, it gave it a more dull look, but more protection. Pretty cool that you can see the little anti skid sand stuff in the layer. Nonetheless, floor still looked great!


Have to give props to the armorclad team, chris helped me out a bunch. He was the one who recommended me the medium gray color and now I am glad I went with his opinion! They answered all of my questions that I had over the phone, even if I thought it was stupid!
My recommendation is to not use blue painters tape. Now I can't figure out to remove it from some spots! Wish I had some left over primer and top coat. I would have painted the 1" step in front of my garage.
Last edited:
