

My garage is finally completed and now the fun begins. I’ve been collecting the blue HF boxes and have butcher block tops ordered. I have two 26” boxes with the hanging end box in the middle. I have a 69”x 24” top for those and have 2 44” boxes that have a 96” top coming for them. What’s the best way to attach the tops? The cabinets are placed permanently as I’ve removed the wheels.
Thanks for any ideas.
I’ll post some pics later tonight.
Rick


Thanks for any ideas.
I’ll post some pics later tonight.
Rick
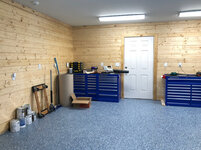
Attachments


Last edited:
