To avoid these ads, REGISTER NOW!

Above 1200 Sq/FT Bailey's Barn Build

Wokspaces above 1200 squarefeet.
To avoid these ads, REGISTER NOW!
OP
M

mwbailey

Well-known member
Joined
Jun 30, 2012
Messages
821
Location
Rock Hill, SC
OK, I'm in the midst of installing a compressed air system that will include the RapidAir Maxline tubing system. More on that later.

To help ensure a neat, straight, clean installation, I have been looking at tubing straighteners. Sure enough, RapidAir sells one for an investment of around $150. I've already spent too much on this project, so I was hoping for a cheaper approach.

Speedy's Garage (
at about 9 minutes and 20 secondsand https://www.garagejournal.com/forum/showthread.php?t=333761 post #16) shows a home built straightener. I saw that Speedy had probably passed his along to someone else so I contacted RapidAir for help. I got a very quick response saying they would look for the plans; they had some at one time. But I'm still waiting for that. . . .

So, I was left with a PrintScreen from Speedy's YouTube and guesstimates at the measurements! While cooling off from a 96 degree October day, I did a little more surfing to look at other compressed air installations and what should I find but the plans for a home built straightener. I figured others using Maxline might be interested so here's the link http://www.unitedstatesbd.com/image...gories/5377/files/PDFs/tubing tool design.pdf

Here's a picture from the .pdf
Tubing Tamer.jpg

I can't figure the copy right rules for this, but don't send me any money and maybe I won't get arrested/sued.

I'll try to put this on the "Tools" forum, too. It was just too hard to find not to share on the forum. Hope this helps some other guy/gal thinking about installing the Maxline system.

I'll let you know how it works out!
 
OP
M

mwbailey

Well-known member
Joined
Jun 30, 2012
Messages
821
Location
Rock Hill, SC
So, The Wife "gave" me a workshop air compressor for my birthday -- not unlike the Ford tractor she gave me for Christmas a few years back. She sorta gave me "permission" to buy one and a check to help out. . . . Very nice gift in any case.

The BIL was sold on Kobalt at Lowe's, so after looking at Home Depot, Lowe's, Tractor Supply, Northern Tool, and Harbor Freight, we ended back up at Lowe's. I'm sure it's overkill, but I don't think I'll need to increase air capacity any time soon. We came home with the 5 hp, two stage, 80 gal model (I had to chip in a few bucks more than The Wife had "gifted").

IMG_0942.jpg

With BIL's help, we moved the 400-plus pound device from the pick-em-up to the box behind Ole Paint. Fortunately, the lift allowed us to get pretty close to the height of the tailgate. Going to the workshop was pretty easy!

IMG_0944.jpg

From there, we pretty much man-handled it to the back of the workshop, pulling the thing on its crate with a rope on the crate.

IMG_0945.jpg

We got it off the crate and actually onto "vibration pads". That wasn't as tough as anticipated but was certainly NOT a one-man job. I have the Redhead bolts to attach to the floor, but I've seen that others have not felt the need to do that. . . and I don't have a hammer drill!

IMG_0948.jpg

After three or four trips to Home Depot and Northern Tool (where I got the RapidAir Maxline system), I had enough fittings and such to make the connection up to the first Maxline tubing.

IMG_0991.jpg

So, there it sat for a day or two while I got up nerve to attack the 240 V electrical connection.

IMG_1002.jpg

It's getting a little congested in the "mechanical room" but I think it will work out. Might have been better to rotate the compressor about 90 degrees but then one of the cylinders would jut out into the stairway. It's pretty close as it is, but the stairway is nice and wide. Should work out OK.
 
OP
M

mwbailey

Well-known member
Joined
Jun 30, 2012
Messages
821
Location
Rock Hill, SC
After getting the air compressor located and the air line connected through to regulator, seemed the next step would be hooking up the 240 V. I'm OK with 110 V, but 240 gives me a little concern.

I picked up a 30 amp double breaker and six feet of 10-4 (I guess that's what it's called) from Lowe's and was ready to connect. . . at least connect the air compressor end, where there's no juice to bite you.

IMG_1038.jpg

The panel already had a line run for a 110 V air compressor, so I could have pulled the single breaker and installed the 240 V double there -- a little more than 1/3 of the way down on the left. There were three slots at the bottom left so I knew the box had room. I decided to go with addition of the double breaker at the bottom left, leaving room for one more single breaker there.

IMG_0996.jpg

I got up my nerve and jumped on the breaker box today. Since I had just cut the red wire off at the compressor, I did the same at the box. Felt silly doing that, but didn't want to run back to Lowe's to exchange the cable. For some reason, I first installed the white wire to the ground bus! Swapped it out for green.

IMG_1040.jpg

Hooked up the white and black wires.

IMG_1042.jpg

Breaker box is almost full, but I don't expect to add anything else.

IMG_1041.jpg

So here's the final (!) connections

IMG_1044.jpg

and now the easy work begins: running the Maxline tubing. That might take a LOT of nerve.

Interesting that the biggest headache seemed to be getting a cable clamp to fit the 4-wire cable and a knockout on the compressor switch. I've got a few extra clamps in a couple of unneeded sizes left over.
 

Bob Heine

ALLIANCE MEMBER
Joined
Oct 24, 2009
Messages
10,703
Location
Boca Raton, Florida
Did you consider installing an outlet instead of direct wire? I installed a double 20-amp 240 outlet with the same plug as my welders. The breaker box in the garage was full. To free up a space, I added a tandem 15-amp breaker (two breakers in a single space) because the wiring was 14-gauge but they also sell tandem 15/20 amp breakers if you have 14- and 12-gauge wiring in adjacent spaces.
attachment.php
 

Attachments

  • Tandem 15-20 Breaker.jpg
    Tandem 15-20 Breaker.jpg
    41.5 KB · Views: 610
Last edited:
OP
M

mwbailey

Well-known member
Joined
Jun 30, 2012
Messages
821
Location
Rock Hill, SC
Hey, Bob, a plug and receptacle actually did cross my mind. I had done something like that for the lift -- I think it was because there was already a pigtail coming from a box on the lift, but I'm not sure.

IMG_4607.jpg

I don't plan (yeah, I know, best laid plans of mice and men, etc.) to add too many more electrical requirements to the workshop, so I'm OK that the box is almost full. And a direct connection seemed to be fine particularly since the breaker box is within easy reach of the compressor; just as convenient to flip the breaker off as to unplug from a receptacle, should the need arise.

Funny that while I feel OK working with 220 V, I started to check the voltage with my multimeter across the connectors just past the main breaker and just couldn't make myself do it. I figure if all the lights went off after I threw the breaker, that was a good indication that I didn't have current past the main breaker and I'd be OK. And I was!
 
OP
M

mwbailey

Well-known member
Joined
Jun 30, 2012
Messages
821
Location
Rock Hill, SC
So, I went from messing with 220 V to doing some piping. I mentioned I was using the Rapidair/Maxline (overkill) system. Before tackling the installation, I did two things. First, I made the "tubing tamer" per instructions, somewhat modified to utilize existing scrap wood, etc., that I had posted earlier. Second, I estimated the amount of tubing that I was going to need for three drops and a connection for an overhead reel. When I added everything up, I got 101'3". Since the kit I got only came with 100', I had to put my drops at 5' high, instead of 4' from the floor.

I straightened a length of tubing that would reach from regulator, up to about 9' girt, and to just inside the wall of the mechanical room. I tried to find a piece of equipment that would give me a roughly 9" radius to bend the pipe to go from the regulator to the vertical run, and ended up using a trashcan lid. Speedy said he used a weight from his weight-lifting equipment. Evidently, I don't lift as much as Speedy because my largest weight was still under 6" radius. By the time it was all over, that relatively straight piece of tubing had several bends in it!

IMG_1045.jpg

IMG_1056.jpg

The connection behind the water heater was a bear. If the system leaks, I know the first place to look but it's so tough to get to that I will probably save it for last.

The next run was over 24'. I had to open the door to get that much tubing through the "tamer". I'm convinced that some "bend" is put back into the tubing just because the weight of the un-suspended end pulls it down. I thought of putting my table saw output support under it at one time, but forgot to do it when the time came, doh!?!!

IMG_1052.jpg

My first drop was also about where I wanted to put the reel connection. Trying to run the tubing along existing beams and girts and posts, I fabbed a double drop to straddle a post.

IMG_1050.jpg

That seemed to work OK. I really would have preferred solid tubing to come off the horizontal run, but to keep it from sticking 9" into the room (recommended bend radius), I used an elbow.

IMG_1062.jpg

This drop will also serve the sand blast cabinet.

I was happy to find a beam where the reel could be located that would put it out of the way and still be convenient. Wow, that thing is heavy trying to work with it overhead. I got real smart and pulled the line off of it. I found out two things: 1) the line is not what's heavy, and 2) I have enough line on the reel to get to just about every corner of the workshop. I wonder why I am going to all that trouble to install additional drops!!

IMG_1069.jpg

Even though I suspect that the most likely leak is going to be behind the water heater, I was concerned about the reel leaking. I installed a valve so I could cut it off at times. We'll see if that was a good idea later.

I learned that it's probably smarter to connect the tubing before fastening down the "block" that RapidAir uses for quick disconnect and drain. I was pretty lucky with the connection to the reel since I had screwed the block to the beam and then cut and installed the tubing. It fit just right. For the drop for the quick disconnect, I connected the block to the tubing before fastening it to the wall. I was off less that 1/4", so I don't think that variance will be noticeable between drops.

So, with that drop installed, I'm considering that the second major step is complete -- after the initial step of installing the compressor.

You can almost see the whole system to the mechanical room wall in this photo.

IMG_1067.jpg

Next step (and last?) will be turning a corner and installing two more drops on either side of the sliding doors.
 
OP
M

mwbailey

Well-known member
Joined
Jun 30, 2012
Messages
821
Location
Rock Hill, SC
OK, so for a little complaining about the RapidAir Maxline system: Why does it require a different size wrench for almost EVERY connection? I did use a 7/8" wrench for two connections. . . and I realize that some of the sizes are dictated by other standards, say, like pipe size.

Combined 7-8.jpg

IMG_1076.jpg

IMG_1074.jpg

IMG_1073.jpg

IMG_1071.jpg

IMG_1075.jpg

Notice that many of these are pretty LARGE wrenches and I had to purchase an even larger Crescent wrench for one of the pieces. Granted, most of RapidAir's videos show adjustable wrenches being used, but I can always use an adjustable to round off a fastener a lot easier than a "sized" wrench. Besides, have you priced a Crescent wrench lately, the price must go up with the square of the size. . . .

In any case, here is another issue I noticed: the drain valve cannot be installed after the "block" is installed if its on a flat surface.
IMG_1079.jpg

It's not hard to install the drain valve first and you have to put a plug in the rear anyway if you are not coming through the wall. But, there should be a pretty easy solution to that problem.
 
OP
M

mwbailey

Well-known member
Joined
Jun 30, 2012
Messages
821
Location
Rock Hill, SC
Eden Farms, see E-mail just sent!

Anyone interested, did a little repair on the carryall box on Ole Paint, the Ford 8N. In the glorious plans for the ever flexible carryall, the design included fold-in sides that used barrel bolt locks to hold the sides in place. Only two problems: 1) the sides were too long to fold flat into the carryall and 2) on one side the hole for the barrel bolt was too close to the edge and split out the wood.

No problem. Just put a metal ******** the edge for added strength!

IMG_1227.jpg

IMG_1230.jpg

That worked fine, give or take the fact that the 2X's have warped/cupped enough that the bolt didn't exactly line up with the hole. A hammer worked to get the bolt into the hole; wonder how I'll get it out. And a small plug was glued into the split hole.

The other side was not a problem, but just to keep things symmetrical, a strap was placed on that side, too.

IMG_1229.jpg

Ta da

IMG_1231.jpg
 
OP
M

mwbailey

Well-known member
Joined
Jun 30, 2012
Messages
821
Location
Rock Hill, SC
Nope, xtremek, have not finished the lines. My excuse is that I have 442 car parts all around the shop -- on shelves, leaning against walls, in the doorway -- so I was waiting to get the parts out to the painter before completing the run. I'd be disappointed if I dropped a SS fitting on a perfectly good hood or something. Painter says he's a bit behind, and I said not to rush. I don't want him to rush MY job, so I'm not going to rush him on another job.

Maybe he'll call this week and my excuse will be gone.
 

xtremek

Well-known member
Joined
Apr 13, 2012
Messages
11,603
Location
St. Johns, Mi
I understand that completely. I have a similar issue with finishing the insulation in the shop ceiling. Got to get a truck movable first. And just like you don't rush the cook at a restaurant, I think your choice about rushing the painter is wise.
 
OP
M

mwbailey

Well-known member
Joined
Jun 30, 2012
Messages
821
Location
Rock Hill, SC
Gotta share this! A local small town has a Christmas parade which allows farm equipment, farm livestock and walking entries, only. It's a bit of a tradition for the area. I've been a couple of times and offered to put the grandkids in the carryall if they wanted to be in the parade. We're registered, but with the stipulation that rain and/or extreme cold would cause us to cancel.

For the parade, 12/21, Ole Paint will become Ruby the Redbelly Tractor (had a very bright red nose. . . .):

IMG_1249.jpg

IMG_1250.jpg

IMG_1251.jpg

Could only find seats for the 4yo twins; 7yo will have to bring her own chair!!

Need to attach fire extinguisher, charge battery, and maybe direct the exhaust away from the grandkids. Otherwise, we're ready. . . hope the car hauler will make it.
 

xtremek

Well-known member
Joined
Apr 13, 2012
Messages
11,603
Location
St. Johns, Mi
I love that about small town USA. Our parade was a week ago last Friday, and our youngest walked in it with her fire batons. What if the 7yr old stood on the running board, leaned on the fender? If you don't mind, post a picture of Ole Paint's moment of stardom
 

Mike.ASC

Well-known member
Joined
Apr 21, 2010
Messages
880
Location
East coast
Gotta share this! A local small town has a Christmas parade which allows farm equipment, farm livestock and walking entries, only. It's a bit of a tradition for the area. I've been a couple of times and offered to put the grandkids in the carryall if they wanted to be in the parade. We're registered, but with the stipulation that rain and/or extreme cold would cause us to cancel.

For the parade, 12/21, Ole Paint will become Ruby the Redbelly Tractor (had a very bright red nose. . . .):

IMG_1249.jpg

IMG_1250.jpg

IMG_1251.jpg

Could only find seats for the 4yo twins; 7yo will have to bring her own chair!!

Need to attach fire extinguisher, charge battery, and maybe direct the exhaust away from the grandkids. Otherwise, we're ready. . . hope the car hauler will make it.

Nice work on getting your tractor in parade shape. Where is this parade at , I would like to notify my kids in case they want to take the grandkids?
 
To avoid these ads, REGISTER NOW!
OP
M

mwbailey

Well-known member
Joined
Jun 30, 2012
Messages
821
Location
Rock Hill, SC
Merry Christmas to all from Lowrys Christmas Parade:
IMG_1775.jpg

Here is Ole Paint, I mean, Ruby the Red Belly Tractor as she heads out to get in line for the parade -- some of the grandkids aboard.

The kids had great fun until the candy ran out -- they just might have been eating more than they were distributing.

Frankly, I was overwhelmed with the number of tractors (mostly John Deere), horses, and spectators.

This was probably the best restoration, WITH International Harvester wrapping paper on one of the packages!
IMG_1276.jpg

To top it off, we won Best Christmas Theme -- Tractor!!! Heck, I didn't even know we were being judged. The excitement of the kids was enough for me.

Here's hoping all GJ folks have a blessed Christmas and a happy New Year.
 
OP
M

mwbailey

Well-known member
Joined
Jun 30, 2012
Messages
821
Location
Rock Hill, SC
Thanks, xtremek. We stopped by the Lowrys Town Hall today to pick up the award. Wow, pretty fancy for a town of about 200 people. The parade organizer said seeing the grandkids on the tractor is what the parade is all about. She even asked me if the spectators were polite -- they were trying to emphasis that this year. I assured her that everyone we bumped into or saw behaved very well, except for one policeman who probably had already been overwhelmed. The initial report was about 10,000 spectators and participants!!! Holy cow. . . .

IMG_1358.jpg
 
OP
M

mwbailey

Well-known member
Joined
Jun 30, 2012
Messages
821
Location
Rock Hill, SC
Yep, reminds me of the three cruise ships at 3-4000, each, docking at Skagway, Alaska, population about 1000!! I suppose the "event" (in Skagway and in Lowrys) has evolved over time and they've figured how to handle the visitors as it grew. I must admit that next time I'll have my car hauler pointed in the "other" direction so I don't have to go back through town when the parade is over!!
 
OP
M

mwbailey

Well-known member
Joined
Jun 30, 2012
Messages
821
Location
Rock Hill, SC
And Merry Christmas to you, one and all.

Still trying to get as much mileage as possible. Balmy weather without rain, so why not leave Ruby/Ole Paint out in her Christmas finery?

IMG_1367.jpg
 
OP
M

mwbailey

Well-known member
Joined
Jun 30, 2012
Messages
821
Location
Rock Hill, SC
How many have been following The Willows Barn Build? Although the build is actually complete, the owner was too busy working on the shop to update on Garage Gallery, but is entering photos and comments now documenting his efforts. It's an outstanding job. Check it out (I think there's a better way to link within Garage Gallery, but I couldn't remember how to do it):

https://www.garagejournal.com/forum/showthread.php?t=437849

Every time I check back in with the build, I find something that reminds me of my place. Last comment asked about utilization of area under the stairs. Turned into my mechanical room, more or less, with water heater, air compressor, breaker box, storage. Will be interesting to see what comes of it at The Willows Barn!

Funny how different areas have different problems. Pretty cold with lots more snow in West Michigan than in South Carolina. We didn't have to deal with much of a frost line, snow, radiant heat, and such, but there was rain, 100 degree days, etc. The Willows is a much more finished construction but some similarities like running/connecting Internet/cable from the house, separate electrical service including 220v allowance for possible future welder, insulation, water and sewer connections, two post lift, Monitor style barn, and on and on. The Willows is on the water situated on something more than 3 acres including a home; I'm on the water on something less than 3 acres including a home.

I think he's got me beat other than the size of the lake (and the number of folks I have to share the lake with). I've got over 13,00 acres and he's got about 35 acres. . . but only 10 homes on the lake!

I don't know if I've ever included a "platt plan", but for comparisons here is the GIS view:

circa2018aerial.jpg
 
OP
M

mwbailey

Well-known member
Joined
Jun 30, 2012
Messages
821
Location
Rock Hill, SC
The Wife doesn't actually understand Pat McManus' situational or sequential vortices, so this one will be shared with GJ folks!

Ole Paint decided late last week not to restart after the BIL distributed a box of mulch near the house. The symptom was a spinning starter motor, but no spinning engine. Best guess was the bendix was not engaging the ring gear/flywheel.

How hard could it be to pull a starter? No big deal, except, there is a coolant stopcock in the way AND the same bolts that hold the starter to the engine also hold the starter ends together. First, drain some coolant, then pull out the starter. . . IF the bendix doesn't hang up on the flywheel on the way out and pull the armature away from the brushes. With some angle adjustment and anguish, the starter came out.

On Thursday, Just 8N was called to see if they had starter with bendix -- figured old starter with armature displaced would probably benefit from a totally new starter. Sure, no problem, part in stock.

On Friday, after BIL's 10:45 am doctor's appointment, the road trip of about 50 minutes began. First stop before Just 8N in Shelby, NC, was the Flying Pig for a BBQ sandwich. The restaurant was a bit cold due to the morning's sleet and snow dusting, but the Q was good. After lunch, trip to Just 8N was completed -- only to find the door is locked!?!

Noticed the sign in the window said, "Open", and the hours of operation include 9-5 on Friday. Phone call confirmed that Derrick had made a parts run for Friday and the "assistant" had called it a snow day! But, assistant would check with Derrick. Yep, still in Charlotte for parts. Not going to wait a couple of hours so assistant promises to send starter, no shipping charge.

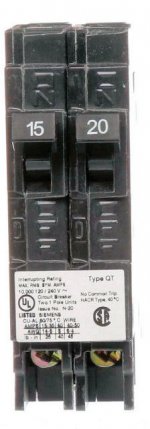
Starter arrives on Tuesday evening. Curiosity demanded a manual test of the bendix. It worked, but also locked in place, "engaged". Otherwise, seemed to be a perfect replacement:
IMG_1508.jpg

Wednesday is two doctor's appointment for BIL, so any further efforts are put off another day.

Much studying on the Internet plus a video where a starter supplier says DO NOT MANUALLY ENGAGE THE BENDIX, suggests that spinning the bendix with a wire brush on a grinder will allow the bendix to return to "neutral". Hmm, not enough power on available grinder to make that work.

So, another entry on a tractor forum suggests that if the starter can be installed with the bendix "engaged", the first start will disengage the bendix. OK, let's try that.

Sounds like starter spins but engine is not turning over; we've been here before. Had not studied the ring gear teeth earlier but didn't recall seeing anything untowards. On closer examination, teeth looked really good, BUT the ring gear rattled and could be rotated by hand a few inches. Not good?!

A call to Just 8N confirmed the suspicion that something was amiss with the ring gear and to replace would require "cracking" the tractor apart. That is well above current pay-grade, so will need to take Ole Paint to Shelby for repair! Ole Paint is still near house, so a long strap and some pulling with the Expedition got Ole Paint up the hill to the workshop.

IMG_1510.jpg

Fortunately, an empty car hauler was available, so the tractor and trailer were aligned for easy loading with the conveniently installed electric winch. Trouble is, the winch is found to be fouled beyond remedy. . . and a horrendous thunderstorm is just passing through. Called off vortex for another day.

Today, found an exact replacement for the winch at Northern Tool and used a $10 discount to help the pocketbook a bit. Turns out, exact replacement is not fitting the existing holes in the trailer floor too well. But with a little larger drill bit and some "wollering" of the existing holes, the winch is installed.

Finally, the tractor gets loaded.

IMG_1514.jpg
IMG_1515.jpg
IMG_1516.jpg

And, once again, Ole Paint is secure in the car hauler. Delivery to Just 8N will have to wait until Monday since The Wife has been promised a movie in less that an hour from now.

Just another everyday vortex in a Garage Journaler's life :)
 

Mike.ASC

Well-known member
Joined
Apr 21, 2010
Messages
880
Location
East coast
There used to be a place in Hickory Grove S.C. that worked on tractors but the fellow retired a few years ago, too bad -he was a great guy.
 

xtremek

Well-known member
Joined
Apr 13, 2012
Messages
11,603
Location
St. Johns, Mi
No pull starting Ole Paint and drive it in? I wonder if the flywheel is toast from the ring gear slipping on it. How much will this set you back?
 
OP
M

mwbailey

Well-known member
Joined
Jun 30, 2012
Messages
821
Location
Rock Hill, SC
Hey xtremek,

I haven't tried pull-starting, but push-starting did cross our minds. However, if the ring gear really is wobbling around, we were afraid running the tractor might REALLY mess things up!! So, we sorta took the safe route. Besides, I had seen something on starting the tractor by letting it roll downhill (an approach I often used with my 1968 Olds 442 until I realized the battery terminals needed cleaning) -- but then you might have the tractor at the bottom of the hill, they said. The bottom of our hill was Lake Wylie :lol_hitti

Besides, I was going to have to replace the winch to pull the 442 chassis/body into the trailer in a few weeks to deliver it for painting! Now I'm ready:bounce:

Hickory Grove would have been a lot closer, Mike, but they don't have the Flying Pig BBQ!?!?!?
 
Last edited:
OP
M

mwbailey

Well-known member
Joined
Jun 30, 2012
Messages
821
Location
Rock Hill, SC
Got Ole Paint "in line" for repair at Just 8N. Seems to be a couple of tractors in line before us. We'll have to wait until they move through the process.
IMG_1546.jpg

In the meantime, BIL and I cleared a spot for my son's Passat on the lift this weekend.

IMG_1554.jpg
 
To avoid these ads, REGISTER NOW!
Top Bottom