To avoid these ads, REGISTER NOW!

Basic Suburban (2+1 = 3)

SKSDO

Member
Joined
Sep 5, 2014
Messages
20
Location
Phoenix, AZ
In keeping with the theme of many threads I have read over the years, I too am a long-time lurker who is finally getting around to putting a thread together. My garage project is modest by some measures, or perhaps even a bit odd by others. I share it mainly in hopes someone else might see something they like, or that they are just curious about. For my own part, I know many of my ideas were born of things I saw on this board.

I have not been, and likely will never be a "power user" so far as internet boards go. When and where I can, I am pleased to offer additional information or advice to anyone who might seek it.

I am also nowhere near done doing everything I want to in my garage. My wife and I built this basic home in the Phoenix Suburbs around 15 years ago, and most of my garage project has only just recently started to look like anything of note (we long ago agreed to a cash only/pay as-we-go strategy). This has been slow, but relatively low-stress -- and no threats of divorce (even if my wife does think my refit of the garage is - shall we say, a bit "unusual").

Anyway -- here we go....
 
To avoid these ads, REGISTER NOW!
OP
S

SKSDO

Member
Joined
Sep 5, 2014
Messages
20
Location
Phoenix, AZ
Our Garage Setup is a bit atypical. It adds up to a 3 Car Garage, but it comes in the form of a 2 Car (attached to the house), and a Single Car (attached structually, but not directly to the living quarters).

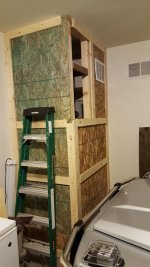
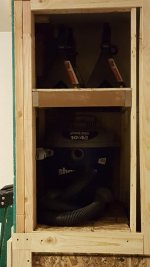
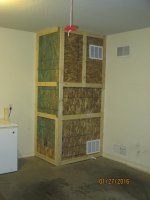
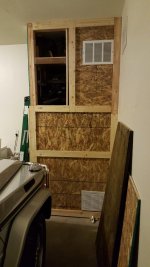
The first thing I did was to create this "closet" to encompass my Water Heater and Water Softener. I was also able to engineer a bit of storage into the project. This closet serves no real purpose other than to clean-up the front of the garage a bit (I hate clutter). It always seemed this area was collecting garbage (or at least a ton of dust/dirt).

*The closet is designed so that it comes apart with only a few large screws since I am aware the water heater and/of water softener will inevitably require service.

In these pics, you don't get a great idea of how I put it together (I don't tend to think about taking pictures when I am working). Still, you can get an idea of how things finished-up.

The photos don't tell a great deal about this setup - unfortunately. The water heater was set in the corner on an 18-24" raised platform. The water softener (including it's copper pre-plumbed loop, the softener itself, and the salt/brine tank) was located immediately next to the softener on the ground level. I was careful to preserve the vents on this structure (water heater is gas).

Immediately in front of the water heater raised platform was a solid vertical pole (placed to prevent my or my wife from running into the water heater - and this was also integrated into the closet structure.

As we go forward, there may be some better pics of this corner closet -- and if not, I can certainly take some additional photos for anyone who might be curious.
 

Attachments

  • 20160125_234009.jpg
    20160125_234009.jpg
    69.1 KB · Views: 55
  • 20160125_233953.jpg
    20160125_233953.jpg
    80 KB · Views: 51
  • 20160125_234322.jpg
    20160125_234322.jpg
    67.2 KB · Views: 49
  • 20160125_234027.jpg
    20160125_234027.jpg
    56.9 KB · Views: 48
  • 124.jpg
    124.jpg
    108.7 KB · Views: 46
  • 123.jpg
    123.jpg
    106.2 KB · Views: 45
Last edited:
OP
S

SKSDO

Member
Joined
Sep 5, 2014
Messages
20
Location
Phoenix, AZ
The next thing I finally got around to was having better lighting installed. I used pretty basic (though not especially cheap) LED Fixtures from Home Depot/Lowe's, and actually had an electrician do the install. I'm all about saving money, and I am not afraid to get my hands dirty when I have a project I understand. However, I am also a big proponent of the savings that can often be achieved by having a professional do it right the first time. I don't work in any specific trade - and although I have worked various forms of construction in my life, the reality is that I sometimes do better going to my own job to make the necessary money to pay someone else. The electrician we hired bid the project fairly, and he was done in an afternoon. Had I done this alone, it would have taken at least 2-3 times longer (time when I would not have been at work), and I would have lost more revenue than what I happily paid the electrician.

There is nothing fancy about my lights, and for those of you who feel you can always have more lighting -- I would agree. Nonetheless, for my purposes, the upgrade was night vs. day, and I am satisfied for now. *The nice thing about lights is that I can always add more if I find it necessary.
 

Attachments

  • 20171124_190446.jpg
    20171124_190446.jpg
    61 KB · Views: 50
  • 20171124_190402.jpg
    20171124_190402.jpg
    94.8 KB · Views: 47
  • 20171124_190354.jpg
    20171124_190354.jpg
    82.9 KB · Views: 50
OP
S

SKSDO

Member
Joined
Sep 5, 2014
Messages
20
Location
Phoenix, AZ
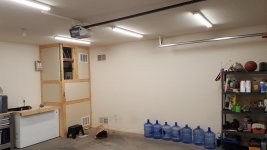
Just another couple of pics of the main (2 Car) garage after completion of the Water Heater Closet and the LED Lighting.
 

Attachments

  • IMG_1512.jpg
    IMG_1512.jpg
    91.6 KB · Views: 18
  • IMG_E1512.jpg
    IMG_E1512.jpg
    91.6 KB · Views: 18
OP
S

SKSDO

Member
Joined
Sep 5, 2014
Messages
20
Location
Phoenix, AZ
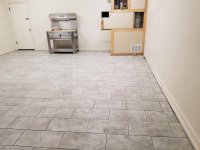
Then - I finally got around to taking the plunge on the flooring.....and this is where Garage Journal has been especially helpful. I never felt Epoxy was for me (expensive to get it done properly, and even then I know too many people who have experienced failures within a few short years). When I can, I like to think I try to do things once - in hopes their longevity will outstrip my own. It is also worth noting that trying to paint/stain/epoxy my own floor was NOT something I ever seriously considered taking a stab at myself -- though I did read about it for several years.

I then moved-on to Race Deck/Swiss Trax(?), and came pretty close to ordering supplies to do this. The thing I could never get past was that one of my 2 garages has a southern exposure and the thought of having to leave a substantial border (so the flooring product can expand and contract without bowing-up) didn't jive with my sense of order (this is where my wife will tell you I might be legitimately ill). Here in Phoenix - weather is pretty straightforward, but temperature variation can be substantial. My investigation lead me to believe I was going to have to leave a considerable (in my mind) area for the floor tiles to expand/contract in order avoid having problems.

Eventually, I started reading about people doing porcelain (and other forms of tile) in their garages, and this really was the solution I was looking for. Probably another 1-2 years thinking it over, and learning as much as I could (there are at least 2 fantastic other Porcelain Tile Floor Installation threads on GJ, and I am forever grateful for these).

A tile floor in both our garages was a bit of a tough sell for my wife, but with careful planning, and in taking my time I was able to convince her the cost was no more than an epoxy or Race Deck/Swiss Trax floor. At that point, she came on-board.....even if she still thought it a bit odd.

We purchased the Porcelain tile locally for around $1.20 per SqFt. I was told it was a "through body tile", but I don't think it actually is. Despite this minor disappointment, it has been down for nearly a year, and I remain convinced it was absolutely the best way to go for my needs.
 

Attachments

  • IMG_E1513.jpg
    IMG_E1513.jpg
    149.8 KB · Views: 22
  • IMG_1514.jpg
    IMG_1514.jpg
    147.4 KB · Views: 28
  • IMG_1513.jpg
    IMG_1513.jpg
    149.8 KB · Views: 29
OP
S

SKSDO

Member
Joined
Sep 5, 2014
Messages
20
Location
Phoenix, AZ
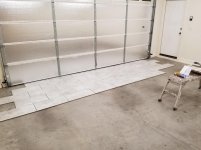
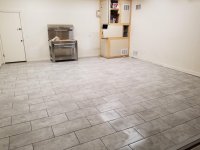
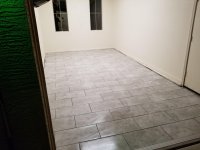
Here is the tile being installed, and then completed in the larger (2-Car) Garage.

I did rent and use a power washer to clean up both garage floors before starting the tile project. There were some oil/fluids stains on the floor after 10+ years of various car storage, but the floor was in otherwise good shape. No other serious floor prep was required (here again, we are blessed in Arizona --- concerns about moisture barriers and freeze-thaw issues aren't really very prevalent).

Basic Pattern/Basic Grout.

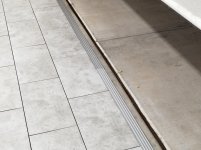
Schluter Reno Ramp for the drive-over threshold.

It is not a fancy job -- still friends and neighbors something see it as exotic - which it really isn't. My whole flooring project came-in under what a reputable company in my area charges for a good epoxy floor.
 

Attachments

  • 20171212_013604.jpg
    20171212_013604.jpg
    146.6 KB · Views: 51
  • 20171212_013642.jpg
    20171212_013642.jpg
    146.6 KB · Views: 46
  • 20171214_142240.jpg
    20171214_142240.jpg
    100.8 KB · Views: 43
  • 20171216_231147.jpg
    20171216_231147.jpg
    128.2 KB · Views: 43
  • 20171216_231254.jpg
    20171216_231254.jpg
    126.4 KB · Views: 49
OP
S

SKSDO

Member
Joined
Sep 5, 2014
Messages
20
Location
Phoenix, AZ
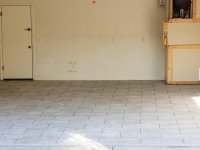
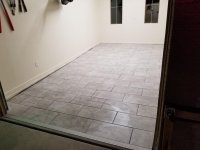
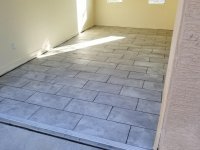
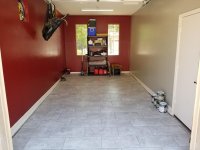
The other smaller (1-Car) Garage with the completed flooring. Used the same supplies and methods as the other garage.

The tiling took (I believe) 3 Days total -- and my installer did not work all day each day -- did the project in steps. Out garage total area is right at 589 SqFt. The project was completed with limited (but some) wastage, and I was able to keep a fair amount of spare tiles should I ever require a repair of some sort.
 

Attachments

  • 20171216_231227.jpg
    20171216_231227.jpg
    122.6 KB · Views: 23
  • 20171216_231216.jpg
    20171216_231216.jpg
    116 KB · Views: 22
  • 20171216_231210.jpg
    20171216_231210.jpg
    115 KB · Views: 25
  • 20171214_142231.jpg
    20171214_142231.jpg
    146.9 KB · Views: 30
OP
S

SKSDO

Member
Joined
Sep 5, 2014
Messages
20
Location
Phoenix, AZ
Recently, we were able to get around to putting some paint on the walls (which had taken a bit of a beating over the years). Here, I realize we stray into areas of taste, and I am quite aware of many people's aversion to using darker colors in the garage. However, I rarely do any real work in the smaller garage, so it is mostly just for vehicle storage. There will eventually likely be some additional storage cabinets in this smaller garage, and probably it will house my planned air compressor (it seems to be my best option for running 220V Service - which I wasn't smart enough to have installed when we built the home).

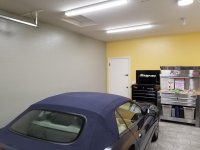
In my opinion - the current LED lighting remains more than adequate, even with the darker paint on the walls.

The larger garage got color, but we did try to keep it a bit lighter to maximize light. Most of my limited work on cars and other projects takes place in the larger garage.
 

Attachments

  • 20180810_143856.jpg
    20180810_143856.jpg
    146.7 KB · Views: 40
  • 20180810_143827.jpg
    20180810_143827.jpg
    119 KB · Views: 48
  • 20180810_143820.jpg
    20180810_143820.jpg
    119.5 KB · Views: 48
  • 20180810_143752.jpg
    20180810_143752.jpg
    79.4 KB · Views: 61
  • 20180617_200602.jpg
    20180617_200602.jpg
    112.8 KB · Views: 51
  • 20180617_200552.jpg
    20180617_200552.jpg
    109.4 KB · Views: 57
  • 20180617_200545.jpg
    20180617_200545.jpg
    111.2 KB · Views: 58
OP
S

SKSDO

Member
Joined
Sep 5, 2014
Messages
20
Location
Phoenix, AZ
Sorry for the underwhelming photos of the larger garage -- I can capture some better pics at some point if anyone is interested.

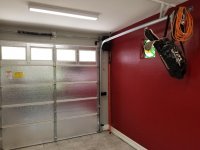
*You can also likely note I took time some years ago to install insulation on the back of both my garage doors. It had been my hope to limit the summer heat coming through the doors (particularly the one facing south). However, given that the garage walls and roof are NOT currently insulated - I fear the benefits have been minimal, if any. I do tend to notice in the winter (when it can get somewhat brisk here) that the garage does preserve its heat quite a lot better. It will warm-up during the day, and then remain quite a bit warmer throughout the evening which can be nice if I have something to do (assuming I don't open the garage door(s), and let out all the heated air.
 
OP
S

SKSDO

Member
Joined
Sep 5, 2014
Messages
20
Location
Phoenix, AZ
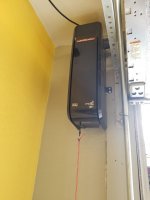
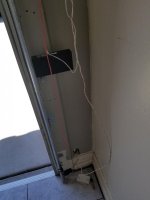
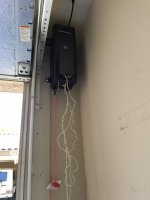
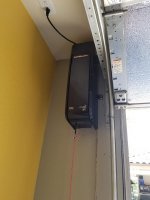
My other most recent project involved removal of the old overhead garage door opener, and installation of #2 LiftMaster 9800 series openers. The original unit worked fine (was installed when the house was built). However, our master bedroom is upstairs close enough to the garage for the old opener to have caused an appreciable disturbance whenever it would run up or down.

The smaller of the 2 garages (1-Car) never had an opener installed. Not a big deal since the cars in that garage have never been driven regularly. Still, it has been a notable improvement having the opener there as well.

I did research the openers for a long-time, and I am aware of the potential safety/security issues related to the openers and their "iffy" wall-control modules. Nonetheless, I was never really able to locate anything viable (read - reasonably priced and appropriate for a home) that offered the same sort of functionality.

To Date, we have been very happy with the setup. I went-ahead an purchased the internet gateway (which I didn't really need since one of my openers was WiFi ready out of the box). In this realm, LiftMaster fell-down a bit: I was provided conflicting information from just about everyone I talked to regarding use of the online/internet App. Everyone from the seller I bought from, to the installer I used, to LiftMaster themselves gave different information about what hardware I would need to make my system work via WiFi.........In the end, my research was correct, and I would not have needed the WiFi Gateway, but it was only $50-$60, and I was certain I wanted this functionality. Had I not been impatient, I could have not ordered the gateway at all, but I didn't to take the risk that I would need it and not have it (you can't just pick these up at Home Depot/Lowe's, and I didn't want to wait several days if I ended-up needing one).

Despite the mild snags, out openers are now working perfectly, and I am beyond pleased with how quiet they are when operating. They simply cannot be heard from anywhere within our home when they run.

The installer who originally set things up had a different definition of a "clean installation" than I do, but I was able to clean-up the wiring without much difficulty.

LiftMaster/Chamberlain also did step-up to provide a wireless bridge of some sort -- since their newer garage door openers are not really backwards compatible with older versions of "Home-Link". Our cars are all newer than 2008, but none of their built-in "Home Link" controls could be programmed to the new openers. I thought this issue was a bit disingenuous because the openers are sold as being "Home-Link" compliant -- which they actually are not for a great many vehicles currently on the road. In the end, a call to LiftMaster customer support to discuss the issue resulted in the necessary wireless bridge being sent-out to me without additional charge - which I appreciated.

We also gained the obvious overhead storage space in the main garage - which I have no immediate plans for, but I do very much like the un-cluttered jack-shaft opener installation.
 

Attachments

  • 20180821_165546.jpg
    20180821_165546.jpg
    49.2 KB · Views: 20
  • 20180810_143915.jpg
    20180810_143915.jpg
    61 KB · Views: 24
  • 20180810_143856.jpg
    20180810_143856.jpg
    146.7 KB · Views: 25
  • 20180627_151137.jpg
    20180627_151137.jpg
    47.4 KB · Views: 22
  • 20180627_151132.jpg
    20180627_151132.jpg
    57.5 KB · Views: 22
  • 20180627_151203.jpg
    20180627_151203.jpg
    64.8 KB · Views: 23
To avoid these ads, REGISTER NOW!
OP
S

SKSDO

Member
Joined
Sep 5, 2014
Messages
20
Location
Phoenix, AZ
Parking on tile has been a non-issue. I was somewhat concerned about tire/rubber transfer - especially in the hotter months here in Arizona (two of our cars run high-performance summer tires which are of a soft compound) - but this has not been a problem.

I was honestly more concerned about the Schulter Reno Ramp’s ability to put up with the car traffic, but it also has not been an issue of any kind. I had to order the Reno Ramps from Schulter directly, and I am pretty sure somewhere in the included documentation was an admonition they were not intended for vehicle traffic. However, my own rough calculations seemed well within the included specs from Schulter (I am also aware others on this board have used this same solution for the drive-over boarder between driveway and tiled garage spaces & I have not yet read of anyone having problems with this solution).

Our largest vehicle (the white truck/SUV you can see in some of the photos) is rated for more than 6,6000 lbs GVW - so if there were going to be problems, I expected it would be the source. However, nothing to report thus far.

*I do make a conscious effort not to turn the steering or goose the throttle when crossing the thresholds while entering or leave the garage. I try to roll smoothely over the ramps, and this has been working well. I think my wife does a pretty good job with this as well. Although, she does have to make a slight steering adjustment when coming or going. Her car actually has a bigger footprint than the truck/SUV, and I also wouldn’t consider it light. Nonetheless - the floor looks today essentially as it did when we completed the install work nearly a year ago.
 
Last edited:
OP
S

SKSDO

Member
Joined
Sep 5, 2014
Messages
20
Location
Phoenix, AZ
Appreciate the read & response. I am obviously going with more of a clean look as opposed to some of the more functional garage setups I have seen on this site. That is part of the greatness of this site — many different ideas, and regardless of the end-use criteria, I have many times seen great ideas and things I am interested in doing in threads that don’t vaguely resemble my own plans.

I should have noted my purpose for this garage is largely tidy vehicle and tool/supplies storage. My actual work/projects tend to be pretty straight-forward. I have no aversion to turning a wrench - and will tackle some repairs here and there (when the project is something I am comfortable with, and more importantly something I want to tackle).

Other than vehicle detailing and small auto projects, my other work runs the gamut of household repairs and typical odds & ends.

There likely won’t be any welding or metal work in my future — things I wouldn’t mind taking a shot at learning, but I fear I lack the space to add these capabilities while keeping things un-cluttered. I would also love to have a lift for working on the lower half of my vehicles. However, space again limits my options (in more ways than 1). I am aware of scissor lift setups and things like Quick-Jack/Max-Jax — but if I elected to try for a lift, I would likely want to insist it be able to be used on the truck/SUV as well as our other cars. Between capacity concerns and ceiling limitations, I think this would be a difficult balance. It also bears mentioning that the tile we see is sitting on top of a post-tension slab which further limits economical options for carving into the floor too much (without a level of expense that would more probably justify moving to a new home altogether).

My most immediate pending plans will involve an Air Compressor with suitable plumbing, a larger tool storage arrangement, and cabinets/storage of some sort. As I have done to this point, I will likely continue to research options and recommendations via this board (as well as Craigslist locally). I expect things will continue to move slowly forward, but a project in progress is always more fun than one that is completed.
 
Last edited:
OP
S

SKSDO

Member
Joined
Sep 5, 2014
Messages
20
Location
Phoenix, AZ
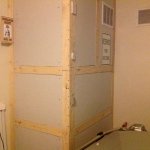
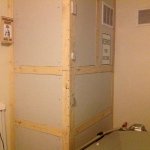
Some better pics which I hope make more clear the construction of the Water Heater/Water Softener Cabinet in the garage. As you can see, some of the panels slide out of the way to allow access to the Water Heater/Water Softener, and to area(s) of storage built into this cabinet.

Applying sheet rock was my final step until tape/texture & painting which came a while later (you can see some shots of the final painted project in my later pics).
 

Attachments

  • 014.jpg
    014.jpg
    106.2 KB · Views: 11
  • 013.jpg
    013.jpg
    59.3 KB · Views: 11
  • 010.jpg
    010.jpg
    121.3 KB · Views: 14
  • 005.jpg
    005.jpg
    75.5 KB · Views: 10
  • 001.jpg
    001.jpg
    58.7 KB · Views: 21
Last edited:
OP
S

SKSDO

Member
Joined
Sep 5, 2014
Messages
20
Location
Phoenix, AZ
The other project from this past year...

Our home was built new in 2004, but for whatever reason the builder designed/finished the home with a space under the staircase completely inaccessible. Since we moved-in, we were aware there was space under the stairs which would allow for storage if we could access it.

Over a period of time, we were able to explore this idea. We did ultimately determine at least one plausible reason why the space was built as it was, and I was able to discuss our desire to gain access to the space with professionals to ensure we weren't asking for trouble somehow. We also were able to consult with other homeowners in our neighborhood (with the same floorplan) who had successfully done something similar.

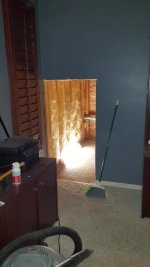
Anyway -- the first step was to make a hole for an access door:
 

Attachments

  • 112417 - 1.jpg
    112417 - 1.jpg
    51.5 KB · Views: 13
OP
S

SKSDO

Member
Joined
Sep 5, 2014
Messages
20
Location
Phoenix, AZ
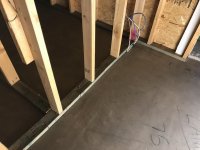
Some initial pics of the framing inside the space -- not especially easy to tell what is being show.....the space is under the stairs which have a 180 landing just above the access door we cut....
These pics are after considerable cleanup - between time and the original mess left by the framers, it took a bit to clean things out.
 

Attachments

  • 112417 - 8.jpg
    112417 - 8.jpg
    70 KB · Views: 11
  • 112417 - 5.jpg
    112417 - 5.jpg
    146.9 KB · Views: 11
  • 112617 - 1.jpg
    112617 - 1.jpg
    95.2 KB · Views: 11
  • 112617 - 4.jpg
    112617 - 4.jpg
    113.9 KB · Views: 11
OP
S

SKSDO

Member
Joined
Sep 5, 2014
Messages
20
Location
Phoenix, AZ
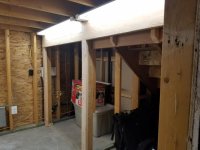
Some adjustments to the framing to make the space more useable.

It was easy enough to do some basic wiring to include 110 V outlets. From there, we installed some basic LED Fixtures wired to a wall switch.
 

Attachments

  • 120717 - 2.jpg
    120717 - 2.jpg
    134.2 KB · Views: 11
  • 120717 - 1.jpg
    120717 - 1.jpg
    117.4 KB · Views: 11
OP
S

SKSDO

Member
Joined
Sep 5, 2014
Messages
20
Location
Phoenix, AZ
Some sheet rock (to cover the exterior insulation), minimal tape & texture, some paint, and some utility carpet squares installed.

*Paint mostly done by my boys - we intended to paint the installed sheet rock, and the rest of it they just did because they had paint remaining and were having fun.
 

Attachments

  • 020118 - 1.jpg
    020118 - 1.jpg
    147.6 KB · Views: 11
  • 020118 - 2.jpg
    020118 - 2.jpg
    154 KB · Views: 12
OP
S

SKSDO

Member
Joined
Sep 5, 2014
Messages
20
Location
Phoenix, AZ
Installation of the ordered safe. Something I had been wanting for some time.

It was/is my own personal preference to have this safe installed in a place where visitors, and anyone else who might casually be in our home would not see it. There isn't what I would consider anything of tremendous value in the safe (I wanted it for firearms storage = safety for children, and to keep documents/photos in a somewhat secure location), but I have always thought making a safe too visible might invite people to take a crack at it.

The space really is perfect for this install with a couple inches of height to spare. I can even stand upright between the floor joists for the staircase landing.
 

Attachments

  • 031718 - 2.jpg
    031718 - 2.jpg
    142.2 KB · Views: 12
Last edited:
OP
S

SKSDO

Member
Joined
Sep 5, 2014
Messages
20
Location
Phoenix, AZ
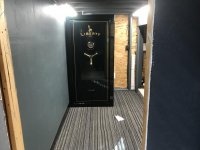
Couple shots as it sits now.....didn't take long to find things to fill up the space. I hope to avoid the space becoming too cluttered/crowded. Time will tell.
 

Attachments

  • 20180905_203012.jpg
    20180905_203012.jpg
    151.2 KB · Views: 11
  • 20180905_203022.jpg
    20180905_203022.jpg
    153.4 KB · Views: 8
OP
S

SKSDO

Member
Joined
Sep 5, 2014
Messages
20
Location
Phoenix, AZ
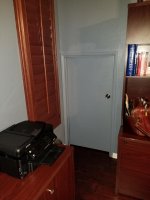
The finished access door after painting.....It isn't quite as stealthy as some other options I considered (Library Paneling or a Hinged Bookcase), but the price was right for this option.

I do still plan to install a deadlock on the access door which will further prevent anyone from accessing the storage space when/if no-one is home (housecleaners, babysitters, etc.). As opposed to the garage (which will likely drag-on for years to come), this project is otherwise pronounced "complete".
 

Attachments

  • 20180905_203124.jpg
    20180905_203124.jpg
    59.4 KB · Views: 11
To avoid these ads, REGISTER NOW!
Top Bottom