To avoid these ads, REGISTER NOW!

Bead roller HF copy upgrades

sarel.wagner

Well-known member
Joined
Jun 2, 2010
Messages
322
Location
Centurion, Gateng Province, South Africa
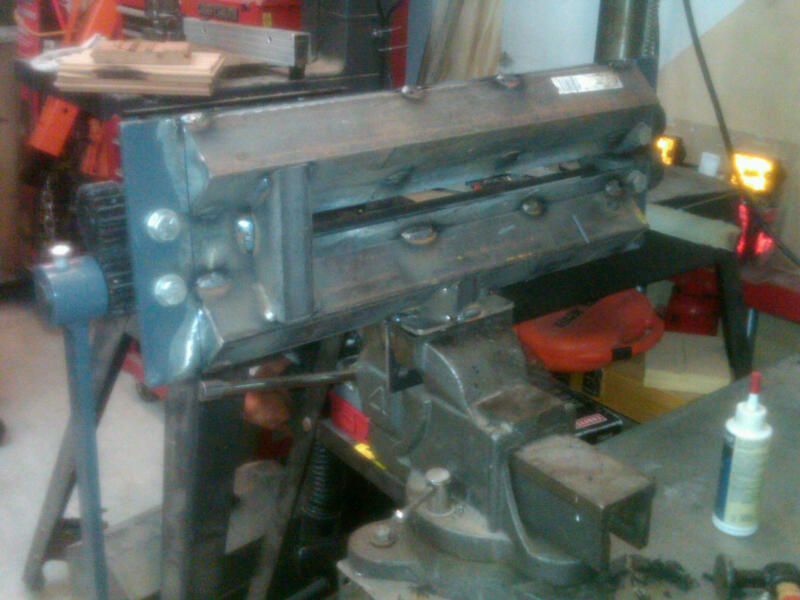
Time to stiffen up the HF copy bead roller. As these things flex so much (fishtail flex mostly) I used some angle stock on the back and rectangular tubing in the front.

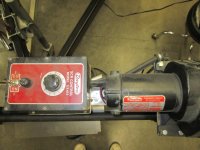
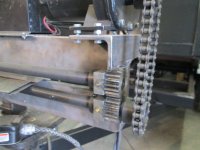
Still to come is a quick release and adjuster as the quick release makes depth settings repeatable. Also in the works is the ATV winch to power the bead roller and then adapt it back to the stand as the original bolt holes are no longer usable.

The whole thing was sandblasted and then MIG welded together. I like the way it turned out. One issue was that when tightening down the screws on the bushing blocks, the shafts were binding terribly. Had to shim the blocks on one side, a bit of a hit and miss affair, but after the shims, it turns freely when snugged down.

Needs some paintin soon :lol:


Hi-Res pictures here
Rgrds
 
To avoid these ads, REGISTER NOW!

goodspeed

Well-known member
Joined
Jul 26, 2012
Messages
305
That green one in the link just posted is beautiful.

I need to get my hands on one of those.
 
To avoid these ads, REGISTER NOW!

37ford4dr

Well-known member
Joined
Jan 5, 2012
Messages
109
Location
Arlington Va
looks good, only problem with beefing these things up is you need Popeye to pick them up... this is what i did to mine and then welded it every 1/2", i still need to make an easy hand crank for the tension bolt. this pattern for a "bomber seat back" is what I made on Sunday, and if we could make an easy motor for these they would be so one person friendly


IMG00689-20120422-1524.jpg


IMG00691-20120422-1528.jpg


IMG03050-20131215-1244_zps60f6903a.jpg


IMG03057-20131215-1559_zps83864b2a.jpg
 
Last edited:

steel 35

Well-known member
Joined
Feb 20, 2011
Messages
2,105
Location
Between the PNW and the Emerald Triangle
This pattern for a "bomber seat back" is what I made on Sunday, and if we could make an easy motor for these they would be so one person friendly

Here is my easy for me motor set up; speep & direction control with a foot pedal but I still havent done anything as nice as that seat :thumbup: how about showing your dies?
 

Attachments

  • roller motor 001.jpg
    roller motor 001.jpg
    67.2 KB · Views: 122

bimmer1980

Well-known member
Joined
Feb 5, 2009
Messages
2,103
Location
York, PA
Steel_35 -- What are you using for the motor and gear box? I like how you modified it...

I would like to do some mod's to mine as well, but I really don't feel the need to reinvent the wheel............
 

37ford4dr

Well-known member
Joined
Jan 5, 2012
Messages
109
Location
Arlington Va
Here is my easy for me motor set up; speep & direction control with a foot pedal but I still havent done anything as nice as that seat :thumbup: how about showing your dies?

Steel35, I can do that now that i see it, whats the parts numbers or source for the components?

my dies are the ones that came with it and the Hoosier profile 3 die set with a tipping wheel and orange skate board die and then a similar profile in metal

i didnt have the tension to create the quilted look by using the flat side of the orange wheel and had to move the orange die in so that the male/female dies were lined up


IMG03034-20131215-1225_zpsaf46d0ac.jpg


IMG03032-20131215-1220_zps5af05176.jpg


IMG03033-20131215-1220_zpsa64754a9.jpg
 
Last edited:

steel 35

Well-known member
Joined
Feb 20, 2011
Messages
2,105
Location
Between the PNW and the Emerald Triangle
Steel_35 -- What are you using for the motor and gear box? I like how you modified it...

I would like to do some mod's to mine as well, but I really don't feel the need to reinvent the wheel............

Steel35, I can do that now that i see it, whats the parts numbers or source for the components?

my dies are the ones that came with it and the Hoosier profile 3 die set with a tipping wheel and orange skate board die and then a similar profile in metal

Thanks for that;
Short story, I got a few of these motors from upstairs in a building that was destroyed and right after the fire department was finished playing with it about when this photo was taken it was my turn with a excavator, it was traumatic for me.:evil:
Picture of the last one of these, and how I did it; I wouldn't go less then the measly 500 Inch pound of torque
 

Attachments

  • Burn.JPG
    Burn.JPG
    105.8 KB · Views: 70
  • Dayton 1.JPG
    Dayton 1.JPG
    138.2 KB · Views: 76
  • Dayton 2.JPG
    Dayton 2.JPG
    127.1 KB · Views: 76
  • Dayton 3.JPG
    Dayton 3.JPG
    117.6 KB · Views: 72
  • Dayton 4.JPG
    Dayton 4.JPG
    108.5 KB · Views: 73
To avoid these ads, REGISTER NOW!
Top Bottom