To avoid these ads, REGISTER NOW!

Bear headlight tester restoration

don long

Well-known member
Joined
Mar 31, 2012
Messages
8,870
Location
southern california
When I was a young boy I went with my dad to the repair garage to get the headlights aimed on our car. They used these big tall machines that the headlamps shined there light into. For some reason I always remembered that.
When I started gathering up things to put in the party garage I thought of those old headlight testers but never found them until a few weeks ago.
There was a set in Pennsylvania near Pittsburgh posted on E-bay and it said pick up only.
After a few phone calls arrangements were made to have them picked up and shipped to me in California.
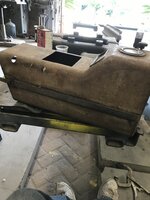
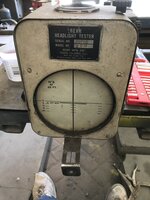
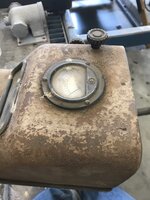
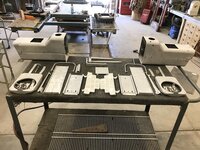
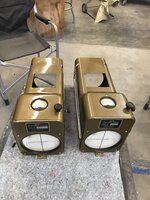
I had them sitting in the work shop for a few days so I could get a good look at them before taking them all apart and shining them up

3.jpg4.jpg6.jpg

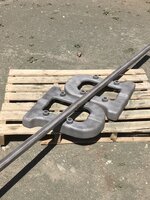
I started the restoration by removing the base from the poles

9.jpg

10.jpg

11.jpg

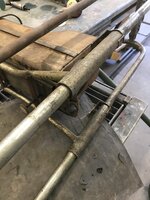
With the bases removed it was time to pull the heads away from the frames
11a.jpg
 
To avoid these ads, REGISTER NOW!
OP
D

don long

Well-known member
Joined
Mar 31, 2012
Messages
8,870
Location
southern california
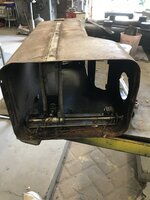
I took the heads all apart. I'm not sure how they work but I found this mechanism inside. I think it levels out the light beam.

2022-05-02 10.22.11.jpg

I finally have the heads all apart so I went after the framework.
It has a slide set up to adjust the height of the seal beam. Pretty simple

2022-04-30 14.34.50.jpg

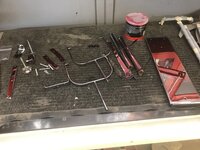
With the frames apart it was time to do a little parts cleaning so off to the blast cabinet for a few hours.

It's finally all blasted and looking pretty good

2022-05-02 16.23.31.jpg

2022-05-07 11.00.23.jpg

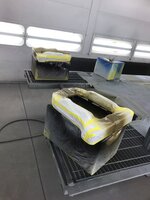
Most of these parts were sent to the chrome shop and they will be there for a while so while they are out I'm going to get the bases and head bodys painted
 

Lou's Garage

Well-known member
Joined
Feb 12, 2008
Messages
582
Location
Anderson, SC
My dad had one of those for his Esso gas station (see my avatar). It was the best headlight aimer I've ever used. Not only can you adjust height, it also gives you a great picture of where the lights are side-to-side. It was so good, that I used to be able to adjust headlights when I was 11 years old. I'll try to remember to check around, I may still have the instructions for it.

Lou Manglass
 
OP
D

don long

Well-known member
Joined
Mar 31, 2012
Messages
8,870
Location
southern california
My dad had one of those for his Esso gas station (see my avatar). It was the best headlight aimer I've ever used. Not only can you adjust height, it also gives you a great picture of where the lights are side-to-side. It was so good, that I used to be able to adjust headlights when I was 11 years old. I'll try to remember to check around, I may still have the instructions for it.

Lou Manglass
I'd like to see the instructions. As I'm taking these apart I'm wondering how they did operate.
 

4xdog

Well-known member
Joined
Aug 18, 2012
Messages
5,636
Location
Santa Fe, NM
That's a nifty item, Don. Very cool.

There's a frequently-reproduced photo of the Triumph team at Le Mans in 1955 using a Lucas beam-setter on one of the works TR2 cars for that year's 24h race. I've always liked that image.

-- Don

i-L8RqkdN.jpg
 
Last edited:

Milton Shaw

Well-known member
Joined
Feb 11, 2011
Messages
4,857
I have a set of the Hoppy headlight aimers. The suction cups are getting stiff and so they don't work well anymore but that's ok since all the cars I could use them on are gone now. The good thing about them is that you could calibrate them on a plate glass window if one of them dropped. I have the adapters for the first generation of streamlined headlights but even those were 20 years ago. Still can find them on Ebay
 
OP
D

don long

Well-known member
Joined
Mar 31, 2012
Messages
8,870
Location
southern california
I have a set of the Hoppy headlight aimers. The suction cups are getting stiff and so they don't work well anymore but that's ok since all the cars I could use them on are gone now. The good thing about them is that you could calibrate them on a plate glass window if one of them dropped. I have the adapters for the first generation of streamlined headlights but even those were 20 years ago. Still can find them on Ebay
Milton
I have a pair of the suction aligners too. I used these back in the 60's & 70's when I worked on the line in a body shop.
Mine

IMG_4230.JPG


I have instructions for the Marquette version of the Bear headlight tester. The optical head looks similar.
Engineer
I'm curious if they work the same
 
OP
D

don long

Well-known member
Joined
Mar 31, 2012
Messages
8,870
Location
southern california
So the work continues on the headlight testers. I'm wondering why they are called testers and not aimers?

With the heads stripped down It was time to do a little body work and get them into primer

2022-05-10 17.28.42.jpg

While waiting on the primer to dry I turned my attention to the base units. They have been sandblasted and are very rough.
i don't like looking at casting marks and all the holes from the casting so I took my grinder and smoothed out the roughness then applied a coat of bondo to fill in all the imperfections before getting a coat of primer on them. Before I sandblasted the bases I removed the 3 wheels from each base then proceeded to clean them up. They are made of hard rubber. The positioning of them I found interesting.
The one in the front is facing forward and roles forward, but the 2 in the rear are facing sideways meaning that you lift the front up and push the tester sideways or you lift the rear of the tester and you can roll it forward. So the wheels are all cleaned and the axles all polished.

2022-05-05 08.55.51.jpg

bondo on the base

2022-05-10 12.32.23.jpg

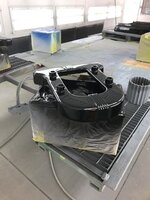
After a lot of sanding the 2 bases made there way to the booth for a coat of primer

2022-05-10 17.29.09.jpg
 
OP
D

don long

Well-known member
Joined
Mar 31, 2012
Messages
8,870
Location
southern california
This project is moving along pretty well. I have spent the last few days smoothing the base units ( grinding, bondo, sanding, more bondo, more sanding, priming, more sanding, more primer, final sanding and P A I N T )

Here they are tonight
2022-05-17 18.02.32-2.jpg2022-05-17 18.02.42.jpg

The heads are painted too now I can start putting them back together while I wait for the chrome to come back home.

2022-05-16 19.21.23.jpg

Next will be working over these top sign plates

2022-05-02 16.22.27.jpg
 

engineer2

Well-known member
Joined
Dec 13, 2009
Messages
11,829
Location
Chicago burbs
Here is the Marquette manual. Very similar because Marquette merged with Bear. This is a quick-and-dirty copy, but it should be legible.
 

Attachments

  • MarquetteHeadlightTester.pdf
    13.4 MB · Views: 54

Modern Garage

Well-known member
Joined
Mar 26, 2015
Messages
585
Location
Southern Minnesota
You didn't go into much detail on the rubber wheels. Were they just a scrub with soap and water or did they need more attention?
It's seems like it's getting hard to find a project that doesn't involve rubber and plastic parts and I just end up trying random conditioners with varying success. Guess I should keep better notes on what does and doesn't work.
Joe
 
OP
D

don long

Well-known member
Joined
Mar 31, 2012
Messages
8,870
Location
southern california
You didn't go into much detail on the rubber wheels. Were they just a scrub with soap and water or did they need more attention?
It's seems like it's getting hard to find a project that doesn't involve rubber and plastic parts and I just end up trying random conditioners with varying success. Guess I should keep better notes on what does and doesn't work.
Joe
Joe
The wheels were just very dirty and I used lacquer thinner and wiped them down and a wire wheel on the bench grinder to clean up the axles and washers. Sorry I didn't give you that info when posting about the wheels
 
To avoid these ads, REGISTER NOW!
OP
D

don long

Well-known member
Joined
Mar 31, 2012
Messages
8,870
Location
southern california
Thanks for all the thumbs up guys
Today I made a little progress on one head. After several attempts I got the head put together correctly. the other one will be a snap to put together. I will need to stop by the hardware store to pick up more stainless screws to put the second head together

2022-05-23 19.30.45 - Copy.jpg2022-05-23 19.30.59.jpg2022-05-23 19.31.14.jpg2022-05-23 19.31.04.jpg

The cover was missing on this head so I will have to make one while I wait for the chrome to come home.
 

4xdog

Well-known member
Joined
Aug 18, 2012
Messages
5,636
Location
Santa Fe, NM
Lookin' good, Don!

Are you trying to restore them to working condition? That would be fun, although I have no idea how one could be sure to have it calibrated -- perhaps some of those original manuals others have offered...

-- Don
 
OP
D

don long

Well-known member
Joined
Mar 31, 2012
Messages
8,870
Location
southern california
Lookin' good, Don!

Are you trying to restore them to working condition? That would be fun, although I have no idea how one could be sure to have it calibrated -- perhaps some of those original manuals others have offered...

-- Don
There is no electronics in these boxes just prisms so it's all manual based on height and lateral movement so they should work when a headlamp is shined into one. But my main concern is looks.
 
OP
D

don long

Well-known member
Joined
Mar 31, 2012
Messages
8,870
Location
southern california
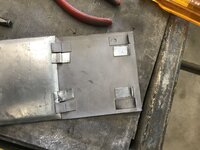
Still pushing this project forward. Today I assembled the other head. Now that both heads are back together I started making the top cover that is missing. Fortunately 1 was there so before I paint it I'll use it for the pattern to make the other one

2022-06-01 17.02.07.jpg2022-06-01 17.02.45.jpg

I started making the cover. I cut the metal then bent the edges

2022-06-01 17.03.12.jpg

With that done I've started to make the clips that will hold the cover on the head

2022-06-01 17.04.11.jpg
 

Ohmthis

Well-known member
Joined
Jan 20, 2013
Messages
3,023
Location
Outside of Louisville KY
Don, those testers are really cool. I didn’t know those even exist. We just pulled up to the garage door and tweaked them LOL! The work you have done is top notch as always!
 
OP
D

don long

Well-known member
Joined
Mar 31, 2012
Messages
8,870
Location
southern california
Don, those testers are really cool. I didn’t know those even exist. We just pulled up to the garage door and tweaked them LOL! The work you have done is top notch as always!
Yep Ohmthis
That's how I did it at home but in the bodyshop we used something quite different. I had heard of these back when I would go with my dad to the repair shop
 
OP
D

don long

Well-known member
Joined
Mar 31, 2012
Messages
8,870
Location
southern california
While I wait for the chrome to show up I'm doing little things to move this project forward
Today I finished making the missing cover for one of the heads. I had to make the fasteners for the cover and then I used JB weld to glue the fasteners in place. I'll find out tomorrow if it worked

IMG_8124.JPGIMG_8126.JPG
 

Modern Garage

Well-known member
Joined
Mar 26, 2015
Messages
585
Location
Southern Minnesota
You've probably mentioned this before but, do you take the paint off the letters with a sanding block or a razor blade or some such? Or does it depend on the situation?
Joe
 
OP
D

don long

Well-known member
Joined
Mar 31, 2012
Messages
8,870
Location
southern california
You've probably mentioned this before but, do you take the paint off the letters with a sanding block or a razor blade or some such? Or does it depend on the situation?
Joe

Joe
I'm trying something new with this sign. First I polished the letters down to 400 grit then painted the black then I scraped the paint off with a razor blade then I'm going to try a block and 600 paper then 800 paper to see if I can get the shine I want without marring the black paint
 
OP
D

don long

Well-known member
Joined
Mar 31, 2012
Messages
8,870
Location
southern california
I got the call that I've been waiting on for a couple of months. My chrome pieces are ready to be picked up.
So off to the chrome shop I went today. Got all 44 pieces home and started to play. First I unwrapped the 4 poles and placed them into the base

2022-07-19 18.31.47.jpg

2022-07-19 14.43.56.jpg

That took me over 2 hours because of the clamping mech. on the saddle of each stand.
There is a small spring under the triggers on the top of the saddles and I kept loosing the springs making me hunt for them 5 times before being successful in getting the poles mounted with the saddles riding on the poles.
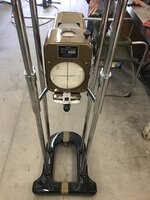
By dinner time I have managed to get the wheels on the bases and the poles attached to the bases. I also have unwrapped about 1/2 of the shinny pieces

2022-07-19 18.32.03.jpg

Tomorrow should be a fun day.
 

Jeff Ivers

Well-known member
Joined
Apr 9, 2010
Messages
2,569
Location
Oklahoma
After seeing the above, Don, I suddenly realized GJ is missing a very important feature - the ability to insert an audio wolf whistle! Wow!
 

bugnut

ALLIANCE MEMBER
Joined
Jul 14, 2012
Messages
4,038
Location
Central Ohio
Don, every image you post of the BPG I see something new and different that I missed before. I just really love the place! Thanks for sharing!!
 
To avoid these ads, REGISTER NOW!
Top Bottom