To avoid these ads, REGISTER NOW!

Beat up 15" planer restoration

Scimonetti

Well-known member
Joined
Aug 25, 2014
Messages
431
Location
VT
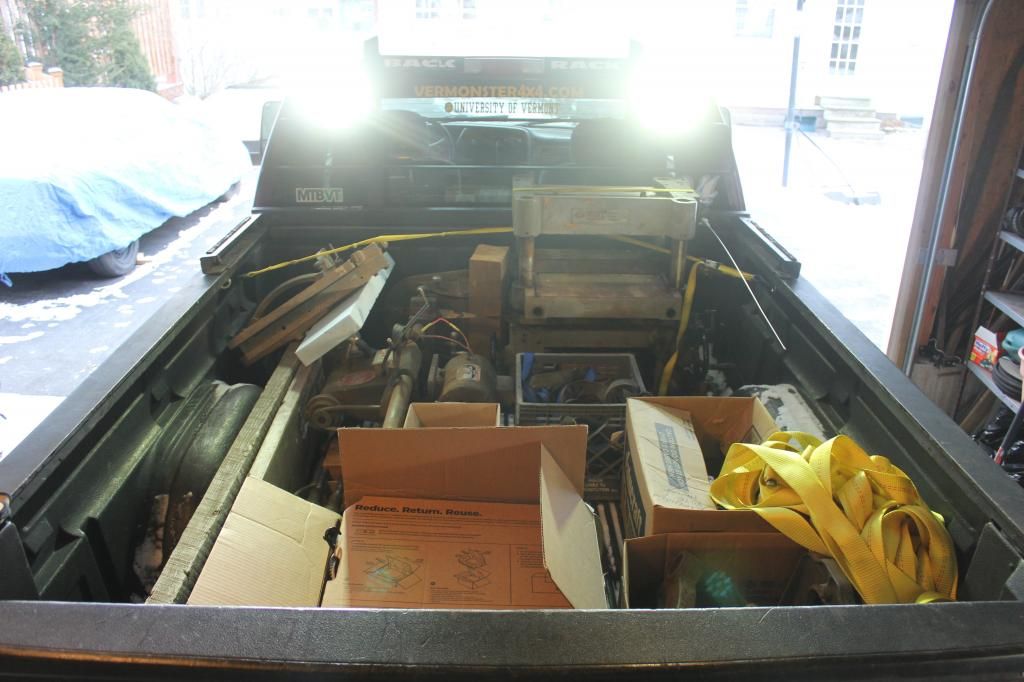
A couple days ago I picked up this American Forge and Foundry 15" planer and a first gen shopsmith with all the accessories for 50 bucks. Both of them had good motors too!

It has handles that screw in so you and a couple others can lift it. No idea of the weight.


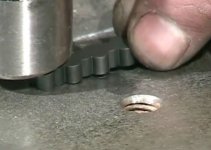
Aaaaaaand here's the catch.

A hairline crack in the table

It does go all the way through

Apparently it's been like this forever and hasn't got any worse. The table does take some serious load so I'm a bit worried about it. Should I braze it, bracket it or leave it be?
 
Last edited:
To avoid these ads, REGISTER NOW!

tarbellb

Well-known member
Joined
Apr 17, 2011
Messages
5,762
Location
Oregon
bump, super interested to see how this turns out. Good luck, looks awesome.
 

scw1991

Well-known member
Joined
Mar 28, 2010
Messages
506
Looks like a fun restoration project. Evaporust will make those rusted components look like new. Even though the table is cracked, it can always be drilled/tapped to accept a piece of plate steel to strengthen it from the inside.

Nice to see the gears within the gearbox are in good shape. Hope the 5HP motor is also in good shape because a new one will set you back about $350.

Look forward to seeing your restoration pics. If you need additional info, the members of vintagemachinery.org or owwm.org can provide some great guidance.
 

Trey T

Well-known member
Joined
Aug 3, 2011
Messages
3,749
Location
Houston, TX
That planer looks like a beast but with that crack, I hope it will work out.

As for the WEG 5hp motor, it's common to see 5/8" or 7/8" shaft for 3600RPM motors.
 

404

Well-known member
Joined
Aug 23, 2014
Messages
3,463
Location
Mass
Did not realize VT was a paradise of tools. Nice find. Do you think that crack was original from the factory? Is there paint in it?

If it was mine I would drill a small hole past the tip of the crack (the crack travels longer than it seems), and then bracket it with steel bars attached with bolts, nuts, and fumed silica thickened epoxy in between. Sandblast the surfaces that will have the epoxy between them. JB weld might be good here too.

Surface prep is vital. Epoxy sticks to dirt real good. Dirt does not stick to item being fixed though.
 

404

Well-known member
Joined
Aug 23, 2014
Messages
3,463
Location
Mass
When applying epoxy do a small scale version of "notched trowel" from tile setting. Up and down on the planer body, left to right on the patching bar. More likely to get contact along the bar without an air bubble in between.
 

toplessHO

Well-known member
Joined
Oct 20, 2014
Messages
14,059
Location
central florida
I would find a local welder that does cast to repair that crack.
If he does it from the inside you can make it look nice on the outside.
as for the bed it looks like its set up for extensions which I would make and use.
I dont like using a planer that only supports 2 ft of board.
When you get ready to set up the knives send me a pm and Ill walk you thru it.
 

404

Well-known member
Joined
Aug 23, 2014
Messages
3,463
Location
Mass
Thank you for the very helpful advise! I've never done much epoxy work but that seems like a very solid fix. The epoxy would stiffen and the bracket reinforce?

There's not really any paint in it but it seems like there was internal flaws in the casting in order for it to crack there.

Making good cast iron parts is apparently not easy. I had a drill press table by Delta 30 years ago with a crack from the factory.

The idea with the epoxy is to fill in the unavoidable small gaps that will exist between the steel plate and the cast iron of the planer. Neither surface is completely, truly flat, and the gaps allows (or even creates when the bolts are tightened) some flexing. The flexing in the patch and planer means that the loads or forces might be going into the cast iron and crack instead of through the patch. When doing the epoxy, snug up the bolts but not real hard, so the patch and the planer are touching on the "high spots" but not bending anything. After the epoxy fully sets then finish tightening. If that makes sense.

Kind of like cement mortar between bricks spreads out the load evenly and absorbs normal variations in brick size and shape.
 

404

Well-known member
Joined
Aug 23, 2014
Messages
3,463
Location
Mass
Do you have a good straight edge to put along the top to see if it is flat even with the crack?
 

woody 73

Well-known member
Joined
Apr 14, 2009
Messages
11,546
Location
The Great State Up North
I would find a local welder that does cast to repair that crack.
If he does it from the inside you can make it look nice on the outside.
as for the bed it looks like its set up for extensions which I would make and use.
I dont like using a planer that only supports 2 ft of board.
When you get ready to set up the knives send me a pm and Ill walk you thru it.

:thumbup::thumbup::thumbup: We have a winner:rocker: take it to a local welder that does cast repair and whatever cost the guy quotes you pay it and smile...:lol: Then have him/her check it for any other metal fatigue and have it repaired and pay whatever it costs and smile each time.:)
 

theoldwizard1

Well-known member
Joined
Feb 22, 2011
Messages
43,216
Location
SE MI
How are the bearing for the cutter ? How much clearance is there between the shaft and the bearings ?

That crack in the table would freak me out AND I don't buy the line "it has been there forever" !! Getting it repaired CORRECTLY could be a challenge and expensive. I suspect it will have to be ground through to remove any rust. Pre-heat, braze and a slow cool are required AND you still may have to resurface it !

Looks like a job for Keith Fenner !
 

jonemark401

Member
Joined
Aug 31, 2014
Messages
24
Look into Lock-N-Stitch to repair that crack. I think for a durable repair it either needs welding by someone who does cast iron welding or a metal stitching technique. Good luck with the restoration and post pics of your progress.
 
OP
S

Scimonetti

Well-known member
Joined
Aug 25, 2014
Messages
431
Location
VT
Look into Lock-N-Stitch to repair that crack. I think for a durable repair it either needs welding by someone who does cast iron welding or a metal stitching technique. Good luck with the restoration and post pics of your progress.
That metal stitching looks very interesting. I'm hesitant to get it welded until I see how much more money I'll have to put into it.
 

404

Well-known member
Joined
Aug 23, 2014
Messages
3,463
Location
Mass
The bearings I'll replace, but the fit is very tight to the cutter head with no rust.


If the crack was on the casting containing the cutterhead I would scrap it and never trust it or risk it ever. With the table I'm open to repair because catastrophic failure with a proper repair seems unlikely. I'll definitely listen to more expert advice before continuing though.

All welded and cast items retain internal stress and tend to warp a bit from the molten weld puddle (or molten iron pool) shrinking unevenly. These forces can get big enough to cause castings and weldments have cracks in the first place. For exhaust manifolds and heads that can be machined to re create a flat surface that is fine.

The planer bed rides up and down the posts nice now, It might not go so well after preheating or welding. There may be internal stresses in the planer bed now that can release during preheat and warp the part.
A repair that does not heat or melt the material is most safe since you have no plans to re machine the part later.

Lock stich is a nice process, if you have the budget. Stronger than needed for this application.

This youtube channel shows the method.


The epoxy and splice plate you can do yourself.
 

cnc-me

Well-known member
Joined
Jan 6, 2010
Messages
1,183
Location
MI
Those Weg motors are good, bet it is a replacement for the original motor though.
Nice find.
 

saryon7

Well-known member
Joined
Sep 23, 2012
Messages
87
If it was me, this is a good deal if it doesn't cost much to rebuild. If it costs too much, it isn't worth the risk. So...
I would simply clean the table to the best of my abilities then really do a good job cleaning the crack area. I would then drop the table on my BBQ and slowly heat up the whole table until it was about 200 degrees. I would then open the BBQ and flip the table so the crack is facing up. I would then use my torch to heat the crack area from the underside till it was cherry red on the outside of the crack. Then I would braze it. Once that was done I would close the bbq and turn it down to low heat for 10 minutes, then turn it off and leave the table inside until everything gets cool again.
 

theoldwizard1

Well-known member
Joined
Feb 22, 2011
Messages
43,216
Location
SE MI
... Lock stitch is a nice process, if you have the budget. Stronger than needed for this application.

I don't think this is a good application for Lock-n-stitch. The stress on that side of the table wants to pull that crack open.
 
To avoid these ads, REGISTER NOW!

theoldwizard1

Well-known member
Joined
Feb 22, 2011
Messages
43,216
Location
SE MI
If I also used the keys/locks that held it perpendicular to the crack do you think that would work?

Not familiar with them. You something that will prevent the crack from opening even the tiniest little bit when downward force is applied directly above the crack.

The Rube Goldberg way would be

  • Get some .250" thick 2"x3" steel angle cut about 1½-2" wide.
  • Weld gusset on both sides of the angle.
  • Drill a matching hole (3/8"?) on each of the two shorter legs.
  • Bolt (2 bolts per leg) the longer legs through the table, one on each side of the crack.
  • Run grade 8 bolt through the holes in the shorter legs and crank it tight !

It won't be pretty, but for this application, it might actually be strong than brazing !
 
Last edited:

theoldwizard1

Well-known member
Joined
Feb 22, 2011
Messages
43,216
Location
SE MI

toplessHO

Well-known member
Joined
Oct 20, 2014
Messages
14,059
Location
central florida
that method might have merit when both ends of crack still have parent metal. but when one end is open I cant see the logic.
If you are afraid of warping just have the lower end welded,thats where most of the stress is.
 

404

Well-known member
Joined
Aug 23, 2014
Messages
3,463
Location
Mass
This technique is very interesting. I do find it weird how much they bash on welding on the website though. I watched all the videos and was sold and then found out the starter pin kit to fix one crack costs $100! You have to buy other much more costly kits to do the more complicated locks.

If one (ha ha) had a milling machine the holes could be *maybe* milled correct relative to each other.

People who are used to welding will think lock stitch is strange. It never made sense to me till I saw a bunch of videos of it.

A verbal description of the process is : Drill a bunch of figure 8 holes. Pound in a bunch of figure 8 pins.

Does not inspire confidence.
 

theoldwizard1

Well-known member
Joined
Feb 22, 2011
Messages
43,216
Location
SE MI

Stills from the above video. You can not see the crack, but it is perpendicular to the hole pattern.
attachment.php

attachment.php


The holes were drilled with provided bits, stops and a jig.

If iI were going to use this type of repair, I would first want to be certain that the top of the table perfectly and clamped to a flat surface. Actually I think I would flip the table over and add some very thin shims at the outer edge of the table and clamp near the middle to force the crack back together.
 

Attachments

  • Capture1.JPG
    Capture1.JPG
    40.8 KB · Views: 139
  • Capture2.JPG
    Capture2.JPG
    44.1 KB · Views: 138

404

Well-known member
Joined
Aug 23, 2014
Messages
3,463
Location
Mass
Those kick back fingers can be re blacked by boiling them in a home made solution of stuff I will have to look up.. Or you can on the gun forums, like
TheHighRoad.
 

Fretters

Well-known member
Joined
Jan 25, 2014
Messages
4,217
Location
South Yorkshire, England
You're as well justusing a plate and bolts/screws rather than welding or using the stitching method. Stitching is more feasible if you need to seal a crack, (cylinder head, for example), rather than just for straight reinforcement. Welding/brazing always runs the risk of highlighting and opening stresses elsewhere in the casting. For where that crack's located, I'd go with a patch plate bolted/screwed in place. It should be ample, and is providing more reinforcement than any other repair method.

Plus, as has already been mentioned, drill a small hole at the true end of the crack to stop it progressing.
 
Last edited:
OP
S

Scimonetti

Well-known member
Joined
Aug 25, 2014
Messages
431
Location
VT
Some unfortunate developments...
I finally got everything apart except for the table off the posts. 4 bottle jacks should do that. I cleaned the gear box, switch, and a bunch of hardware and shafts. The crack goes up further than I thought after cleaning, and because the table lock down wedge rods pass right through that area it will be very, hard to mend. On the other side there is no clearance because the gearbox passes by the table there. That's why it cracked, somewhat poor design. A relief was made to allow the gearbox to pass by, where as on the other side there is a heavy rib to add support and rigidity.
I got a quote to get the outfeed roller recovered with urethane and it is over 100 dollars not including heavy shipping. I would have to put all this money( several new bearings, some hardware, paint, black oxide, knives) and all this time into a foreign planer that has a pretty good chance of cracking on one of the first uses. I also don't NEED a planer this minute so because of that I will be parting it out. I only really spent 25 bucks on it and the 5 HP motor is worth that so I'm not upset. I expect to make a decent amount cleaning up and selling parts on eBay so I can put that into more machines! The larger pieces of base and cracked table might get reused, used as electrolysis scrap or go to a scrapyard. Sorry you guys couldn't see it completed but thank you very much for the help! It helped me make a decision and I learned some stuff for future projects.
 
Last edited:

hemifalcon

Well-known member
Joined
Jan 4, 2013
Messages
708
Location
Union Grove, Wisconsin
dang... I was looking forward to seeing this finished.. For what its worth It'd be interesting to see just how far inward the crack spreads.. This is obviously an old machine--maybe too much investment is being made into the possibility of the table failing.. Keep moving forward on it I'd say!
 

RonSandor

New member
Joined
Aug 30, 2015
Messages
1
I have the same model planer. If you want it let me know. Mine has always been garage kept. It is in good shape.
 

Tony1143

New member
Joined
Mar 14, 2021
Messages
2
Location
New York
Hello, I just joined this group. I was searching on line for a manual for (I think) this wood planer and came across this site. I have an American Forge and Foundry wood planer model 682 made I believe in 1984. Everything looks great with it. I am trying to find a manual for it. I was wondering if you have a manual for yours or if anyone knows where I might find one. Here is the story behind it, if interested. This was my father-in-laws machine. He passed away over 30 years ago and it has been sitting in my basement. About 10 years ago I had a friend take it apart and clean it up for me. He told me it had a 5 hp motor in it which was too powerful for the machine so he put in a 3 hp motor instead. Now it has been sitting for 10 years and I have yet to even turn it on. Just goy my work shop set up in garage and looking for a manual. Of course my biggest problem right now is getting it out of my basement. It must weigh 500 lbs! Thanks for listening, Tony
 

Tony1143

New member
Joined
Mar 14, 2021
Messages
2
Location
New York
Forgot to add one issue I have. I chain to raise/lower the table came off. The connection link clip fell off. I got a new clip, but trying to get tht chain back on has proven very difficult for me! Tony
 
To avoid these ads, REGISTER NOW!
Top Bottom