To avoid these ads, REGISTER NOW!

Behind the door. 2 car plus some

timm95

Well-known member
Joined
Mar 20, 2013
Messages
64
Location
Kansas City Mo
Hey Guys,

I've finally done an intro and now landed myself at a desk top so I can add pictures while I create this 'build thread' because as we all know a thread is useless with out pics :)

To get you all up to speed my wife and I bought our home this last summer. Built in 1967 we bought from the original owners and have been making it our own. I of course have been focused on the garage and shop aspects as I can't see me getting anything done on the rest of the house with out knowing were all my tools are. Makes enough since right?

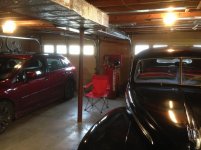
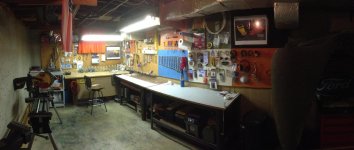
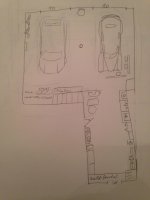
The garage is under the home and currently has room for two cars with lots of walk around room, if I removed or relocated the post in the middle of the parking area I'm sure I could get one more in there but for now I'll stick with two.

So far I've broken the space into zones, I love everything having a spot and everything being in that spot but i also don't like to cross up my car tools with say, lawn supplies or general house work stuff. I have done well so far keeping all the lawn and out side the house related stuff in a closet/shelving unit under the stairs while all the inside the house stuff such as paint and painting supplies are on a set of pre existing shelves and a cubes unit ive dragged around for a couple years leaving the majority of the space for car stuff and heavier tools.

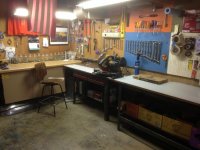
So far its been a lot of putting stuff away, working with it for a while and then moving it all around again but i feel like some progress is being made even if its slow. I'll start adding some photos now and try to add captions as I go.

Hopefully they well be chronologically in order but as I'm new to this particular forum~ posting on it anyways~ ill be happy if i get them to post period!

anyhow, here goes!

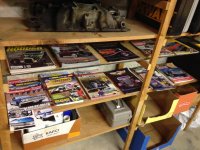
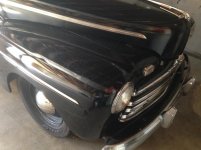
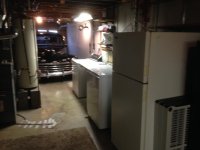
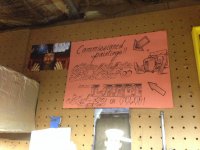
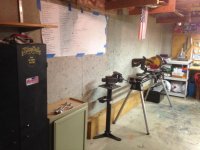
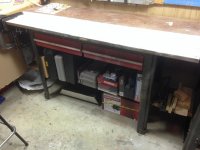
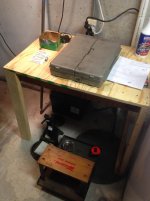
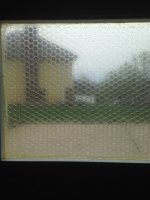
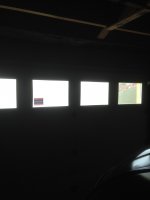
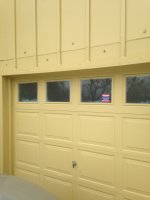
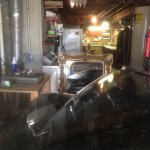
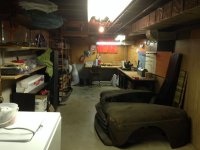
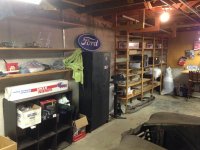
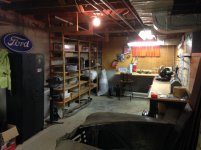
Edit: looks like it worked! what you should be seeing it moving day and the days right after. The garage and shop had a ton, seriously a TON of built in and added shelving so to start i just kinda started stacking stuff to see were it landed and laying things out trying to get organized. In a later post i will reveal the origin of all these shelves!
 

Attachments

  • IMG_3002.jpg
    IMG_3002.jpg
    143.2 KB · Views: 139
  • IMG_3045.jpg
    IMG_3045.jpg
    140.6 KB · Views: 118
  • IMG_3046.jpg
    IMG_3046.jpg
    130.9 KB · Views: 132
  • IMG_3047.jpg
    IMG_3047.jpg
    140.8 KB · Views: 142
  • IMG_3048.jpg
    IMG_3048.jpg
    132 KB · Views: 125
  • IMG_3049.jpg
    IMG_3049.jpg
    128.7 KB · Views: 100
Last edited:
To avoid these ads, REGISTER NOW!
OP
T

timm95

Well-known member
Joined
Mar 20, 2013
Messages
64
Location
Kansas City Mo
this has been since July so ill try to get you all caught up to speed as quickly as I can. Lots of subtle changes and some not so subtle :)

im sure you'll quickly see that the focus of the garage is working on our 46 ford with some working on our house projects thrown in for good seasoning.

Just having moved we decided that now was the best time to change the whole top end of the engine on the ford before our labor day weekend destination "greaserama" its kansas citys traditional and low buck... and punk rock show. its kinda like some one threw a two day party and the thousand people that showed up drove something cool and stayed way to late haha.

Anyhow we made it and we set up to sell some hot rod paintings and prints :)

next youll see some creative space use, I decided that i would hang my spare front clip on the wall to let it take up the least amount of space possible and wouldnt you know it my small tool car fit right in! Our Realtor gifted me with the light up ford sign when we took possession so i figured id make it a proper hotrod shrine and light it up :)

This being my first garage thats MINE i really geeked out being able to put things up and when it started to look like a little speed shop i was in heaven. The magazines and catalogs didnt stay there to long as they got really dusty when i would use a saw or anything else. The rodders journals are all upstairs in a lawyer bookcase behind glass so its not like these are anything i care to much about but it just looked messy.

the last photo is kind of a twofer. We love hitting estate sales and one morning my wife woke me up excited with an email of a listing way across town. When i looked to see what the fuss was i saw a red ford oval patch. for some reason im not a big fan of the blue oval but color it red and im all about it. Its mostly tractor stuff when its red but hey i like what i like ( suppose it goes with the firestone and mobile stuff haha ) anyhow we get across town to find they are on a set of nodak ford tractor overalls! in great shape from the early 60s? im to big to fit in them but i had to have them and a few other neat things im sure ill show later.

The flag however was in the shop space when we moved in, we've found all kinds of weird stuff hidden all over the house but the flags i love. there are two in the shop and i figured it was a sign that they should just stay
 

Attachments

  • IMG_4548.jpg
    IMG_4548.jpg
    137.2 KB · Views: 57
  • IMG_4087.jpg
    IMG_4087.jpg
    146.1 KB · Views: 75
  • IMG_4044.jpg
    IMG_4044.jpg
    127.3 KB · Views: 73
  • IMG_4043.jpg
    IMG_4043.jpg
    138 KB · Views: 77
  • IMG_3782.jpg
    IMG_3782.jpg
    147.6 KB · Views: 61
  • IMG_3517.jpg
    IMG_3517.jpg
    138.9 KB · Views: 53
Last edited:
OP
T

timm95

Well-known member
Joined
Mar 20, 2013
Messages
64
Location
Kansas City Mo
well about this time it was getting colder and i moved the car to a friends show with a lift and some bigger tools for some 'upgrades' and as such every time i went down to the shop and the car wasnt there i just dicked around moving the shop around. im sure many of you can relate :)

in the first photo you can see that ive started to find better places for things as i reach for them while working and think "that should be over here" I kept the wood shelves on the left but moved the black cube to the front of the garage for painting stuff, photos of that later on.

at first i thought i wanted to paint the peg board and everything else white but as i hung things up i kinda liked the different colors as i could use them as dividing points to make up little zones for tools.

the second photo shows my butcher paper on a length of pvc so i could pull lengths out at will. I grew up drawing on this stuff all the time and was gifted a big roll for a wedding present. Its been handy for everything from templates and lists to a good work bench cover when things get messy! next to it are a few rolls of masking paper left over from painting the ford.

by the third pic you can see ive covered the space under the narrow bench, i made it "long term storage" and hung some cardboard over it. Id like everyting to be in shallow drawers but im a tight *** so ill work with what ive got ;) you can also see that ive divided more or less consumables into labled cardboard boxes under the long benches.

some are all screws and nails the other might be ikea stuff and curtain hangers, one is full of tape! it proved to be a great tool to know were things are and were they go but it gota little dusty with the saw on top of the bench. Works out great when my wife calls looking for something and i can just direct her to the boxes and its all labeled on the front of the box. super easy.

You can also see that i added some framed photos of the california kid and jakes coupe, i think maybe the superbell coupe is in one of those photos. Growing up you didnt go into a garage with a hotrod in it and there wasnt a poster of the california kid on the wall. I still geek out over being only a quick drive away from pete and jakes to see the cars in person now. anyhow the posters that are available are pretty lame and dated. undaunted i got ahold of the rodders journal to see if they had a poster available of the images they published about the pete and jakes cars. They said maybe sometime in the future so i did what anybody would do and got ahold of a few extra copies and pulled the staples out of them :O gotta do what ya gotta do!

you can see that the black cabinet is still in the same spot, ive got it full of anything aerosol, all the car cleaning products and stuff like that.

and of course the last is my wife :) heated, a/c and wifi shes not a stranger to the garage
 

Attachments

  • IMG_6044.jpg
    IMG_6044.jpg
    142 KB · Views: 102
  • IMG_5970.jpg
    IMG_5970.jpg
    143.5 KB · Views: 50
  • IMG_5969.jpg
    IMG_5969.jpg
    140.9 KB · Views: 53
  • IMG_5968.jpg
    IMG_5968.jpg
    138.9 KB · Views: 66
  • IMG_5958.jpg
    IMG_5958.jpg
    136.3 KB · Views: 50
  • IMG_5957.jpg
    IMG_5957.jpg
    137.6 KB · Views: 55
Last edited:
OP
T

timm95

Well-known member
Joined
Mar 20, 2013
Messages
64
Location
Kansas City Mo
a few inches lower and a whole lot more fun the 46 came back to the garage and decided to celebrate by having my friend Neko, who has recently taken to laying lines on whatever will hold still long enough, come over to help me make a new sign and to fancy up my vice.

my wife is a major fiber nerd so we brand everything "McKenny speed and wool" Neko and I took turns and i think it turned out pretty neat. Its a spare deck lid for my ford with some 49 nash trim and lights on it. its even got the light buckets on the back side and is all wired. the plate is Kansas from 1961 i would have loved to see what it was bolted to! looks great hung on the wall and makes it take up less floor space :)
 

Attachments

  • IMG_7001.jpg
    IMG_7001.jpg
    138.8 KB · Views: 43
  • IMG_6999.jpg
    IMG_6999.jpg
    139.2 KB · Views: 34
  • IMG_6997.jpg
    IMG_6997.jpg
    134.9 KB · Views: 36
  • IMG_6996.jpg
    IMG_6996.jpg
    141.1 KB · Views: 44
  • IMG_6995.jpg
    IMG_6995.jpg
    133.6 KB · Views: 35
  • IMG_6955.jpg
    IMG_6955.jpg
    140.7 KB · Views: 29
Last edited:
OP
T

timm95

Well-known member
Joined
Mar 20, 2013
Messages
64
Location
Kansas City Mo
alright so this brings it up to where we are now, im sure a few of these photos will be a little redundant but i figured it would help get a feel for the space so you all could be better equipped to offer ideas and suggestions :)

first is my abbreviated to do list for the 46'

second the ford and Subaru looking towards the doors, you can see now how low the ceilings are. even the doors are under 7 feet tall. the two light bulbs are all that is there for now and my air compressor sits between the doors back there.

third i turned around and you can see some came with the house shelving and the black cube thing stacked with more or less house painting stuff, coolers and to the right some lumber stacks and ladders

forth you can see the small work table i built from scrap wood to keep me from putting my stuff on the drier and getting dirty looks from my wife. I made it just big enough to cover the sump pump access points and battery. I also made it pretty light duty so i wouldnt be tempted to put anything heavy on it. you can also see the section of wall that got one quick coat of kilz. Id like to paint all the walls a semi gloss or egg shell white to help with the lighting and the crampt space feeling but being late in the fall it wreaked up the whole house so it stopped at one pass until summer when i can paint with all the doors open and not give us all migraines.

you can also see in this photo my mega lack of outlets, the fuse box for the house is on the opposite wall so it shouldnt be to hard to add them but im still moving things around before i decide were i think they should be. I really wanted to tear down the wood hanging down that no doubt at some point held lumber or some other length of stuff because im just sure ill bust my head on it but my wife had the brilliant idea of sticking a pipe threw some of them and adding some clamp lights for a surgery room like light set up for under the hood on the cheap. works great!

fifth you see looking from the cars into the shop area. Drier, deep sink with cover and washer on the left before you get to the fridge and furnace/ water heater on the right.

sixth yes i snuck some extra back fenders onto the peg board next to the utilities haha. works for now but its not a good long term solution as ive got to take them out to get in and change filters etc.

and last looking back into the car area
 

Attachments

  • IMG_7128.jpg
    IMG_7128.jpg
    128.9 KB · Views: 37
  • IMG_7127.jpg
    IMG_7127.jpg
    136.5 KB · Views: 32
  • IMG_7126.jpg
    IMG_7126.jpg
    129.5 KB · Views: 36
  • IMG_7125.jpg
    IMG_7125.jpg
    127.6 KB · Views: 37
  • IMG_7124.jpg
    IMG_7124.jpg
    137.7 KB · Views: 35
  • IMG_7123.jpg
    IMG_7123.jpg
    139.5 KB · Views: 45
  • IMG_7122.jpg
    IMG_7122.jpg
    142.1 KB · Views: 41
Last edited:
OP
T

timm95

Well-known member
Joined
Mar 20, 2013
Messages
64
Location
Kansas City Mo
ok back into the shop!

you can see that ive now torn the shelves down on the left. I moved things around a million times but in the end decided that i would rather have the space and options available with them down. I moved everything that was in the cardboard boxes into about half a dozen empty tool boxes to keep them dust free and for now the cardboard lables sit on top of the boxes. im jonesing to bust out the label maker but i know this isnt the final resting place for most of this so im waiting on that.

I've also moved my chop saw off the work bench onto the beefy ryobi work stand my father in law brought us this weekend.

The rest of the photos are just some kinda "interest" shots.

starting out i really wanted the all white work shop. not a show room but almost an operating room. about 13 re arrangements in it just didn't feel right.

I dont want a space covered in my knick knacks and trinkets but at the same time being to clean just didnt feel right. I found a photo of Pete Chapouris in his garage in what i assume is the 70's and it just nailed it for me so now ive kinda kept that vibe in mind while this space takes shape.

Ill try to remember to post it later as i guess i havnt got one of it handy right now.
 

Attachments

  • IMG_7135.jpg
    IMG_7135.jpg
    143.1 KB · Views: 30
  • IMG_7134.jpg
    IMG_7134.jpg
    137.8 KB · Views: 35
  • IMG_7133.jpg
    IMG_7133.jpg
    140.5 KB · Views: 32
  • IMG_7132.jpg
    IMG_7132.jpg
    140 KB · Views: 31
  • IMG_7131.jpg
    IMG_7131.jpg
    135.3 KB · Views: 32
  • IMG_7130.jpg
    IMG_7130.jpg
    139.5 KB · Views: 28
  • IMG_7129.jpg
    IMG_7129.jpg
    137.3 KB · Views: 28
Last edited:
OP
T

timm95

Well-known member
Joined
Mar 20, 2013
Messages
64
Location
Kansas City Mo
ok so some of these could have been in one of the earlier posts but its alot of photos to get up at once so forgive me ;)

1: the sorted tool boxes
2: the power tools under the second half
3: a bit of some shelving units i took down in another room holding the shop radio and etc
4: a little inspiration here and there
5: found this hiding behind the curtains, gonna leave that one too.
6 and 7: pano shots of the space
 

Attachments

  • IMG_7142.jpg
    IMG_7142.jpg
    151.9 KB · Views: 22
  • IMG_7141.jpg
    IMG_7141.jpg
    149.6 KB · Views: 27
  • IMG_7140.jpg
    IMG_7140.jpg
    137.3 KB · Views: 33
  • IMG_7139.jpg
    IMG_7139.jpg
    142.7 KB · Views: 29
  • IMG_7138.jpg
    IMG_7138.jpg
    142.9 KB · Views: 24
  • IMG_7137.jpg
    IMG_7137.jpg
    137.8 KB · Views: 28
  • IMG_7136.jpg
    IMG_7136.jpg
    138.4 KB · Views: 28
Last edited:
OP
T

timm95

Well-known member
Joined
Mar 20, 2013
Messages
64
Location
Kansas City Mo
my light duty table, i keep one jack stand and my sweet wizard creeper seat under it. i just pulled it out so you could see it better. Another estate sale deal :) and a random shot of the kilz'd wall i guess. I've been playing with light placement as i work inside the car to see if i cant get some light to bounce in.

the third photo shows how things are laid out if you are still having a hard time figuring the lay out out, the last photo is kind of what i have in mind for the future.

Id like to take the two work benches on the right apart and put them back together with two shelves each and close them in with masonite sides and plywood doors. that would let me take all the stuff out from under the "long term storage" bench and put it under those two benches as well.

Id then get rid of the 'long term storage' bench which is just an old counter top with some 4x4 legs and put a harbor freight 44" box in its place. hopefully getting rid of the little shelving unit in the corner as it all comes together.

on the left wall i would like to line up the chop saw with a table saw stored underneath the stand possibly and next to it a drill press and grinder in line with the vice. I was considering putting a bench top drill press on the rails next to the chop saw but i dont know if thats a good idea or not. its rated for 400 lbs?

while thats all happening id like to paint all the cement walls white, tear down any of the wooded over head "hangers" that i keep ducking. Id then run some conduit along the left wall about work bench height with plug ins every couple feet and add some lights.

Ive taken down some of the hanging 'shop lights' and really found that it made the ceiling feel higher. I know i have plenty of room to put in some can lights which would give me zero hang down but i dont know how well they spread light per fixture compared to a set of florescent tubes that can mount straight to the ceiling. i feel like the tubes will give me more light.

in the parking space im planing on taking the existing shelving and the black cube unit out and replacing them with a deep set of cabinets that would span most of that wall so that i can put all of that stuff were its out of site. Id like to stick the bits of lumber and the coolers in there as well to really clean it up. those cabinets would also be white most likely.

i think that about covers it :) oh! more plug ins and lights in the parking area as well but nothing to crazy.

If youve read this far thanks and i look forward to seeing what you all have to offer as i track along messing around with this garage :)
 

Attachments

  • IMG_7144.jpg
    IMG_7144.jpg
    137.2 KB · Views: 20
  • IMG_7145.jpg
    IMG_7145.jpg
    127 KB · Views: 20
  • IMG_7146.jpg
    IMG_7146.jpg
    152.4 KB · Views: 28
  • IMG_7147.jpg
    IMG_7147.jpg
    155.8 KB · Views: 25
Last edited:

jim

Well-known member
Joined
Feb 26, 2005
Messages
284
Location
wi
timm95, nice shop!! i noticed in the pix with the valve cover that there was some little tins with auto manufactures stamped on them sitting on top of the valve cover. i have a lot of the same ones and more. could you tell me where they are from and what they were used for? any history on those little tins would be great! jim
 
To avoid these ads, REGISTER NOW!
OP
T

timm95

Well-known member
Joined
Mar 20, 2013
Messages
64
Location
Kansas City Mo
Hey Jim!

I'm not sure of their age but if I had to guess I'd say late 50's or 60's maybe judging my feel and size. The lady I bought these from had probably a hundred of them andwe just choose the ones we liked the best.

As far as I can figure they are really large buttons/ pins. If you look at them they are all the same size, have a lip on the back and two holes. This is just like the smaller 1 inch pins you see all the time but larger. I would guess you could google 3 inch auto pins and have something pop up?

I guess I hadnt really thought much past them being neat but now I have to admit I'm a little curious. I'll snoop around and see what I can find :)
 

jim

Well-known member
Joined
Feb 26, 2005
Messages
284
Location
wi
timm95, that would be great. you are right, each seem to have 2 holes near the top. i have some cool ones like daimler, sunbeam talbot, bentley, lancia, and hudson and more. the tins don't have any pins in the back and i could never figure out what they were used for or what the purpose of them were but they sure are cool. a guy at work gave them to me a few years back and have never seen anything like that until i saw them in your pix. thanks jim
 
Last edited:

Bassfishing54

Active member
Joined
Jun 19, 2014
Messages
43
Location
Camden, SC
In looking at the pictures I believe they are the advertising buttons.
When I was a kid I remember these being handed out, but I especially remember the auto industry ones. I have one that was given to me when mom and dad when bought a new '56 Chevy Bel Aire. I remember one of my friends had one from Ford.
 
OP
T

timm95

Well-known member
Joined
Mar 20, 2013
Messages
64
Location
Kansas City Mo
Cool! I've yet to google it but sounds like we are on to something. With them being so uniform over so many brands I've got to assume they were all made by a third party.

I havnt seen any of them other than ours.

Edit: I googled about every combination of plausible words I could think of and got no where. Oh well, I will keep an eye out for info though and let you know what comes of it
 
Last edited:
OP
T

timm95

Well-known member
Joined
Mar 20, 2013
Messages
64
Location
Kansas City Mo
kind of going backwards but i found some pano shots of before we moved in that show the lay out fairly well so i thought it throw them up :)

~apparently i am now missing a security token and cant post photos? guess ill post when it lets me again ;)
 
Last edited:
OP
T

timm95

Well-known member
Joined
Mar 20, 2013
Messages
64
Location
Kansas City Mo
Ha! it let me post these :)

The first two are the reason for the title of this thread, when we moved into the house this door was painted, well, door! bumper sticker included. you walk threw this door to get to the shop :)

the third is my previously mentioned "insperation" photo of Pete in his garage with a torn apart california kid.
 

Attachments

  • FullSizeRender.jpg
    FullSizeRender.jpg
    138.3 KB · Views: 35
  • 2.jpg
    2.jpg
    117.1 KB · Views: 15
  • 1.jpg
    1.jpg
    108.7 KB · Views: 17
OP
T

timm95

Well-known member
Joined
Mar 20, 2013
Messages
64
Location
Kansas City Mo
still wont let me post the previous photos i tried first though, hmm. oh well i guess we'll have to live with out them
 
OP
T

timm95

Well-known member
Joined
Mar 20, 2013
Messages
64
Location
Kansas City Mo
Alright a little update :)

I've been messing with the car more than the garage but i did finally get around to this!

My garage doors are on the short side and as such the windows are a little on the low side as far as concealment goes. The previous owners had decided to solve this issue by taping bubble wrap to the window pains from the inside.

~though as I tore it off it looks like one side was taped and the other door used some sort of silicone, gummy strip stuff~

Anyhow, I like that it made it harder to see inside but didnt kill my light. Seeing as I've got cement walls and no other windows in the area I thought it worked well until I came home one night and with the garage lights on I could see right in!

A little goggling around led me of course back to the garage journal and I found some one using clear matte finish contact paper to cover their garage windows.

It allows light in during the day but is all but impossible to see threw, at night with my nose against the window I can kinda sorta see some shapes and even that is fairly vague. during the day from a few steps away you cant tell there is anything on them at all.

granted in my photos they just look like dirty windows but i think i just didnt get my windows as clean as i thought i had before putting it on.

anyways im happy with it and for $6 ive got enough left over that i can re do them if i feel like it.
 

Attachments

  • g1.jpg
    g1.jpg
    90.9 KB · Views: 9
  • g2.jpg
    g2.jpg
    119 KB · Views: 8
  • g3.jpg
    g3.jpg
    96.2 KB · Views: 10
  • g4.jpg
    g4.jpg
    82.8 KB · Views: 8
  • g5.jpg
    g5.jpg
    92.4 KB · Views: 7
  • g6.jpg
    g6.jpg
    79.3 KB · Views: 9
OP
T

timm95

Well-known member
Joined
Mar 20, 2013
Messages
64
Location
Kansas City Mo
As far as whats going on in the garage ive been trouble shooting my lights on the 46'.

It sat in a dusty damp shop over the winter and thus ive been chasing some gremlins. I've got my head and tail lights back and my blinkers all sorted now I'm trying to chase down my problem with the brake lights.

It's always something lol.

heres a photo of me seeing if the blinkers were working, and of a rad neon sign i saw the other day online and thought would look cool in the garage someday.
 

Attachments

  • blinkers.jpg
    blinkers.jpg
    104.4 KB · Views: 12
  • neon.jpg
    neon.jpg
    118.4 KB · Views: 7
To avoid these ads, REGISTER NOW!
Top Bottom