
NotStock
Well-known member
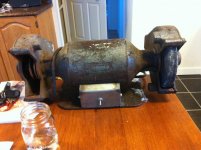
I started the hunt for a bench grinder three weeks ago and I'm happy to say I finally found one. It runs smooth and weighs more than me (my main concerns when buying it).
I have absolutely no info on it, so I was hoping the GJ could offer up some help. Its an 8" with no maker's marks. The name plate has been removed at some point (two small machine screws are missing from the front).
There is a little bit of yellow writing on the motor, but it isn't legible.
The tool rests are cast (well one is, the other is a home built rig) and the base is definitely homebrew.
Here are the pics
Attachments
Last edited:

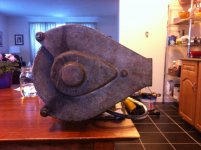
") Not sure on maker, but it is an interesting setup, especially the guard and dust chutes. Looks like a quality built unit.
Not sure on maker, but it is an interesting setup, especially the guard and dust chutes. Looks like a quality built unit.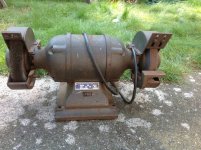


 on this. you're not killing the nuts but you also done want them vibrating loose. make damn sure you put the armature/shaft back in the right way, the nut are RH/LH so they tend to tighten in use. however, I have had then come loose under vibration...


