To avoid these ads, REGISTER NOW!

Blackhawk jack rebuild-advice needed

scott37300

Well-known member
Joined
May 5, 2010
Messages
3,450
Location
Wisconsin
Last summer I picked up a used blackhawk 2ton jack for 50 bucks and need to rebuild it. I don't have a kit yet but hopefully will be ordering one soon.

Little side note....I've decided I needed to start getting some of my projects done since I have a habit of buying these things with full intentions of making them new again but end up just keep getting more and piling up! Example being my rolair 2 stage rolair compressor that needs a new pressure switch and install a drain and then pipe the garage for air, I bought a ridgid threader and cutter and pipe vice to do this but again it's just been sitting around! This is needed so when I get my ALC sandblaster working I will have air to power it, not sure if anything is wrong with it, just bought it used about 8 years ago and haven't used it yet. This will be needed to do the frame of the jack so I can paint it. I have a tendency to plan these projects but seem to just keep aquiring new projects and never seem to finish any of them!

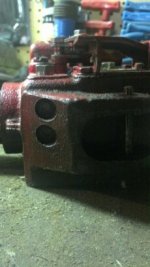
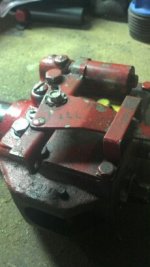
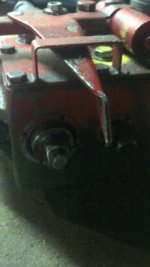
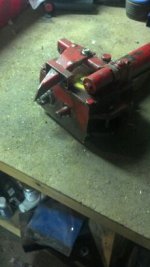
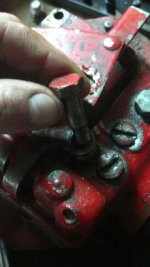
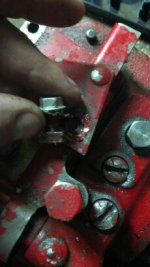
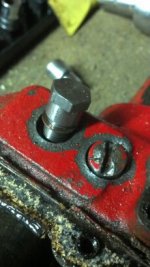
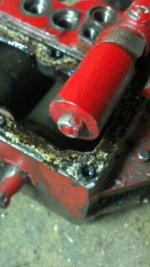
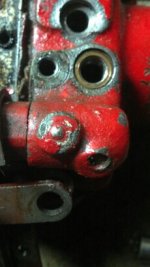
Back to the jack, I took the pump assembly out of the frame last fall in case I got around to ordering a rebuild kit I could do it in the basement since the garage is unheated. Well I never got around to ordering a kit which is around 90 bucks but I want to tear into the pump so I know what I'm working with since I've never rebuilt a jack before. Then hopefully I will be getting a rebuild kit in the near future and will be able to rebuild it and get this wonderful jack in working condition. There are a few things that I'm not sure about. One is where to start! What all gets replaced? There are two rams that the handle pumps to mack the jack work that look like they need a special socket to get them out?

So here's some pictures and hoping someone, Hiball or others can shed some light on where to start! Thanks

1332628669838.jpg

1332628678483.jpg

1332628687925.jpg

1332628699887.jpg

1332628712810.jpg

1332628724849.jpg

1332628737020.jpg

More pics in next post.
 
To avoid these ads, REGISTER NOW!
OP
S

scott37300

Well-known member
Joined
May 5, 2010
Messages
3,450
Location
Wisconsin
1332628754767.jpg

1332628775942.jpg

1332628785048.jpg

These show where it looks like I will need a special socket with 4 "prongs" to take apart?
 
Last edited:

Hiball

Well-known member
Joined
Apr 30, 2009
Messages
14,032
Location
Missery
These show where it looks like I will need a special socket with 4 "prongs" to take apart?

Adjustable Face Spanner will remove that Compression Nut... Or... And i Never recommend Not using the Correct tool for the Job, but its hard to justify a Tool for a 1 time Job. (You can tap it with a Punch ONLY to loosen it and then spin it off generally fairly Easily) Ill Check on that Kit Price.. $90 seems High for some reason.

If you intend on tearing it down, Some Simple Tips are to Document the Jack linkages etc with Pictures (Looks like you've already done that) and when you get into the Valves, Keep them Seperate, and Document what comes out and in what Order. Im Sure i have the Owners manual for that Jack and can send you a copy/pdf if you PM me your Email Addy.
 
Last edited:
OP
S

scott37300

Well-known member
Joined
May 5, 2010
Messages
3,450
Location
Wisconsin
I just found a rebuild kit on ebay for 40 bucks shipped! I'm super happy right now!! The only other one I found was through blackhawkparts.com for 90 bucks. Looks like this will be a working jack sooner than I thought!

Put a new pressure switch on the compressor today and bought some black sand for the sand blaster. I've had a huge list of projects that I have started over the past few years that I am on a mission to finish. Money and time haven't been on my side but now I am trying to put a dent in the list.
 

Hiball

Well-known member
Joined
Apr 30, 2009
Messages
14,032
Location
Missery
I just found a rebuild kit on ebay for 40 bucks shipped! I'm super happy right now!! The only other one I found was through blackhawkparts.com for 90 bucks. Looks like this will be a working jack sooner than I thought!

Put a new pressure switch on the compressor today and bought some black sand for the sand blaster. I've had a huge list of projects that I have started over the past few years that I am on a mission to finish. Money and time haven't been on my side but now I am trying to put a dent in the list.


Eww... Link? there is some donkey on there selling OLD Stock Kits and i can tell by the discoloring/Labels of some of the parts that they are NOT Good. Hopefully since your Jack uses alot of Leather Vee's you'll be Ok. I would Definitely check the condition fo the Vee's looking for chipping around the lip area.

I found the Kit, Your Ok.... I think, Be Leary of NOS Kits though, Especially if your Jack contains Poly Seals as they Harden with Age and are a Ticking Time Bomb.
 
Last edited:
OP
S

scott37300

Well-known member
Joined
May 5, 2010
Messages
3,450
Location
Wisconsin
Eww... Link? there is some donkey on there selling OLD Stock Kits and i can tell by the discoloring/Labels of some of the parts that they are NOT Good. Hopefully since your Jack uses alot of Leather Vee's you'll be Ok.

I found the Kit, Your Ok.... Be Leary of NOS Kits though, Especially if your Jack contains Poly Seals as they Harden with Age and are a Ticking Time Bomb.

http://www.ebay.com/itm/260922638495?ssPageName=STRK:MEWNX:IT&_trksid=p3984.m1439.l2649

Hopefully it will be fine! Honestly I don't know much about these kits, I just saw blackhawk SJ3 and bought it. I was going to PM you asking if this kit would work but I got a little excited and just bought it! Looks like I will be tearing into this thing this weekend.
 
OP
S

scott37300

Well-known member
Joined
May 5, 2010
Messages
3,450
Location
Wisconsin
After some advice from Hiball I found one of these on ebay, http://www.ebay.com/itm/220972799601?ssPageName=STRK:MEWNX:IT&_trksid=p3984.m1439.l2649, 15 bucks shipped for a US made Williams spanner wrench to take out the pumps. It's the cheapest I could find for a US made pin face spanner wrench. The seller shipped out within an hour so it should be here by the end of the week. Hopefully my kit will also be here by the end of the week.

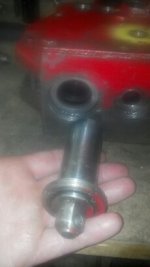
I got some of the pump apart tonight but not sure where to go from here. Obviously I need to wait till I get the spanner wrench to take the two plungers out but I'm not sure about the lowering valve.

Here are some pics from tonight, mostly to remind me where everything goes.

1332797092158.jpg

1332797106010.jpg

1332797115339.jpg

1332797166298.jpg

1332797371345.jpg

1332797444561.jpg

1332797520721.jpg
 
To avoid these ads, REGISTER NOW!
OP
S

scott37300

Well-known member
Joined
May 5, 2010
Messages
3,450
Location
Wisconsin
Well I dug into this a little more last night. I bought a JH williams adjustable face spanner wrench to take the pumps out, received it yesterday but the pins are to big for the slots on the pump retaining nuts. I thought this was a pretty small one, williams has a 482, 483, and 484 models and this is the 482 with 3/16" pins. I'm guessing there is a special socket for these nuts? Or do I just need a different adjustable pin face spanner with smaller pins? I can grind these pins down if I need to but not sure how that would work?

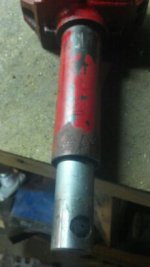
Also having a rough time getting the ram unscrewed from the pump. I've tried a big pipe wrench but I don't have a good vice and broke my 4" cheap vice trying to get this apart. Not sure how I'm going to get this apart yet!

Hopefully my rebuild kit gets here today or tomorrow so I can try and get this done this weekend.

If anyone has advice on how to get these things apart please share it!
 
OP
S

scott37300

Well-known member
Joined
May 5, 2010
Messages
3,450
Location
Wisconsin
After letting it soak with some pb blaster over night I took two 24" pipe wrenches to it and still couldn't budge where the ram is screwed into the pump housing. Can I safely heat this up? Or should I wait until I can get the two pumps out before throwing heat to it? Or is there something inside the ram that I can ruin by throwing heat on it. I only have a mapp torch so it won't be a lot of heat.

So far it's Jack 3, Scott 0. Not looking good.
 
OP
S

scott37300

Well-known member
Joined
May 5, 2010
Messages
3,450
Location
Wisconsin
I ground down my brand new Williams pin spanner wrench today so I could get the two pump nuts loosened up and out. This worked great, just don't like to grind a brand new tool but have to do what I have to get the job done!

As for getting the cylinder un screwed from the pump housing I am not having any luck! Let it sit overnight again with some penatrating oil and went at it with two 24" pipe wrenches again and nothing. Really not sure what I am going to do here? I'll have to see if I can find some cheater pipes and make some 48" pipe wrenches and see if that works. Just feels like something is going to give and I don't want to crack this thing!
 
OP
S

scott37300

Well-known member
Joined
May 5, 2010
Messages
3,450
Location
Wisconsin
This cylinder is ******* me off!!!

I just ran out and bought two 36" long 1 1/4" pipes to use as cheaters and still can't get it to turn. I'm not sure what else to try? Don't really want to throw a bunch of heat to it and wreck something inside.

Think it's time to go have a couple of beers and think about things for the night before I end up going and getting two 10' long cheater pipes and snap the thing in half!
 
OP
S

scott37300

Well-known member
Joined
May 5, 2010
Messages
3,450
Location
Wisconsin
Great success!!! Cylinder is off.

And me rebuild kit came in!!!

I will post pictures later tonight. Having some celebration drinks now after a long day of working in the garage.
 
OP
S

scott37300

Well-known member
Joined
May 5, 2010
Messages
3,450
Location
Wisconsin
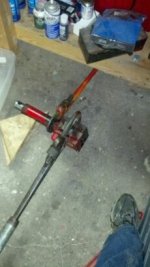
Today started out rough. This jack was fighting me all the way. Hiball recomended an adjustable face pin spanner wrench to get the nuts for the pumps off. I ordered the smallest one I could find with 3/16" diameter pins, a J.H. Williams. The pins were to big for the slots on the nuts. So I ended up grinding the pins down to fit and got the nuts off.

Now the cylinder was fighting me all week. I tried two 24" pipe wrenches with no luck. Went and bought two 36" steel pipes to use as cheaters and still no luck. I ended up sticking one wrench under a workbench and also standing on it while pushing down on the other wrench and finally it popped loose! So now everything is apart and my kit came in today so I will start putting it back together.

With the kit came an exploded parts diagram which is a BIG help.

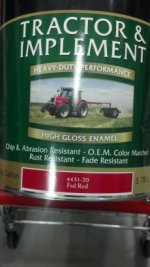
Here is some pics from today's adventures! And some paint I found at fleet farm, they have ford red, IH red, and MF red, not sure which one matches the original the best.

1333213452102.jpg

1333213691201.jpg

1333213671898.jpg

1333231775061.jpg

1333231791048.jpg

1333223989325.jpg
 

Billybdakota

Member
Joined
Jun 25, 2024
Messages
8
I am in the process of rebuilding my Blackhawk SJ3 and have a question. The release mechanism seems to consist of a cam operated by the handle, which moves a lever on the top of the power unit. The end of the lever that engages with the cam is triangular and when it moves it shifts another lever/component that surrounds a cylinder. My question is how does it work? The cam only pushes the lever a small mount and it doesn’t seem to engage with the cylinder in any way. I’m confused as to how it works. Thanks for helping if you can!
 
To avoid these ads, REGISTER NOW!
Top Bottom