To avoid these ads, REGISTER NOW!

Blank Slate

RonB001

Well-known member
Joined
Apr 19, 2014
Messages
72
Location
Burlington, NC
Back in February of this year, I bought and moved in to an older house (1963). It had a small single-car garage that was not usable to a car due to the stairway going down into the middle of it. We converted that garage to a utility/laundry/workout/dog room, which meant I still needed a garage.

We ended up starting construction of a 24' x 32' garage connected to the house with a breezeway. Constraints of the lot and existing house meant that the garage had to be set into the hill, which caused the excavation and concrete to be more expensive than first estimated.

Step one: dig a hole
CAM00385.jpg


Step two: put a bunch of concrete and cement block in the hole
CAM00417.jpg


Step three: build a garage on top of the concrete. (this hasn't happened yet)
Before I can get to that stage, I have to finish the backfill and draining of the foundation.

Stay tuned for further progress.
 
To avoid these ads, REGISTER NOW!
OP
R

RonB001

Well-known member
Joined
Apr 19, 2014
Messages
72
Location
Burlington, NC
Today, I finished the basic backfill of the foundation. This process consisted of applying 2 coats of drylok waterproofing paint, a layer of 1/4" foam to serve as a capillary break, 4" perforated pipe for the foundation drain (plus another pipe for gutter drain), 5 cubic yards of gravel, a layer of landscape fabric to keep silt from plugging up the gravel and pipe, a layer of sand to protect the landscape fabric, and a big pile of dirt to bring it up to the surrounding grade.

CAM00456.jpg


The dirt will inevitably settle, so I will need probably a dump truck full of topsoil to establish the final grade.

I still have to run the 2 drain pipes out to daylight, but I can also start building with wood :)
 
OP
R

RonB001

Well-known member
Joined
Apr 19, 2014
Messages
72
Location
Burlington, NC
Thanks, Bib Overalls. The concrete and block work, I hired out. The concrete contractor arranged for the excavation and block work. Everyone who has seen it, including some who used to do block work for a living, has commented on how clean the block work is.

Out of the four contractors I have used on this house, this one was the best.

Regards,
RonB
 

dlhindiana

Member
Joined
May 10, 2013
Messages
17
Location
Western PA
Very nice. I would like to ask a couple of questions. Don't take it as a put down or that anything is wrong. I am just trying to learn.
1. It doesn't appear very deep but did anyone say anything about not back filling until you had weight on the block walls?
2. It appears that your seal plate is on the outside edge of the walls. Is it ok not to have that centered on the block or covering the whole block? You have weight pushing in on the outside of the walls from backfill and you have weight pushing down on the outside of the wall. Would this not cause concern of the wall bowing or cracking?

Again I truly don't know these answers. I am trying to learn. Thanks.
 

theoldwizard1

Well-known member
Joined
Feb 22, 2011
Messages
43,077
Location
SE MI
Today, I finished the basic backfill of the foundation. This process consisted of applying 2 coats of drylok waterproofing paint, a layer of 1/4" foam to serve as a capillary break, 4" perforated pipe for the foundation drain (plus another pipe for gutter drain), 5 cubic yards of gravel, a layer of landscape fabric to keep silt from plugging up the gravel and pipe, a layer of sand to protect the landscape fabric, and a big pile of dirt to bring it up to the surrounding grade.
Glad to hear you did a good job on the backfill and drainage ! Too many people skip this because don't understand how much water can come down even a small hill.
 

JimVonBaden

Well-known member
Joined
Dec 2, 2011
Messages
15,716
Location
Northern Virginia
Looks like a great start!

What is the structure going to look like? How high are your ceilings? How long do you expect the project to take? What are your plans for insulation and finishing?
 
OP
R

RonB001

Well-known member
Joined
Apr 19, 2014
Messages
72
Location
Burlington, NC
Very nice. I would like to ask a couple of questions.
1. It doesn't appear very deep but did anyone say anything about not back filling until you had weight on the block walls?
2. It appears that your seal plate is on the outside edge of the walls..

My concrete guy did mention not backfilling completely until some weight was on the walls. However, the back wall, which has the most height, will never have much weight on it as the side walls will carry the load of the roof and ceiling. What can't be seen from the outside, though, is that the first two feet of fill on the back wall is gravel, which does not have anywhere near the pressure on a wall that dirt does.
Sill plates normally go on the outside of foundation walls (almost). They are set back from the outside edge by the thickness of your sheathing (1/2" in this case). That way, the finish siding can lap down over the edge of the foundation, and you have a waterproof seam for anything except water traveling up. The exception to this is when you have brick or stone veneer on the outside of the wall, and in that case you set your sill plate back by the thickness of the veneer.

TheOldWizard:
Thanks for the compliment. Trying to do a proper job of backfill and draining is one of those things that will never be seen unless you don't do it right :)

JimVonBaden:
This is going to be a gable roof single-story building with the ridge line running front-back. The roof pitch will be 6/12 to match the existing house.

Ceiling height will be approximately 10'; the exact measurement won't be available until I tear in to the house and compare that top plate with the garage foundation.

The garage is expected to be usable by mid-March 2014. Oh, wait, that was the plan when I started the project last October, not when I didn't have a concrete floor until March. I really don't know how long it is going to take. Some steps go very quickly, like walls and roof. Others take a long time where it looks as if nothing is happening.

My plans for insulation and finishing are constantly evolving. This has been a very expensive web site to have found. :willy_nil

Volleyball:
I did not run a conduit for underground power, as the garage will be connected to the existing house by a breezeway, and power will be run through that roof structure.

Progress will be slow. What you see on these first few pictures is the result of breaking ground in January. I work on it a few hours in the evenings some days of the week, and a few more hours on Saturday and Sunday. It has taken me about a month to get the drainage, waterproofing, pipe, and backfill to where it is now. That is still not finished, but at least it has advanced to a point that I can start woodwork while continuing. Oh, and there are additional demands on my time from work and ongoing remodeling inside the house.

We will see what happens, and I will post advances as they happen.

Regards,
RonB
 

volleyball

Well-known member
Joined
Aug 29, 2011
Messages
4,127
Location
NY, not NYC
You do it when you can. Some people cannot wait and kill themselves getting something done. Others just put their milestones in pencil and get it done when they can.
 

dlhindiana

Member
Joined
May 10, 2013
Messages
17
Location
Western PA
My concrete guy did mention not backfilling completely until some weight was on the walls. However, the back wall, which has the most height, will never have much weight on it as the side walls will carry the load of the roof and ceiling. What can't be seen from the outside, though, is that the first two feet of fill on the back wall is gravel, which does not have anywhere near the pressure on a wall that dirt does.
Sill plates normally go on the outside of foundation walls (almost). They are set back from the outside edge by the thickness of your sheathing (1/2" in this case). That way, the finish siding can lap down over the edge of the foundation, and you have a waterproof seam for anything except water traveling up. The exception to this is when you have brick or stone veneer on the outside of the wall, and in that case you set your sill plate back by the thickness of the veneer.


Regards,
RonB

Thanks for the info.
 

NUTTSGT

Super Moderator
Staff member
Joined
Sep 14, 2009
Messages
50,863
Location
Northern Central Ohio
Welcome to GJ Ron.


How many or how often did you core fill those block ?

How about a picture showing the house in relation to the new garage ?
 
OP
R

RonB001

Well-known member
Joined
Apr 19, 2014
Messages
72
Location
Burlington, NC
How many or how often did you core fill those block ?

They really were not. The mason just filled the top so there was a flat surface to bolt the sill plate to. I have a slight concern that this might be a problem, but I'm not real worried.

How about a picture showing the house in relation to the new garage ?

That is going to have to wait until there is something more to show. The lot is small enough, and wooded all around, that you can't really get a decent view of both at the same time.

I do have a site plan, though. I had to draw this to get the building permit.
http://www.rbutterfield.com/Garage/SitePlan.pdf

Regards,
RonB
 

NUTTSGT

Super Moderator
Staff member
Joined
Sep 14, 2009
Messages
50,863
Location
Northern Central Ohio
They really were not. The mason just filled the top so there was a flat surface to bolt the sill plate to. I have a slight concern that this might be a problem, but I'm not real worried.


Regards,
RonB

I understand it's your build, your mason has his way of doing things and what you do is all up to you. Personally, it would more than cause a slight concern for me. I'd be out there myself filling many of those cores, whether it made the mason mad or not, it would be for my own peace of mind.

Once that backfilled dirt gets wet, it's holding back many tons of weight.
 

volleyball

Well-known member
Joined
Aug 29, 2011
Messages
4,127
Location
NY, not NYC
If you are going to grout, you have to add some rebar to be effective in keeping the wall from being blown out.
Maybe the mason used ladder or Z wire to add horizontal stiffness.
 
OP
R

RonB001

Well-known member
Joined
Apr 19, 2014
Messages
72
Location
Burlington, NC
Progress without pictures today.

Yesterday, I ordered beams and trusses. The beams should be delivered this coming week, and trusses the following week.

Today, I went and got a trailer full of lumber, and started building walls. Too dark when I stopped tonight for pictures, but hopefully I will finish tomorrow while there is still light.

In the category of "ideas from this site that I will incorporate", from 5stitches I am going to put the garage door opener sensors at bumper height rather than near the floor.

My own idea, since the ground level is so high, I am going to make an access door in the rear gable to the back of the attic, so that I can store ladders and the canoe in there.

Regards,
RonB
 

jsherid1

Well-known member
Joined
May 28, 2009
Messages
1,272
Location
Lucas, TX
Neat build and it sounds like you've planned the structure well.

I'd second the recommendation on filling and rebar before going further. A buddy in Michigan had a similar setup that wasn't filled (he designed and built it himself) and his walls cracked after the first winter. You have paid admirable attention to drainage but block filling and rebar would give you even more peace of mind. Alternatively, have a structural engineer come out (it will cost only a few hundred bucks) and take their recommendations--I've used them and they ended up being worth every penny. While he's there he could also take a quick look at your framing plan and give you guidance on that as well.
 
OP
R

RonB001

Well-known member
Joined
Apr 19, 2014
Messages
72
Location
Burlington, NC
I'd second the recommendation on filling and rebar before going further. A buddy in Michigan had a similar setup that wasn't filled (he designed and built it himself) and his walls cracked after the first winter.

Hi

I appreciate yours and NuttGT's concern, but I'm afraid I am a bit too far along for that now. I am just going to have to pay close attention to grade on the back side and keep that fill from getting saturated.

Then, next winter, if it cracks you can chant "I told you so" while I tear the whole thing apart to fix it :-(

Regards,
RonB
 
To avoid these ads, REGISTER NOW!
OP
R

RonB001

Well-known member
Joined
Apr 19, 2014
Messages
72
Location
Burlington, NC
We have walls!

Well, three of them, anyway. The fourth will have to wait for beams to show up this week.

CAM00483.jpg


It's a bit odd, in that the side walls are 2x8, and the back (and soon to be front) walls are 2x4. There is a reason for that, which will be disclosed as soon as I can find the post to attribute the idea...

Celing height will be 10'6", which will be nice and useful.

NUTTSGT asked about a picture showing relationship to the house. This is what you can see so far:
CAM00484.jpg


Regards,
RonB
 
OP
R

RonB001

Well-known member
Joined
Apr 19, 2014
Messages
72
Location
Burlington, NC
Found it:
XcYZ has a very nice soffit/shelf/light idea that I am going to copy.

2' down from the ceiling, both sides and the back, with storage above and lights below.

The sides of the garage have 2x8 walls because of the stepped foundation. This way, I can run drywall all the way to the floor, and have a smooth surface for cabinets/shelves/ workbenches. In the back, the foundation goes so high that I will just fill in below the shelves for a flush wall.

I also really like Jack Olsen's idea of using motion detectors for room lights. I think work area lights should still be on switches, though.

Regards,
RonB
 
OP
R

RonB001

Well-known member
Joined
Apr 19, 2014
Messages
72
Location
Burlington, NC
Since you mentioned an attic access door on the back for storage, did you get storage trusses to take advantage of that 6/12 pitch roof?

Yes. There is ~8' clear at the floor of the attic. Only about 5' high inside, but there will at least be room to crawl without banging your head.

Regards,
RonB
 

volleyball

Well-known member
Joined
Aug 29, 2011
Messages
4,127
Location
NY, not NYC
If I were going to have storage. I would have planned for knee walls. Without them you cut your space cut in half.
 
OP
R

RonB001

Well-known member
Joined
Apr 19, 2014
Messages
72
Location
Burlington, NC
If I were going to have storage. I would have planned for knee walls. Without them you cut your space cut in half.

The storage idea was an afterthought. I still don't want the roof to be above the main house. If I had been OK with a taller roof, I would have ordered half-story trusses; that is one of the cheapest ways to get square feet that is available.

Regards,
RonB
 

NUTTSGT

Super Moderator
Staff member
Joined
Sep 14, 2009
Messages
50,863
Location
Northern Central Ohio
Then, next winter, if it cracks you can chant "I told you so" while I tear the whole thing apart to fix it :-(

Regards,
RonB

I'd rather that you don't have problems with your walls. We have seen a few issues here including a very sever issue with walls falling down.

I really like how the garage appears to be tucked right behind the house.
 
OP
R

RonB001

Well-known member
Joined
Apr 19, 2014
Messages
72
Location
Burlington, NC
Major disappointment this evening: My wife had texted me that we had wood. I had been expecting delivery of the 6 LVLs for the garage door header and breezeway beams. Imagine my feelings when I pull in the driveway and find only 2 pieces, then measuring what I have and it is just half of the short ones (which go on TOP of the long ones).
Guess who I'm calling 8AM tomorrow?

Oh, well, I worked on the ditch/french drain instead, and got one more section of pipe installed.

Regards,
RonB
 

JimVonBaden

Well-known member
Joined
Dec 2, 2011
Messages
15,716
Location
Northern Virginia
Major disappointment this evening: My wife had texted me that we had wood. I had been expecting delivery of the 6 LVLs for the garage door header and breezeway beams. Imagine my feelings when I pull in the driveway and find only 2 pieces, then measuring what I have and it is just half of the short ones (which go on TOP of the long ones).
Guess who I'm calling 8AM tomorrow?

Oh, well, I worked on the ditch/french drain instead, and got one more section of pipe installed.

Regards,
RonB
I'm usually the one texting my wife that!:lol_hitti
 
OP
R

RonB001

Well-known member
Joined
Apr 19, 2014
Messages
72
Location
Burlington, NC
Well, the wood arrived today. I spoke with the salesman at the truss company I used, and it was just a mixup. They had a return of 2 of the 4 22' LVLs I ordered, and sent them on their own truck yesterday. The LVL supplier brought the rest of the order on their truck today.

So, after dinner, I put together the header and jacked it into place. This process involved a bit of tedium. It was not difficult for me to pick up one end of the beam and slide it around on the ground, but that is a bit different from pressing it overhead. So, after cutting to length and nailing together the two LVL pieces, I dragged them over to where they were going. I put a couple of 2x8 scraps on edge next to the foundation wall at each end, then lifted the beam up on them. Flipping the whole thing up on edge was relatively easy as well.

Next, I drug out the little floor jack, and started jacking and propping. I am not good about stopping to take pictures while I work, so hopefully a verbal description will be helpful. In preparation, I put in the end studs, and an additional 2x4 sandwiching the beam so that it could not fall over during the process.

Starting at 7" off the floor, I jacked up the beam as far as the little jack could go (about 10" per lift), then measured and cut a 2x4 prop to go under that end. Then drop the beam onto the prop, and go to the other end and repeat. The whole process took about an hour and a half, but I now have the beam in its proper place.

As usual, it was too dark to take a picture when finished for the night. Tomorrow, I will finish the jack studs under the beam, hopefully get one of the breezeway beams in place (the second will have to wait for the garage trusses to be set), and if all works well get the truss scaffolding in place.

Pictures to follow if I get something done while it is still light :)

Regards,
RonB
 

volleyball

Well-known member
Joined
Aug 29, 2011
Messages
4,127
Location
NY, not NYC
When you are working alone, what I do is lift one LVL into place. Then another, attach as needed. Way easier than assembling the beam on the floor and lifting it overhead. That is the method of a crew, not one person.
Glad you didn't get messed up on the order, just a little delivery excitement.
 
OP
R

RonB001

Well-known member
Joined
Apr 19, 2014
Messages
72
Location
Burlington, NC
Well, today was mostly detail work. I tied together the joints between the beam and walls, put the cripples under the beam, and added the bracing sheathing.

There is an odd code-required bracing scheme here: Since the wall length on either side of the garage door is less than 1/4 the wall height, I had to do it this way. The beam runs the full length of the wall, less a single full-height stud on each end. The sheathing has to have a block under any joints, and must be nailed at 3" on center all the way around. There also has to be a 1000# rated uplift anchor on the inside of the wall, at the top of each end of the door. There are a few more details involved, but the upshot is that they don't want the garage door wall to be floppy side-to-side.

Here are pics:
CAM00490.jpg

CAM00491.jpg


Tomorrow's project is to get one of the breezeway beams built up and in place. That will include a bit of brick sawing, and a really hefty joist hanger.

Once that is done, I will use the lumber for the breezeway roof to build scaffolding the length of the garage on each side and in the middle, for use while setting the trusses.

Regards,
RonB
 
OP
R

RonB001

Well-known member
Joined
Apr 19, 2014
Messages
72
Location
Burlington, NC
It is nice when the math works out:
CAM00492.jpg

If you zoom in on the image, you can see that it is not quite perfect, but it is definitely close enough.

I managed to get the one breezeway beam up today. It took about 3 hours, including all the prep, to get it in place and tied down. I don't remember it taking much less time back when I was running a crew. I used a top-mount beam hanger to mount it to the existing wall. There won't be any good photo angle available until I tear the roof open further for the valley framing.

This week, I am supposed to get delivery of the trusses, and build scaffolding to set them with. As soon as the trusses get out of the way, I need to get a delivery of OSB. I added up the weight, and it would take 3 trips to get it all with my little utility trailer.

Regards,
RonB
 
OP
R

RonB001

Well-known member
Joined
Apr 19, 2014
Messages
72
Location
Burlington, NC
Trusses are coming!

I have been promised to have the roof trusses delivered tomorrow morning.

Pics to follow.

Regards,
RonB
 
OP
R

RonB001

Well-known member
Joined
Apr 19, 2014
Messages
72
Location
Burlington, NC
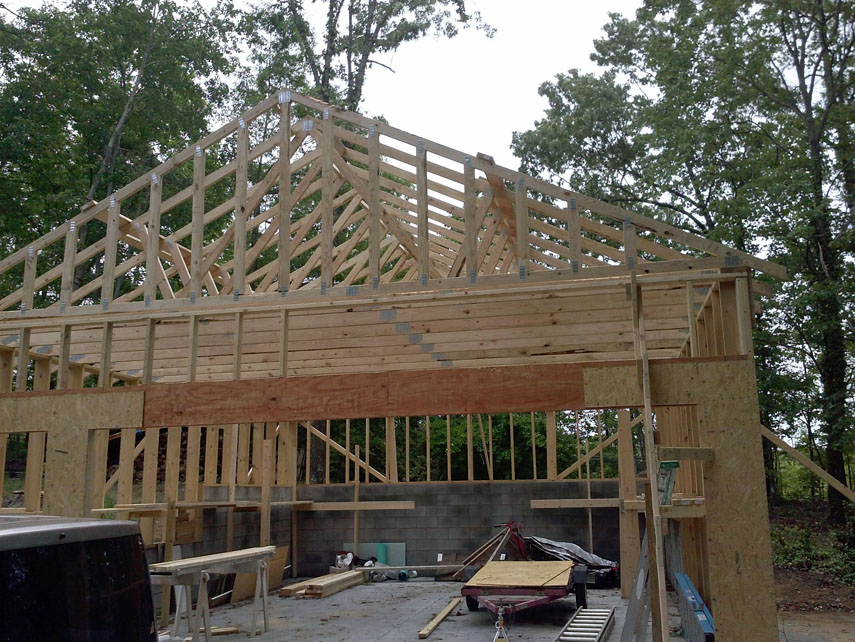
Trusses arrived Friday!

I took a half day off, and got started about 1:30. I managed to get the first 5 trusses set before reinforcements arrived in the form of two of my friends. With their help, and in spite of a couple thunderstorms that blew through, we managed to be finished by 8:00.

CAM00507s.jpg


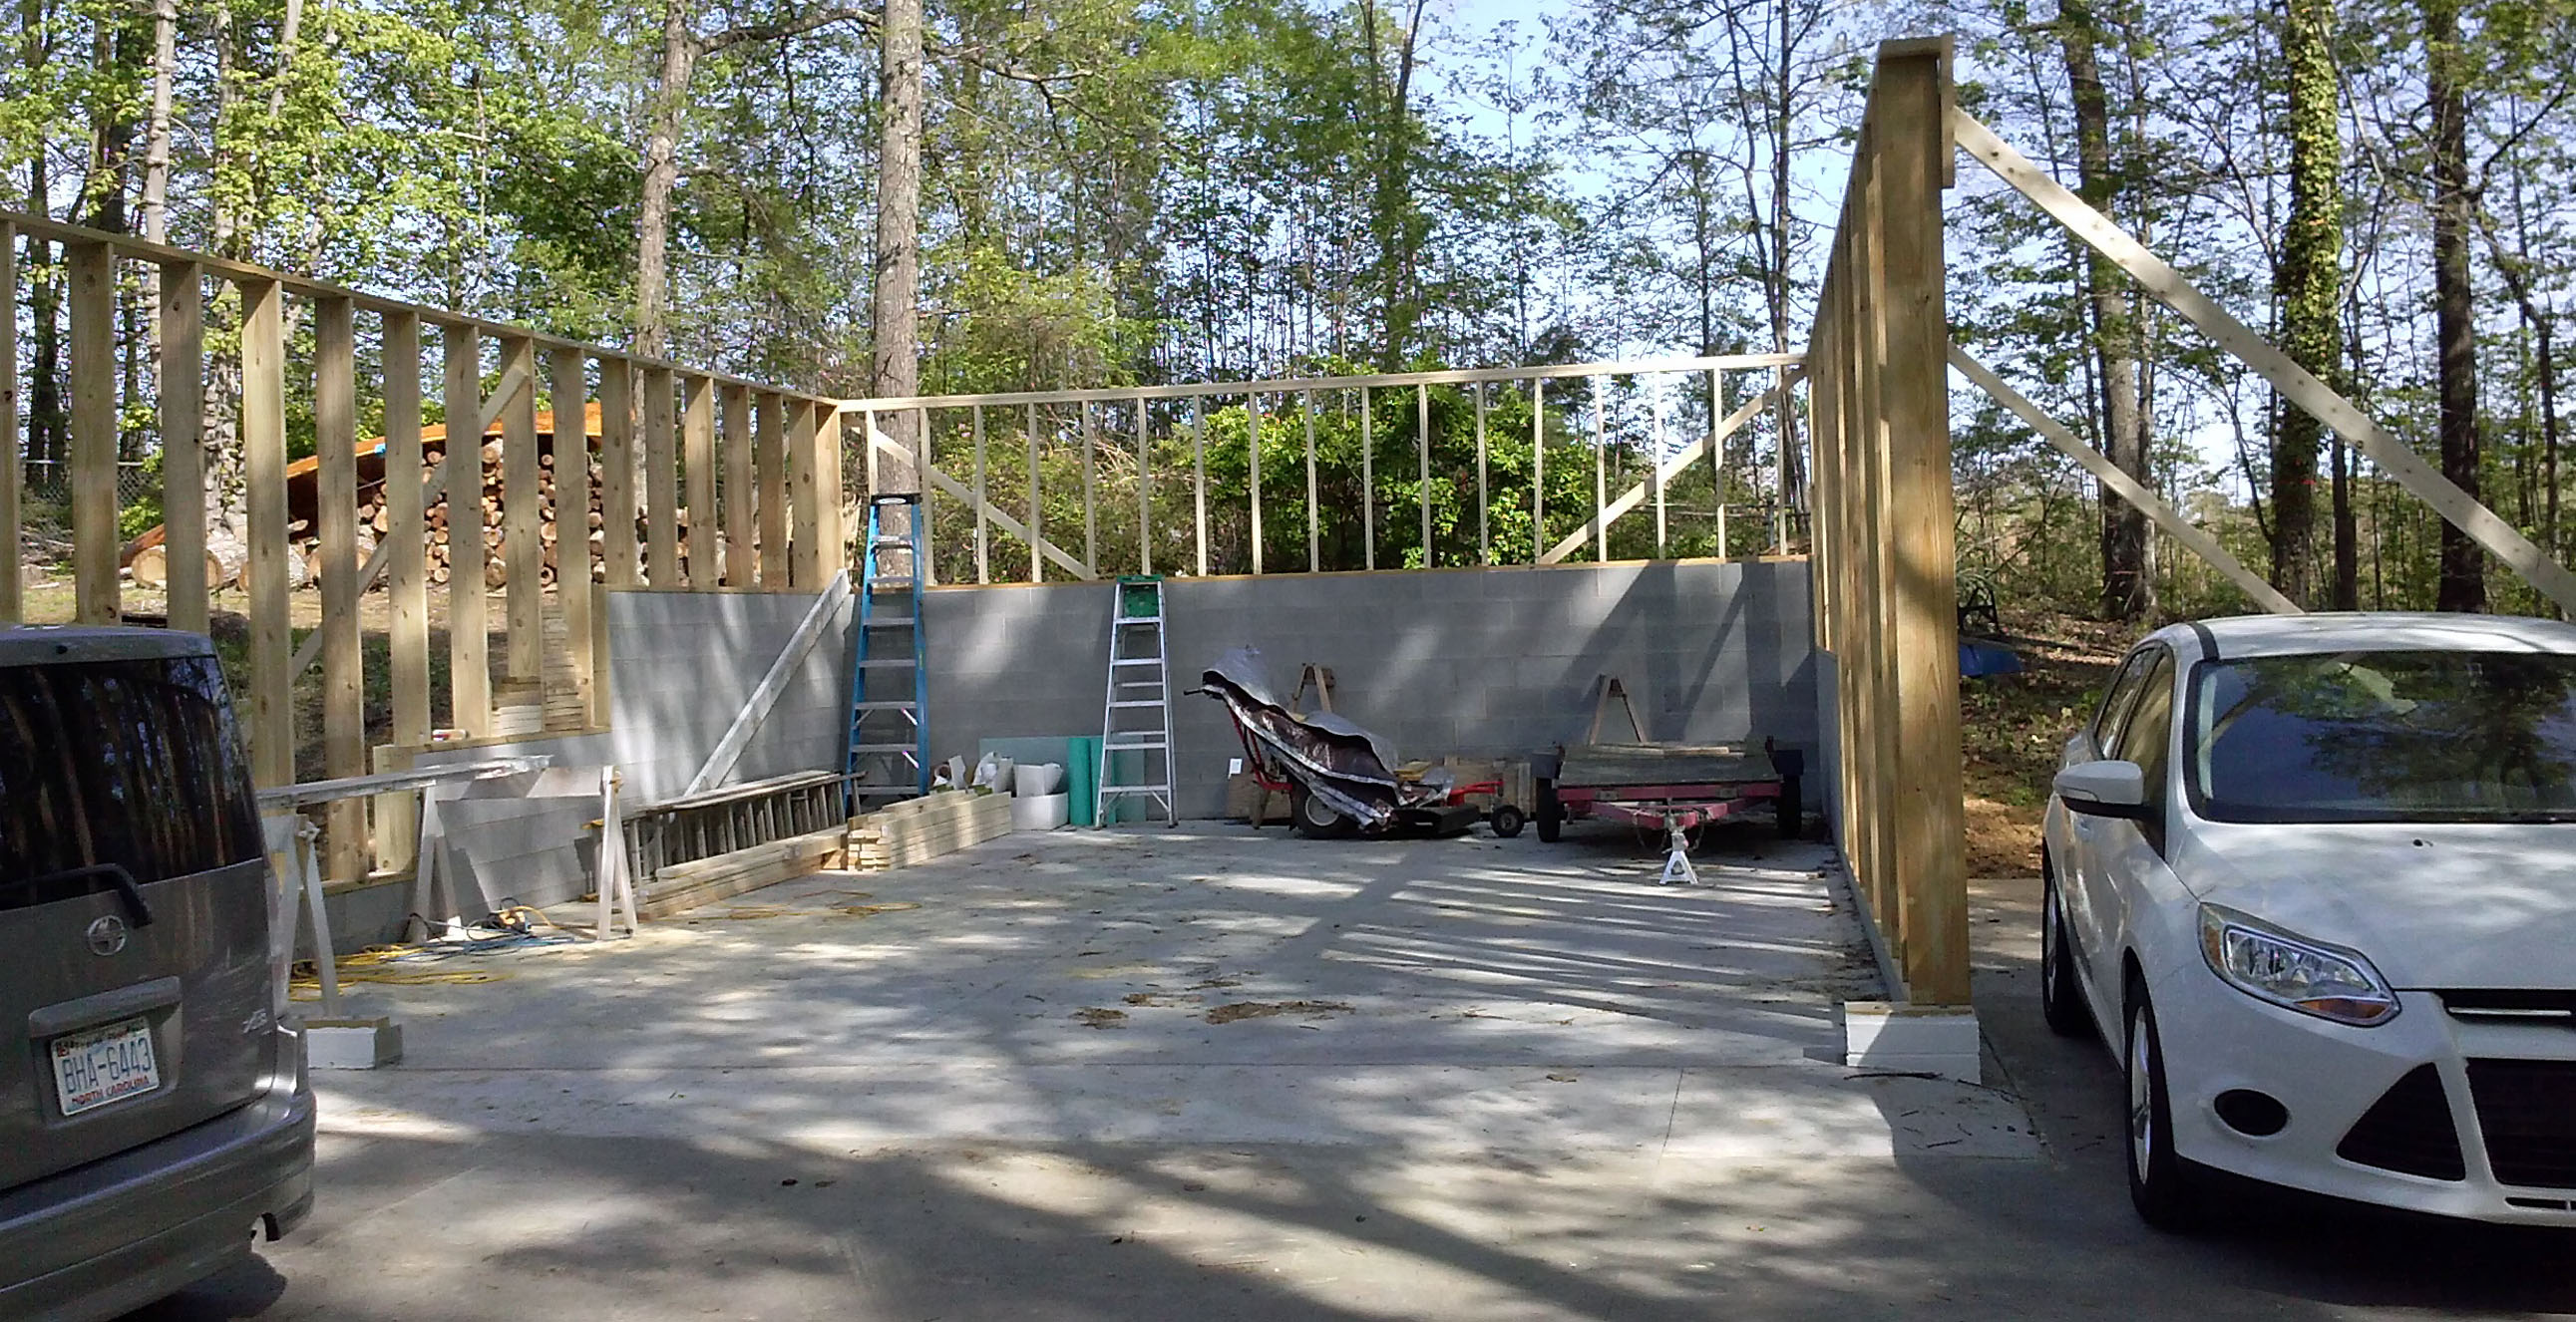
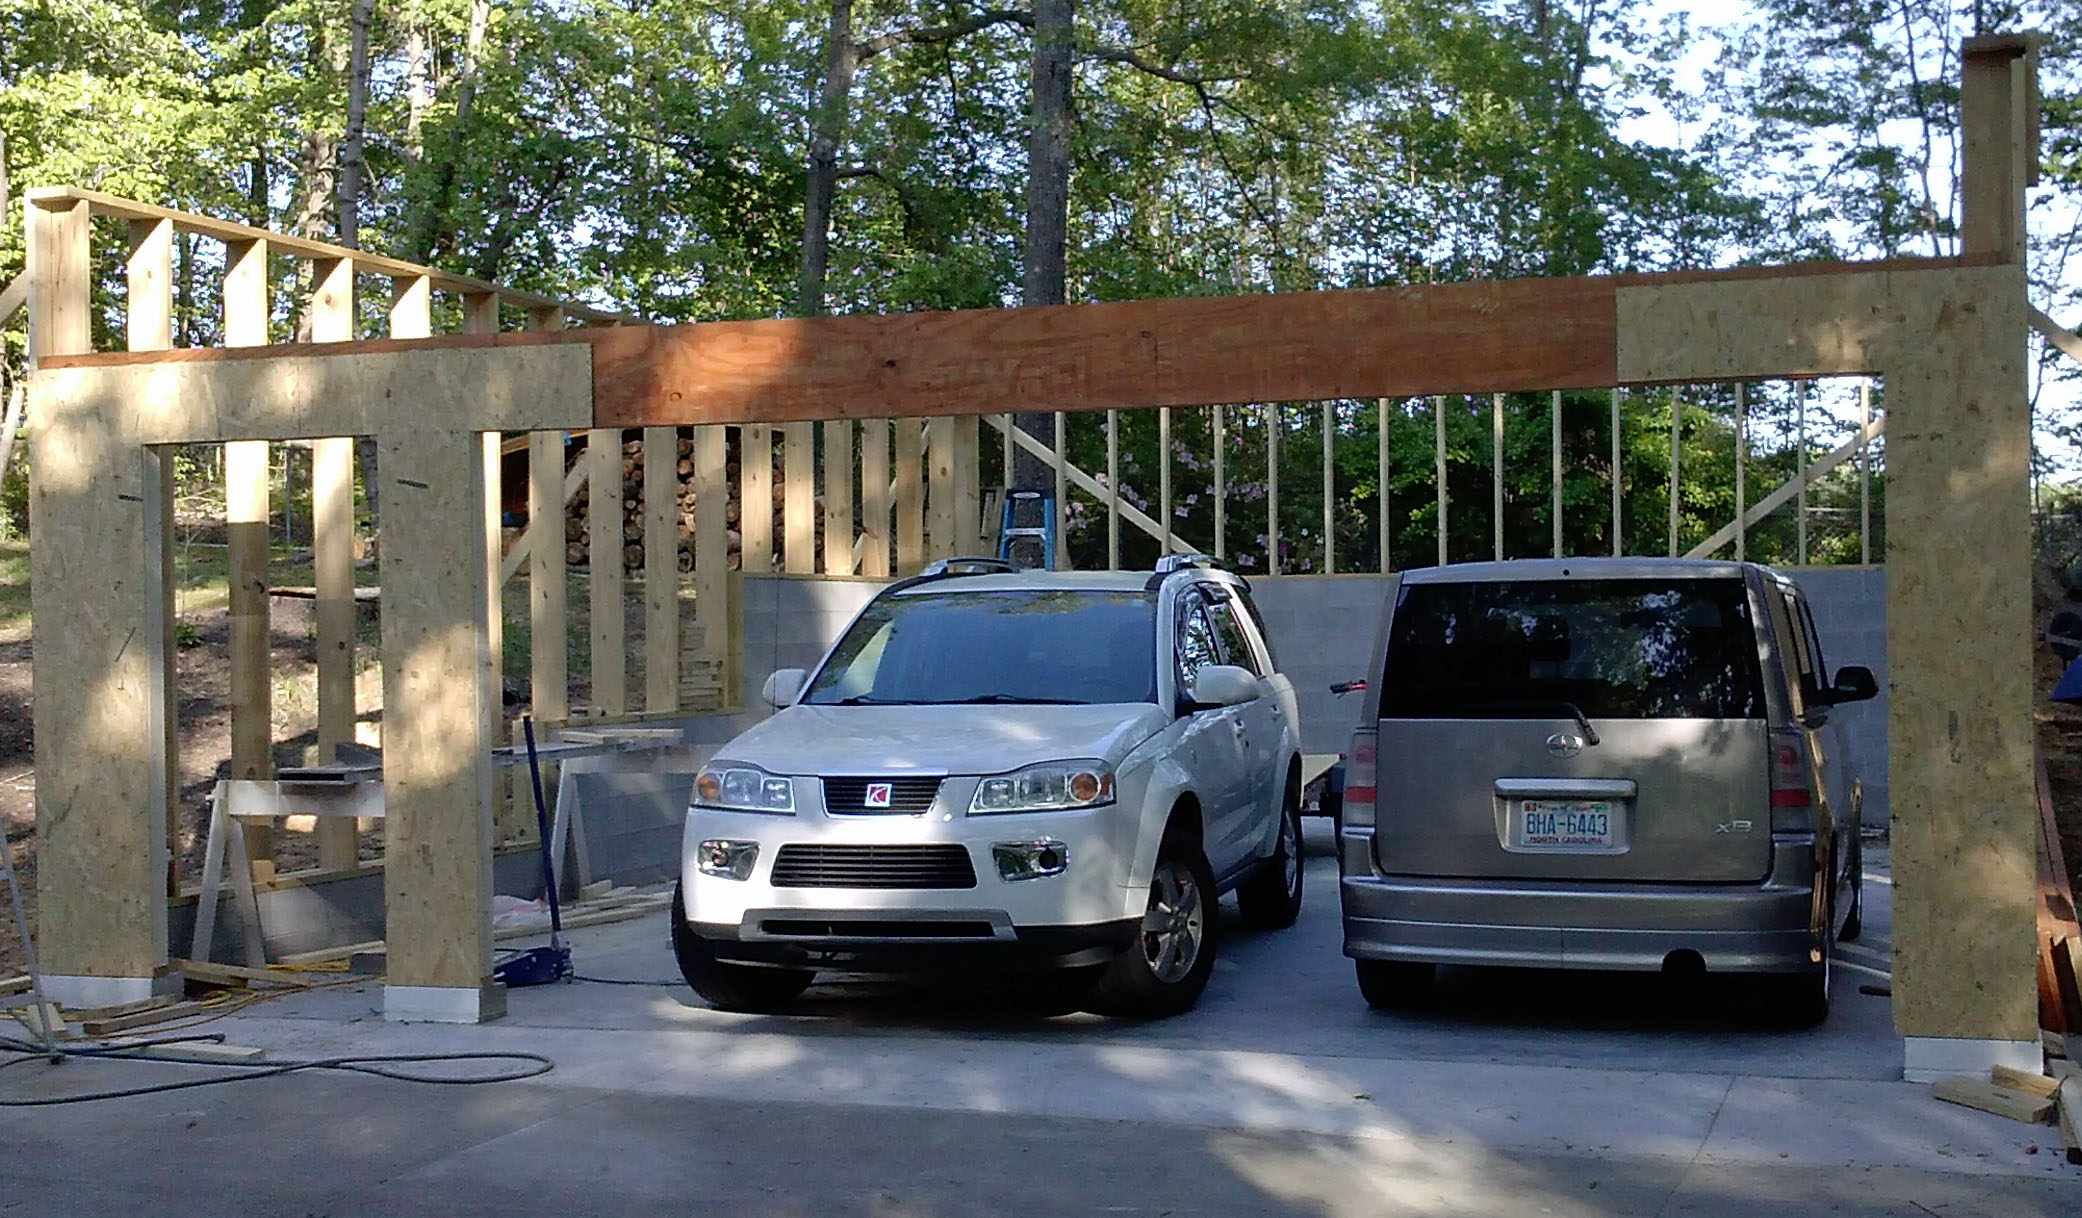
There are a few tricks to setting trusses by yourself. The first thing you need is bracing at the end where the first truss will be set. You need 3 vertical members from the bottom of the wall to the top of the truss at that place. Technically, they should all be braced to the ground; I only braced the middle one.

Next, you need some "helpers" at the end where the trusses are laying on the ground. There needs to be something sticking out from both ends of that wall to support the trusses at the top of the wall. In my case, I had the breezeway beam at the left end, and I fabricated a ramp with 4 strategically located stops. These stops were little wedges of 2x4s at shoulder height, press height, halfway between press height ant the top of the wall, and at the top.

Something new with this batch of trusses (it's been 10 years for me), is that each one was nailed to the next with a little sinker nail. Just enough to keep them from sliding across each other when you break the straps.

I didn't like the horizontal weakness of the bottom chord, so I nailed a 4 foot piece of 2x4 across that splice so that the truss wouldn't break when laying horizontal across the walls. I also nailed a couple blocks sticking up from the ends of each truss, so that they couldn't slide off the walls while I was moving them.

Now, it is time for some physical labor. Drag the truss over to the wall where it starts. Grab the first end about 4 feet from the end, and shove it up the wall. Keep going up until you can catch your helper, and go to the other end. Push that end up also, catching the stops on the helper at that end. At this point, you also need to make sure that the first end doesn't slide downhill off _that_ helper. At this point, you have a truss hanging upside down off the end of a wall.

In my case, the helpers were about 3 feet in from the end of the wall, which had the bottom chord of the truss sticking up enough for me to get a 2x4 under it an pry. It was fairly easy to pry the truss up and over so that it laid flat on top of the wall.

One way to proceed at this point is to have a temporary support wall down the middle, so that you can just slide the trusses to where they will be going. I skipped that step, and carefully slid the truss so that the top slid off the wall and it hung upside down. I then nailed a pre-cut block of 2x4 to the peak to catch the next truss. This is one of those things that we now take for granted, but wasn't possible before nail guns came in to common use.

At this point, it is simple to slide the truss down the wall to the other end of the building. You don't want to go too far at a time, though, or one end might fall off the wall while you are sliding the other end.

After the first truss, I cut blocks to go between the existing truss and the one being erected, to lay on top of the wall and stop the truss where it was supposed to go. I slid the truss up about 8 inches from these blocks, and then started the process of erecting it.

There needs to be a prop cut to the same length as the wall height. Swing the truss up with this prop, and stop when it is flat.

Next, you need a prop long enough to reach from where you can hold it, to the top of the erected truss. In this case (24 foot span, 6-1/2 foot height, 10-1/2 foot wall height), a 16 foot 2x4 was long enough to reach.

With single-handed truss setting, the most critical point is between when you get it up (from the floor), and when you nail it (at the top). If you get this wrong, the truss might fall, it might break into little pieces, and it might bust your head (or other body parts) in the process.

What I ended up doing to manage this aspect, was to use my little utility trailer. I would set the end of the prop on the trailer, slide a block up against it, and nail the block in place. My uneasiness at this process was slightly diminished by the wind blowing in a direction that would have held the trusses up if I hadn't done anything smart.

So, this part of the process looked like: Shove the truss up, nail a block to hold it, throw up the extension ladder, grab the nail gun, run up the ladder, nail the top of the truss. Then, at a bit less frantic pace, go adjust the truss to the string line ( just barely not touching the string; if you touch the string the trusses will gradually push out and you will have a nice convex bow to your facia line) Nail the truss to the wall, take off all the blocking you nailed to it, and remove the nails for reuse, and get ready to repeat.

Each truss need to be nailed to a 2x4 that runs from one end of the building to the other. This can start with a short piece from the start end. When these overlap, they need to have 3 trusses nailed in common, with 2 nails into each 2x4 in each truss. Also, there needs to be a diagonal brace crossing at least the first 4 trusses, nailed into each. I only just barely got these braces in place before the first thunderstorm blew through.

The other detail of truss setting, solo or with a crew, is bracing. There should be a run of 2x4s down each side of the roof with 2 nails into each truss, overlapping with at least 3 trusses nailed in common, in addition to the blocking at the peak. There should also be a diagonal brace for at least the first 4 trusses, with 2 nails into each.

By myself, it would not be finished yet. I had some volunteer labor to do today, and wouldn't have been able to finish until tomorrow. With the help of a couple friends, though, that stage is behind me.

Next up is to place the other beam for the breezeway, and put joists and rafters on that. Before that task, though, I need to use the scaffold I have in place to put the hurricane clips on the trusses in place.
 
Last edited:
OP
R

RonB001

Well-known member
Joined
Apr 19, 2014
Messages
72
Location
Burlington, NC
Not much happening this week. I did get the other breezeway beam up, and the last bit of the wall over the garage door filled in.

I also received a delivery of plywood (really OSB) and lumber for finishing the roof framing, and sheathing the roof and walls. Unfortunately, it is pouring down rain tonight, and I have to go out of town for work this weekend.

Stay tuned next week...

Regards,
RonB
 
OP
R

RonB001

Well-known member
Joined
Apr 19, 2014
Messages
72
Location
Burlington, NC
Well, a bit has happened since the last update. I've just been too busy to post updates :)

OSB went on Sunday afternoon, Monday, and Tuesday after work. This is what that looked like:
CAM00519.jpg

In all, the sheathing of the main roof took about 6 hours.

Shortly after, it was all covered with 30 pound felt. The felt took about 2 hours, and left my back quite sore.

Tonight, I started on the attic floor and the bracing of the bottom chord of the trusses. I prefer to use plywood instead of OSB for attic flooring, but 1/2 inch plywood is so expensive now that I chose 3/4 inch tongue and groove OSB instead. It makes for a nice, solid attic floor, but it is quite heavy to get up there.

I hope to finish the attic and bracing this weekend, as well as start the breezeway roof.

Regards,
RonB
 
To avoid these ads, REGISTER NOW!
Top Bottom