To avoid these ads, REGISTER NOW!

Bubbles in new Polycuramine Basement Floor

mikeyb45

New member
Joined
Apr 28, 2019
Messages
3
Location
Wisconsin
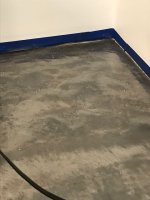
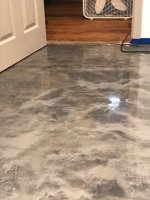
I know this has been covered in some other threads but I think my problem may be a little different than others. I applied 3 boxes of Rust-Oleum Rocksolid Silver Bullet yesterday in a ~130 square foot area of my finished basement. I know this is technically a garage forum but this seems to be the most knowledgeable forum about these types of floors. There are bubbles in some spots that I thought would dissipate as the floor cured, but they did not. I would say that about 80% of the floor looks acceptable to me, and the other 20% has way too many air bubbles. In reading other threads, the air was probably introduce by my method of mixing the metallic powder. It's unfortunate that Rust-Oleum doesn't say anything about this in the instructions, but it is what it is now. I'm not super concerned about the way the bubbles look, but more concerned about the way they feel, being that this is a finished area where my family might be walking barefoot. My question is basically this: could I grind the ridges of the most concerning bubbles with a dremel, and then cover the whole floor with the Rocksolid clear coat kit? Keep in mind that I'm after improving the texture and less interested in the aesthetics. Also note that I'm 6 months into a basement remodel project and just ready to be done with the whole mess. Therefore I don't view grinding the whole thing and starting over as a viable solution. If it comes to be that the Rocksolid floor is not salvageable then I'll just paint over it.

Any help or ideas are most appreciated!
 

Attachments

  • IMG_0439.jpg
    IMG_0439.jpg
    95.2 KB · Views: 94
  • IMG_0440.jpg
    IMG_0440.jpg
    87.9 KB · Views: 98
  • IMG_0441.jpg
    IMG_0441.jpg
    71.6 KB · Views: 91
To avoid these ads, REGISTER NOW!

Shea

Well-known member
Joined
Sep 19, 2012
Messages
2,871
Location
California
Those are some large bubbles. Almost too large to be caused from introducing air while mixing. In addition, the entire floor will usually be affected by tiny bubbles from air introduced during mixing. Did you moisture test before hand? Assuming the results were negative, how did you prep the concrete? If it was via etching, did you allow enough time for the moisture within the concrete to comply dissipate?

Assuming you do not have a moisture issue, you can apply a coat of clear. RockSolid allows 7 days for recoats before any additional prep to the surface needs to be done. Knock down the bubbles with 100 grit sandpaper and then apply a coat of RockSolid clear. Though the area where the bubbles are located will look deglossed and roughed up, the clear will make it all look glossy and good again.
 
OP
M

mikeyb45

New member
Joined
Apr 28, 2019
Messages
3
Location
Wisconsin
I etched using the provided solution and then waited about a day for everything to dry, with heaters and fans going that whole time. Perhaps that wasn't long enough...I did not moisture test. I'm guessing that was my problem then, but odd that some areas are far worse than others. I anticipated that the answer to my problem would be another $300 investment on top of the $400 I already spent, but thanks for confirming! This flooring sure is a risky proposition for a first-time DIYer.
 

Shea

Well-known member
Joined
Sep 19, 2012
Messages
2,871
Location
California
Hopefully the issue is not allowing the slab to dry long enough. 24 hours for a basement slab to dry is too short. However, if you didn't moisture test before deciding on a coating for the basement, then your problem could be moisture vapor coming from under your slab. If that is the case, then you may be experience peeling of the coating sometime in the future. You may want to read this: https://allgaragefloors.com/concrete-moisture-test/
 
To avoid these ads, REGISTER NOW!

LegacyIndustrial

ALLIANCE MEMBER
Joined
Jun 7, 2010
Messages
7,995
Location
deerfield, IL
Big bubbles, as Shea mentioned.
Bubbles like this can happen from air moving over the surface (HVAC, FAN or Draft), vigorous mixing, resin that reacts to certain additives, etc....

They can be dealt with if you spot them early by misting the surface with a good acetone-sprayer loaded with denatured alcohol, however once the floor starts to set it's too late.

You can sand down each bubble, then scuff the entire floor with a green pad, then clear-coat. The bubbles will leave marks for sure but if you are cool with that then go for it.

The only other remedy is to repair them well and re-coat the entire floor, then clear-coat.

Good luck!
 
OP
M

mikeyb45

New member
Joined
Apr 28, 2019
Messages
3
Location
Wisconsin
Big bubbles, as Shea mentioned.
Bubbles like this can happen from air moving over the surface (HVAC, FAN or Draft), vigorous mixing, resin that reacts to certain additives, etc....

They can be dealt with if you spot them early by misting the surface with a good acetone-sprayer loaded with denatured alcohol, however once the floor starts to set it's too late.

You can sand down each bubble, then scuff the entire floor with a green pad, then clear-coat. The bubbles will leave marks for sure but if you are cool with that then go for it.

The only other remedy is to repair them well and re-coat the entire floor, then clear-coat.

Good luck!

I realize I’ll be able to see the sanded bubbles through the clearcoat, but will the floor be shiny again after recoating it? Or will I see scuff marks below?
 
To avoid these ads, REGISTER NOW!
Top Bottom