To avoid these ads, REGISTER NOW!

Build progress of the Busted Knuckle

freddyaudiophile

Well-known member
Joined
Aug 3, 2011
Messages
49
Location
New Brunswick, Canada
Nice work on those cabinets... they look very rugged!!

Can you describe the construction of these a bit in detail for me? What type of wood is used (looks like 2x6 lumber with some routered edges)? What thickness is the plywood?

What are their overall dimensions?

Also, on your miter saw station, what size is the space you left for the miter saw and how deep is that area?
 
To avoid these ads, REGISTER NOW!

bauschracing

Well-known member
Joined
Mar 31, 2011
Messages
117
Location
Springville Alabama
Paint looks better than the stain to me. I wish that I could do woodwork! I would just have to weld up some square tubing if it were me doing the tables and shelving.

Mike
 
OP
B

blurred

Active member
Joined
Dec 31, 2009
Messages
40
Thanks everyone.. I have a couple ideas for the paint, one involves a teal/green color and some white, but not sure how this would work with the paint on the cabinets. Probably going to incorporate some red in there somehow though...

:lol: baus, you wish you could do woodworking and I wish I could weld. Swing on over and teach me to weld and I will show you what I know about woodworking. :lol:

Nice work on those cabinets... they look very rugged!!

Can you describe the construction of these a bit in detail for me? What type of wood is used (looks like 2x6 lumber with some routered edges)? What thickness is the plywood?

What are their overall dimensions?

Also, on your miter saw station, what size is the space you left for the miter saw and how deep is that area?

2x6s of pine for the frame/skeleton and then 3/4 oak sheets for the tops of the cabinets and the center section of the doors.

The overall length of the shelf on the left is about (LxHxD) 112"x43"x26" and the cabinet above is 112"x42"x24" and the shelf on the right is 90"x39"x34" (just the lower section).

Mounted the top cabinet to the ceiling by drilling 6 holes down through the ceiling on each side of the ceiling joice and then using lag bolts and some 4x8s and 2x6s to anchor it in. I can actually hang from the thing and do pullups.:lol:

Any other details you are interested in? Not really sure if I answered you question thoroughly.

and are you talking about the scroll saw that I have mounted on the right table? I don't have a miter saw in the garage..
 

anotheroldguy

Well-known member
Joined
Mar 28, 2011
Messages
61
Location
Upstate NY
Looks good blurred. I see the truck was apart again. Not going to make Stone Mountain this year. I see your wood working talent is on par with your truck work. Keep up the good work on both. Thanks for serving. (Old Guy)
 

freddyaudiophile

Well-known member
Joined
Aug 3, 2011
Messages
49
Location
New Brunswick, Canada
Thanks everyone.. I have a couple ideas for the paint, one involves a teal/green color and some white, but not sure how this would work with the paint on the cabinets. Probably going to incorporate some red in there somehow though...

:lol: baus, you wish you could do woodworking and I wish I could weld. Swing on over and teach me to weld and I will show you what I know about woodworking. :lol:


2x6s of pine for the frame/skeleton and then 3/4 oak sheets for the tops of the cabinets and the center section of the doors.

The overall length of the shelf on the left is about (LxHxD) 112"x43"x26" and the cabinet above is 112"x42"x24" and the shelf on the right is 90"x39"x34" (just the lower section).

Mounted the top cabinet to the ceiling by drilling 6 holes down through the ceiling on each side of the ceiling joice and then using lag bolts and some 4x8s and 2x6s to anchor it in. I can actually hang from the thing and do pullups.:lol:

Any other details you are interested in? Not really sure if I answered you question thoroughly.

and are you talking about the scroll saw that I have mounted on the right table? I don't have a miter saw in the garage..

Sorry... I figured the lower section was for a chop saw... must be for doing work on a stool.
 

Zeke

Well-known member
Joined
Aug 13, 2009
Messages
17,176
Location
Long Beach CA, the sewer by the sea.
I will add to the positive comments on paint vs. stain. If you don't mind, I'd suggest going lighter on the gray. Add a touch of green so that there is no doubt that you can't see blue and do the green you said on the walls. Oh, and red plays into those colors really well.

You'll have Jack running for the paint cabinet. ;)
 
OP
B

blurred

Active member
Joined
Dec 31, 2009
Messages
40
So, not much work has been done to the garage as I haven't had the time... but to add a couple pictures, here are some recent ones from work being done in the garage. ~shrug~

IMG_3530.jpg


IMG_3553.jpg


final outcome:
IMG_3561.jpg
 
OP
B

blurred

Active member
Joined
Dec 31, 2009
Messages
40
Oh, the truck still has plenty of room to fit in there. I still own the black one earlier in the thread. I have about 6-7 more inches I could lift it. :beer:


But yeah, I have some spare cash in my pocket and really leaning towards getting the floor coating, though I also need a few tools. Maybe the wife.. er Santa will bring me what I had on my list...
 

Grizz1963

Well-known member
Joined
Jan 7, 2010
Messages
12,064
Location
Rochester, KENT. UK
Great looking cabinets, and love the tools.
Used to have a pillar drill and thicknesser planer , lathe and table saw before I moved to England.
Now slowly building up a new set of tools..... buying older style solidly engineered rather than disposable import stuff.

I am super envious of the truck.

In England, what you know as mini pickups (Toyota, Isuzu etc ) are work tools, rarely used as daily or family transport. Unlike South Africa where I am from.

Still, would happily have the Chevy.
 
OP
B

blurred

Active member
Joined
Dec 31, 2009
Messages
40
Appreciate the compliments. Personally, I would love to have that little diddy in your avatar. Would be cool to have something so odd around here.
 
To avoid these ads, REGISTER NOW!
OP
B

blurred

Active member
Joined
Dec 31, 2009
Messages
40
And an actual update on this since I haven't done one in quite some time..

All the big tools (jointer/planer, drill press, table saw, etc.) have been sold and now I have the space back in the garage, which is nice. Though I do miss being able to use the tools whenever...


For Christmas I ended up getting this print from the guys that I hang out with. Since the garage adopted the name Busted Knuckle, I had a little fun with photoshop at some point. One of my friends pulled the shot offline and then had the guys in the group (some from as far as Ohio and Pennsylvania) sign the matting that is inside. So now, it hangs on the wall...

IMAG0305.jpg


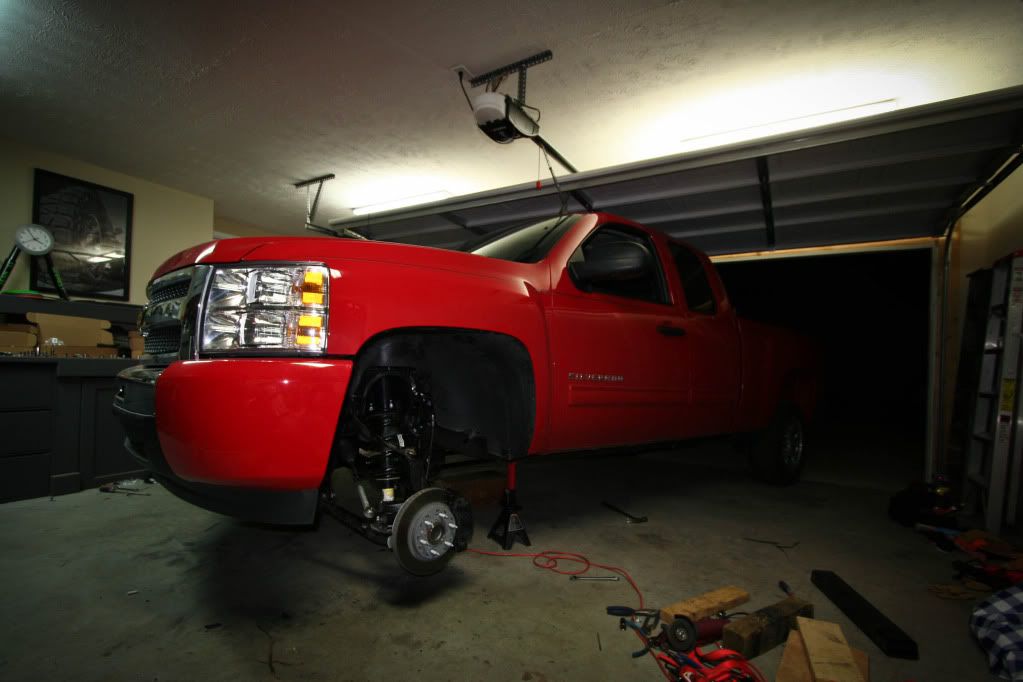
Picked up this jack while I was at it since I sold my old lifted truck and purchased a lowered one. Needed the low-clearance to get under the new one.

IMAG1028-1.jpg


Installed some wheel mounts on the wall to get the extra set (summer/winter) off the ground and safe. Thought about doing the rack/shelf style mounts but opted for this one to 1. take up less space out into the garage and 2. I like the "decoration" of the wheels hanging there.

IMAG1213.jpg


and the new truck

IMAG1224.jpg


I was able to score this tool box for the great great price of Free, so that is in there now.


and finally... made some more progress today. Decided to do the walls in a silver/gray and white two tone. Got the idea off someone on here, though I cannot find it at the moment. So, I have the bottom complete, and here are the pictures.

Had little man out there helping me out.


And where it sits as I left it.


Never realized just how yellow/orange the original paint was.. :lol:

anyway, I will lay down the white paint tomorrow morning then I will need to get a trailer to store the stuff until I have the etching done and the epoxy on the floor.

The epoxy will be a light gray and plan on doing a medium coat of flake over it in black and white, possibly add a little bit of blue in there too to ad some color. That will be here on Wednesday.
 
OP
B

blurred

Active member
Joined
Dec 31, 2009
Messages
40
Progress as of today

Paint complete


wasn't happy with the solid break as some of the paint pealed up due to the humidity so I picked up some cheap trim to toss up there...


Very happy with how it all turned out. Cannot wait to get the floor done now!
 

Omphaloskeptic

Well-known member
Joined
Oct 11, 2008
Messages
2,346
Location
Ultima Ratio, Wa.
Your shop is really coming together!

Getting the painting done is a big milestone and means that you are getting very close to the finish line.

The pics of you and your 'helper' are terrific. Please do get a print or two and mount them in the garage for posterity's sake. Maybe even get a very large frame and matting; big enough matting to allow the both of you to place yours and his hand prints (using finger-paint smear) side-by-side to go along with the pics. As he gets bigger and helps dad in the garage, you can create a whole series of hand print & pics to commemorate the years spent together in the shop. Just a thought.....
 
Last edited:
OP
B

blurred

Active member
Joined
Dec 31, 2009
Messages
40
Your shop is really coming together!

Getting the painting done is a big milestone and means that you are getting very close to the finish line.

The pics of you and your 'helper' are terrific. Please do get a print or two and mount them in the garage for posterity's sake. Maybe even get a very large frame and matting; big enough matting to allow the both of you to place yours and his hand prints (using finger-paint smear) side-by-side to go along with the pics. As he gets bigger and helps dad in the garage, you can create a whole series of hand print & pics to commemorate the years spent together in the shop. Just a thought.....
I really like that idea. In fact, love it.

Will have to work something out with the photo. Really appreciate that idea!!!!!!!!!!!!!
Great benches but I see one thing missing unless I missed it. where's the vise? :)

You... you just.... you just had to remind me... you.... :lol_hitti

I still need to get one. ~for shame!


But, it might happen soon... just decided that I wasn't going to do the floor, just clean it up all nice and neat and put everything back. Very happy with the garage looks right now, no need to do the floor, especially with a possible move in the next year...
 
OP
B

blurred

Active member
Joined
Dec 31, 2009
Messages
40
Made a lot of progress over the last couple days.

Was able to get the cabinets put back to their place, removed some paint from the floors to clean it up a bit and repositioned some stuff, threw out some stuff and just cleaned everything up to be more orderly.


Very happy with the over-all look of the entire garage. Very. Just need to do a little bit of work to clean up the concrete a bit and put up a few other things to finish it off, but I actually had the wife in there today just hanging out while our son played in the door way/driveway. :lol:
 

Omphaloskeptic

Well-known member
Joined
Oct 11, 2008
Messages
2,346
Location
Ultima Ratio, Wa.
"I really like that idea. In fact, love it.

Will have to work something out with the photo. Really appreciate that idea!!!!!!!!!!!!!"


I'm glad you think my suggestion is worth doing; every once in a while one of my J.A.W.I.F.O.'s (Just Another Wacky Idea From Omphaloskeptic) gets implemented. It's what keeps me trying to contribute to this great GJ forum!

Now, that you are on record as making it happen, to spur you on this little project, I (we?) want to see a picture of the finished result! lol
 
OP
B

blurred

Active member
Joined
Dec 31, 2009
Messages
40
Alright, slight update for the garage. Was able to take one of the above photos of my son and I painting and get it printed out and hung up. Going to add a few more signs on each side of the print, perhaps another print somewhere else but very happy with this one...


OP
B

blurred

Active member
Joined
Dec 31, 2009
Messages
40
And today I picked up a vise... finally.


And painted the steps and added some slip-stop tape stuff...


And finally, built a small shelf to go along the right wall to hold our yard shoes and my blower..


enginewizard1969

Well-known member
Joined
Feb 27, 2013
Messages
133
Location
Camberley surrey UK
Looking good :thumbup:

love the woodwork that you have done and the colour combo on the walls. I think a lot of the garages on he have a busted Knuckle sign in there shop I know I have. I mother in law got mine in the states she took one look at it and said it was me to a tee.
 
To avoid these ads, REGISTER NOW!
Top Bottom