Junkman
Well-known member
Remember, you must follow the instructions in the manual, and these photos and description are only intended to help you to understand the assembly proceedure. You are responsible to make sure that everything that you do is done correctly and safely. Failure to follow the instruction manual can lead to injury or death. Please be very careful and read and understand the factory instructions and work safely.
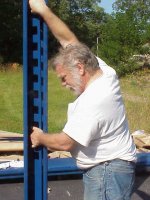
My lift arrived about a week ago, and I finally got time and help to put it together. Below are the pictures of the process. I have to thank Question, a member on this site for the help he gave me in assembling. I started to assemble it with my wife, but we were unable to complete the task due to time, lack of strength, and operator error.. Question (without his permission, I don't want to use his real name.... who knows, he might be in the witness protection program.. ) stepped in to help complete the job.
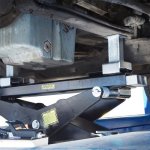
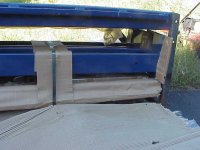
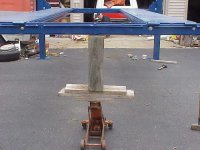
When you get the lift delivered, place some wooden blocks under the runways so the end shipping brackets are not touching the ground. This will make it easier to take them off. The top runway will be the one with the hydraulic cylinder mounted in it, so it will also be the heaviest to lift. Start by removing the plastic wrap, and then remove as much cardboard as possible. Once you have the cardboard removed, you will find the steel strapping holding the corner posts and the cross tubes to the bottom runway. Cut the steel strapping, and start taking everything out from between the runways. You will find one large box containing the hardware & instructions, and another box containing the hydraulic pump. You will need help getting everything out from between the runways, since it is designed to have everything fit in a way that nothing can shift and get damaged.
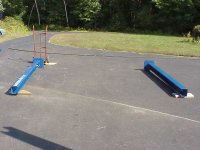
My lift arrived about a week ago, and I finally got time and help to put it together. Below are the pictures of the process. I have to thank Question, a member on this site for the help he gave me in assembling. I started to assemble it with my wife, but we were unable to complete the task due to time, lack of strength, and operator error.. Question (without his permission, I don't want to use his real name.... who knows, he might be in the witness protection program..
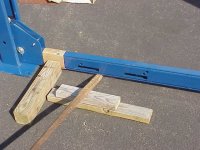
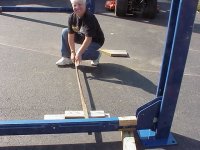
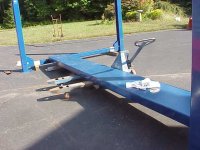
) stepped in to help complete the job.When you get the lift delivered, place some wooden blocks under the runways so the end shipping brackets are not touching the ground. This will make it easier to take them off. The top runway will be the one with the hydraulic cylinder mounted in it, so it will also be the heaviest to lift. Start by removing the plastic wrap, and then remove as much cardboard as possible. Once you have the cardboard removed, you will find the steel strapping holding the corner posts and the cross tubes to the bottom runway. Cut the steel strapping, and start taking everything out from between the runways. You will find one large box containing the hardware & instructions, and another box containing the hydraulic pump. You will need help getting everything out from between the runways, since it is designed to have everything fit in a way that nothing can shift and get damaged.
Attachments


Last edited:


")