To avoid these ads, REGISTER NOW!

Building a buggy: nobggrnchvy

OP
B

bggrnchvy

Well-known member
Joined
Nov 14, 2011
Messages
589
Location
Pleasant Hill, CA
I made series of pickups this last weekend collecting the last large drivetrain parts and some other items I needed.


A friend had a married Ford 205 case he acquired from a mutual friend who has since passed. Really appreciate the gift, as well as the sentimental attachment. The mutual friend was the individual that got me started into crawling and fabricating. He actually built the rock sliders that were on the Chevy and sold me the 60 I solid axle'd it with.


Another friend bought a 4400 car that was originally a trail rig for the old owner of PBB. As such, the seats have the signature green and black on them and the additional bass boat trim package :lol_hitti He replaced them some time ago and was nice enough to donate them to the cause. The passenger seat is ripped, but I already factored in replacement covers if due to nothing else than the color an material choices. They even have seat heaters already, major score.


Last pickup was a rear axle. I had been searching for a reasonably priced 01-07 14 bolt rear axle with less than 200k miles either local or from a non-salt state with cheap shipping. It has been a task. This axle showed up on marketplace one morning, marked down to the right price and I messaged about it. While enjoying breakfast with my wife he responded and even offered to bring it halfway if I was serious...in the next hour. Cash in hand, I drove the 45 minutes to meet him and now have the rear end I need. I wanted to avoid having to rebuild an axle from the housing up again and this doesn't even need brake pads. Spool, 5.38s, cut all the brackets off and start moving forward. Easy.


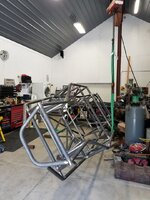
Beyond that, I started running all the root passes for the cage. I am going to try and get all the welds at the right height currently before pulling it out of the fixture and flipping it for the subframe attachment.
 
To avoid these ads, REGISTER NOW!
OP
B

bggrnchvy

Well-known member
Joined
Nov 14, 2011
Messages
589
Location
Pleasant Hill, CA
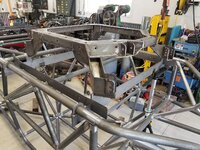
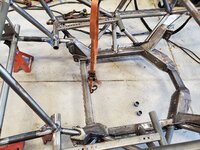
The chassis got pulled from the fixture and flopped onto it's lid this weekend.

20210508_132906.jpg

With it upside down, I removed the fixture plates from the table and rest them onto the rockers, but in the flipped position to locate the subframe I had previously welded together.

20210508_142057.jpg

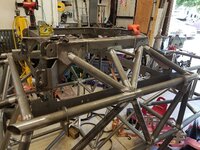
I hoisted the subframe onto the bottom of the buggy and spent a while getting it centered up. The upper link mount arms look to have drawn inwards a bit when welding out so the position notches are a little shy of positively locating it.

20210508_143329.jpg

In place I tacked all the support tubes that fit with the fixture plates still on. Then I started welding them out to make sure it was in place. Next up is dropping the plates out and fitting the last 6 support tubes.

20210509_163954.jpg

Beyond that, I just keep plugging away at all the root passes. Some joints will not need a cover, but the throat on quite a few is too small with just a single 1/16 filler pass.
 

rattle_snake

Well-known member
Joined
Jun 25, 2015
Messages
5,221
Location
Chandler, AZ
Man you are moving right along on this. I'd be stuck in analysis paralysis. So many decision to make with a build like this. Nice work, welds.
 
OP
B

bggrnchvy

Well-known member
Joined
Nov 14, 2011
Messages
589
Location
Pleasant Hill, CA
Man you are moving right along on this. I'd be stuck in analysis paralysis. So many decision to make with a build like this. Nice work, welds.

I've been planning this for about 10 years. A lot of decisions where made well in advance of any work getting done or parts being purchased.
 

fordkid88

Well-known member
Joined
Nov 10, 2013
Messages
680
Fabricator question, how are you fighting pull and shrinkage? How often do you have to straighten? Can you safely heat straighten if need be?
 
OP
B

bggrnchvy

Well-known member
Joined
Nov 14, 2011
Messages
589
Location
Pleasant Hill, CA
Fabricator question, how are you fighting pull and shrinkage? How often do you have to straighten? Can you safely heat straighten if need be?

I'm just using the welds to pull my cross dimensions in. All the fit-up is very tight being laser and plasma notched from parametric data and it's only mild steel and tacked well so it isn't moving much.

This chassis is so rigid from all the nodes and multiple planes once you have it stiched, no localized heating it going to make much difference dimensionally.

The lower subframe locked in well enough with all the tab and slots and tacks, even after all the heat from the mig it's only got a heavy 1/16" of potato chip in the long direction. That is tighter than I hold my guys to at work with large stainless space frames.
 

LXCam

ALLIANCE MEMBER
Joined
Apr 23, 2013
Messages
19,175
Location
AZ
Wow what a project. Now you've got another follower.
 

fordkid88

Well-known member
Joined
Nov 10, 2013
Messages
680
Thanks for the reply, I ask because I work in a stainless steel fab shop and I know with stainless that if you look at it wrong it's pulling and warping, and we're 99% Tig so we have a lot of heat input.

Ive done a lot of reading on frame building as I'd like to get into this in my own shop and read plenty on special weld procedures and watching heat affected zones and compromising the chassis from to much heat. Obviously you're on your game here and I appreciate the input, seems like most things fitment is everything.
 
OP
B

bggrnchvy

Well-known member
Joined
Nov 14, 2011
Messages
589
Location
Pleasant Hill, CA
Thanks for the reply, I ask because I work in a stainless steel fab shop and I know with stainless that if you look at it wrong it's pulling and warping, and we're 99% Tig so we have a lot of heat input.

Ive done a lot of reading on frame building as I'd like to get into this in my own shop and read plenty on special weld procedures and watching heat affected zones and compromising the chassis from to much heat. Obviously you're on your game here and I appreciate the input, seems like most things fitment is everything.
I actually manage a food and beverage Filtration oem when I'm not home. It is hard to find fitters and welders that can actually build true 304 frames, let alone autogenoualy purge weld 316 tubing without carbide precipitation.
 

fordkid88

Well-known member
Joined
Nov 10, 2013
Messages
680
I actually manage a food and beverage Filtration oem when I'm not home. It is hard to find fitters and welders that can actually build true 304 frames, let alone autogenoualy purge weld 316 tubing without carbide precipitation.
That's awesome. We do a lot of our frames outs of 304 schd 40 pipe and I **** and putting those together but when it's box tubing its not bad. We do quite a bit dairy tubing and it's a pain in the *** because one of our customers has 0.030 tolerance and it's autogenous as well and its pain in the ***. I've just come up on a year in this field and its been a hell of a learning curve.
 
OP
B

bggrnchvy

Well-known member
Joined
Nov 14, 2011
Messages
589
Location
Pleasant Hill, CA
Just welding away, one joint after another.

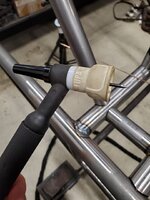
I learned a new trick from a friend, Furick 12 cup, 150a straight and 3/32 rod gets it done in one. Works pretty well for a cover pass on the other roots too, just have to be careful with the 3/32 overlay as you can **** enough heat from it that it doesn't wet well and you show some cold lap. With the back of the garage closed so there isn't a breeze through, it sips gas at about 13cfh too which is at or better than an #8 gas lense cup.

20210613_202312.jpg
20210612_143911.jpg
20210613_201255.jpg
20210613_201239.jpg

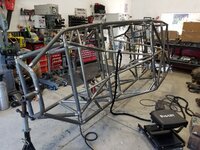
My home for most of Saturday as I did tig yoga inside of a cage.

20210612_135346.jpg

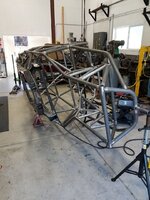
It's upside down again now. Hopefully on more weekend and it's solid.

20210613_202247.jpg
 
OP
B

bggrnchvy

Well-known member
Joined
Nov 14, 2011
Messages
589
Location
Pleasant Hill, CA
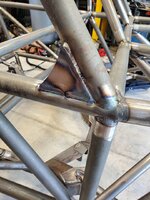
I finally reached the milestone of having all the tubes welded out end of day Saturday. Really glad to be done with that task. The over engine crossmember is the only one not burned in. I don't like it's fit as it's about a 1/8th short, but I picked up some weld in tube connector bungs in place of the flat plates supplied that I will use to make that up and move the tube forward a little.

20210626_170024.jpg

Sunday I had to weld in the 6 plate gussets that come in the kit. Two at the A pillar, and 4 that support the structure of the rear seat frame where you can not fit any diagonal bars. On top of those, I fit and tacked the rear bench seat mount in.


20210627_162632.jpg
20210627_162623.jpg

Moving onto other components, I split the two rub rails and weld prepped then and the rocker tubes and got one side fit. I test fit the boatside skid to make sure the holes fit and started to fit the rest of that boatside's mounts when I had to shut down for the day.

20210627_164457.jpg
20210627_190019.jpg
 

Mr.N

Well-known member
Joined
Jul 13, 2005
Messages
2,222
Location
Mpls, MN
I finally reached the milestone of having all the tubes welded out end of day Saturday.
Congratulations BggrnChvy! That has to feel soo nice... if only it was the last weld ;)

So, can you share your first tube weld vs your last? I would guess you improved with that much welding.


.
 
OP
B

bggrnchvy

Well-known member
Joined
Nov 14, 2011
Messages
589
Location
Pleasant Hill, CA
Congratulations BggrnChvy! That has to feel soo nice... if only it was the last weld ;)

So, can you share your first tube weld vs your last? I would guess you improved with that much welding.


.
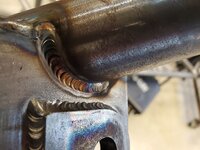
Fortunately/unfortunately all of the first tube welds were roots and have been covered to get to a final throat. I did find this weld I made about the end of day Saturday which is right next to the welds I made to attach the link bolt doubler plates.

20210629_081033.jpg
 
Last edited:
To avoid these ads, REGISTER NOW!
OP
B

bggrnchvy

Well-known member
Joined
Nov 14, 2011
Messages
589
Location
Pleasant Hill, CA
Good looking TIG welds on your chassis. I'm enjoying following along on the progress.

Thank you.

Those welds look awesome!

Started thinking color for paint?

No idea. Wife has ixnayed green before we even started it, not that I'm much for flashy color. Friends suggested power coat which I honestly hate for a crawler. I'm leaning towards a weldable primer like Steel It.

Clear coat!

It is an option!

Slow progress the last couple of weeks. Personal life issues combined with significant professional change at the same time overlapping a holiday weekend. I did get some items knocked out.

I pulled the rear seat and sway bar mount out and cut all the tacks and refit it all. Drew gave me the outside to outside dimension to hit for the bench I will be running so making sure that was locked in was the most important.

20210711_150802.jpg

I welded it out on the bench, which was a really nice change from working at less comfortable heights and angles on the chassis.

20210711_160327.jpg

It was dropped back in and fit very well, just needed a little pull on one corner to lay dead flat. I also dropped in and laid out the mount for the front seats and center console and tacked them in.

20210711_164950.jpg

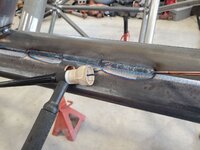
The real time **** has been welding in the rub rails, just a lot of filler needed to fill the gap between the 2x4 .188w box and .120 round. I ran straight 3/32 @ 200a for most of it. I decided on the bottom of one side to try something I have not done before, walk the cup. I dialed back my amperage to about 180 and actual used a lay wire technique with two 3/32 rods. The motion is hard to be consistent with and is something I'll have to practice more with. I found it difficult to maintain the motion while traveling more than a few inches as I felt I was no longer comfortable. Not the best result, but I am glad I tried it. It really laid down some material. Regardless, they are both welded all the way around now. The belly skid mounting tabs also got fitted, check and welded out but I forgot to take a picture before I flipped the chassis again.

20210711_143141.jpg
20210711_173618.jpg

Next task is fitting the over engine tube with weld in bungs.

20210711_173704.jpg

On closer inspection I am a little suspect of the actual minimum cross section. If they were used in something seeing shear or tension primarily I think they would be a failure waiting to happen.
 

fordkid88

Well-known member
Joined
Nov 10, 2013
Messages
680
For walking the cup that fupa might be a bit of a pain in the *** as you have to have your stick out pretty far. Try an 8 cup with less stick out so your pointed more into the material and less towards the direction your traveling.

I don't know what that joint or gap looked like previous to welding but when we have large grooves at work we crank the heat and grab 1/8 wire and point the torch pretty much 90 degrees to the material and flow it fast, no motion doesn't matter what it looks like as long as it fills it. It'll give you a minimal heat affected zone and then you can do a cover pass at much lower amps to help walk it
 
OP
B

bggrnchvy

Well-known member
Joined
Nov 14, 2011
Messages
589
Location
Pleasant Hill, CA
For walking the cup that fupa might be a bit of a pain in the *** as you have to have your stick out pretty far. Try an 8 cup with less stick out so your pointed more into the material and less towards the direction your traveling.

I don't know what that joint or gap looked like previous to welding but when we have large grooves at work we crank the heat and grab 1/8 wire and point the torch pretty much 90 degrees to the material and flow it fast, no motion doesn't matter what it looks like as long as it fills it. It'll give you a minimal heat affected zone and then you can do a cover pass at much lower amps to help walk it

Good input. The diameter of the cup defintely made the motion exaggerated. I tried several different stick out lengths, that one being the last, but not necessarily the best.

I dont have any 1/8 ER70 on hand, which was why I was fudging with 2 peices of 3/32. A single peice of 1/8 and a little more amperage running straight might have been the right solution to properly fill the joint in one pass. I will keep that in mind.
 
OP
B

bggrnchvy

Well-known member
Joined
Nov 14, 2011
Messages
589
Location
Pleasant Hill, CA
I haven't touched the chassis in a month. Lots of things going on, but I should have some more content this weekend.

I rode with some friends and did a 4 day Con trip this last weekend. Fun not fixing everything all weekend :lmao:

20210806_114612.jpg
20210807_103951.jpg
20210808_070514(1).jpg
20210808_100230.jpg

I did get the front seats back from PRP after recovering eliminating the glitter finish and tears.

20210811_152243.jpg
 
OP
B

bggrnchvy

Well-known member
Joined
Nov 14, 2011
Messages
589
Location
Pleasant Hill, CA
A few hours of time in the garage this weekend. I finished making the floor tubes removable for easier servicing and pulling of the transmission and cases as well as welded up the shifter mount.

20210814_171600.jpg

The center seat and console mount got welded out to fix the tubes together. Then I taped out the tube that needed to be removed to set the tube disconnects.

20210814_174252.jpg
20210814_180159.jpg
20210814_181300.jpg

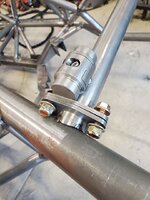
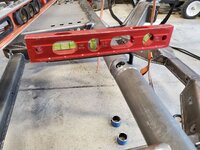
I lopped out the center frame and deburred and cleaned up the ends and fit the disconnects. I used the allen key and a torpedo level to get them all facing roughly the same direction. A 3' level and a couple of clamps got it all lined back up and I tacked the ends in.

20210815_135548.jpg
20210815_135535.jpg

Then they all got welded out. I flipped the chassis over and welded the back side in position afterword's which is how it sits at the moment.

20210815_131159.jpg

Lastly I pushed and pulled the shifter mount together and burned it together. It was a little gappy, and it's all laser cut so the edges are pretty sharp so it's going to get a bit of roloc sanding/buffing love this week to make it more presentable.
 

Bob Heine

ALLIANCE MEMBER
Joined
Oct 24, 2009
Messages
10,708
Location
Boca Raton, Florida
20210815_131159.jpg


Lastly I pushed and pulled the shifter mount together and burned it together. It was a little gappy, and it's all laser cut so the edges are pretty sharp so it's going to get a bit of roloc sanding/buffing love this week to make it more presentable.
Are those cup holders or sockets for a huge pair of masts to go land sailing?
 
OP
B

bggrnchvy

Well-known member
Joined
Nov 14, 2011
Messages
589
Location
Pleasant Hill, CA
It was a weekend of project catchups. Cleaning up the garage, new tubes in the wife's bike, finally mounted the step on the trailer, did another wheel seal on the truck.

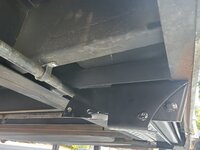
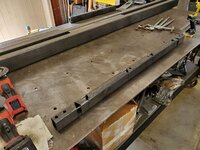
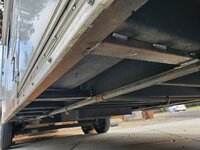
It's not the buggy, but I unbolted the gas line and cut some 2x2 1/4" angle drops to make mounts for the trailer step we haven't had. I laid out the holes and got everything knocked into place and burned it in upside down with the hot metal glue gun.

20210821_123211.jpg
20210821_125114.jpg
20210821_125135.jpg
20210821_181709.jpg

It was a tight fit, glad I didn't have rework the gas line.

Buggy side I formed up and got the engine crossmember partially welded out.

20210822_153042.jpg
20210822_164544.jpg

Rear seat mount and the lower link bolt hole doubler plates all got welded out as well, forgot to take pictures.
I also bought a used BMW 550i 850w brushless fan and a cheap PWM generator from ebay. I'm going to play with the signal and see if it operates the same way Spal brushless fans do. If it does, I just need a Spal thermostat and some connectors to have a fully modulating electric cooling fan. They're cheap too, less than $100.

20210818_174404.jpg
 
OP
B

bggrnchvy

Well-known member
Joined
Nov 14, 2011
Messages
589
Location
Pleasant Hill, CA
The way that square tube was cut for the cross member is genius.
It's becoming an industry standard.

We do a similar process for our frames at work. I have a vendor laser cut and tab and notch stock tubing so we're a day away from a welded out frame when an order comes in. The fabricator just takes a hammer and knocks out the wedges and then folds the tube over by hand to create 90* mitered corners. It really makes the outside corners look good as well.

20210824_130150.jpg
20210824_130113.jpg
 

fordkid88

Well-known member
Joined
Nov 10, 2013
Messages
680
It's becoming an industry standard.

We do a similar process for our frames at work. I have a vendor laser cut and tab and notch stock tubing so we're a day away from a welded out frame when an order comes in. The fabricator just takes a hammer and knocks out the wedges and then folds the tube over by hand to create 90* mitered corners. It really makes the outside corners look good as well.

20210824_130150.jpg
20210824_130113.jpg
I talked to my foreman today about doing our skids like this, he kinda shot me down saying the owners wouldn't really go for it, especially since 75% our frames are made from pipe. Kinda ***** because we don't have any decent equipment in our shop. Everything is 30 years old and beat to hell so it really makes putting stuff together a nightmare and this would have made things so much easier.
 
To avoid these ads, REGISTER NOW!
Top Bottom