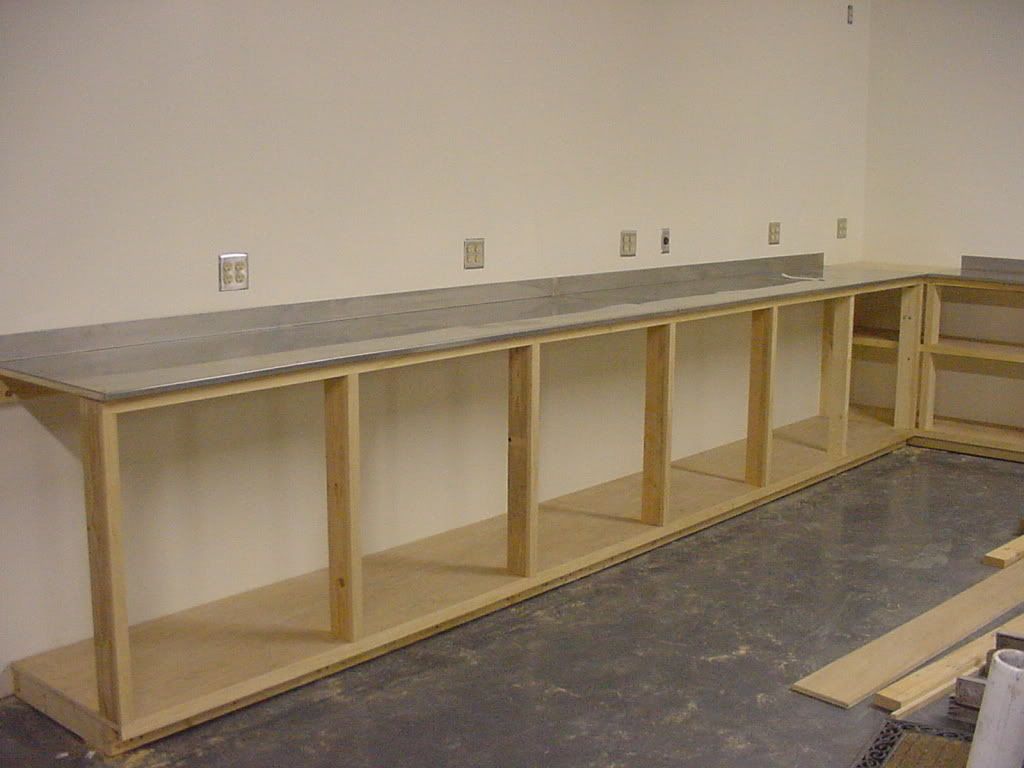
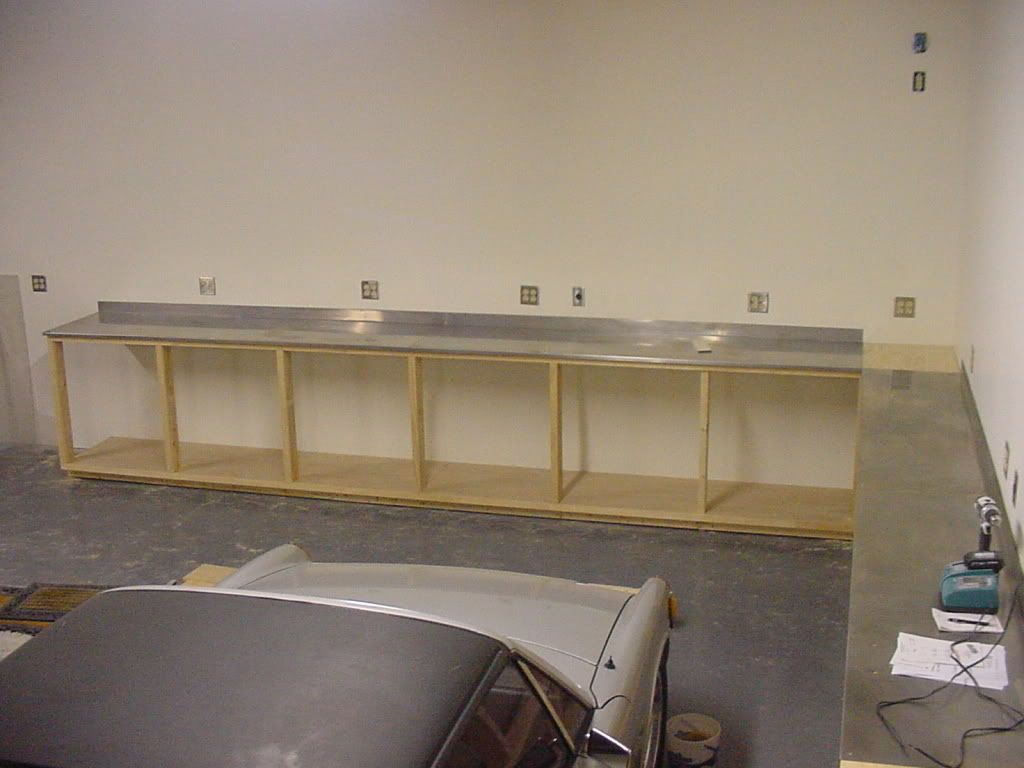
These are for storage as much as they are for work tops. I really like to be able to wipe the work surface down and have a clean dry area to work.
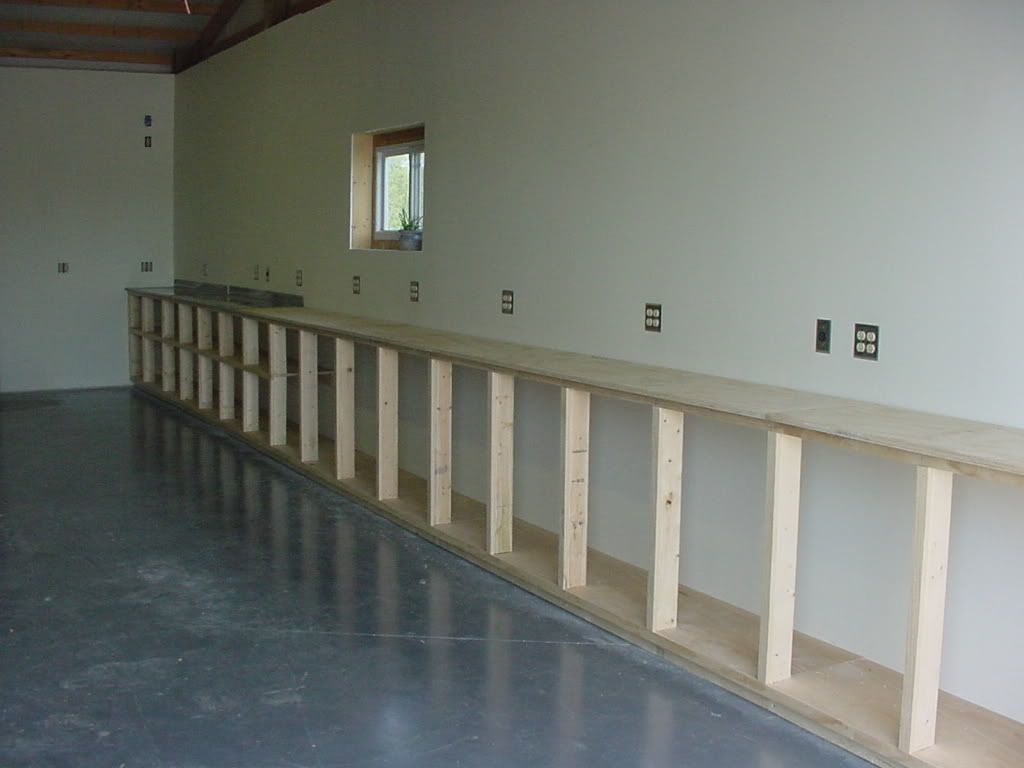
The only shelves (in the lower base cabinets) will be the ones shown.
There will be upper cabinets (with shelves) hung on the walls above the base cabinets.
These benches (and the storage space below) are sized for the space they occupy as well as for the items to be stored (mostly boxes, totes, and crates).
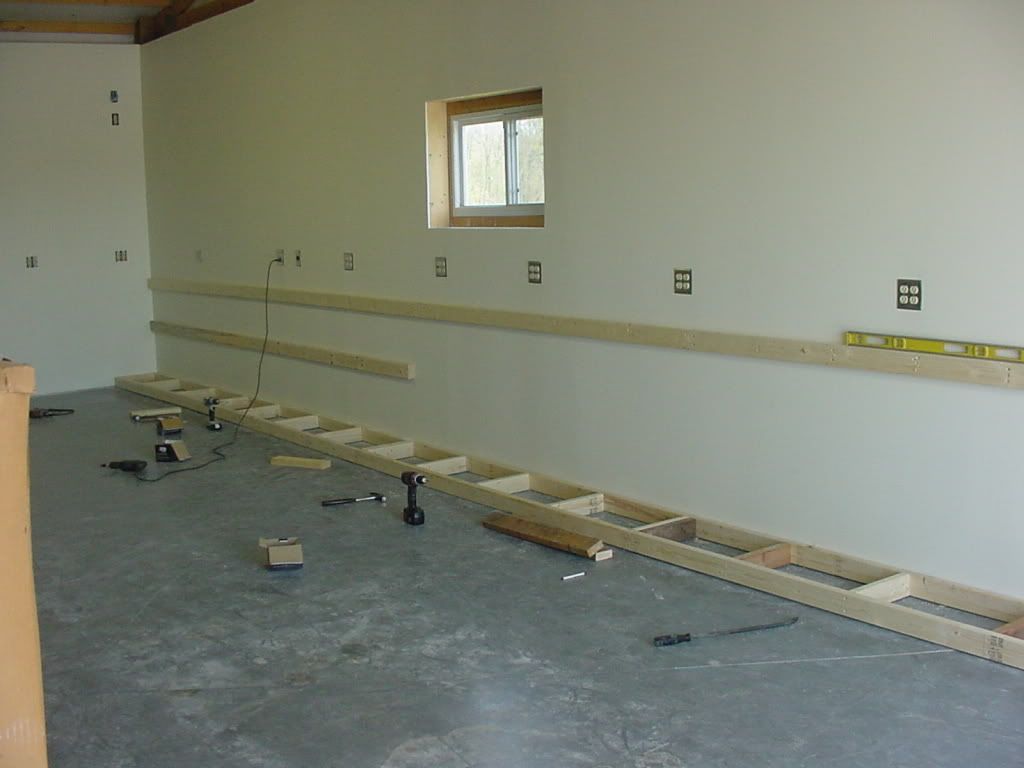
My new shop(pole barn) has no attic (trusses are 8'-0" O/C), so I need the storage space for items I used to store in the attic.
When dirt becomes an issue (and I know it will), I may look at doors more closely, but at the present, I have no plans. I need the storage space more than I need cleanliness right now.
As far as my outlets go, I will never want for more (at least in these areas). I dislike extension cords, and some items may remain plugged in taking one or two sockets. These are all 20A and the voltage drop from the breaker is minimum.
When the upper cabinets are hung, I will run my air lines (which will be tight up against the bottoms of the upper cabinets).
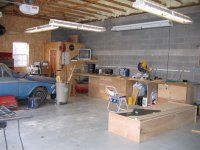
They were simple to build, are plenty strong (strong enough to support a complete engine or trans), and with the exception of the stainless tops, were reasonably economical to build. A skill saw (circular saw), an 8' straight edge, a table saw, a chop saw, electric screwdrivers, hammers, and a nail set were the major tools used to build. Other items like glue, clamps, stud finder, would be useful as well.
Find a buddy to loan you tools you don't have. (I'm borrowing the chop saw and 8' straight edge). That way, when the project is done, you don't have to store the tools and you don't have a bunch of money ******* in tools you may not use enough to justify the expense.
Good luck with your project.
An old thread with my old shop is here:
http://www.garagejournal.com/forum/showthread.php?t=13954&highlight=stainless&showall=1


 . I would say before you go out and start buying a bunch of wood and stuff to make cabinets try getting them for FREE


 Can't wait to see this finished. Are you going to have more shelves than what you show so far? Looks good
