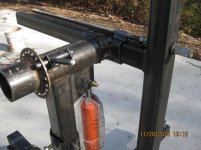
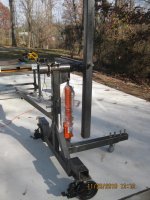
To avoid these ads, REGISTER NOW!

Building my ROTISSERIE!!

MP&C

Well-known member
Joined
Oct 21, 2009
Messages
4,405
Location
Leonardtown, MD
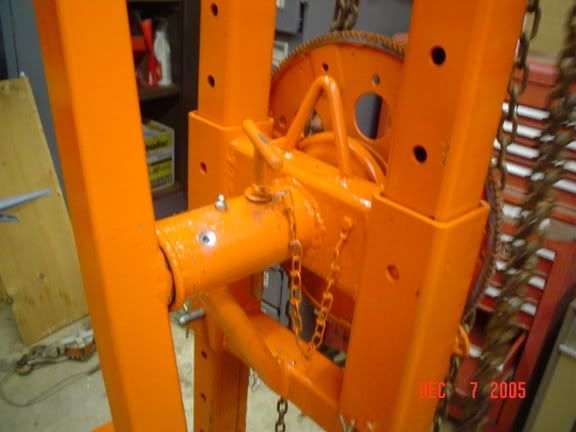
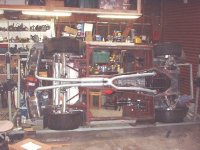
etek, with most of the car's weight situated above the pivot point, that is going to be a bit top heavy where it may get away from you on the first rotation. I found these pics online where someone had a similar design where the pivot did not have a CG adjustment; he installed a flywheel and crank handle to permit a more controlled rotation once the weight factor takes over. May not be as much an issue with the weight of the (240z?) over a larger car, but once you get doing body-off's on something larger, it may be a modification to look at.
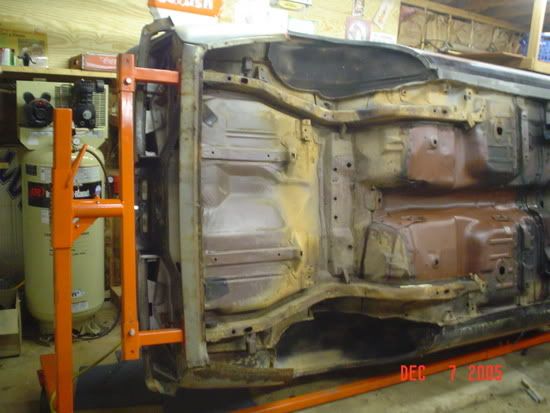
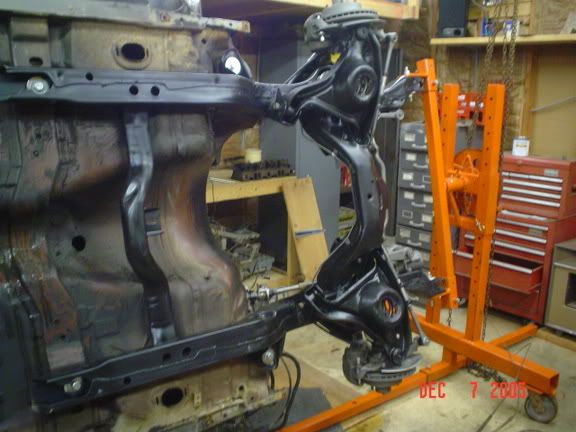
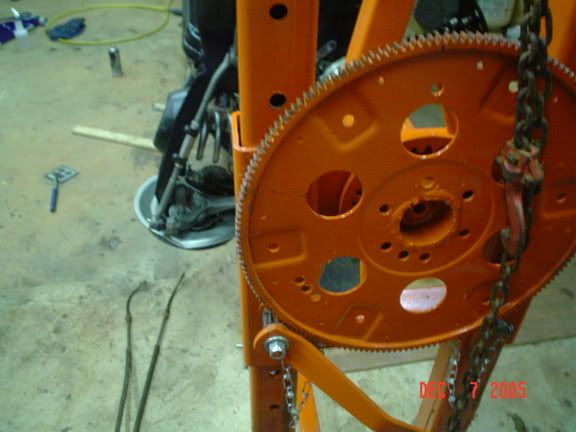
rottisserie.jpg


rottisserie2.jpg


rottisserie4.jpg


rottisserie5.jpg


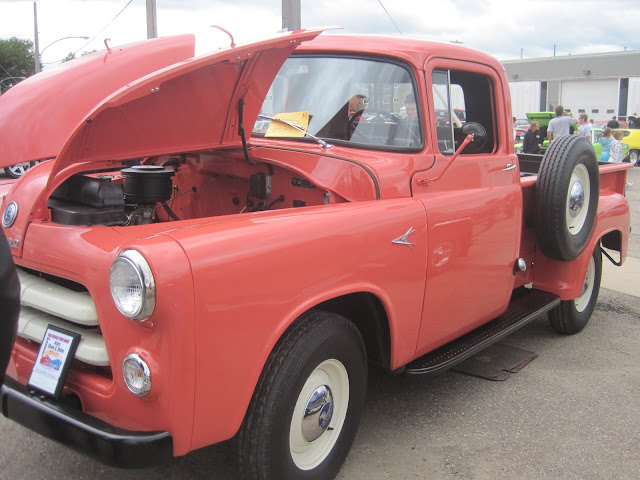
Was the car show at a local Mopar dealer? Your Challenger is looking good!


:thumbup:
 
Last edited:
To avoid these ads, REGISTER NOW!
OP
E

e-tek

Well-known member
Joined
Dec 19, 2007
Messages
10,690
Location
Saskatoon, SK
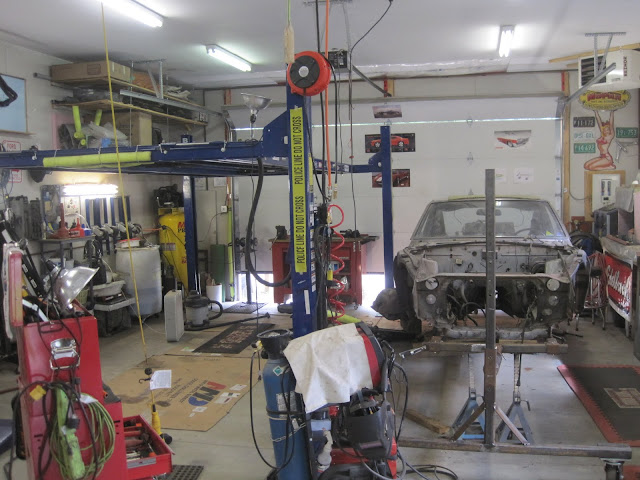
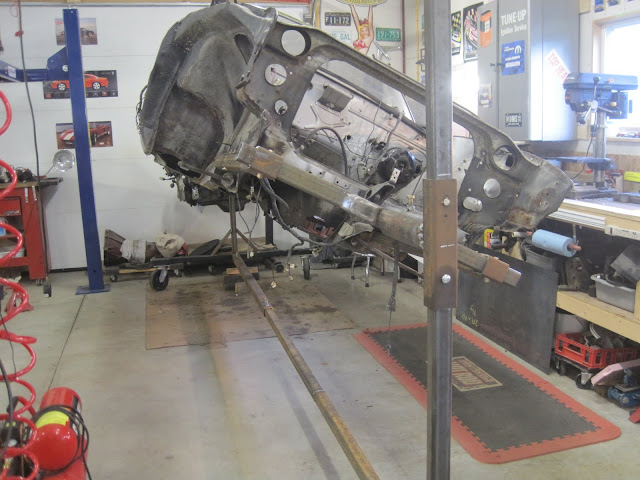
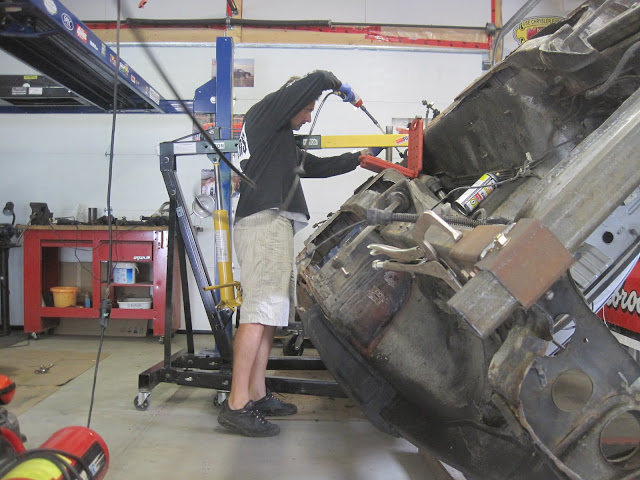
Worked hard today to get er done! The scene:

IMG_2499.JPG


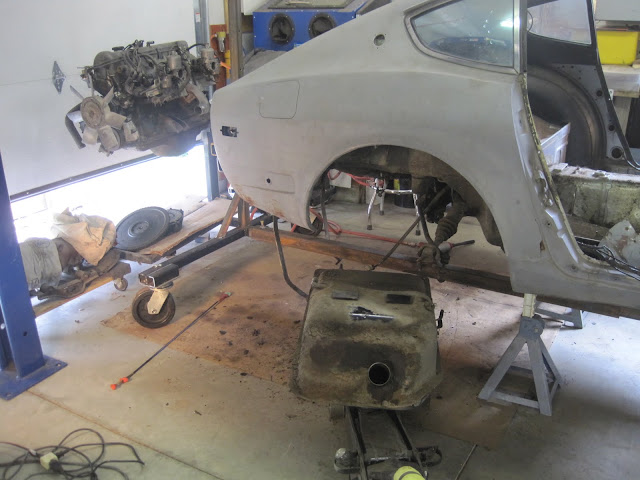
Had to pull the tank out to get the rear bolted up (and to avoid spilling any remnants of old gas!):

IMG_2501.JPG


Front end attachments:

IMG_2504.JPG


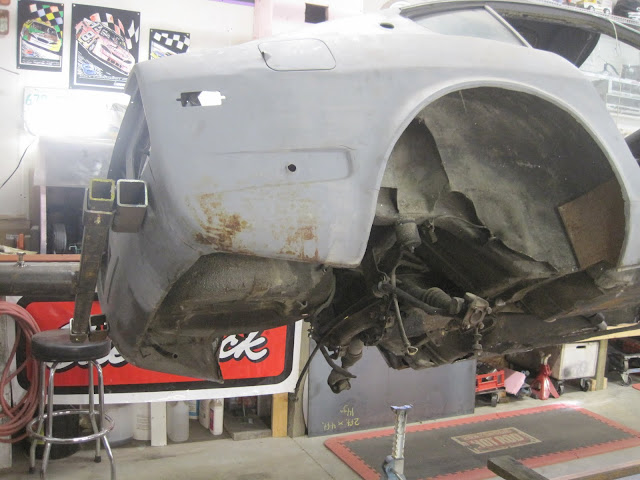
Rear end attachments (spoiler alert!):

IMG_2510.JPG


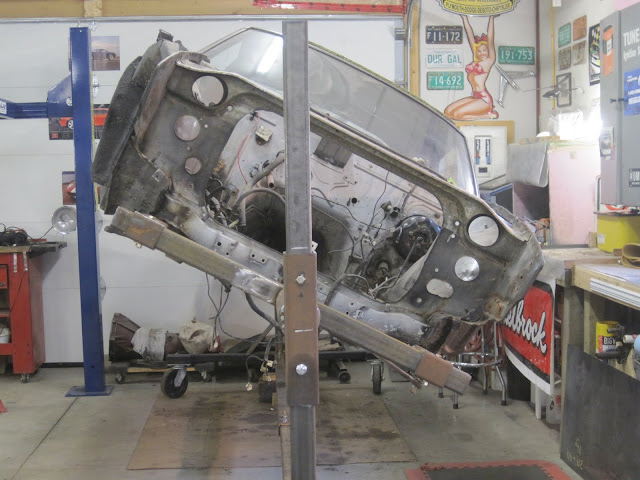
Here we go!

IMG_2511.JPG


IMG_2513.JPG


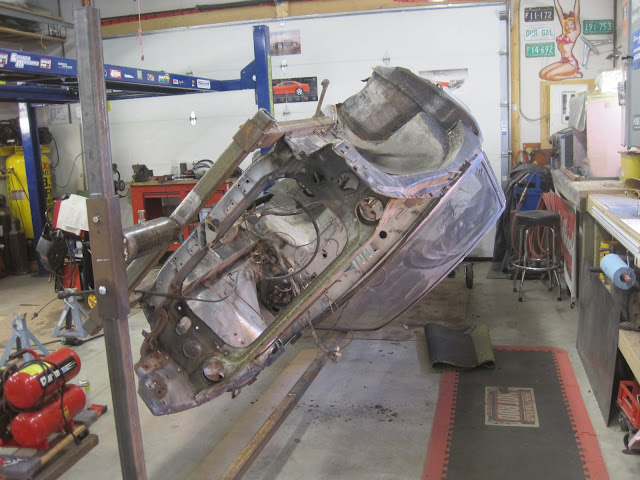
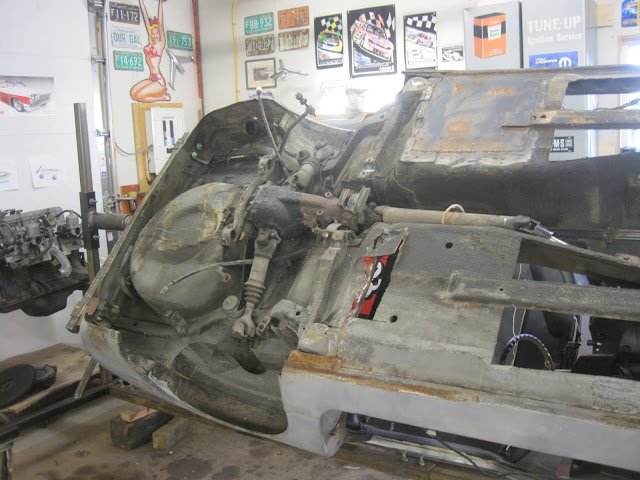
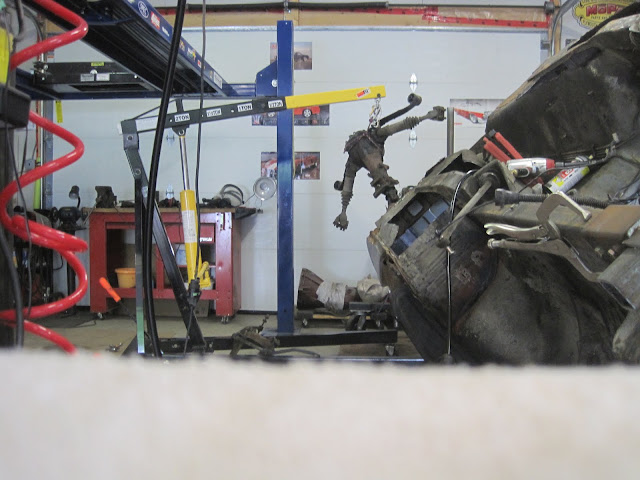
Woo-hoo! It actually turned over on it's own due to being slightly top heavy (wish I had seen your "heads up" Robert!). I think once I remove the rear end gear, it should even out. I did plan it this way as I didn't want to remove the running gear lying under it, but I'm sure you should have a shell stripped before twirling!

IMG_2514.JPG


IMG_2515.JPG


IMG_2516.JPG


Thanks for looking!!

PS - Robert, the show was at one of our Dodge dealerships: Dodge City. It's been in business since the 50's and sold some of these very cars! I noticed my car sure looks better in the sun (as do most!) - the white pops more. That years Dodge white was actually quite grey and on a cloudy day it looks a little washed out.
 
Last edited:

Abbott

Well-known member
Joined
Apr 29, 2009
Messages
1,684
Location
U.S.A.
Great thread E-tek. I liked the shot with your boys and the dog, what a lucky man you are to have such a nice family.
 

alberto

Well-known member
Joined
May 28, 2007
Messages
756
I found these pics online where someone had a similar design where the pivot did not have a CG adjustment; he installed a flywheel and crank handle to permit a more controlled rotation once the weight factor takes over.

Do you know how they kept it from rotating? Did they pin the handle down somehow, or was there enough resistance in the gearing to keep it from moving?

Great thread.

Alberto
 

MP&C

Well-known member
Joined
Oct 21, 2009
Messages
4,405
Location
Leonardtown, MD
It looks to me like that T-handled pin going through the center shaft locks it in place....


rottisserie5.jpg


Etek, looking at those floor pans, the rotisserie sure will come in handy. It will make short work of welding them in. Are you going to keep this thread going for the build or start another one?
 
Last edited:

Jim Stabe

Well-known member
Joined
Feb 18, 2009
Messages
801
Location
San Diego, Ca
You are going to wonder how you ever got along without it all these years. With advancing years and a knee replacement, I don't do floors anymore. Every weld is now done in the flat position no matter where it is on the car, I've forgotten how to weld out of position. I built the exhaust system standing upright. All the under dash fabrication is done sitting on a mechanic's stool with the car upside down.

Life is good!

bottom2.jpg
 
OP
E

e-tek

Well-known member
Joined
Dec 19, 2007
Messages
10,690
Location
Saskatoon, SK
Etek, looking at those floor pans, the rotisserie sure will come in handy. It will make short work of welding them in. Are you going to keep this thread going for the build or start another one?

Thanks Rob, There's a fair amount of work under there, but it'll be easier than lying on my back! I have a thread going on at ClassicZ.com ("http://www.classiczcars.com/forums/showthread.php?p=336446#post336446") but I'll likely mirror it here for the GJ gang :)!

You are going to wonder how you ever got along without it all these years. With advancing years and a knee replacement, I don't do floors anymore. Every weld is now done in the flat position no matter where it is on the car, I've forgotten how to weld out of position. I built the exhaust system standing upright. All the under dash fabrication is done sitting on a mechanic's stool with the car upside down.

Life is good!

bottom2.jpg

I can see the benefits for sure Jim - I also suffer from over-use and "old-age: (I'm 47!) injuries. BTW - I still think the shot of your project like that is one of the coolest shots!!:bowdown:
 

Jim Stabe

Well-known member
Joined
Feb 18, 2009
Messages
801
Location
San Diego, Ca
I can see the benefits for sure Jim - I also suffer from over-use and "old-age: (I'm 47!) injuries. BTW - I still think the shot of your project like that is one of the coolest shots!!:bowdown:
47 isn't old, I've got 18 years on you. Working on stuff like this is what keeps you young.
 

4rcFed

Well-known member
Joined
Jan 22, 2011
Messages
108
Location
Pittsburgh, PA
Finally getting to the rotisserie I've dreamt about!! Bought the steel last week, along with casters. The casters had just come in to the Steel Recycler and where on the scrap pile. I grabbed a wrench from one of the guys and went out there in my shorts and flip flops to unbolt them - while the guy swinging the GIANT magnet was working right behind me! :wtf: Being aluminum - and because everything is sold by weight - they came to about $4 each!!!! These are 5inch, ball bearing in cup, aluminum wheels. Perfect for this project!

E-tek, can I ask where you got thar print for your rotisserie?

I plan to tackle one this year for my 1973 Camaro resto. I started doing some blasting with it jacked high in the driveway last year, but I have decided to do a full paint job on the underside as well, so I need to do some good work there.

Just looking for a rotisserie that works and has a good control of COG.:beer:
 
To avoid these ads, REGISTER NOW!

MP&C

Well-known member
Joined
Oct 21, 2009
Messages
4,405
Location
Leonardtown, MD
Just looking for a rotisserie that ...has a good control of COG.

The one E-tek built does not have an adjustable CG, the mounting bars are fixed at the pivot height, so it will have a tendancy to roll away from you as the top heavy load is rotated. Many people will fix this issue by adding the "flywheel" and drive gear to allow the rotation in a more controlled manner. An adjustable CG, like shown in the following picture, will allow you to postion the CG of the loaded assembly at/near the pivot point for a more controllable rotation (without an external drive gear arrangement) by eliminating a top-heavy condition. Not as much an issue with smaller cars, but quickly becomes a greater consideration (and safety issue) with larger, heavier cars. So in order to meet your
"good control of COG" requirement, you will need an adjustable CG feature or a gear drive type arrangement to control the rotational forces of a top-heavy load.

HPIM4767.jpg
 
Last edited:
OP
E

e-tek

Well-known member
Joined
Dec 19, 2007
Messages
10,690
Location
Saskatoon, SK
E-tek, can I ask where you got thar print for your rotisserie?

I plan to tackle one this year for my 1973 Camaro resto. I started doing some blasting with it jacked high in the driveway last year, but I have decided to do a full paint job on the underside as well, so I need to do some good work there.

Just looking for a rotisserie that works and has a good control of COG.:beer:

The print (you mean diagram?) was out of a local parts magazine, Performance Plus. You could just print the one I posted, it's a good design and the same as most others.
If/when I put a larger, top-heavy vehicle on it then I'll add the CG parts. The 240 is easily moved and balanced as is, but as MP&C mentioned, you wouldn't want to load a big car one there without the adjusters!
Don't forget to consider the wooden "Incredible tip-over jig" design. If I wasn't into welding and building ****, I would have gone with that....not sure why more guys don't.
 

4rcFed

Well-known member
Joined
Jan 22, 2011
Messages
108
Location
Pittsburgh, PA
Thanks guys! I need to do some more searching for dimensions so that I can start getting saw raw materials together.

MP&C, I do like the holes in your tubing to adjust for the COG adjustment. And awesome idea for the standoffs. From working on rotisseries before, this would be a huge help.
What is on the front of your first stand there? It looks like a ratchet hanging there or something.

:beer:
 

larry4406

Well-known member
Joined
Jan 27, 2006
Messages
19,581
Location
Northern Virginia
Here is a picture of the rotator I made. It has a spring loaded indexing pin that I can lock out by putting the pin handle on the other side of the angle stop. Both rotators are the same.

The center of gravity is adjusted by the threaded rod. The nut is welded to the rotator head. The threaded rod has jamb nuts on either side of the Tee brace and has machine washers and oil-lite bushings in the t-brace to permit rotation. The lower nut under the T-brace is welded to the threaded rod and is used to rotate the threaded rod to tune the center of gravity.

The axis of rotation is the same on both ends and has pins to ensure that both arbors are uniaxial.
 

Attachments

  • IMG_6013.jpg
    IMG_6013.jpg
    141.2 KB · Views: 316
  • IMG_6012.jpg
    IMG_6012.jpg
    145.1 KB · Views: 322
OP
E

e-tek

Well-known member
Joined
Dec 19, 2007
Messages
10,690
Location
Saskatoon, SK
larry - I REALLY like that set up. Did you fab it all yourself? Very intricate! I think I may be borrowing some of that!

Reason I didn't put hydraulic jacks on mine was they where $200 a piece and I didn't want to piss myself off by spending way more than I would have had I just gone with the "Incredible Tip-Over Jig" idea!

If you're unsure of that design: http://www.garagejournal.com/forum/showthread.php?t=44539
 

larry4406

Well-known member
Joined
Jan 27, 2006
Messages
19,581
Location
Northern Virginia
larry - I REALLY like that set up. Did you fab it all yourself? Very intricate! I think I may be borrowing some of that!

Reason I didn't put hydraulic jacks on mine was they where $200 a piece and I didn't want to piss myself off by spending way more than I would have had I just gone with the "Incredible Tip-Over Jig" idea!
[/URL]

Yeah I made this whole thing, was a lot of fun. Loosely based on pictures of a plan set that used to be posted on e-bag. This was my 2nd metal fab project after making some metal benches. I found the oil-lite bushings and hardened machine washers at Tractor Supply. The jacks came from Harbor Freight. The spring loaded pin and lockout was my idea since being a one man band, how else to lock the pins open on both ends to permit rotation?

I am still fooling with the braces to the carbody - I made them with an offset so the valences could be attached, but this in essence raised the CG and I ran out of adjustment.
 

CARS

Well-known member
Joined
Jan 19, 2011
Messages
535
Location
New Ulm, MN
I am still fooling with the braces to the carbody - I made them with an offset so the valences could be attached, but this in essence raised the CG and I ran out of adjustment.

Ya, eventually you have to ditch the roto and place the body on a cart.
 
To avoid these ads, REGISTER NOW!
Top Bottom