To avoid these ads, REGISTER NOW!

Building my ultimate Lista work bench

CNGsaves

Well-known member
Joined
Sep 26, 2012
Messages
13,233
Location
KS and OK
WOWSA . . . that's some Awesome work in building a GJ epic bench for Lista cabinets !! :thumbup: . :thumbup:

As others have said, the leveling feet welding/setup is great !!

Curious what that beast might weigh when done
. . . WITHOUT . . . . . and . . . . . . WITH all the Lista cabinets ????

By the time you fill all those drawers with tools . . .
. . . . . you may need to re-pour new concrete floor first !!! :D . . :thumbup:
 
Last edited:
To avoid these ads, REGISTER NOW!

PoorOwner

Well-known member
Joined
Feb 10, 2007
Messages
5,032
Location
CA
I am curious where you found the adjustable 3/4 threaded feet? I looked for something similar on Amazon before but couldn't find any with just the stud on it.
 
OP
L

LXCam

ALLIANCE MEMBER
Joined
Apr 23, 2013
Messages
19,090
Location
AZ
Looks awesome, such a shame to put it down next to the floor where it's harder to admire.

Looking forward to seeing the cabinets on it.

Thanks brother and me too. :beer:

WOWSA . . . that's some Awesome work in building a GJ epic bench for Lista cabinets !! :thumbup: . :thumbup:

As others have said, the leveling feet welding/setup is great !!

Curious what that beast might weigh when done
. . . WITHOUT . . . . . and . . . . . . WITH all the List cabinets ????

By the time you fill all those drawers with tools . . .
. . . . . you may need to re-pour new concrete floor first !!! :D . . :thumbup:

Thanks CNG. Well the frame rolls in at close to 260 I figure. The cabinets are right around 2200-2400lbs for all three. The top is a 250+ so real close to 3K. It's a damn good thing that slab is 3500 psi and 6" thick huh? haha. :lol_hitti

I am curious where you found the adjustable 3/4 threaded feet? I looked for something similar on Amazon before but couldn't find any with just the stud on it.

These came from Enco. I got them during the last 30% off day so they were right at $14.00 each. I also have two matching 1.5" on a 1/2" stud for the end walls that'll support the parking stall area. BTW, these are 3" diameter and rated at 17Klbs. I found the part number for ya.

990-2067 3/4-10 WITH BOLT NICKL LEVELING MOUNTS


Yes sir, just like those cept cheaper :p


So The wife says "hey, you need some new clothes". I figured sure why not, I got a couple hours to kill. My shopping took all of 20 minutes. The rest of the last several hours have been spent shopping for the grand baby. But I did get home and primer the top, it'll get sprayed first thing in the morning.
 
Last edited:
OP
L

LXCam

ALLIANCE MEMBER
Joined
Apr 23, 2013
Messages
19,090
Location
AZ
A nive Valentine's Day present!

Right.

Time for a lunch break and just cause I don't feel like rushing right back out there, an update.

So I decided to get more of the fab work done, done, done before I whip out the spray gun again. Ya see I'm a lazy bastage and get tired of cleaning everything up just to spray a couple things. So I'm going to get further ahead then tear it down for final paint.

So off the table she comes, like I said I'm lazy.

CB1145E9-CA98-425E-B673-61DAB2DB45AF_zpspn8vmppu.jpg


Perfectly leveled :p

C0A41303-5E82-4E2B-9E75-63FBE14A4B77_zpsd9gu6cem.jpg


F48B4E04-87D5-46D7-A3C4-4924C1C51A5D_zpsi9ynmbqc.jpg


Just sitting there everything looks pretty good. That middle cabinet was a little more tweeked then I thought, but nothing that couldn't be beaten back into shape once it was bolted down 100%.

FA26C016-FADD-4A10-B54F-95719473A222_zps2u9d3syf.jpg


Getting ready to bolt the cabinets down. I went ahead and tapped the frame for a 3/8 X 24 and used grade 8 bolts, 6 per cabinet with fender washers. Me thinks these aren't going anywhere. Also bolted them at the top side by each.

BD2CE2D6-BDCC-414F-ABD7-E1FE837B08C4_zpstxambvoy.jpg


DONE

8AFB2CD0-FB33-4621-AA04-54840E697D86_zpsiew0ofqf.jpg


And holy hell that's a **** load of drawers. Once I get everything painted and going back together I want to move these all around. I sure hope I get it right the first time cause I don't want to do this again.

E7E2A15E-18DC-4896-B871-E25A592E4003_zpsb2xd27ot.jpg
 
Last edited:

akdiesel

Well-known member
Joined
Aug 8, 2008
Messages
2,617
Location
Wasilla, AK
LXCam

Very nice build going on.
When those cabinets get dismantled they do take up some acreage. And then you almost need a crane of some sort to even work with the base cabinet which also takes up room.
 
OP
L

LXCam

ALLIANCE MEMBER
Joined
Apr 23, 2013
Messages
19,090
Location
AZ
LXCam

Very nice build going on.
When those cabinets get dismantled they do take up some acreage. And then you almost need a crane of some sort to even work with the base cabinet which also takes up room.

Thank ya sir. After seeing your thread I've thought long and hard about building a crane for loading it. But fact is it's so damn high that anything that heavy would never be worked on there anyhow. Right now she'll finish out at 45.5".

So I got everything painted last night and put back together today. Where the mobile cart is going I'm installing some Teflon guides so nothing gets beat up. And it's time to run back to the supply joint for more metal. I've been trying to burn up as much extra materials as possible I have laying around, but what I thought about using just isn't the best way.

I still need to so all the drawer faces, but at least it can really start coming together now.

17669129-3588-454A-8752-1E94B9087CDB_zpsujmsyaio.jpg


Gezzis this stuff makes a mess. I went ahead and beveled the first 6" so the cart will hopefully just get guided into place. I'm leaving an extra 1/2" of interior width as well. It should lock right in without any drama.

03C1594C-6A70-4444-BC2D-4E774D90019E_zpszlvvezbz.jpg


698FDEC2-847E-4482-93D6-56F616636533_zpsf3tgyz98.jpg


4C8921CC-166A-4A38-9E82-9CFC2FB551CF_zpsqph9sde6.jpg


6D263B82-5117-4C87-B1B1-3BD186D64659_zpsmbtcyxsd.jpg


Maybe it's just me but I found a little irony in storing all the parts for the Lista units in that other Vidmar cabinet I bought :lol:

61402642-DA2C-4464-9112-F7B6D77700F0_zpsh1zb3k7y.jpg
 
Last edited:

zkling

Well-known member
Joined
Jan 23, 2007
Messages
16,939
Can't wait to see it finished. Awesome all the way around. Great idea on the cart bay bumpers. I need that vidmar as a matching cart for my bigger box, IDLs and all. :D
 
OP
L

LXCam

ALLIANCE MEMBER
Joined
Apr 23, 2013
Messages
19,090
Location
AZ
Lista and Vidmar are the same company. Stanley Vidmar bought Lista a while back.
:pimpflash

Ya, ya, but at one time they were bitter rivals. :lol_hitti


Can't wait to see it finished. Awesome all the way around. Great idea on the cart bay bumpers. I need that vidmar as a matching cart for my bigger box, IDLs and all. :D

Where are you located, I still haven't decided if I'm going to keep it. It might be worth shipping.

I probably missed it, but what paint are you painting with? And what color?

It's the vibrant blue, I got a gallon of it directly from lista, well via joe. But I learned a important lesson much too late into the game. The frame turned out a perfect match to the cabinets since I laid the paint over the mat primer. The big cabinet I just scuffed and didn't prime. Well the damn paint has a glossy appearance where as the stock powder coat is more of a mat finish. I was worried it may not match perfectly so I sprayed just the face of all three. I'm hoping the drawers match ok.
 

zkling

Well-known member
Joined
Jan 23, 2007
Messages
16,939
Where are you located, I still haven't decided if I'm going to keep it. It might be worth shipping.

About 2k miles directly east of you. Don't think it would be practical. :lol_hitti I'm sure you will find a place for it.

My baby...
 

Attachments

  • Vidmar.jpg
    Vidmar.jpg
    137.8 KB · Views: 205
OP
L

LXCam

ALLIANCE MEMBER
Joined
Apr 23, 2013
Messages
19,090
Location
AZ
About 2k miles directly east of you. Don't think it would be practical. :lol_hitti I'm sure you will find a place for it.

My baby...

Black and blue baby. Well tell ya what after searching for these damn things in good shape I sure have a great idea what they average. I'm not looking to make any money off what I paid but If I do decide to sell it, I'll let you know. Unlike the shipping quote I received for a single cabinet, I'm pretty certain I can get this anywhere in the county for a couple hundred. Hell last year I shipped me ex-superintendents job box that was twice as big and heavy as this to NC with a lift gate drop for 225.00.
 
OP
L

LXCam

ALLIANCE MEMBER
Joined
Apr 23, 2013
Messages
19,090
Location
AZ
Made a little headway today. Not as much as I'd hope too, but some of it was involved.

Todays cutting tasks for the wing wall and the top.

B16934EE-0803-4B00-B2C7-5B04962C94DC_zpsus49gjgh.jpg


A few hours of machining duty modifying the frame channel and making the latch and catch for the built in locking system for the cart.

2966F9C9-2363-4BA0-9161-05345FD6BCCB_zpsjxkjyuve.jpg


And here is all that put together for life. So here's how this work if the picture doesn't make sense. The latch located at the top when close and locked twists out the lower piece that will have a hook welded to it that catches a bar system on the bottom of the cart. All of it is pretty knarly metal. The latch and catch arm are 3/4" X 1-1/2" solid bar, the axle is 1" solid.

DDD30960-9349-4DF6-9161-8F8AA5706E28_zpsvraoawj0.jpg


Unlocked

79A48170-7BD3-4F8E-87A7-EA82AC284F63_zps7m9krj8n.jpg


Latched

D2F8D4E0-5B48-46BD-A6F2-815575347F25_zpscqrwm2kq.jpg


Tomorrow I should be able to rap this up with the exception of paint unless I happen to get real lucky

And maybe it's just me getting old, but I had to include a gratuitous shoot of something just gives me wood. There's just something about a not so precision tool making a killer cut. Check out that 1/16" sliver at the point. Wood baby!!.

8A8D10D6-9DD0-445A-826B-6EFCBD52C2D2_zpslawoapag.jpg
 
OP
L

LXCam

ALLIANCE MEMBER
Joined
Apr 23, 2013
Messages
19,090
Location
AZ
Well I made some decent headway today and good thing since I need to get back to my real job for a little while. At least as this point I can do a couple hours here and there to wipe it out.

Got the end wall framing all finished up. The first one to go on was the back wall. Because of how the cabinet is framed internally I needed to move the mounting locations inside and install nutserts. This way when I need to remove and reinstall I don't have to remove the drawers to do so. Also by installing the 1/8 flat stock I was able to offset enough to miss the cap and not have that part impact the framing. It's amazing how a 32nd of an inch here and there can screw the pooch as it adds up.

E7AE92B0-AC87-47A7-A584-5FBADDFC7B26_zpsvnhiyktg.jpg


Because the flange of the nutsert stuck out a 1/16" I opened up the mounting hole to fit around it.

F77DAE0A-D7B4-4859-984A-4298DB457211_zpsbf2i7wdl.jpg


I recessed some angle 1/4" on the end wall so I could insert a panel after everything is said and done.

E7878EB1-8D72-46D9-B053-07797341B65E_zpshirp32nr.jpg


So I had a bit of an issue with the depth of the cabinet and mobile cart. In order for it to finish out flush with the face it obviously had to match the rest of the cabinets. that meant I either installed a panel on the back which would get the **** beat out of it or come up with a stop. So I choose to use the bottom rail of the wall as the stop against the wheel uprights. I got just enough room left to install 1/8" of rubber on the inside of the rail so it's not metal on metal. I also tried to get the height just right and allow for an uneven floor. Between the guide rails and the stop and cabinet goes perfectly into place everytime.......it turned out better then I had hoped. :)

47B2E488-B5B6-4DA8-9B8A-50B897963E5D_zpsvvmxrysf.jpg


28BF2456-E6A9-49CC-862A-DB0BD1F27155_zps2bio3xkj.jpg


After that it was time to get going on making sure this end piece always stayed true and square so I added some additional corner bracing. And installed the mount for the hose reel that's going to occupy that space. I recessed that part of the frame so I could minimize how far the hose end stuck out. That's get a stainless filler panel.

3F20D214-9746-4255-90F2-7CB007A7DB4A_zpskkglqkx6.jpg


34161CB1-51D4-4227-8EE4-1ACEF05F7C64_zpsoqejvvlc.jpg


3B856F25-DF15-4AD9-83CD-3E8143081FE5_zpswmojdi56.jpg


And once that got done I could finish up the top support frame. I came up with something I think is going to be fine for mounting it. I installed rod couplers, bolted from the bottom and as you can see the top (well as soon as I get the right length bolts). This way I could put the drawers back in and not have to remove them when taking the top and the frame off. Man was I glad to get this done so I could clean the insides out.

1A613EA7-9C80-45D4-A29B-AD38971F7CBF_zpsst8dfqvh.jpg


And once that was wiped out, I vacuumed out the insides and go that pile of drawers off the floor. Ya I still need to paint the faces of the larger drawers, but screw it, I'll tape the **** out of everything and spray it in place.

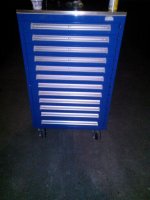
So here she boys, not done but done enough to be able to install the liners and start loading my tools.

D11980AA-A887-4E4F-8763-6129F26D9C1E_zpslfg2csxt.jpg


DF98F1EA-6428-4248-A559-87D8C2EFFF5D_zpsuxbfn6zw.jpg
 
Last edited:
To avoid these ads, REGISTER NOW!

62blue

Active member
Joined
Feb 13, 2016
Messages
30
Nice build LX Cam. I have one question why didn't you under sling the bench that way you would of had a nice work top too. How do you plan on moving that bench around with a lift truck? Just curious LX!
 
OP
L

LXCam

ALLIANCE MEMBER
Joined
Apr 23, 2013
Messages
19,090
Location
AZ
Thanks blue but what do you mean by undersling? If you mean a sitting area I have that at another area. I needed this to hold tools and lay **** on. When I do car builds I normally have to break out the saw horses and plywood to lay out fittings and such, this will work perfectly as it'll sit directly next to my lift.

Moving it is pretty easy. The reason for the big angle is more then just support it allows me to stick a jack under it and raise one end, in two moves and one block and can have it on a pallet jack in two minutes. And as for moving to another location I'm pretty fortunate to have a forklift as well as my skid steer with pallet forks, so I got that covered.
 

frankush

Well-known member
Joined
Oct 23, 2011
Messages
1,156
Location
IL
Damn nice fab work. It's a shitload of storage space and the cubby for the mobile cabinet is integrated nicely. Awesome job!
 
OP
L

LXCam

ALLIANCE MEMBER
Joined
Apr 23, 2013
Messages
19,090
Location
AZ
Much appreciated frank.

Hey guys am I burning you out with all the pictures? If so let me know and I'll back off. I know lot of guys don't care to see that much detail and others want everything. I'm trying to not get very detailed even though I have waaaaaay more pics then I've shared. I've always taken a million pictures of projects. Always figured when the day comes I can no longer physically do it, I'll be able to annoy the **** out of my care takers with "hey I didn't always wear a diaper!" :)
 

CNGsaves

Well-known member
Joined
Sep 26, 2012
Messages
13,233
Location
KS and OK
Keep the pics coming LXCam . . . . . we are glutten for pics on GJ !! ;)

Awesome planning that you can move the whole thing with forklift or pallet jack. :thumbup:
 

shortykorte

Well-known member
Joined
Sep 1, 2014
Messages
8,034
Location
Tallahassee, Fl
More on the paint. Did you spray, brush or roll? Edit: Sprayed w/HF gun. Check
Was the paint ready to apply straight from the container?
What size container and how much $.

Thanks
 
Last edited:
OP
L

LXCam

ALLIANCE MEMBER
Joined
Apr 23, 2013
Messages
19,090
Location
AZ
No pictures means it didn't happen.

Fine then. Did ya notice there's no pictures of me in the pictures, that means I didn't do it there for none of this exists. :eyecrazy: :p

Keep the pics coming LXCam . . . . . we are glutten for pics on GJ !! ;)

Awesome planning that you can move the whole thing with forklift or pallet jack. :thumbup:

Thanks again but I spoke too soon. So I slide my jack into the side with the wing to snap a pic for you guys and whatta ya stinking know, the cross brace for the guide is right in the way of jacking it up with it all attached..hahaha :sad:


More on the paint. Did you spray, brush or roll? Edit: Sprayed w/HF gun. Check
Was the paint ready to apply straight from the container?
What size container and how much $.

Thanks


Sprayed but should have thinned it a bit. I got a gallon and it was something like $70 shipped.


That thing is bad ***!!! Great job on the fab work

Thanks Jake :beer:

So here's todays project so I can take it apart and paint it. I've had this double reel for better then 20 years and it was old when I got it handed down to me. But despite it's less then stellar appearance it's in really good shape. I almost hate cutting it in half, but you do what ya gotta do.

17B3E160-B0C2-4677-98DD-35A3E74A20B9_zpsyrf2jmij.jpg


BAFA5039-CCD3-4433-8E5B-E54D65BC54E1_zpsi18keqqx.jpg


4A3A86F6-BF3E-4571-A4E9-A2B2B580C541_zps60m6ewlj.jpg
 

Avplayer

Well-known member
Joined
Nov 10, 2014
Messages
286
Location
NYC
Love the work an by all means keep the pics comin...a picture is worth a thousand words
 

Capegls

Well-known member
Joined
Feb 13, 2013
Messages
49
Location
Connecticut
This is certainly one impressive build. I love the quality of craftsmanship you have put into the project.
 

zkling

Well-known member
Joined
Jan 23, 2007
Messages
16,939
Can you post a close up or detail on the cart locking mechanism? I'm having a hard time seeing what the bar engages on the bottom of the cart.

Also do you think there will be any issues with the hose reel on it's side? I wonder if it will spool up properly across the entire width of the reel.
 

62blue

Active member
Joined
Feb 13, 2016
Messages
30
Hi LX Explaining my words of under slung would be like a low boy trailer. When we were working all the maintenance crew under slung their frames as to lower the box to be able put on a steel work top. Working in a canning facility we had to move the boxes around during overhauling season. We also used a small hydraulic jack to lock to keep the box from moving. If anyone wants to see the jack that keeps the box from moving I will post when I get a chance. That is a sweet setup you made.
 
OP
L

LXCam

ALLIANCE MEMBER
Joined
Apr 23, 2013
Messages
19,090
Location
AZ
Much appreciated guys!

Can you post a close up or detail on the cart locking mechanism? I'm having a hard time seeing what the bar engages on the bottom of the cart.

Also do you think there will be any issues with the hose reel on it's side? I wonder if it will spool up properly across the entire width of the reel.

Well the reason you can't see it isssss, it doesn't exist yet :)

I've only finished what had to be welded into the frame work. I haven't built the hook or the catch for the box. I'm really concentrating on getting this thing loaded with tools so I can sell my other boxes, I need my space back badly. I have a couple nothing months in front of me and I'm hell bent on doing some long outstanding projects. The last 4+ years of commuting 150 miles a day on top of extra long days killed some dedication time.

Anyhow I'll probably have that done by the end of the weekend. If I don't finish right now while it's fresh, chances are it won't get done.

Oh ya the reel, you're absolutely right. After disassembly I realized that ****, that won't work, I'll wear it out in nothing flat. So it needed some type of carrier to hold the reel up and not allow the air adapter to be the wear point. Well it just so happens I have some 3" diameter thrust bearings I bought for some coil over shocks. I'm going to machine a piece to carry it between the adapter and the reel. As for the hose bunching up we'll wing that one. Maybe a cage?, not sure. And I don't need much hose as on the other side of the shop I have two reels with 50ft hoses. I just thought it would be cool to have adjustable air right at my finger tips when working on something instead of adjusting the whole shop. There are times other guys come over during builds.


Hi LX Explaining my words of under slung would be like a low boy trailer. When we were working all the maintenance crew under slung their frames as to lower the box to be able put on a steel work top. Working in a canning facility we had to move the boxes around during overhauling season. We also used a small hydraulic jack to lock to keep the box from moving. If anyone wants to see the jack that keeps the box from moving I will post when I get a chance. That is a sweet setup you made.

Ah I got ya. That would have been trick, really didn't even consider it to be honest. Originally I was going to have provisions for casters, then reality set in and I realized rolling around a 10ft long and close to 5klbs object of shear desire might not be the smartest move. :dunno: ;)
 
Last edited:
OP
L

LXCam

ALLIANCE MEMBER
Joined
Apr 23, 2013
Messages
19,090
Location
AZ
Alrighty guys the metal work is done. Tomorrow I just need to clean, prime and paint. Today I played with the hose reel stuff like I showed earlier but after looking at clearances and plumbing decided to turn it upside down. This way I could plumb it without having to have the top off which will make servicing a thousand times easier as well as it doesn't slow me down getting the top mounted.

87088A31-5C3F-4DC1-816A-BFD24B0768D9_zpse1a2fej9.jpg


And Z here is the thrust bearing I was talking about. It'd be great if it was 12" in diameter, but I think it's work just fine....I hope.

972BA743-D021-4305-81BD-9B04F7DEDCB5_zpsw4hgvlwo.jpg


65006A0B-D031-43B0-8E9C-8463B9AE995B_zpspr894dl9.jpg


I made a tab to hold the tail end of the reel mount flat so there no sag. Also I tacked flange nuts to the back of all the mounting locations so I don't have to battle assembly.

72B58D8B-3A3E-418D-AD53-A0E7C273202A_zpses1kp4ba.jpg


0017EF81-7A1F-4652-982A-BB56393B7C4B_zpsahknyczp.jpg


Also I cheezed out on the table frame hold downs for the wing wall. I just kind of burned out making stuff and had a couple tabs that lined up perfectly so that part is done. Kind of figured after all, where it's gonna go.

ED7074BF-15E7-47FF-8572-DBF87FAF3CF1_zpslsautxtw.jpg


And through out the whole build process I kept thinking about how I would mount the frame and more importantly the top to the frame. I really considered studding the bottom of the top and through bolting but decided not to just to make taking it apart easier. So I cut the corners off some of the scrap 3/8" thick angle I had and welded those into the corners and the center. The top will be held down with counter sunk screws threaded into these.

13E0E168-C207-4E99-AC5A-A3849B76A7E7_zpsu0ur6f8r.jpg


And that's it guys, I already cleaned and primed the bottom of the top frame but hated that primer. Tomorrow I'll get some that I like and unless something comes up, it'll be painted and assembled tomorrow in it's new home.

275FFC59-D7FE-431E-A5F5-5444B893946E_zpsltkh9qj0.jpg


D59152FE-72C2-4427-8766-9B13B9ED4F9C_zpsffn6qbi0.jpg
 
Last edited:
To avoid these ads, REGISTER NOW!
Top Bottom